

I stood in my kitchen at 10:00 PM, staring at a teaspoon that still had a stubborn smear of peanut butter on it. This was not supposed to happen. I had just upgraded to a ‘whisper-quiet’ model with that fancy third rack everyone raves about, yet my silverware looked like it had only been coughed on by a humid breeze. I felt cheated. I had spent more money for more racks, but I was getting less cleaning. If you have ever pulled out a tray of ‘clean’ dishes only to realize you have to hand-wash half of them, you know exactly the frustration I am talking about. It is a specific kind of annoyance that bubbles up when technology fails to do its one job. Have you ever felt like your high-tech dishwasher is actually lazier than your old 1990s clunker?
The Sneaky Culprits Stealing Your Water Pressure
I will be honest with you: I made a massive mistake early on. I assumed the pump was dying and almost called for an expensive repair. I even started pre-rinsing every single dish until they were basically clean before they went in—which, as it turns out, is the fastest way to waste water and confuse your machine’s sensors. The truth is that diagnosing these pesky dishwasher problems usually reveals something much simpler than a dead motor. My ‘lightbulb moment’ came when I realized the water has a long, difficult journey to reach that top tray. It has to travel from the bottom, up the back manifold, and dock perfectly into the spray assembly. Today, we are going to pinpoint exactly why that top-tier sprayer is acting like a clogged garden hose. We are going to reclaim your water pressure and ensure every fork comes out spotless. We are talking about checking seals, alignment, and the tiny bits of debris that cause big headaches.
Is the third rack just a clever marketing gimmick?
It is a fair question to ask when you are looking at a tray of dirty spatulas. You might worry that the pump just is not beefy enough to push water that high up. However, the issue is rarely about the ‘strength’ of the pump and almost always about the path the water takes. According to the Association of Home Appliance Manufacturers, modern dishwashers are engineered to use significantly less water, meaning the distribution system must be perfectly sealed to maintain pressure. If there is even a tiny leak at the manifold or a bit of debris in the way, that third rack is the first thing to lose power. You can actually perform the paper plate test for coverage to see if the water is even reaching the top. Often, the culprit is as simple as a loose spray arm nut or some gunk you can clear out. If you have noticed a drop in performance, do not panic—it is likely a fix you can handle with a toothpick and ten minutes of your time by cleaning the hidden spray arm nozzles yourself. We are going to look at the ‘docking station’ where the rack meets the back wall next, because if that connection is loose, your pressure is literally leaking away before it ever hits a dish.
Clean Out the Gunk Before You Blame the Motor
I once spent an entire Saturday morning convinced I needed to buy a new circulation pump, only to find a single, translucent piece of plastic from a frozen pea bag wedged perfectly inside the top spray arm. It acted like a check valve; as soon as the water pressure built up, the plastic would flatten against the nozzle, cutting off the flow. This is why you must start with the physical path of the water. Remove that third rack and the middle tray entirely. Flip them over and use the toothpick method for cleaning nozzles to ensure no mineral scale or debris is hiding in those tiny apertures. If the holes are clear but the arm feels stiff when you flick it, you likely need to learn how to deep clean the hidden spray arm bearings to restore that effortless rotation. 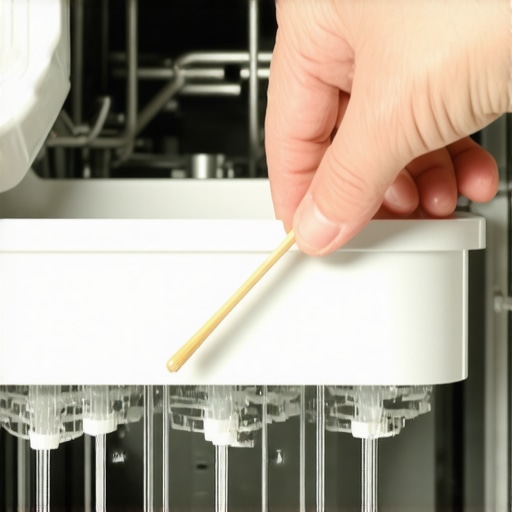
Hunt for Micro-Cracks in the Plastic
Plastic spray arms are notorious for splitting along the heat-welded seams. When the machine is off, they look fine. But under high pressure, the seam opens up like a wound, spraying water sideways instead of up at your dishes. I use the flashlight trick for finding micro-cracks by shining a bright light through the side of the arm in a dark room; any thin spots or gaps will glow. If you find a split, do not bother with glue; it will not hold against the heat. You are better off replacing a cracked spray arm yourself to save on labor costs.
Look for the Leaking Gap at the Back Wall
Think of your dishwasher rack like a docking spacecraft. When you push the rack in, a manifold at the back must plug into a water supply port on the rear wall of the tub. If this connection is loose or misaligned, the water meant for your third rack is simply spraying out the back and falling into the sump. I found this out the hard way when I realized my rack was sagging because of a broken plastic clip. Ensure the rack slides all the way back and ‘seats’ firmly. You can verify the reach by using the paper plate test for spray arm coverage—if the plates on top are dry, your docking port is the prime suspect.
Check the Manifold Nut and Gaskets
Check the very back of the rack where the tube attaches. If that connection is wobbly, it might just be a loose spray arm nut that needs a quarter-turn to tighten. Also, inspect the rubber gasket on the wall port. If it is pinched or brittle, your pressure is bleeding out before it ever reaches the silverware.
Crack the Code with Your Control Panels Secret Menu
Modern machines are smarter than they look, but they are also prone to software hiccups. If your pump is not ramping up to the correct RPMs, the water will never have the ‘head pressure’ required to climb to that third rack. Before you pull the machine out from the cabinets, try to access the secret diagnostic mode on your touch panel. This often involves a specific sequence of button presses (like ‘High Heat’ and ‘Normal’ three times in a row) that forces the machine to run a component test. Using smart diagnostic apps can also tell you if the controller is registering a low-flow error that has not yet triggered a full system lockout.
Most people assume that as long as they have a piece of paper saying ‘Warranty’ on it, they are protected from any mechanical disaster. I used to think the same until a technician pointed at my sink and told me my claim was dead on arrival. In my experience, the biggest mistake is treating a service plan like a ‘get out of jail free’ card. The reality is that understanding appliance diagnostics is actually your best defense against a denied claim. Many manufacturers actually require proof of regular maintenance before they will approve an expensive motor replacement, and why your warranty claim was denied due to lack of maintenance is the most common story I hear in repair circles.
Your Warranty Isn’t an All-Access Pass
Everyone says the manufacturer has to fix it if it breaks, but that is a dangerous half-truth. According to a study by the Association of Home Appliance Manufacturers (AHAM), modern high-efficiency units are far more sensitive to external plumbing issues than the old tanks we grew up with. If your machine stops draining, your first instinct is to call for a pro. However, if they find the issue is actually a clogged drain line or a ‘high loop’ failure, you are on the hook for the service call fee—which can be $150 or more. This is why knowing the top signs your dishwasher needs professional diagnostics versus a simple DIY fix is essential for your wallet. I always tell people to check the basics first because how appliance diagnostics can save your warranty benefits often comes down to proving you haven’t been negligent.
Can a simple garbage disposal mistake void your entire claim?
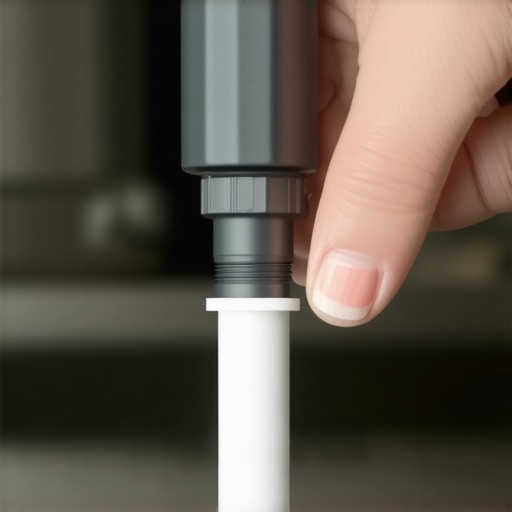
Yes, and it happens more often than you’d think. This is the ultimate ‘Oops’ factor: if you recently replaced your garbage disposal and suddenly your dishwasher won’t drain, you likely forgot to remove the plastic knockout plug. If you call a warranty tech for this, they will charge you full price and potentially flag your account. This is a classic example of why your warranty claim got denied because of your garbage disposal. It is not a machine defect; it is a setup error. Always check the disposal connection before assuming the pump is dead.
The High-Efficiency Myth You Are Probably Buying Into
We have been conditioned to love ‘convenience,’ which usually means dropping a plastic-wrapped pod into the dispenser and walking away. However, why your high-efficiency machine hates cheap pods is a nuance most owners miss. These machines use very little water, and sometimes those pods don’t fully dissolve, leading to a gummy buildup in the delicate internal sensors. You might think your sensor is failing when it just needs a good cleaning. Additionally, why your low-water dishwasher requires special rinsing habits is a huge point of contention. If you pre-rinse too much, the enzymes in the detergent have nothing to latch onto, and they can actually end up attacking the plastic components of your machine over time. Have you ever fallen into this trap of over-cleaning your dishes before the cycle starts? Let me know in the comments. I’m curious if you’ve seen that ‘gritty’ residue that usually signals you’re actually being *too* clean.
The Truth About Third-Party Parts
When a part does fail outside of the initial year, the temptation to buy a $15 knock-off pump from a random website is high. But you have to be careful. The truth about non-manufacturer repair parts and your warranty is that using them can permanently void any remaining coverage you have. If you are still under an extended service plan, stick to OEM (Original Equipment Manufacturer) parts. It might cost more upfront, but it keeps your long-term protection intact. If you’re unsure about your coverage, how to tell if your service plan actually covers motor failure is a great place to start your research before you start unscrewing panels.
Stop the gunk before it stops your pump
I have learned the hard way that maintenance isn’t just about a quick wipe down after a messy load of lasagna. If you want to avoid expensive service calls, you have to be proactive. I have found that cleaning your sump filter with a soft brush once a month is the literal difference between a five-year machine and a fifteen-year machine. If you live in an area with hard water, mineral buildup is your silent enemy, slowly choking the heating element. I personally swear by the secret to de-scaling your machine using lemon juice because it is significantly gentler on the rubber seals and gaskets than those aggressive commercial chemicals that can cause premature leaks.
My must-have kit for home diagnostics
I never call a technician until I have pulled out my own basic toolkit. You do not need a garage full of gear; a T15 Torx screwdriver, a bright LED flashlight, and a basic digital multimeter are usually enough. Troubleshooting dishwasher problems with expert diagnostics becomes much more approachable when you can actually check for electrical continuity. For instance, according to official Bosch service manuals, the first step for a machine that won’t heat is checking the resistance of the element, not just assuming the control board is fried. Having these tools ready allows you to speak the same language as the repair pros, which is vital for understanding appliance diagnostics and ensuring you aren’t overcharged for simple fixes.

How do I keep my dishwasher running like new for a decade?
It really comes down to a consistent schedule of small habits. You should clear your sink’s air gap every few months to prevent nasty backflow and run a dedicated high-heat cycle once a month to melt away accumulated animal fats. If you catch a small rattling sound early, you can often fix it before it destroys the impeller. I also recommend checking your drain line once a year to ensure there are no kinks or clogs starting to form. These tiny checks preserve the internal components and keep your utility bills low.
The future is digital and sometimes buggy
As we look forward, we are moving toward a world where your dishwasher will likely email you a diagnostic report before it even breaks down. While smart diagnostic apps are changing the game, they also introduce new points of failure. I have already seen several cases where a mandatory firmware update just bricked the control board of an otherwise perfectly functional unit. You have to stay ahead of the technology; for example, knowing why your smart appliance needs regular software cache clears will help you prevent those annoying sensor glitches that cause the machine to pause mid-cycle for no apparent reason. My best advice? Go pull that mesh filter out tonight and give it a good scrub with a soft brush—your pump will thank you tomorrow.
Lessons Learned the Hard Way Under My Kitchen Sink
After years of tinkering, I’ve realized that a silent dishwasher isn’t always a healthy one. If you hear a sudden change in pitch, do not ignore it; knowing how to stop a rattling noise during the rinse cycle early can save your motor from burnout. I also discovered that your machine has a digital brain you can actually communicate with; the secret tech menu that calibrates your water sensors is often the only way to fix a machine that thinks it is empty when it is clearly full. Lastly, never underestimate the power of a manual scrub. Even the best self-cleaning cycles miss the hidden filter most owners never clean in their machine, which remains the leading cause of that persistent, swampy odor.
The Three Tools That Saved My Savings Account
You do not need to be a master plumber to handle 90% of these common issues. I always keep a digital multimeter handy for testing your heating element for ground faults—it takes five minutes and prevents you from buying a $300 control board you do not actually need. For those of us obsessed with efficiency, using a thermal camera to find heat leaks can pinpoint exactly why your drying cycle is failing without you having to take the door apart. For everyday maintenance, skip the harsh chemicals; how to remove cloudiness from glasses using citric acid is my go-to secret weapon for keeping everything sparkling while protecting your rubber seals.
Take Control of Your Kitchen’s Hardest Worker
Fixing your own appliances can feel intimidating at first, but once you master understanding appliance diagnostics, you stop being at the mercy of expensive service schedules and technician fees. You have the tools, the knowledge, and now the plan to keep your dishes spotless and your utility bills low. Have you ever found something truly bizarre stuck in your spray arm nozzles? Let me know your weirdest dishwasher finds in the comments below!
#IMAGE_PLACEHOLDER_E#