

I remember standing in my kitchen at 11 PM, staring at a stack of ‘clean’ plates that felt like sandpaper. It was heartbreaking. I had just bought this machine two years ago, and already it sounded like it was chewing on gravel. The culprit? Hard water scale. I almost called a technician for troubleshooting dishwasher problems, thinking my pump was shot. But before I spent a dime on professional diagnostics, I tried something so simple I felt a bit silly: a bottle of lemon juice from the back of my fridge. Today, I am going to show you how that one simple fruit can save your machine from the scrap heap.
Stop Wasting Money on Fancy Chemicals
We often think we need those neon-colored pods or expensive commercial descalers to fix the white film. I made the massive mistake of ignoring the buildup for months, which I later learned is the real cost of skipping your monthly descaling cycle. Eventually, the real reason your glasses come out cloudy is just calcium carbonate looking for a home on your glassware. Early in my DIY journey, I actually tried using a harsh industrial acid I found in the garage—big mistake. It nearly ate through the rubber gaskets. Don’t be like me. Lemon juice is the ‘Goldilocks’ solution: strong enough to dissolve minerals but gentle enough to keep your seals intact. If you have been struggling with a chalky tub, you might even consider the natural way to strip hard water buildup from the tub before reaching for the heavy stuff.
Does a Little Fruit Juice Actually Beat Industrial Cleaners?
It sounds like an old wives’ tale, doesn’t it? I was the biggest skeptic until I saw the results myself. According to studies on organic acids, citric acid—the primary component of lemon juice—acts as a powerful chelating agent. It literally grabs onto the calcium and magnesium molecules that make up hard water scale and pulls them into solution so they can be rinsed away. In fact, research published in the Journal of Surfactants and Detergents notes that citric acid is one of the most effective biodegradable agents for removing inorganic scales. Have you ever opened your dishwasher only to find everything covered in a weird, chalky dust? If so, you’re not alone, and you probably don’t need a new machine. You just need a trip to the produce aisle. We are going to look at the exact steps to get that sparkle back without voiding your dishwasher warranty.
Start With a Clean Foundation
Before you even think about reaching for that lemon juice, you need to clear the path. Think of your dishwasher like a straw; if there is a big piece of paper stuck in the middle, it doesn’t matter how hard you suck, nothing is getting through. You have to locate the hidden filter most owners never clean in their machine. I once found a petrified chicken bone and three pennies in mine—no wonder it sounded like a jackhammer. Pull that filter out, rinse it under hot water, and make sure the sump area is clear. If you skip this, your lemon juice is just going to be fighting yesterday’s leftovers instead of the scale on your heating element. It’s also a good time to check the debris trap most owners miss during monthly cleaning to ensure water flows freely.
The Right Way to Load the Juice
Now for the main event. You might be tempted to just dump a quart of juice into the bottom of the tub, but don’t. Most modern machines start every cycle by running the drain pump for a few seconds to clear out any standing water. If you pour your juice in early, you’re literally flushing money down the drain. Instead, fill a heavy, dishwasher-safe bowl with about two cups of lemon juice and place it upright on the top rack. This allows the juice to be distributed slowly as the spray arms rotate, ensuring every square inch of the interior gets a citrus bath. I learned this the hard way after my first attempt resulted in a ‘clean’ bottom rack but a chalky top rack because the juice drained before the cycle even started. 
Choose the Heat Not the Eco Mode
This is where most people fail. They want to be environmentally conscious, but why the eco mode cycle takes longer than a standard wash is because it relies on time rather than high heat. For citric acid to really break down stubborn calcium, it needs heat. Select the ‘Heavy Duty’ or ‘Sanitize’ cycle. You need that water hot enough to dissolve the minerals. If you notice the machine isn’t reaching those temperatures, you might need to check the exact multimeter reading for a healthy thermal fuse to ensure your heater is actually working. While the cycle runs, listen for any weird noises. If the scale was really thick, it might have been weighing down the spray arms. A smooth, rhythmic ‘whoosh’ is what you’re after. If you still hear clicking, it might be why your drain pump makes a clicking sound as it tries to process broken-off scale chunks.
Finish With a Quick Inspection
Once the steam clears, don’t just walk away. Pull the racks out and look at the back wall. It should look like a mirror, not a chalkboard. If you see tiny white flakes, that’s actually a good sign—it means the lemon juice did its job and broke the ‘armor’ of the scale. I remember my first attempt at this. I thought I could just toss a couple of lemon wedges into the silverware basket and call it a day. Big mistake. The pulp got stuck in the tiny holes of the spray arms, and I spent the next hour using the toothpick method for unclogging spray nozzles. Now, I always strain the juice first. Just run one more quick rinse cycle to flush those particles away. If you find the spray arms are still sluggish, try the five-minute fix for a loose spray arm nut to ensure they are spinning at full speed. This simple routine is far more effective than most realize and helps you avoid top signs your dishwasher needs professional diagnostics down the road.
However, there is a massive misconception I see all the time: the belief that a warranty is an all-access pass to free repairs. I used to think that as long as I did not open the casing with a screwdriver, I was safe. I was wrong. Most people do not realize that ‘lack of maintenance’ is one of the most common reasons claims are denied. If a technician arrives for troubleshooting dishwasher problems and finds the sump choked with calcium because you skipped the descaling, they might mark it as user neglect. Knowing when to trust a warranty for dishwasher repairs is as much about your cleaning habits as it is about the age of the machine. In fact, finding the hidden loophole that gets your denied claim reversed usually requires proof that you performed regular upkeep, like the lemon juice trick I just showed you.
Why Vinegar Might Be the Wrong Choice for Your Machine
Wait, you might be asking, ‘Why not just use white vinegar?’ Everyone on the internet swears by it. Here is the contrarian truth: I actually prefer lemon juice because it is slightly less aggressive toward the internal rubber components. While both are acids, white vinegar has a higher concentration of acetic acid. According to materials research in the International Journal of Electrochemical Science, prolonged exposure to acetic acid can cause specific rubber elastomers—like EPDM—to swell or degrade faster than citric acid does. If you use vinegar every week, you might accidentally create a leak.  This is the ‘Oops’ factor most DIY bloggers miss. You are trying to save the machine, not melt the gaskets. If you are already seeing water on the floor, you should learn how to find the slow leak hiding under your kickplate before the damage spreads to your subfloor.
Can You Really Recalibrate a Sensor with Plain Water?
Here is an advanced nuance: sometimes the ‘scale’ isn’t just on the walls—it is on the turbidity sensor. This little eye ‘sees’ how dirty your water is to decide how long the cycle should run. When it gets coated in a thin film of minerals, it thinks the water is always filthy, leading to those three-hour cycles that drive everyone crazy. Before you assume you have a broken control board, try to calibrate your dishwasher turbidity sensor with plain water. It is a sophisticated move that most people ignore, thinking they need professional diagnostics immediately. Finally, let us talk about the ‘pod’ problem. There is a reason why your service tech secretly hates pod detergents. They often release too much soap too early, which can interfere with the chemistry of the descaling process. If you are running a lemon juice cycle, keep the detergent out entirely. Mixing them can actually neutralize the acid you are trying to use to clean the machine. Have you ever fallen into this trap where you thought you were helping but actually made it worse? Let me know in the comments below.
If you are serious about moving beyond basic citrus tricks, you need to stop guessing and start measuring. I spent years replacing parts based on gut feelings until I finally bought a basic multimeter. It changed everything. For example, instead of wondering if your heater is dead after a cold cycle, you can learn the specific way to test a thermal fuse for continuity. It takes thirty seconds and saves a three-figure service call. I also highly recommend you learn how to test your inlet valve with a simple voltmeter before you assume your control board is fried. Most people are terrified of electricity, but as long as the machine is unplugged, these tests are safer and more accurate than any online forum guess. 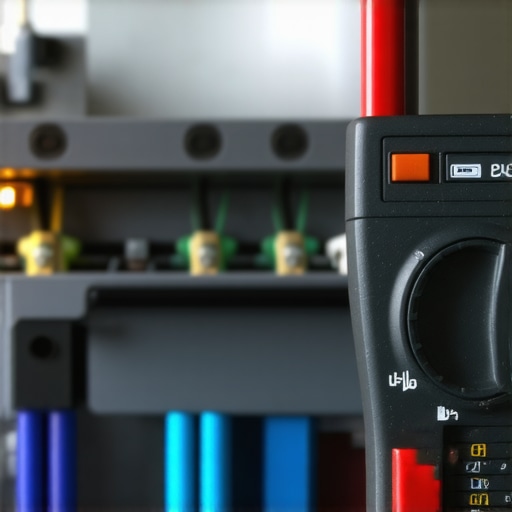
How do I maintain my dishwasher efficiency over the long haul?
It comes down to consistency rather than intensity. You do not need a deep clean every week; you need a strategic clean every month. This involves more than just the lemon juice; it is about how to deep clean a dishwasher sump without pulling the machine to prevent sludge from reaching the pump impeller. In my own kitchen, I have found that understanding appliance diagnostics improving your warranty claims is the best insurance policy you can have. If you can show a manufacturer that you have regularly checked the thermal sensors and kept the sump clear, they are far more likely to approve an out-of-warranty courtesy repair. According to technical bulletins from the Association of Home Appliance Manufacturers (AHAM), the average lifespan of a modern dishwasher has dropped to about 7-9 years, largely due to poor water quality and neglected filters. You can beat those odds by becoming your own first line of defense.
The Future of Repair is Already in Your Pocket
I predict that within the next five years, we won’t even be looking for blinking lights or error codes on a tiny LED screen. We are already seeing how smart diagnostic apps are changing home appliance repair by allowing your smartphone to ‘listen’ to the motor and tell you exactly which bearing is failing. However, be careful with these high-tech features; I have seen cases why your smart home hub is blocking appliance commands because of a simple firmware mismatch. If your machine starts acting possessed, always check for how to find a service manual hidden inside the unit. Usually, there is a paper tech sheet tucked behind the bottom kickplate that tells you exactly how to enter the secret diagnostic mode. This is the ultimate ‘cheat code’ for how appliance diagnostics can save your warranty benefits. Before you give up on your machine, I want you to try one thing: go grab a multimeter and test one component today. You will be surprised at how empowering it feels to know for a fact what is broken instead of just hoping for the best.
Lessons from a Decade of Fighting Hard Water
The biggest mistake I made for years was treating my dishwasher as a set it and forget it appliance. It is actually a precision instrument that needs a bit of love to stay in peak condition. First, never ignore the paper plate test for spray arm coverage; it is the fastest way to see if your lemon juice treatment actually worked. Second, I have learned that scale is not just a cosmetic issue—it is a mechanical one. If you let it sit, you are literally inviting troubleshooting dishwasher problems that could have been avoided. Finally, keep a close eye on the air gap. Finding the secret to unclogging a dishwasher air gap with a straw has saved me more than one frantic call when the sink started backing up.
#IMAGE_PLACEHOLDER_E#
Tools I Never Start a Repair Without
Building a small kit can save you thousands over the life of your appliances. Here is what I always keep within reach to maintain my machines:
- A Reliable Digital Multimeter: This is the holy grail of DIY. It is how you perform the specific way to test a thermal fuse for continuity and stop the guessing game.
- A Dedicated Tech Sheet: I always look for how to find a service manual hidden inside the unit. It is like having the teacher’s edition of a textbook for your specific model.
- A Simple Magnet: Essential when you need to test your float switch with a simple magnet without tearing the whole door apart.
The Future of Your Kitchen is in Your Hands
You do not need a degree in engineering to keep your dishes sparkling and your machine running for a decade. It starts with one simple choice: deciding to look under the hood yourself before reaching for the phone. Whether it is a citrus bath or a quick voltage check, every action you take builds your understanding appliance diagnostics improving your warranty claims. This knowledge is power, and it turns a stressful breakdown into a manageable project. Your dishwasher is a workhorse, and now you have the tools to keep it that way. Have you ever found something completely unexpected inside your dishwasher filter? Let me know in the comments below!