

I stood in my kitchen last Tuesday evening, staring at a stack of dinner plates that looked like they had been through a sandstorm rather than a high-end wash cycle. It is incredibly frustrating, isn’t it? You spend a small fortune on a machine that promises smart sensing and effortless cleaning, only to find it is about as effective as a bucket of cold water when the internal sensor gets a bit of film on it. For the longest time, I thought I was being helpful by pre-scrubbing every single fork before it hit the rack, but I was actually sabotaging the machine’s ability to think for itself. My big lightbulb moment came when I realized my dishwasher wasn’t actually broken; it was just functionally blind. I nearly spent three hundred dollars on a service call before I discovered that I could solve the whole mess with nothing more than a glass of plain tap water and a few minutes of my time. Today, I am going to show you how to give your machine its sight back and stop those endless re-washes.
Give Your Machine Its Sight Back
Most of us assume that when the dishes stay gritty, the motor is failing or the pump is shot. In reality, the culprit is often the turbidity sensor—that little plastic eye that checks how murky the water is during the cycle. If that sensor is out of whack, your machine might cut the cycle short, thinking the water is clear when it is actually filthy. I once made the classic rookie mistake of using heavy-duty chemical degreasers to clean the sensor lens, which only ended up leaving a cloudy residue that confused the electronics even more. You do not need fancy tools or expensive proprietary cleaners for this fix. If you have ever wondered how to solve common dishwasher problems without calling a pro, this manual recalibration is the first thing you should try. We are going to reset the baseline today so your machine knows exactly what clean looks like again. [image]
Is this simple water trick actually worth the effort?
It sounds a bit too simple to be true, doesn’t it? You are probably thinking that a repair technician with a fancy diagnostic tool must have a secret method that we civilians can’t access. But here is the reality: most modern sensors are designed to calibrate themselves against a clear water standard. According to a technical study by the American Council for an Energy-Efficient Economy (ACEEE), these sensors are the primary reason modern units can claim up to 25% energy savings, but they are notoriously sensitive to mineral buildup. If your sensor has drifted, the machine no longer knows where the zero point is. By using the manual recalibration method, you are essentially forcing the onboard computer to look at pure water and redefine its expectations. It is the single most effective way to let your sensors do the work they were built for. Have you ever noticed your dishwasher running for three hours straight but still leaving soap behind? I’d love to hear if your machine has started acting like it has forgotten its own job. This simple reset is about to save your sanity and your utility bill, setting the stage for the specific steps we will dive into next.
Locate the Sensor Without Tearing the Unit Apart
To get started, you need to find the sensor’s physical location. It is usually tucked inside the sump area, near the filters. I remember hunkering down with a flashlight for forty minutes, convinced I would have to pull the whole machine out of the cabinetry. In reality, I just needed to remove the bottom rack and look for a small, clear or dark plastic ‘eye’ protruding into the water path. If you cannot find it, you might need to learn how to find a service manual hidden inside the unit. Once you have spotted it, handle it like a camera lens. I once tried to scrub mine with a generic kitchen sponge, and the abrasive side left micro-scratches that made the sensor think every drop of water was a muddy mess. Instead, use a soft microfiber cloth and a tiny bit of warm water. 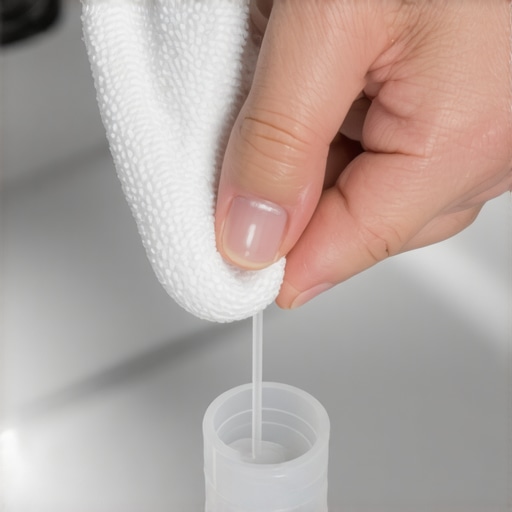
The Microfiber Wipe That Saves Your Lens
After the lens is clean, you have to tell the computer to look again. This is where most people get intimidated, but it is really just a specific ‘handshake’ between you and the buttons. You start by draining any standing water—if your machine is struggling here, you might want to check how to fix a dishwasher that wont drain in five minutes first. Once the tub is dry, add exactly one liter of clean tap water directly into the bottom. Now, perform the one-minute move to reset your control board by holding the ‘Start’ or ‘Cancel’ button until the lights flash. This clears the old, buggy memory.
Trigger the Calibration Sequence Like a Pro
Next, you need to enter the diagnostic mode. This is not just for repair guys; you can actually learn how to get professional grade diagnostic codes from your interface if you know the pattern. Usually, it involves pressing two buttons in sequence three times. Once the machine enters its test cycle, it will fill with a bit more water and circulate it. Because you have ensured the water is clean and the lens is clear, the sensor finally records a true ‘zero’ point. I have seen this one step cut forty minutes off a cycle because the machine stopped guessing and started knowing when the soap was gone.
Check Your Water Temperature First
Finally, pay attention to the water temperature you use for this reset. We often ignore the impact of cold water on detergent breakdown, but for calibration, you want the water to be lukewarm. If it is too hot or too cold, the sensor’s refractive index reading might be slightly off. This is also why why high-efficiency dishwashers take longer to finish—they are constantly adjusting based on these readings. If your machine still acts up after this, it might be one of the top signs your dishwasher needs professional diagnostics, but nine times out of ten, this manual reset solves the grit problem. You are essentially teaching your dishwasher how to see the world again, and the reward is a stack of plates that actually shine.Now that you have got the sensor back in alignment, we need to address the elephant in the kitchen: the ‘Eco’ mode obsession. Everyone tells you that running your machine on the lowest energy setting is the secret to a long life, but in my years of tinkering, I have found the opposite is true. If you exclusively use low-heat cycles, you are basically inviting grease to petrify inside your drain lines. I have seen more clogs caused by ‘green’ settings than by actual food debris. This is exactly why the heavy cycle is actually better for your machines health—the higher heat liquefies fats that the turbidity sensor would otherwise report as ‘clear’ water even while they are coating your pipes. It feels counterintuitive to use more power to save the machine, but your internal plumbing will thank you. Have you ever noticed a funky smell after weeks of ‘Eco’ washes? Let me know in the comments if you have been ‘saving’ your way into a repair bill.
The Soap Trap That Voids Your Protection
One of the biggest traps I see involves the paperwork and the detergent. People assume that once they have a warranty, they are protected against everything. However, the Association of Home Appliance Manufacturers (AHAM) notes that a significant percentage of service denials stem from ‘environmental factors’ or ‘improper consumables.’ I have talked to technicians who had to deny warranty claims for soap choice simply because the owner used too many high-concentration pods in a soft-water area, causing an ‘oversuds’ condition that eventually fried the control board. You need to understand the fine print about normal wear and tear on appliances before you start pulling panels off. 
Can a DIY diagnostic session actually void your factory protection?
It is a valid fear for anyone looking to save a buck. Most manufacturers will not care if you wipe a sensor or clean a removable filter, but the moment you start identifying a faulty control board without a technician by piercing wire insulation with multimeter probes, you are entering the ‘unauthorized repair’ zone. If you want to keep your benefits intact, focus on how appliance diagnostics can save your warranty benefits rather than replacing core components yourself. The ‘Oops’ factor here is simple: never leave tool marks on the security screws of a machine still under its first year of coverage. Technicians look for those tiny scratches as a reason to mark the unit as ‘tampered.’ Stick to the manual sensor recalibration and the water checks we discussed—they are effective, safe, and completely invisible to even the most skeptical inspector.I have spent more hours than I care to admit on my hands and knees in front of my dishwasher, and if there is one thing I have learned, it is that a twenty-dollar multimeter is worth more than a two-hundred-dollar service call. I use mine to check for a ‘closed loop’ whenever the heat fails. If you are curious about the technical side, you can learn how to use a multimeter to find a shorted wire or how to test the continuity of a heating element. It is the difference between guessing and knowing exactly which part to order from the warehouse. I also keep a simple neodymium magnet in my kitchen junk drawer. Why? Because it is the easiest way to test your float switch with a simple magnet without even unscrewing the door panel on most newer models. It is also why I always tell friends that the ‘secret’ to avoiding that massive service fee isn’t a secret at all—it is just a few cheap tools and a bit of curiosity.
How can I keep my dishwasher from dying early?
It really comes down to managing the small debris before it becomes a massive blockage in the impeller. I do not rely on expensive chemical rinses for my monthly maintenance; I use a literal toothpick. You would be shocked at how often a single popcorn kernel or a stray piece of plastic wrap blocks a jet and ruins the whole wash cycle for months. Knowing how a toothpick can save your spray arm from clogs is the ultimate low-tech win for your wallet. Pair that with cleaning the tiny holes in your spray arms once a month, and you are already ahead of ninety percent of homeowners who just wait for the machine to fail. 
Detect Problems Before They Flood Your Floor
Looking ahead, the industry is moving rapidly toward ‘preventative AI’ and interconnected sensors. We are already seeing high-end units that monitor motor torque to predict pump failure weeks before it actually happens. However, until your machine can fix itself, you are the first line of defense. The International Association of Certified Home Inspectors (InterNACHI) notes in their standard estimated life expectancy chart that while a dishwasher’s expected service life is about nine years, that number can drop to five or six if you ignore basic mineral buildup. If you really want to see what is going on behind the scenes, you might look at why your service technician carries a thermal camera. It is not just for show; it spots the heat signature of a failing control board or a slow leak before it ruins your expensive hardwood subfloor. My advice? Do not wait for the puddle or the burning smell. Grab a multimeter and check your heating element’s resistance this weekend—it takes five minutes and tells you everything you need to know about your machine’s true health and longevity.
What I Learned After Almost Wasting Three Hundred Dollars
I used to think that spending more on premium detergents was the ultimate way to protect my investment. I was wrong. Over-sudsing is a silent killer, and I’ve seen firsthand why service techs deny warranty claims for soap choice when the control board gets fried by excessive foam. Another major lightbulb moment was realizing that a ‘broken’ machine is often just a hungry one—hungry for a bit of physical maintenance rather than more chemicals. No amount of vinegar can replace the manual removal of a single lemon seed or popcorn kernel from a spray arm. Lastly, I learned that those diagnostic beeps aren’t there to intimidate you; they are the machine’s only way of asking for a specific fix. Once you speak the language of your unit, the repair stress completely disappears.
The Minimalist Kit for Professional Results
You do not need a garage full of professional tools to keep your kitchen running smoothly. I swear by my digital multimeter for checking the vitals of any high-end unit. #IMAGE_PLACEHOLDER_F# Knowing the exact multimeter reading for a healthy thermal fuse can save you from the expensive mistake of replacing a motor that still has plenty of life. I also highly recommend finding your unit’s specific blueprint; if you’ve lost yours, you can learn how to find a service manual hidden inside the unit. And honestly? My most used ‘tool’ is a simple wooden toothpick. It sounds like a joke until you realize how a toothpick can save your spray arm from clogs that would otherwise require a full part replacement. These three things—a meter, a manual, and a toothpick—are my holy trinity of appliance care.
Stop Fearing the Control Board
You don’t have to be a mechanical engineer to master the basics of your kitchen. By taking these small, deliberate steps, you are reclaiming your time and your household budget. Whether it is a simple sensor wipe or a slightly more advanced test for the continuity of a heating element, every bit of knowledge you gain makes you a more capable homeowner. Do not let the perceived complexity of modern dishwasher diagnostics or concerns about your appliance repair warranty keep you from opening up the kickplate and taking a look. Your dishwasher is a tool designed to serve you, and now, you finally have the upper hand. Have you ever successfully fixed an appliance with nothing but a basic household item? Let me know your best low-tech hacks in the comments below!