

I stood in my kitchen last week, staring at a “clean” wine glass that looked like it had been dipped in sugar. It wasn’t sugar; it was grit. I’d been through three different brands of detergent, convinced that the “eco-friendly” stuff was the culprit. I even started looking into why my dishwasher was failing. But the fix was much simpler—and much cheaper—than I expected. I finally took a good look at the spray arms and realized they were essentially suffocating. Those tiny nozzles, designed to blast water at high speeds, were choked with white, crusty buildup. If you’ve noticed your dishes coming out dull, we are going to fix that today. I used to think my dishwasher was just “getting old.” I’d resigned myself to the idea that I’d eventually have to call in a pro for some expensive professional diagnostics or start shopping for a new unit entirely. I was wrong. One afternoon, after seeing another popcorn kernel jammed in a nozzle, I realized the machine wasn’t broken—it was just blocked. It’s easy to overlook these components because they sit under the racks, out of sight. However, when those holes are obstructed, the water pressure drops, and the spray arm might not even spin properly. You end up with “dead zones” where the water never even touches your plates. Have you ever opened your dishwasher and found one specific corner where everything is still dirty? Let me know in the comments if you’ve been fighting that same battle. Today, I’m going to walk you through exactly how to clear these out. We’ll talk about why they get clogged and how to do it without accidentally voiding your warranty. [image placeholder]
Stop Blaming Your Detergent for Dirty Dishes
Most of us reflexively buy a more expensive soap when the dishes look bad. I did the same thing. I bought the “platinum” pods and the rinse aid that costs as much as a fancy cocktail. It didn’t help. The problem wasn’t the soap’s ability to break down grease; it was the fact that the soap never actually reached the grease. If the water can’t get out of the arm, it doesn’t matter how powerful your chemicals are. I learned the hard way that neglecting basic maintenance can lead to a host of other issues, including pumps that work too hard and eventually burn out. It’s a classic case of a five-cent problem causing a five-hundred-dollar headache. According to Consumer Reports, nearly 30% of dishwasher repairs could be avoided with simple, routine cleaning of filters and spray arms. That’s a huge number when you consider the cost of a service call. I’ve been where you are, standing over the sink with a scrub brush, wondering why I even have a dishwasher. It feels like a betrayal of modern convenience. But before you call a technician, let’s look at the plumbing equivalent of a clogged artery. It’s a bit of a project, but it’s incredibly satisfying to see that first jet of clean water blast through once you’re done.
Does cleaning these tiny holes really make a difference?
You might be skeptical. You might think, “It’s just a little bit of lime scale, surely the water can push through?” I thought that too. But dishwasher pumps aren’t fire hoses. They rely on specific pressure levels to rotate the arms. If even 20% of the holes are blocked, the arm might lose its momentum and stop rotating entirely. I remember early on, I tried to “force” the clogs out by running a cycle with extra vinegar, but it didn’t budge the solid debris like seeds or plastic bits. You have to get in there manually. The good news? Using a simple toothpick is often all it takes to restore your machine to its former glory. This tiny bit of effort ensures your dishwasher operates within its designed parameters, which is vital if you ever need to prove you’ve maintained the unit for a warranty claim. We want to avoid any reason for a provider to deny a fix based on neglect.
Pop Those Arms Out Without Breaking Anything
Before you can really fix the flow, you have to get the hardware out of the machine. Most lower spray arms are held in place by a simple plastic nut that unscrews counter-clockwise, or they just snap onto a hub. If yours feels stuck, don’t yank it. Check your owner’s manual or look for troubleshooting-dishwasher-problems-expert-diagnostics-repair-tips online for your specific model. I remember the first time I tried this; I was terrified I’d snap the plastic. It turned out I just needed to give the center hub a firm twist. Once it’s free, you might be surprised by the weight. It shouldn’t be heavy, but if it’s full of trapped water and gunk, it’ll feel sluggish. This is also the perfect time to check the the-debris-trap-most-owners-miss-during-monthly-cleaning right at the base of the machine, as these two areas often share the same source of filth.
The Shake Test for Hidden Debris
Once the arm is in your hands, take it to the sink and shake it. If it sounds like a maraca, you’ve got solid debris inside. I once found a single cherry pit and a piece of a plastic bread tie rattling around in mine. These items are too big to be sprayed out through the tiny nozzles, so they just tumble around, intermittently blocking the holes. This internal blockage is a major reason how-to-fix-a-spray-arm-that-wont-spin becomes a common search query. If the water can’t exit the arm, the jet propulsion required to spin the arm never happens. You’re left with a stationary stick of plastic that only washes the dishes directly above it.
Clear Every Single Nozzle One by One
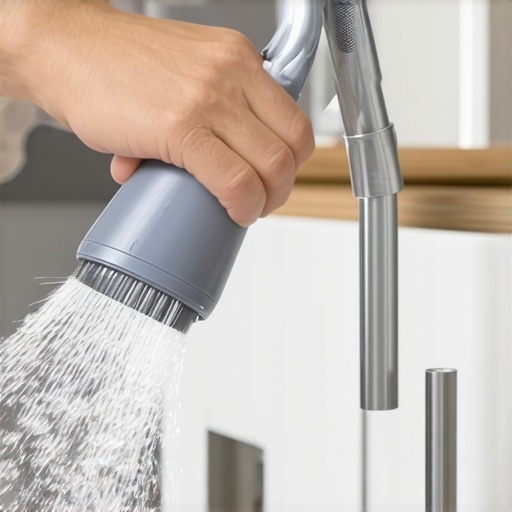
Now comes the tedious but incredibly effective part. You need to inspect every single hole. Even if a hole looks clear, there might be a thin film of translucent lime scale over it. how-a-toothpick-can-save-your-spray-arm-from-clogs is not an exaggeration—it’s the best tool for the job. Metal needles can sometimes scratch or enlarge the plastic holes, which changes the spray pattern and can lead to the-hidden-cost-of-ignoring-a-cracked-spray-arm if the pressure becomes unbalanced. Poke the toothpick into each hole to break up the crust. After you’ve poked them all, run hot water through the center of the arm and let it blast out through the nozzles. It’s like a mini pressure washer for your plumbing. Don’t forget to look up and see how-to-clean-the-tiny-holes-in-your-top-sprayer as well; that top arm often gets neglected because it’s harder to see, but it’s usually the reason your glasses have that annoying grit on the rims.
Flush the Gunk Away Without Harsh Chemicals
If the buildup is particularly stubborn, you might be tempted to use industrial descalers. Instead, try the-right-way-to-de-scale-your-machine-without-chemicals by soaking the removed arms in a 50/50 mix of warm water and white vinegar for about 30 minutes. This softens the minerals without damaging the plastic or any rubber seals. While the arms are soaking, I like to use a flashlight to peer into the water inlet where the arm connects. If you see debris there, use a pair of tweezers to pull it out. This prevents the very next cycle from just blowing more junk right back into your freshly cleaned spray arm. Taking these manual steps shows you’re doing your part in maintenance, which is exactly the kind of thing that helps when how-appliance-diagnostics-can-save-your-warranty-benefits comes into play for bigger repairs later on. A clean machine is a machine that’s easy to defend to a warranty provider.
The Eco-Cycle Myth That’s Gunking Up Your Pipes
Most homeowners believe they are extending the life of their appliance and saving the planet by exclusively running the ‘Eco’ or ‘Quick Wash’ cycles. In my experience, this is a recipe for a slow mechanical death. These modes often operate at temperatures too low to fully dissolve animal fats and modern detergent binders. Over time, these undissolved solids create a waxy buildup known as ‘biofilm’ that coats the internal sensors and the very spray arms we just cleaned. This is why the heavy cycle is actually better for your machines health. According to the Association of Home Appliance Manufacturers (AHAM), high-efficiency detergents require specific thermal activation points that many energy-saving cycles simply do not maintain for long enough to prevent fatty acid precipitation. By running a high-heat heavy cycle at least once a week, you’re effectively performing a ‘thermal purge’ that keeps the internal plumbing clear.
The Expensive Trap of the No-Failure Service Call
Before you get excited about your coverage and schedule a tech, you need to understand the ‘Oops’ factor. If you call a professional because your dishes are dirty, but the technician determines the cause is simply a clogged filter or a piece of glass in the spray arm, you will likely be hit with a ‘No Failure Found’ (NFF) charge. Most providers won’t cover a visit that results from poor maintenance. This is why your warranty provider might deny a no-failure-found claim and leave you with a $150 bill for fifteen minutes of work. I always tell my readers to check the fine print about normal wear and tear on appliances before picking up the phone. A little bit of manual diagnostics now can prevent a very awkward conversation with a service manager later. Have you ever fallen into this trap where your ‘eco’ settings or a simple clog led to a surprise repair bill? Let me know in the comments.
Can the manufacturer really blame your soap choice for a pump failure?
It sounds like an urban legend, but it’s a standard tactic in the industry. I’ve seen technicians document the presence of non-HE (High Efficiency) soap suds or ‘bulk’ store-brand detergents as a reason to deny a claim. This is why your service technician wants to see your detergent box the moment they walk into your kitchen. They are looking for evidence of chemical oversudsing, which can cavitate the circulation pump and lead to premature motor failure. By understanding appliance diagnostics improving your warranty claims, you can ensure that you are using the correct chemistry for your local water hardness. Knowing when to trust a warranty for dishwasher repairs vs. when to handle a simple descaling yourself is the hallmark of a savvy homeowner. Proper how appliance diagnostics can save your warranty benefits starts with proving you’ve followed every guideline in the manual, from the spray arm holes to the brand of pods in your cupboard.
I’ve learned that having the right tools is the difference between a quick weekend fix and three weeks of hand-washing dishes. While a toothpick is great for the spray arms, I eventually graduated to a digital multimeter. I use a Klein Tools MM400 because it’s rugged and handles the ‘ghost voltage’ that can sometimes trick you when checking a control board. If you want to get serious, you need to know the exact multimeter reading for a healthy thermal fuse. Checking for continuity in the heating element or the thermal fuse is often the only way to tell if a component is truly dead or if a wire just rattled loose. I’ve seen so many people toss a perfectly good machine because they didn’t realize a $15 fuse had popped. Another ‘secret weapon’ in my kit is a flexible borescope. It sounds like overkill until you are using a borescope to find clogs in your internal drain hose to see a piece of broken glass wedged deep in the plastic elbow where the hose meets the pump. You simply can’t see that from the outside. According to the Whirlpool Service Job Aid for Dishwashers, checking the resistance in ohms of the circulation pump motor is a primary step in identifying failure before the motor actually seizes. This kind of data-driven approach is how you secure understanding appliance diagnostics improving your warranty claims. 
How do I maintain my dishwasher’s health over the long haul?
Consistency beats intensity every time. Instead of deep cleaning once a year, I do a five-minute check every month. I start at the sink because why your repair tech always checks the air gap first is all about preventing backflow. If that air gap is clogged with gunk, your dishwasher is basically fighting a losing battle against gravity and old food. I also suggest performing the simple move that doubles the life of your dishwasher racks, which is simply wiping down the rack tines to prevent the vinyl coating from cracking. Once the metal underneath rusts, it’s only a matter of time before it starts staining your plates. If you already see red spots, look into the trick to removing rust from your dishwasher racks before the damage spreads to the tub itself. Small habits like these keep you from needing top signs your dishwasher needs professional diagnostics later on.
Prepare for the Age of AI Sensors and Predictive Maintenance
The trend is clear: appliances are getting ‘smarter,’ but that doesn’t always mean they are more reliable. In the next five years, expect your dishwasher to tell you exactly which solenoid is failing before the leak even starts. However, as we see with current tech, these sensors can be finicky. This is why your smart app says the filter is dirty when it is not; the software often misinterprets a slight change in water turbidity for a hardware failure. We are moving toward a ‘subscription’ model for repairs, but the savvy homeowner will always win by knowing how to how to get professional grade diagnostic codes from your interface manually. If you want to stay ahead of the curve, I challenge you to try the simple paper towel test for checking leak locations tonight. It’s the easiest way to find a slow drip under the kickplate before it ruins your subfloor. If you find anything suspicious, contact us or check your manual for the next steps before when to trust a warranty for dishwasher repairs becomes your only remaining option.
The Hard Lessons I Learned After Wasting $400 on Soap
I used to think that buying the most expensive detergent was the solution to every problem. It wasn’t. One of my biggest lightbulb moments was realizing that water quality matters more than soap brand. If your water is extremely hard, even a perfectly clean spray arm can’t prevent lime scale from choking the system. I highly recommend learning how to tell if your water softener is actually working before you go out and buy another bulk pack of pods. Another hard-earned truth: the warranty provider is not your friend. They are looking for any excuse to deny a claim. I’ve started a habit of documenting everything. Keeping the photo evidence you need for every warranty claim—including photos of your clean filters and spray arms—can save you hundreds of dollars. Finally, listen to the machine. A weird clunking isn’t just ‘character’; it’s often the sound of a failing check valve that needs a five-minute fix before it leads to a flood.
#IMAGE_PLACEHOLDER_E#
Tools Every Smart Homeowner Should Keep Under the Sink
I’ve spent too many hours on my knees on the linoleum to not share what works. My Klein Tools MM400 is basically an extension of my hand now because it stops me from guessing. When you understand how to use a multimeter to find a shorted wire, you stop fearing that ‘Check Control’ light. I also highly recommend digging through the frame of your unit; knowing how to find a service manual hidden inside the unit changed my life because it provides the exact diagnostic sequences the pros use. And for the really tricky financial side, I learned how to get a manufacturer to pay for an out-of-warranty repair through persistence and policy knowledge.
Take Back Your Kitchen from the Repairman
At the end of the day, your dishwasher is a tool designed to serve you, not a mystery box meant to stress you out. By taking ten minutes to clear those spray arm nozzles and understanding the basics of appliance repair, you’re doing more than just cleaning plates—you’re protecting your home and your wallet. Don’t be afraid to pull off that kickplate and look for yourself. If you ever feel stuck or see a leak you can’t identify, don’t hesitate to contact us for guidance. You’ve got this. Have you ever found a weird object like a cherry pit or a piece of glass stuck in your spray arm? Let me know your craziest discovery in the comments below!