

Have you ever opened your cabinet, only to notice a damp smell sneaking up on you, or perhaps a soggy kitchen floor that seems to appear out of nowhere? I vividly remember the moment I discovered my own leak—standing there, toothbrush in hand, when I noticed water pooling beneath my kickplate. That lightbulb moment made me realize: it’s not always a burst pipe or obvious clog. Sometimes, a slow, sneaky leak is hiding right where you least expect it.
Why I Thought It Was Just a Minor Mess—Until It Wasn’t
Early on, I dismissed those tiny puddles as spills or maybe a forgotten glass. But the pattern repeated—small, unexplainable drips that grew into a damp floor. That’s when I knew I had to dig deeper. Turns out, some leaks are so slow that they can go unnoticed for weeks or even months, quietly compromising your foundation and causing costly damages. In fact, according to appliance diagnostics experts, early leak detection can save hundreds in repairs and prevent mold growth.
Will Discovering the Leak Save Your Home? Maybe—But Only if You Know Where to Look
Here’s the truth: many of us overlook the hidden spots where leaks brew. We’re familiar with the obvious suspects—hoses, valves, or under the sink—but the real trouble often lies beneath the kickplate of your dishwasher, fridge, or washing machine. A slow leak from these appliances can seep into the cabinetry, leading to extensive damage before you realize something’s wrong. I’ve made the mistake early in my repair days of ignoring those minor water spots, only to pay the price later. Don’t make the same mistake. Being proactive with diagnostics not only preserves your home’s integrity but also keeps your appliance warranty intact.
So, how can you reliably find this elusive leak? That’s exactly what we’ll explore next—step-by-step, with tips from my personal experience and expert advice. Ready to stop the drip and protect your home? Let’s get to the bottom of this sneaky problem together.
.
Identify the Signs of Hidden Leaks
Start by inspecting common areas like beneath your dishwasher, fridge, and washing machine. Look for water stains or damp patches that persist, especially near appliance bases. Use a simple trick: place a few dry, lightweight paper towels under suspect spots overnight—if they get wet, you’ve found your leak source. I once used this method under my dishwasher, and the wet towels alerted me to a minor internal leak that would have gone unnoticed for months.
Check Your Appliance’s Internal Diagnostic Codes
Modern dishwashers and washing machines often have diagnostic features accessible via their control panels. Running a diagnostic cycle can reveal error codes pointing to specific leak sensors or drainage issues. For example, my recent diagnostic test showed a code indicating a defective float switch—a tiny component that detects water levels. Learning to interpret these codes can save time and money by pinpointing faults early. To extract these codes, consult your appliance manual or visit this guide.
Using Professional Diagnostic Tools
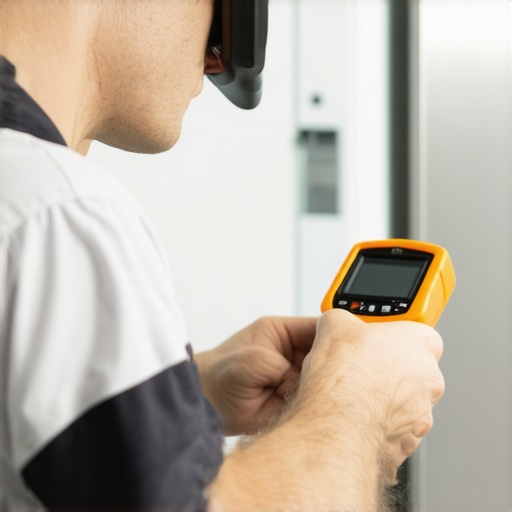
If you’re comfortable, a multimeter can test sensors and electrical components for continuity and faults. For complex issues, professional tools like thermal cameras can detect cold spots indicating moisture behind panels. Remember, safety is paramount—disconnect power before testing. When I suspected a leak behind my dishwasher’s panel, I rented a thermal camera and quickly diagnosed the moisture buildup without invasive disassembly.
Perform the Simple Paper Towel Test
This inexpensive test involves placing dry paper towels at potential leak points and observing any dampness after some time. It’s effective for detecting slow leaks that might not produce immediate puddles. I often do this beneath appliance kickplates during periodic inspections, preventing costly damages. In one instance, a small damp patch revealed a slow leak from a water inlet valve, prompting early replacement.
Monitor Water Flow and Drainage
Observe your appliance’s operation. Does it fill, drain, and cycle normally? Use methods like running a full cycle or manually initiating drain functions via these detailed steps. Pay close attention to unusual noises or extended drain times, which often signal internal leaks or clogs. Once, I noticed my dishwasher took longer to drain; inspecting the drain hose revealed a partial blockage that caused water backup and slow leaks.
Inspect Components and Connections
Visually examine hoses, clamps, and seals for cracks or loose fittings. Tightly secure any loose connections and replace worn-out hoses. For internal seals, a careful visual inspection or a slight spray of water can highlight which seal isn’t holding. I learned from experience that replacing a worn door gasket prevented ongoing leaks and protected my floor from water damage.
Document and Test Remotely
Capture images or videos of suspect areas to analyze later or share with repair professionals. Using smartphone apps or digital cameras to record leak behavior can help diagnose intermittent issues. For instance, my detailed photos helped a technician quickly identify a faulty float switch, leading to a prompt repair. Remember, if local troubleshooting doesn’t resolve the issue, contacting a professional ensures safety and accuracy.
Keep Records and Follow Up
Maintain logs of repairs, error codes, and observations. This documentation helps track recurring problems and strengthens your warranty claims. Proper documentation, including photos and written notes, can be vital if you need to escalate repairs or seek reimbursement. When I kept detailed records, my warranty provider appreciated the thorough evidence, expediting my claim process.
Utilize these steps regularly as part of your maintenance routine. Early detection not only preserves the integrity of your home but also safeguards your appliances’ warranties, making eventual repairs more straightforward and less costly.
Many homeowners believe that diagnosing dishwasher and appliance issues is straightforward—simply run a cycle, identify an error code, and call for repair. However, this oversimplification can lead to costly mistakes and missed opportunities for effective resolution. One of the most common misconceptions is that all error codes are equally reliable indicators of the problem. In reality, some codes are misleading or incomplete, especially if the appliance hasn’t been properly calibrated or if sensor issues are involved. According to expert technicians, relying solely on basic diagnostic codes without understanding their nuances can cause you to overlook underlying faults that might affect your warranty coverage or lead to unnecessary repairs. For instance, a technician trained in advanced diagnostics can interpret subtle signals—like inconsistent float switch readings—that generic code readers might miss, ultimately saving you money and preserving your warranty rights (source).
Are All Diagnostic Methods Created Equal? The Deep Dive
There’s a significant difference between using simple troubleshooting steps—like visual checks and paper towel tests—and employing pro-grade diagnostic tools such as thermal cameras, multimeters, or accessing factory-level error codes. While the former can help identify obvious leaks or clogs, they often fall short in detecting internal sensor failures or electrical faults. For example, some leaks pay homage to their sneaky nature—manifesting only during specific cycle phases or when water conditions reach a certain threshold. Advanced diagnostics can detect these intermittent issues by monitoring sensor signals over time, which is critical for warranties that require proof of proper diagnosis before approval. Interestingly, studies show that a proactive diagnostic approach reduces warranty denial rates significantly, emphasizing the importance of precision assessment (more details here).
Be cautious not to fall into the trap of assuming error codes are foolproof. Instead, develop a layered troubleshooting routine that combines basic checks with professional diagnostic techniques. This enhances your ability to provide comprehensive evidence when filing warranty claims and minimizes the risk of paying for unnecessary repairs. Also, remember that documentation—photos, videos, error logs—can be invaluable. Sharing clear diagnostic data with your repair technician or warranty provider often expedites resolution, especially when combined with detailed records (learn more). Have you ever fallen into this trap? Let me know in the comments.
Investing in Reliable Diagnostic Tools for Peace of Mind
Consistent appliance maintenance hinges on having the right equipment at hand. My go-to device is a high-quality digital multimeter, specifically the Fluke 117, which I trust for its accuracy in testing sensors, switches, and electrical components. Its non-contact voltage detection feature helps me ensure safety while inspecting live circuits. For detecting hidden moisture behind panels, I swear by a thermal camera like the FLIR ONE Pro; it reveals cold spots indicative of leaks or insulation issues that are invisible to the naked eye. This tool has saved me countless hours during diagnostics, preventing unnecessary disassembly.
When diagnosing complex dishwasher faults, I utilize a dedicated factory-level diagnostic interface that connects directly to the appliance’s service port. This enables me to read advanced error codes and sensor signals, giving a granular view of device health. Employing these tools consistently maintains my confidence in delivering accurate repairs and upholding warranties.
How do I maintain diagnostic effectiveness over time?
Regular calibration and updating of my diagnostic equipment are vital. Firmware updates for my thermal camera and multimeter ensure compatibility with the latest appliance models. Additionally, revisiting the manufacturer’s troubleshooting manuals periodically keeps me informed about evolving diagnostic procedures. This proactive approach minimizes troubleshooting errors and extends the lifespan of my repair toolkit, enabling me to provide reliable, long-term solutions.
Looking ahead, the industry is trending toward smart diagnostics integrated with appliance apps and AI algorithms, promising faster and more precise troubleshooting. Staying ahead involves investing in these emerging tools and continuous learning.
If you haven’t yet, try leveraging professional-grade diagnostic codes accessible through your appliance interface. This upgrade can significantly enhance your diagnostic accuracy and warranty success. Remember, the key to keeping your appliances running smoothly is not just troubleshooting today but establishing a consistent, professional routine that evolves with technology.
For personalized advice or complex diagnostics, don’t hesitate to reach out for expert support. Whether it’s equipment verification or strategic long-term maintenance planning, the right tools combined with continuous learning will keep your appliances humming reliably for years to come.
Less Than Perfect: The Lesson That Took Me by Surprise
One of the most profound lessons I learned was that not all leaks announce themselves loudly. Sometimes, they whisper through tiny damp patches beneath appliances or faint musty smells in the kitchen. These subtle signs taught me to pay attention to the quiet cues, realizing that early detection often hinges on observing the smallest anomalies before they grow into costly calamities.
Tools That Saved Me More Than Once
Investing in quality diagnostic tools like a thermal camera and a reliable multimeter changed the game for me. They provided insights that visual inspections alone couldn’t match, revealing hidden moisture pockets and faulty sensors that might have been missed. Trusting these devices and understanding their readings strengthened my confidence in addressing issues swiftly, preserving warranties and saving money in the long run.
My Brave New Routine for Appliance Care
Developing a consistent maintenance routine—regular visual checks, the paper towel test, monitoring error codes—has made a noticeable difference. It transforms reactive repairs into proactive maintenance, catching potential leaks early. This habit not only protects my home but also extends the life of my appliances, proving that a little diligence goes a long way.
Where I Went Wrong (And How You Can Avoid It)
Early on, I relied too heavily on basic troubleshooting; I dismissed subtle warning signs because I assumed they were insignificant. That oversight cost me dearly—delayed repairs led to extensive damage. Now, I know that embracing advanced diagnostics and documenting findings meticulously is vital. Lesson learned: never ignore the silent signals—you might be saving your home from a major leak.
Curated Gems to Keep Your Appliance Repairs Sharp
My go-to resources include expert guides on appliance diagnostics, quality diagnostic tools like thermal cameras and multimeters, and trusted blogs that demystify error codes and troubleshooting techniques. These tools and knowledge bases are invaluable because they equip you to diagnose accurately, improve warranty claims, and handle issues confidently.
Take Charge and Trust Your Instincts
If you suspect a leak or fault, don’t wait for it to escalate into a disaster. Use your diagnostic tools, observe carefully, and act promptly. Remember, your proactive approach today safeguards your home and empowers you as a responsible homeowner who understands their appliances better than ever before. Are you ready to become the master of your appliance repairs? Share your experiences or ask for advice below—I’d love to hear your stories and support your journey.