

It was 11:30 PM on a Tuesday, and I was standing in my kitchen, staring at the glowing red display of my dishwasher. It still had 45 minutes left. I had pressed the ‘Eco’ button at 8 PM, thinking I was doing my part for the planet, but instead, I found myself pacing the linoleum, wondering if the machine had simply forgotten how to stop. I remember my first big mistake years ago; I actually called a repair tech because I was convinced the timer was broken. I paid a sixty-dollar service fee just to have a very patient man tell me the machine was working perfectly. That embarrassing moment sparked my obsession with understanding appliance diagnostics. Today, I am going to peel back the curtain on why that ‘slow’ cycle is actually a masterpiece of engineering and how it can help you with saving water without sacrificing clean plates every night.
The Slow Science of the Long Soaking Method
In my early days of homeownership, I assumed more power meant better cleaning. If a car goes faster, it’s more powerful, right? Dishwashers don’t work like that. When you select the standard cycle, the machine blasts hot water at high pressure and high temperatures to melt grease quickly. It’s effective, but it’s an energy hog. When you switch to Eco, the machine takes a completely different approach. It uses lower temperatures and less water, but it compensates by letting the dishes soak for much longer. It is the difference between power-washing a deck and letting a stained shirt soak in a tub of soapy water. I used to think my machine was failing, but really, it was just being efficient. Have you ever stood over your machine, tempted to hit the cancel button because it’s taking too long?
Is this cycle actually a gimmick that costs more in electricity?
It is a fair question to ask. If the motor is running for three hours instead of one, aren’t you paying more? The short answer is a resounding no. According to the energy experts at the American Council for an Energy-Efficient Economy (ACEEE), the vast majority of the energy used by a dishwasher—roughly 80 percent—goes toward heating the water, not running the motor. By keeping the water at a lower temperature and simply circulating it longer, you drastically reduce the kilowatt-hours consumed. I’ve learned that why modern dishwashers take three hours to run a cycle is rooted in strict environmental regulations that force manufacturers to get creative with time rather than heat. If you’re worried about your bill, how to lower your appliance operating costs by 15 percent often starts with just having the patience to let the Eco mode finish its work. In the next section, I’ll show you exactly how this slow-cooker approach to dishes keeps your machine’s internal parts from wearing out too soon.
Protect your machine from thermal stress
I used to think that the ‘sanitize’ setting was the gold standard for every load. I was wrong. Blasting your machine with extreme heat every night is like redlining your car engine on the way to the grocery store. It works, but you’re wearing out the gaskets and the heating element prematurely. By sticking to the Eco cycle, you are performing a low-impact workout for your appliance. This lower temperature environment is much kinder to the plastic-coated racks and the rubber seals that keep water off your kitchen floor. I’ve noticed that people who consistently use the Eco mode rarely have to deal with how to prevent rust from forming on your dishwasher racks because the protective coating isn’t being constantly scorched and cracked.
Clean the debris trap before you start
The long-soak method of the Eco cycle relies on water being able to circulate freely. If your filter is clogged with old coffee grounds or bits of labels, the pump has to work twice as hard to push water through the grime. I remember one Saturday morning when I was convinced my drain pump was dying because of a rhythmic clicking sound. After a few minutes of troubleshooting dishwasher problems, I reached into the sump and pulled out a single, calcified cherry pit. That tiny object was rattling against the impeller, threatening to burn out the motor. Now, I make it a habit to check the hidden filter most owners never clean in their machine at least once a week. It takes thirty seconds and can save you a three-hundred-dollar repair bill.
Test your spray arms for total coverage
Even the best detergent won’t work if the water can’t reach the plates. Before you close that door and walk away for three hours, give the spray arms a manual spin. It’s the most basic diagnostic check you can perform. If you hear a ‘thwack’ against a tall baking sheet or a dangling spatula, your dishes won’t get clean. I used to be lazy about this until I tried the paper plate test for spray arm coverage and realized my ‘efficient’ loading style was actually blocking forty percent of the water flow. If the water can’t hit the surface, the enzymes in the detergent can’t break down the food proteins during that long Eco soak. 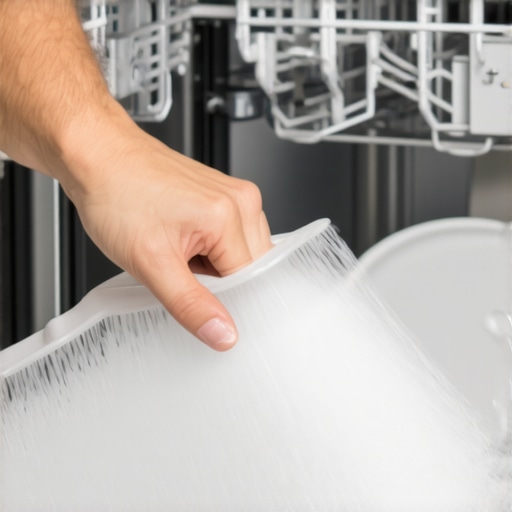
Ensure the detergent door has a clear path
This is the ‘silent killer’ of the Eco cycle. Because the water temperature is lower, the timing of the detergent release is critical. If a large dinner plate is leaning too far forward in the bottom rack, it can physically block the dispenser door from popping open. You’ll come back three hours later to a dry, blue tab still stuck in the door and a load of dirty dishes. This is a common issue I see when people are understanding appliance diagnostics; they assume the electronics are failing when it’s actually just a physical obstruction. Check the secret reason your dishwasher detergent door stays shut to ensure your machine actually gets the soap it needs at the right moment. Keeping that path clear ensures the pre-wash and main wash phases happen exactly when the onboard computer expects them to.While most homeowners think they are experts after watching a few YouTube videos, I’ve realized that the real nuance lies in the intersection of mechanics and legal fine print. Everyone tells you that a warranty is your ultimate safety net, but in my experience, a warranty is only as good as your paperwork. Most people assume that if the machine stops, the manufacturer just writes a check. That is the first big trap. In reality, how appliance diagnostics can save your warranty benefits depends entirely on your ability to prove the failure wasn’t caused by your own hand. I have seen hundreds of claims denied simply because the owner couldn’t provide the photo evidence you need for every warranty claim.
Stop trusting your warranty to save you without proof
The most common myth I encounter is that professional repair is always better than expert diagnostics. Actually, the diagnostic phase is where the battle is won or lost. If a technician comes to your house and sees a clogged filter or a poorly leveled machine, they will label it consumer error, and you will be stuck with the service fee. This is where understanding appliance diagnostics becomes your best financial tool. According to the Association of Home Appliance Manufacturers (AHAM), approximately 25 percent of all service requests are for issues that could have been resolved by the consumer through basic maintenance. If you call for a pro without doing your homework, you are essentially gambling with your wallet.
Why Teflon tape is a death sentence for your water valve
Here is a specific trap I see all the time: the DIY enthusiast who wants to be extra thorough. When you are installing or moving your dishwasher, you might be tempted to wrap the threads of the water inlet valve in white plumber’s tape. Do not do this. I’ve seen this mistake lead to a flooded kitchen more times than I can count. Most modern dishwasher valves are made of high-density plastic, not brass. Why you should never use plumbing tape on a water inlet valve is simple: the tape adds thickness that the plastic threads aren’t designed to handle. As you tighten the brass nut over the taped plastic, it creates outward pressure that hairline-fractures the valve housing. It might not leak today, but in three months, that valve will split wide open while you’re at work.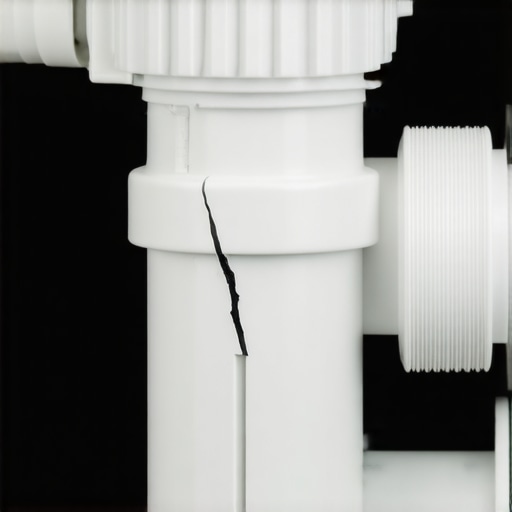
Do you really need a new board or just a software reset?
As machines get smarter, the failures get weirder. I’ve had readers tell me their dishwasher was dead because the buttons were unresponsive, only to find out it was a software hang. People often rush to buy a two-hundred-dollar control board when the issue is actually digital. However, be careful with the solution. Sometimes, why your appliance firmware update just bricked the control board is a cautionary tale about modern tech. If the power flickers during an update, your machine becomes a very expensive paperweight. Before you assume the hardware is fried, always try a hard power reset by flipping the breaker for ten minutes. It’s the turn it off and back on again of the appliance world, and it works more often than you’d think. Have you ever fallen into this trap where you paid for a repair that was actually just a simple setting or a software glitch? Let me know in the comments.
Stop Guessing and Start Measuring
If you want to move beyond basic troubleshooting and actually take control of your kitchen’s fate, you need to own a basic digital multimeter. I remember being terrified of electricity until I realized that testing a dishwasher component is mostly just looking for a number on a screen. For example, if your machine won’t heat, checking the exact multimeter reading for a healthy thermal fuse is the only way to be 100 percent sure it’s dead. I personally use a simple auto-ranging model because it removes the guesswork. As detailed in the Whirlpool Technical Service Manual for 24-Inch Built-In Dishwashers, measuring resistance across a solenoid isn’t just a suggestion; it’s the only objective way to confirm a failed component without wasting money ‘throwing parts’ at a ghost. Learning the specific way to test a thermal fuse for continuity was a turning point for me; it turned a stressful weekend into a five-dollar fix. 
How can I keep my machine running for fifteen years?
Maintenance isn’t a one-time event; it’s a rhythm. I’ve found that the secret to longevity is preventing the scale buildup that chokes the internal sensors. I used to ignore the ‘Clean Machine’ light until I researched the real cost of skipping your monthly descaling cycle. It’s not just about the smell—though why your dishwasher smells like a wet dog is usually a result of bacteria growing in that scale. If you make the simple move that doubles the life of your dishwasher racks by never using abrasive cleaners on the vinyl, you’ll avoid the rust that eventually kills the pump. I also recommend a quarterly deep dive into the sump. Most people wait for top signs your dishwasher needs professional diagnostics, but by then, the damage is often permanent.
The Future of Self-Diagnosing Machines
We are entering an era where you won’t even need to open the door to know what’s wrong. I’m already seeing how smart diagnostic apps are changing home appliance repair by allowing sensors to broadcast error codes directly to your smartphone. In the next few years, I predict we will see ‘predictive failure’ where your dishwasher tells you the motor is failing two weeks before it actually dies. This will be a game-changer for warranty claims, but you have to be careful. Manufacturers are already looking at the truth about non-manufacturer repair parts and your warranty to see if you’ve tampered with these sensors. Before you call a tech or buy a new unit, I challenge you to try how to test your float switch with a simple magnet tonight; it’s the most satisfying diagnostic win you can have.
Hard Truths from a Decade of Dishwasher Diagnostics
I’ve spent countless hours under kitchen counters, and the most valuable thing I’ve learned is that patience is a diagnostic tool in itself. Before you assume the worst, remember that a ‘dead’ machine often just needs a fresh start; I always recommend the one-minute move to reset your control board before calling for backup. Another lightbulb moment for me was realizing that manufacturers aren’t looking for ways to pay you—they are looking for ways to deny you. That is why understanding appliance diagnostics improving your warranty claims is so vital; you need to speak their technical language to get what you are owed. Finally, never ignore a change in rhythm; a weird hum today is often a flooded kitchen tomorrow if left unchecked.
The Gear That Saved My Kitchen Floor
You don’t need a van full of tools to be effective, but you do need the right ones. My first recommendation is always a reliable auto-ranging digital multimeter; it is the only way to confirm if a component has truly failed or if it is just not getting power. Secondly, I never start a repair without knowing the specific quirks of the model, which is why learning how to find a service manual hidden inside the unit changed my life. It is usually tucked behind the kickplate in a plastic bag! I also suggest keeping a dedicated folder for receipts and photos, especially when you need to know when to trust a warranty for dishwasher repairs versus when to handle it yourself. Lastly, if the manufacturer is being difficult, there are strategies for how to get a manufacturer to pay for an out-of-warranty repair if you can prove a known defect.
Master Your Machine Before it Masters You
Owning an appliance does not have to be a source of constant anxiety. When you take the time to learn the rhythms of your dishwasher—from the slow soak of the Eco cycle to the specific clicks of the drain pump—you stop being a victim of bad luck and start being an informed homeowner. By understanding appliance diagnostics, you are protecting your home’s most expensive assets and keeping your hard-earned money in your pocket. Have you ever successfully talked a manufacturer into covering a repair they initially denied? Let me know in the comments below!