

I stood there staring at my ‘clean’ dinner plates, but they weren’t clean. Not even close. There was a weird, gritty residue on the glasses, and my favorite cereal bowl still had a stubborn ring of dried oats. I felt that familiar surge of annoyance. Is the motor dying? Do I need to call a technician and shell out a fortune? I’ve been there. In fact, I once went so far as to replace a spray arm entirely because I assumed the plastic had failed, only to find out later I was just dealing with a few stray lemon seeds and some calcium. It was an embarrassing waste of money. But that’s how we learn, right? Today, I’m going to show you how to skip the expensive appliance diagnostics and fix the root cause of those dirty dishes with nothing more than a common toothpick.
Stop Throwing Money Away and Check the Spray Nozzles First
Most people assume that if the top rack is coming out filthy, the machine is toast. I used to think the same. I’d complain that my eco cycle leaves food particles on top rack bowls because the ‘green’ settings just weren’t powerful enough. The truth is usually much smaller—literally. Over time, tiny bits of plastic, seeds, and hard water minerals lodge themselves inside those tiny holes in your spray arms. When those holes are blocked, the water pressure drops, and the spray pattern gets wonky. You aren’t getting a wash; you’re getting a light drizzle. According to research from the Association of Home Appliance Manufacturers (AHAM), mineral buildup is one of the leading causes of perceived ‘mechanical failure’ in dishwashers. Using the toothpick method for unclogging spray nozzles is the ultimate ‘neighborly’ secret that keeps your machine running like new without a heavy toolbox.
Is a tiny piece of wood really enough to fix a machine?
It sounds like a DIY myth, doesn’t it? I was skeptical too. I thought I needed high-pressure air or some fancy chemical solvent to clear out the gunk. But here’s the thing: most of what clogs those nozzles is brittle mineral scale or soft food debris. A toothpick provides the perfect amount of reach and stiffness to break that stuff loose without damaging the plastic spray ports. If you get too aggressive with a metal paperclip, you might actually widen the hole and ruin the factory-calibrated spray pressure. Have you ever noticed your dishes getting progressively dirtier over a few months, or have you already tried the ‘vinegar trick’ with no luck? Drop a comment and let me know. Before you think about calling in a warranty claim, let’s look at why these hidden nozzles are the real key to a sparkling kitchen.
Free the Spray Arms and Get Better Water Flow
Before you can start poking at the gunk, you need to get those spray arms into the light. Most modern dishwashers make this incredibly easy, though it feels a bit like surgery the first time you do it. For the bottom arm, it usually just lifts off or requires a quick unscrew of a plastic nut. If it feels stuck, don’t force it; sometimes you’re just dealing with the five-minute fix for a loose spray arm nut that has become cross-threaded. I remember the first time I pulled mine out—I expected a complicated mechanical connection, but it’s really just a hollow piece of plastic designed to spin. Think of it like a lawn sprinkler; if the holes are blocked, the grass (or in this case, your plates) stays dry. Once you have the arm in your hand, give it a good shake. If you hear a rattle, that’s your target. I once found a tiny plastic bread tag trapped inside that was acting like a flap valve, blocking water every time the pump kicked in.
Perform Precision Surgery with a Simple Toothpick
Now, take a standard wooden toothpick and gently insert it into each nozzle. You aren’t trying to spear a cocktail olive here; you are looking to break up the calcified minerals or dislodge a stray peppercorn. I prefer wood over metal because it has a slight grip to it, allowing you to ‘hook’ debris and pull it out rather than just pushing it deeper into the arm. If the debris is stubborn, you might need to try the lemon peel trick for clearing hard water scale to soften the buildup first. 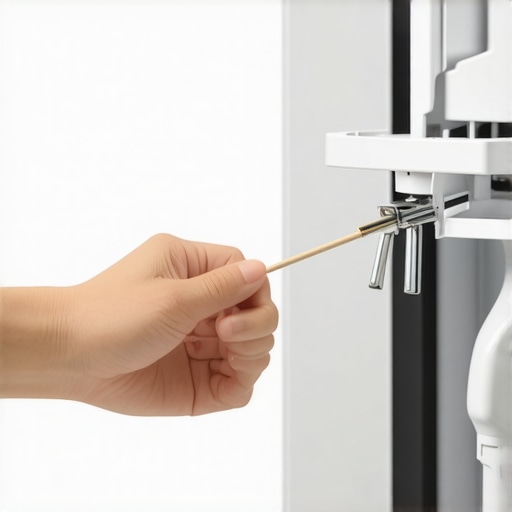
Why you should avoid the paperclip temptation
It is tempting to grab a needle or a paperclip for this job, but I strongly advise against it. Those tiny nozzle ports are engineered for a very specific flow rate. If you use a metal tool and accidentally shave off a bit of the plastic, you’ve just permanently altered the water pressure. It’s like putting a thumb over a garden hose; a small change in the opening size completely ruins the aim of the spray. If you find that the plastic is already brittle or the holes are warped, it’s better to learn how to replace a cracked spray arm without calling a technician rather than trying to MacGyver a broken part back to life.
Flush the debris out the center hole
Once you’ve loosened the gunk with the toothpick, run hot water into the center hub of the spray arm so it flows *out* through the nozzles. This back-flushing technique ensures that the stuff you just broke loose doesn’t just settle back into a different hole the second you turn the machine back on. While you have the arms out, it’s the perfect time to how to deep clean the hidden spray arm bearings to ensure they spin freely without resistance.
How to Know You Have Actually Fixed the Problem
Before you slide the racks back in, use the flashlight trick for finding micro-cracks in your spray arm to ensure the integrity of the plastic. If everything looks solid, pop them back on and run a quick test. A great way to verify your work is by using the paper-plate test for spray arm coverage, which gives you a visual map of where the water is actually hitting. This simple maintenance prevents the headache of troubleshooting dishwasher problems that look like motor failure but are really just hygiene issues. Remember, staying on top of this is vital because why your warranty claim was denied due to lack of maintenance is a conversation nobody wants to have with a manufacturer representative.The biggest mistake I see isn’t failing to fix the machine—it’s failing to understand the contract you signed when you bought it. We all think the manufacturer’s warranty is a ‘get out of jail free’ card. Everyone says calling the manufacturer is the safest first step, but in my experience, the moment you call a pro without doing your own basic maintenance check, you’re playing a high-stakes financial game. If a tech arrives and finds that your ‘broken’ pump is just clogged with grease because you skipped a cleaning cycle, they won’t just deny the repair; they’ll hand you a bill for the travel time. This is where understanding appliance diagnostics becomes your best financial defense. According to data from the Association of Home Appliance Manufacturers (AHAM), up to 25% of service calls are ‘no-fault found,’ meaning the issue was purely maintenance-related. This is exactly why your warranty claim was denied due to lack of maintenance in so many cases. The company isn’t being mean; they’re strictly following a contract that requires you to be the first line of defense.
Does calling for service too early actually risk your future coverage?
It might sound counterintuitive, but yes. Every time a technician visits, it’s logged in a permanent service history. If you have a track record of ‘nuisance calls’ for simple clogs or dirty nozzles, the warranty provider might flag your account as high-risk for improper maintenance. This makes it significantly harder to how to appeal a rejected extended warranty claim later when something expensive, like a main control board, actually fails.  One major ‘oops’ factor is the temptation to buy cheap, off-brand parts from a random online marketplace. I get it; a $10 spray arm is better than a $60 one from the manufacturer. However, the truth about non-manufacturer repair parts and your warranty is that using them can void your entire coverage. If that third-party part fails and causes a slow leak, the manufacturer won’t touch the resulting water damage or the secondary repair. Before you panic, see if your machine has a ‘smart’ out. Many modern units have hidden features where how smart diagnostic apps are changing home appliance repair by telling you exactly what’s wrong via your phone. It’s essentially a professional’s brain in your pocket. If the app confirms a sensor error rather than a clog, then you know it’s time to check the top signs your dishwasher needs professional diagnostics and make that call with confidence. Have you ever fallen into this trap where you paid for a tech just to have them point at a piece of stuck food? Let me know in the comments.If you have already mastered the toothpick method and survived the anxiety of a warranty call, it is time to build a real defense strategy. I used to think a screwdriver was the only tool I needed for the kitchen, but I was wrong. To truly take control, you need a digital multimeter. It sounds intimidating, but it is the only way to verify if a component is actually dead or just playing dead. I personally use it to check the thermal fuse whenever my machine refuses to light up. Instead of guessing, you can learn the specific way to test a thermal fuse for continuity and save yourself from buying a new control board you didn’t need. This is the level of detail where how appliance diagnostics can save your warranty benefits really starts to make sense. By providing a technician with hard data from your own tests, you stop being a ‘nuisance caller’ and start being a partner in the repair process. According to the International Association of Certified Home Inspectors (InterNACHI), the average life expectancy of a dishwasher is about 9 years, but consistent maintenance can easily push that to 12 or 15.
How do I maintain my machine’s performance over the long haul?
The secret isn’t a single big fix; it is a series of tiny, boring habits. You have to look where the water goes. Most people ignore the sump area until it overflows, but I recommend checking the hidden filter most owners never clean in their machine at least once a month. If that filter is clogged, your pump works twice as hard, gets twice as hot, and dies twice as fast. I also set a calendar reminder for a deep clean because the real cost of skipping your monthly descaling cycle isn’t just a few spots on your glasses—it is the gradual erosion of your pump’s internal seals.  Looking ahead, the future of our kitchens is moving toward ‘Right to Repair’ modularity. I predict that within the next five years, major brands will move away from sealed units and toward ‘plug-and-play’ sensors that we can swap out as easily as a printer cartridge. We are already seeing this shift with why firmware updates are essential for new smart dishwashers. Your machine is becoming a computer that happens to wash dishes, which means you need to know why your smart appliance needs regular software cache clears just as much as you need to know how to scrub a filter. If your machine is acting glitchy, don’t assume the motor is gone; it might just be a software hang-up. Before you spend a dime, I want you to try one thing: if your dishwasher won’t start but has power, grab a cheap multimeter and test the door latch or the thermal fuse. It is the ultimate ‘pro’ move that separates the victims of planned obsolescence from the masters of their own domain. If you are still unsure about your coverage, check how to tell if your service plan actually covers motor failure before the next cycle starts.
3 Myths About Dishwasher Maintenance That Cost Me a Fortune
Early in my journey of home ownership, I believed that more detergent meant cleaner dishes, but I quickly learned that how to prevent suds locks in high efficiency machines is actually about using less. I also fell for the myth that the ‘Heavy’ cycle was a cure-all, only to realize why your energy bill spikes when using high heat modes without actually improving the results for lightly soiled loads. Perhaps the biggest lightbulb moment was discovering that the fix for a dishwasher that won’t start but has power is often just a simple reset or a cheap fuse, not a dying motor. These lessons taught me that paying attention to the small signs is the only real way to avoid the ‘technician tax’.
The Small Toolbox That Saves My Kitchen Sanity
You do not need a professional-grade workshop to keep your machine running for a decade. My essential toolkit starts with a simple pack of wooden toothpicks for the spray arms. Next, I always keep a digital multimeter nearby to practice the specific way to test a thermal fuse for continuity before I ever consider calling for help. I also rely on my smartphone to see how smart diagnostic apps are changing home appliance repair, which allows the machine to literally tell me what’s wrong. Finally, for those annoying surface issues, I keep a small bottle of liquid rubber, as it is the best way to patch a rusted rack tine before it ruins your favorite ceramic bowls.
Stop Being Afraid of Your Own Appliances
It is easy to feel intimidated by the flashing lights and beeps, but remember: these machines were built to be serviced. By taking these small steps, you are doing more than just cleaning plates; you are mastering how appliance diagnostics can save your warranty benefits and taking full control of your household budget. Don’t wait for a flood or a failure to start exploring how your dishwasher works. You have the tools and the knowledge now to ensure your kitchen remains a place of efficiency rather than stress. #IMAGE_PLACEHOLDER_E# Have you ever found a bizarre object—like a plastic toy or a fruit pit—inside your spray arm? Let me know your strangest discovery in the comments below!