

I was standing in my kitchen at 11 PM, staring at a “clean” dinner plate that looked like it had been seasoned with sand. It was infuriating. I had already spent an hour scrubbing the sump area and running empty cycles with vinegar, but the grit remained. That’s when I realized the problem wasn’t the water or the soap; it was the physics of the spray arm itself. If those hidden bearings are choked with hair, hard water scale, or old pasta bits, the arm won’t spin fast enough to actually wash anything.
Stop Wondering Why Your Plates Are Still Gritty
Most of us focus on the filter, which is a great start, but we ignore the pivot points where the magic happens. I learned this the hard way years ago when I panicked and called a technician, only to watch him pull a single piece of plastic out of the bearing assembly—a professional diagnostic visit that cost me a cool two hundred bucks for five minutes of work. Today, I’m going to walk you through exactly how to reach those hidden crevices so you can save your cash and your sanity. We’ll look at the parts the manual usually glosses over. Have you ever noticed your top rack dishes coming out worse than the bottom ones? That’s the classic “stuck bearing” red flag.
Is This Maintenance Truly Worth the Hassle
You might be worried that poking around in the mechanical bits will break something or ruin your warranty coverage. The truth is, keeping these pathways clear is considered standard maintenance, much like cleaning out the tiny spray nozzles. According to experts at Consumer Reports, nearly 30% of dishwasher performance issues stem from poor user maintenance rather than actual mechanical part failure. By the time we’re done here, your machine will spin like it’s brand new, and you won’t have to spend a dime on a repairman. I’ll show you how to identify the buildup and the specific movements needed to flush out the gunk without snapping any plastic tabs. Let’s get that machine back to peak performance.To start, you need to verify if the arm is actually the culprit. Reach in and give it a flick. It should spin freely for a few rotations, much like a well-oiled bicycle wheel. If it grinds to a halt after half a turn, you have a friction problem in the hub. This is exactly what the paper plate test for spray arm coverage is designed to catch before you start taking things apart. If the plates on one side are consistently dirty, that arm isn’t making its full rounds because it’s physically dragging.
Pop the Arm Off Without Breaking Anything
Most modern machines use a simple plastic nut or a pressure-clip system to hold the assembly in place. Don’t go grabbing a heavy wrench yet; you are dealing with brittle plastic that has been heat-cycled for years. For many units, a simple quarter-turn counter-clockwise on the center hub is all it takes to release it. If yours feels stuck, you might just need the five-minute fix for a loose spray arm nut to understand how your specific model’s threads are oriented. I once tried to brute-force a Bosch arm and nearly snapped the entire plastic housing because I didn’t realize there was a tiny locking tab hidden under a layer of slime. Once it is off, hold it up to a bright light. You can use the flashlight trick for finding micro-cracks to ensure the arm isn’t losing water pressure through the seams. 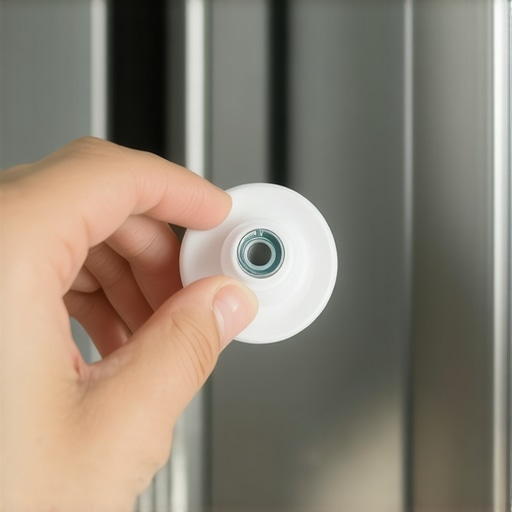
Flush the Gunk Out of the Bearing Hub
This is where the real cleaning happens. The bearing is essentially the ‘neck’ of the spray arm. Over time, stray hairs and those tiny plastic stickers from store-bought produce find their way into this gap, acting like a brake pad. Take the arm to your kitchen sink and run hot water directly into the center hole while shaking it vigorously. You would be surprised what falls out. I remember doing this after a particularly bad week of gritty dishes and a single, petrified corn kernel fell out of the hub. It had been wedged in the pivot point for a month. While you have the part removed, don’t forget the exit points. Using the toothpick method for unclogging spray nozzles is essential here to remove seeds or glass shards. If you see white, chalky buildup, the lemon peel trick for clearing hard water scale works wonders to dissolve that calcium without using harsh chemicals that can degrade the plastic. If you find that the plastic is actually split along the seam while you’re scrubbing, you will need to know how to replace a cracked spray arm immediately, as no amount of cleaning will fix a structural loss of water pressure.
Why Keeping These Paths Clear Saves Your Wallet
You might think this is overkill, but why your warranty claim was denied due to lack of maintenance is a horror story you do not want to live through. If a technician finds that your pump failed because it was struggling to push water through blocked arms, they can argue the failure was user-induced. It is about protecting the motor by ensuring the water flow is as smooth as possible.Wait, before you pat yourself on the back for a clean spray arm, let’s address the elephant in the room: the ‘safety net’ of your warranty. Most homeowners think that as long as they have a service contract, any failure is the manufacturer’s problem. In my experience, that is a dangerous assumption. You see, why your warranty claim was denied due to lack of maintenance is often the result of failing to perform the exact steps we just discussed. The Association of Home Appliance Manufacturers (AHAM) explicitly states that maintenance is the owner’s responsibility, and a technician can easily blame a motor burnout on the back-pressure caused by clogged spray arms.
The Eco Mode Trap No One Mentions
We are all trying to be greener, but here is a contrarian take: using Eco mode exclusively is actually killing your machine. While why the eco-mode cycle takes longer than a standard wash explains the mechanics of water conservation, it ignores the fact that lower temperatures fail to dissolve fats completely. This grease eventually settles in those bearing hubs you just cleaned. It’s an ‘oops’ factor that leads to a cycle of constant scrubbing. To make matters worse, why your service tech secretly hates pod detergents is because they often don’t dissolve fully in these cooler cycles, adding another layer of grit to your internal parts.
Does My Smart Diagnostic App Actually Know When It’s Failing?
It’s tempting to trust the blinking lights, but how smart diagnostic apps are changing home appliance repair is a double-edged sword. These tools are excellent at identifying symptoms, but they rarely pinpoint the cause. If your app says ‘low water pressure,’ it might tempt you to buy a new pump when the real issue is a tiny piece of plastic stuck in the arm. 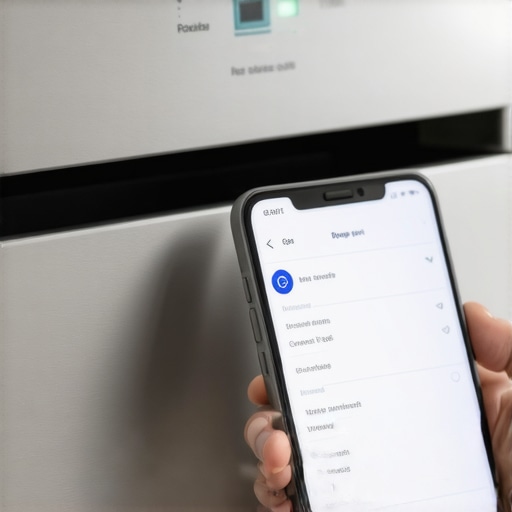
Don’t Let the Fine Print Win
Before you assume you’re covered for a major repair, take a moment for understanding appliance diagnostics improving your warranty claims. You need to know how to tell if your service plan actually covers motor failure or if it’s full of loopholes regarding ‘consumable’ parts. Also, be wary of third-party fixes; the truth about non-manufacturer repair parts and your warranty is that using an off-brand spray arm could void your entire contract. Have you ever fallen into this trap of assuming a warranty would cover a maintenance-related failure? Let me know in the comments.I personally never walk into a kitchen to troubleshoot a machine without my digital multimeter. It is the one tool that separates the DIYers from the experts. If you are serious about saving money, you need to learn how to test your inlet valve with a simple voltmeter instead of just replacing parts on a hunch. I’ve seen too many homeowners spend fifty bucks on a valve when the real issue was a five-cent wire that had vibrated loose. If your machine is dead and has no power, knowing the specific way to test a thermal fuse for continuity can save you an entire weekend of hand-washing. I recommend a meter with an auto-ranging feature; it prevents you from blowing the internal fuse of the tool if you accidentally touch the wrong leads.
Why Software is the New Mechanical Clog
We are entering an era where the hardware is often fine, but the ‘brain’ is glitching. I’ve noticed a rising trend where why your appliance firmware update just bricked the control board becomes the leading cause of service calls. In the future, I predict that ‘software maintenance’ will be just as common as cleaning a filter. You will likely need to learn the trick for updating firmware on your connected kitchen appliances to prevent sensor errors. According to the AHAM DW-1-2020 technical standard, soil-sensing technology—the magic that tells your dishwasher when the water is clean—is highly sensitive to software calibration. If your machine is acting erratic, don’t overlook the digital side. You might need to access the secret tech menu that calibrates your water sensors to reset the baseline. 
How do I maintain my dishwasher over time?
The secret isn’t a one-time deep clean; it’s a rhythmic schedule of descaling and checking your gaskets. I’ve found that the real cost of skipping your monthly descaling cycle isn’t just a few spots on your glasses—it is the slow erosion of the internal pump seals. Every six months, I also check for physical misalignments. Using the simple trick for realigning a sagging dishwasher door ensures that your seals aren’t being crushed unevenly, which eventually leads to a ‘non-warranty’ leak. If you ever find yourself fighting with a warranty provider over a major repair, being able to show a log of these maintenance steps is your best weapon. Knowing how to appeal a rejected extended warranty claim is much easier when you can prove you weren’t the one who caused the failure through neglect. I highly encourage you to try one advanced move tonight: find your dishwasher’s model number and look up how to enter the ‘Diagnostic Mode.’ Just seeing the error code history will give you a level of control over your appliance that most people never have.
The Hard Truth About My Five Most Expensive Mistakes
Looking back at years of repair calls, the biggest lesson I have learned isn’t about parts—it’s about proof. If you can’t show that you have been doing your part, the manufacturer often won’t do theirs. I always tell my friends to keep a small notebook in the kitchen junk drawer to log every time they perform a monthly descaling cycle. This simple habit makes it much harder for a company to deny your claim based on “user neglect.” Also, never underestimate the power of a simple physical inspection. I once spent two weeks troubleshooting what I thought was an electronics issue that turned out to be a slightly misaligned door. Learning the simple trick for realigning a sagging dishwasher door saved me from buying an expensive control board I did not need. Finally, remember that your smart features are tools, not gods. If the app says something is wrong, verify it manually before you reach for your credit card.
Gear That Actually Belongs in Your Kitchen Drawer
You do not need a massive professional toolbox to keep things running, but a few specific items are non-negotiable for the savvy homeowner. First, get a decent multimeter; it is the only way to know for sure if you are testing your heating element for ground faults or just guessing. Second, I swear by a dedicated soft-bristled brush for the gaskets. A toothbrush works in a pinch, but a wider brush ensures you are not leaving behind the slime that causes slow leaks. Third, bookmark the expert diagnostics and repair tips from a trusted source. Having these guides ready before the water starts pooling on the floor is the difference between a calm fix and a panicked emergency call.
Don’t Wait for the Next Gritty Plate
You now have the knowledge to move beyond just pressing “Start” and hoping for the best. By taking ten minutes to check those spray arm bearings and clear out the scale, you are extending the life of your machine by years. This proactive dishwasher maintenance is not just about clean dishes; it is about the confidence that comes with knowing exactly how your home works. You have got this—grab that flashlight and see what is actually happening inside your machine tonight. #IMAGE_PLACEHOLDER_E# Have you ever had a warranty claim denied for a reason that felt totally unfair? Let us talk about it in the comments below.