

I will never forget the Tuesday night my kitchen started smelling like a dry-docked shipyard. That weird, ozone-heavy scent of something electrical dying is unmistakable. I reached out to open my dishwasher, and—snap—a static shock that felt like a bee sting traveled up my arm. My first thought was not about the dirty plates; it was about my wallet. I have been tinkering with appliances for twenty years, and I still remember the time I replaced a perfectly good control board because I did not know how to properly diagnose a grounded element. It was a $200 mistake that taught me a valuable lesson: always check the basics first. If your machine is acting possessed or your GFCI outlet keeps tripping, you likely have a heater that has leaked its electrical current directly into the chassis. This is a classic ground fault. Most folks know how to test the continuity of a heating element, which tells you if the circuit is complete, but they skip the crucial safety check. A ground fault means the internal heating wire has touched the outer metal sheath. It is a sneaky failure because the machine might still appear to work, but it is becoming a legitimate safety hazard. [image_placeholder_1]
Stop Ignoring That Random Burning Smell
If you have ever wondered why your appliance overheated without tripping a fuse, a partial ground fault is often the culprit. It creates just enough heat to cause damage but not enough of a surge to pop the breaker immediately. I learned the hard way that skipping this test leads to chasing ghosts in the wiring. Today, we are going to solve this mystery together so you do not end up throwing away a perfectly fixable machine.
Do I actually need a professional meter for this?
You do not need a five-hundred-dollar industrial tool. A basic digital multimeter will do the trick perfectly. Many people wonder if understanding appliance diagnostics is actually worth the time. Trust me, it is. According to data from the National Fire Protection Association (NFPA), electrical failures and malfunctions are a leading cause of home fires, and faulty kitchen appliances are frequently cited in these reports. By learning this one skill, you are not just fixing a machine; you are actively protecting your home from a potential fire hazard. Have you ever felt a weird tingle when touching your appliance, or does your breaker trip the second you hit the start button? I want to know if you are currently fighting with a machine that seems to have a mind of its own. Before we get into the nitty-gritty of the meter settings, we need to ensure the unit is totally powered down and safe to touch.Before you even touch a screwdriver, flip the breaker. I cannot stress this enough. I once forgot to pull the plug on an old dryer while reaching for the heater coils, and the resulting pop didn’t just scare my cat—it fused my favorite needle-nose pliers shut. Safety isn’t about being cautious; it is about not buying new tools every week.
Lock Down Your Power and Set the Stage
To get an accurate reading, you must isolate the part. This means you need to pull the wires off the heating element terminals. If you leave them connected, you might end up measuring the resistance of the entire control board or a stray sensor, which completely ruins your data. If you are struggling to reach the connections, you should locate the service manual which is often tucked in a plastic bag behind the kickplate. Use a pair of pliers to gently wiggle the spade connectors off.
Choose the Highest Sensitivity on Your Meter
While a standard continuity test uses a low resistance setting, checking for a ground fault requires the opposite. Think of a ground fault like a tiny pinhole leak in a dam. It might not let through much water, but it is enough to cause disaster. Turn your multimeter to the highest Ohms (̤) setting—usually 20k or 2M. We are looking for any connection at all where there should be none. If your meter stays at OL (Open Loop) or 1, that is actually a good sign. It means the electricity is staying where it belongs: inside the wire.
The Two-Point Contact That Reveals a Leaky Element
This is the moment of truth. You are going to test if the juice is jumping from the inner wire to the outer metal shell. Take one probe and press it firmly against one of the metal terminals where the wire was connected. Take the other probe and touch it to the outer metal casing (the sheath) of the heating element. 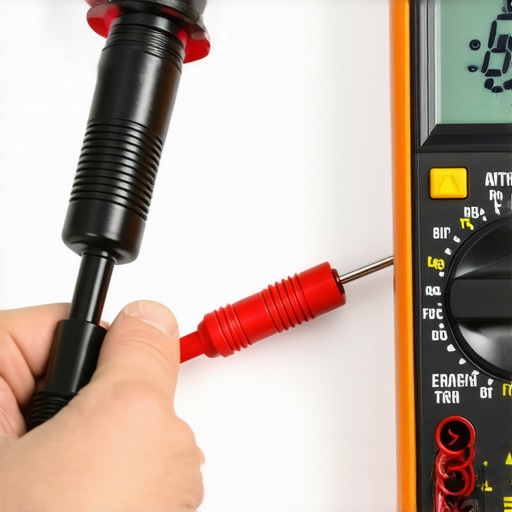
Probe the Sheath to Find the Ghost Voltage
To get a real reading, you might need to scratch the probe tip against the metal casing slightly to get through any limescale or oxidation. If the meter shows any numbers at all—even a very high resistance—the element is grounded and needs to be replaced. I remember a specific job on a high-end dishwasher where the element looked brand new, but the owner complained about a buzzing feeling on the door. My meter showed 500k ohms between the terminal and the casing. That tiny leak was enough to electrify the whole chassis. If you find a reading, stop immediately; your element is a brick. This kind of deep dive is why troubleshooting dishwasher problems requires more than just a visual inspection. You are looking for things the human eye literally cannot see. While you are in there with your meter, it is also a good idea to check the multimeter readings for the thermal fuse, as a grounded element often generates enough excess heat to blow the safety limits.
One of the biggest misconceptions in the DIY community is that a successful repair is the same thing as a ‘smart’ repair. Everyone says you should always go for the cheapest part if it fits, but in my experience, ‘universal’ heating elements often have slightly different wattage ratings that can stress your control board relays over time. This is where the truth about non-manufacturer repair parts and your warranty really bites you. If a service technician sees a non-OEM part during a later visit, they can legally deny coverage for completely unrelated issues, like a failed wash motor, simply because the machine was ‘modified.’
Here is the ‘oops’ factor most people ignore: the dreaded firmware brick. In modern smart machines, you might think you are doing yourself a favor by running a forced update during a repair to ‘clear out the bugs.’ However, why your appliance firmware update just bricked the control board is usually due to a mismatch between the new hardware version and old sensor data that hasn’t been reset. I’ve seen high-end machines turned into expensive boat anchors because someone tried to ‘patch’ a hardware fault with software instead of fixing the physical leak first.
Why does a ‘healthy’ element still trip the GFCI outlet?
This is the nuance that separates the pros from the amateurs. You might get a perfect continuity reading and no ground fault on your meter, yet the breaker still pops the moment the cycle starts. This is often caused by ‘intermittent breakdown under load.’ When the element is cold, the internal gap between the wire and the sheath is wide enough to hide the fault. But once it draws current and heats up, the metal expands, and the fault only appears then. A study by the Association of Home Appliance Manufacturers (AHAM) indicates that thermal stress is a primary driver of secondary component failure. If you cannot find the fault while the machine is cold, you should investigate why your appliance overheated without tripping a fuse in the past, as heat damage is cumulative and may have weakened your home’s GFCI sensitivity.
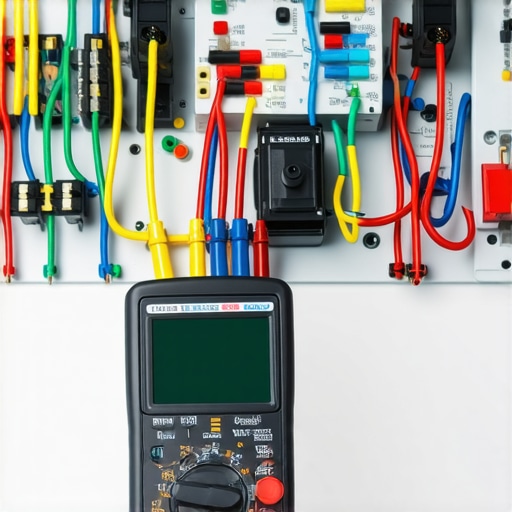
Always keep a meticulous paper trail of your work. Knowing how appliance diagnostics can save your warranty benefits means documenting your meter readings before you even pick up a wrench. If you can prove you followed the service manual’s specific electrical parameters, you have a much higher success rate when trying to get a manufacturer to pay for an out-of-warranty repair. Have you ever fallen into this trap of fixing one minor thing only to accidentally void your protection on the whole machine? Let me know in the comments.
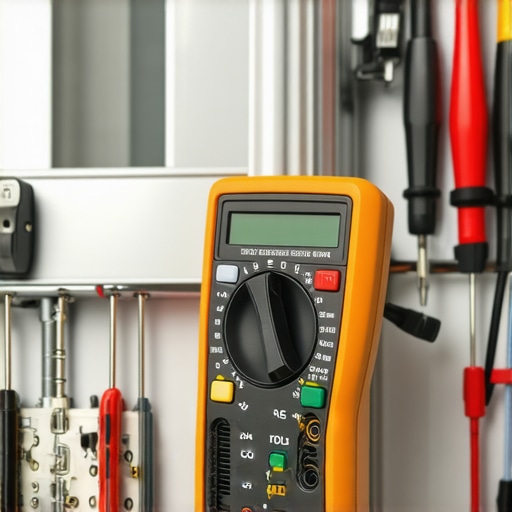
I always tell my friends that a cheap multimeter is better than no multimeter, but if you are serious about this, you need a tool that handles ‘ghost voltage.’ I personally carry a Fluke 117 because of its LoZ (low impedance) mode. When you are troubleshooting dishwasher problems, stray electromagnetic interference from nearby wiring can give you a false reading on a high-sensitivity digital meter. A professional-grade tool ensures that when you see a ground fault, it is a real physical leak and not just induction from the control board. Using needle-tipped probes is another pro move I swear by; they let you pierce through the thin layer of oxidation that builds up on terminals without having to scrub them with a wire brush first. Once you have confirmed the element is shot, you might also want to how to test your inlet valve with a simple voltmeter while the machine is already open, as these two components often fail in tandem due to shared electrical spikes.
Stop Guessing and Build Your Professional Diagnostic Kit
Maintenance is where most homeowners fall off the wagon. We tend to only look at our appliances when they stop working, but the heating element’s worst enemy is actually limescale. According to the technical specifications in the ANSI/AHAM DW-1-2020 standard, mineral buildup on a heating element acts as an insulator, forcing the internal wire to run significantly hotter to reach the same water temperature. This extra thermal stress is exactly what causes the metal sheath to crack and create that ground fault we just tested for. This is why the real cost of skipping your monthly descaling cycle is more than just a few spots on your glasses; it is the physical degradation of the metal components inside your machine. I recommend using a citric-acid-based cleaner every 30 days to keep the sheath smooth and shiny.
How can I keep my heating element from burning out again?
Beyond descaling, you need to watch your cycle choices. Many people do not realize that why your energy bill spikes when using high-heat modes is because the element is staying energized for nearly the entire 120-minute cycle. If you live in an area with hard water, those long, high-heat runs are essentially ‘baking’ the minerals onto the element. If you have already repaired the machine once, try to use a balanced cycle and ensure you how to deep clean a dishwasher sump without pulling the machine to keep water flow at its maximum. Better flow means more efficient heat transfer and less strain on the element’s metal housing. I also suggest checking your house’s main ground wire at the panel; a poor whole-house ground can make your appliance’s internal ground faults much more dangerous and harder for the GFCI to detect.
Your Dishwasher Is Getting Smarter Than You Think
Looking ahead, the days of manually probing for ground faults might be numbered. We are seeing a massive shift toward predictive maintenance through embedded sensors. I predict that within the next five years, most mid-range dishwashers will come standard with real-time insulation resistance monitoring. This means the machine will send a notification to your phone saying ‘Heating Element Integrity Low’ weeks before it actually fails or trips a breaker. We are already seeing the beginning of this with how smart diagnostic apps are changing home appliance repair, allowing us to see error codes and sensor voltages through an interface rather than a multimeter. However, until that tech is in every kitchen, you still need to know the manual basics to avoid being overcharged by a technician.
Before you button everything back up and call the job done, I want you to try one advanced calibration step that most people skip. If your element was failing, your machine’s ‘brain’ might have adjusted its cycle times to compensate for the slow heating. Take a moment to learn how to calibrate your dishwasher turbidity sensor with plain water. This resets the baseline for the machine’s internal logic and ensures your new element works in perfect harmony with the rest of the system. If you still feel like something is off after the repair, it might be time to check the top signs your dishwasher needs professional diagnostics before you dig any deeper into the wiring harness.
The Hard-Earned Truth About Electrical Leaks
After two decades of opening up these machines, I have realized that the biggest mistake isn’t misreading the meter—it is rushing the process. If you find a ground fault, do not just swap the part and walk away. You need to ask why it failed. Most of the time, it is because skipping your monthly descaling cycle allowed mineral buildup to crack the protective sheath, leading to an early death for your element. Also, remember that understanding appliance diagnostics is the only way to ensure you aren’t just treating a symptom while the main control board continues to suffer from voltage spikes.
- Always clean the contact points with a bit of sandpaper if they look dull; oxidation is a liar that ruins your Ohms reading and gives you a false sense of security.
- If your GFCI trips but the element tests fine, look for the slow leak hiding under your kickplate, as water on the wire harness creates the same electrical path to ground as a bad element.
- Never trust a ‘universal’ element without checking the wattage, or you’ll find yourself spotting a failing control board capacitor sooner than you would like due to circuit strain.
The Toolbag That Saves Me Hundreds Every Year
You do not need a workshop full of gear, but a few specific items make troubleshooting dishwasher problems much less stressful. I always keep a set of needle-tipped multimeter probes because they can pierce through grime to get a solid connection on the heating element terminals. I also swear by the original manufacturer’s service manuals; knowing how to find a service manual hidden inside the unit is like having the teacher’s answer key for a complex electrical test. Finally, keep a simple magnet in your kit to help you test your float switch, which is another common culprit when the heater won’t engage despite a healthy continuity reading.
Take Control of Your Kitchen Repairs
There is a unique sense of pride that comes from hearing your dishwasher hum back to life because you had the guts to test it yourself. Don’t let a few wires and a digital screen intimidate you. By mastering these diagnostics, you are doing more than just saving money; you are becoming the expert of your own home and ensuring your family’s safety. Whether you are dealing with a grounded element or just trying to figure out the top signs your dishwasher needs professional diagnostics, you now have the skills to make an informed decision. Have you ever felt that tiny electrical tingle when touching your machine, or did your breaker trip without any obvious reason? Let me know your diagnostic stories in the comments below!