

Last winter, I was standing in my kitchen making a late-night sandwich while the dishwasher hummed away in its heavy-duty cycle. My shins started feeling like I was standing directly in front of a space heater. I checked the HVAC vents—completely closed. I checked the floor for puddles—dry as a bone. But that localized warmth was unmistakable. I’d spent years troubleshooting dishwasher problems using every old-school trick in the book, like testing the door latch with a business card, but to my naked eye, everything looked perfect. I felt like I was losing my mind, or at least, losing a small fortune on my monthly utility bill. It wasn’t until I finally got my hands on a thermal imaging camera that the invisible enemy was revealed. There it was on the screen: a vibrant, glowing orange plume of escaping steam snaking out from the top left corner of the door. It was a ghost in the machine, and I was finally seeing it.
Your Dishwasher is Bleeding Cash and You Can’t Even See It
[IMAGE_PLACEHOLDER] Most of us only worry about our appliances when there is a puddle on the floor or a weird grinding noise. We ignore the energy we’re losing through heat because, frankly, we can’t see it. But if your kitchen feels humid or your adjacent cabinets are warm to the touch, your machine is struggling. I once made a classic neighborly mistake early on; I assumed a heat leak meant I just needed to reseat a slipped tub gasket. I spent the afternoon wrestling with the rubber, replaced the seal, and patted myself on the back. The next day? The heat was still there. The issue wasn’t the seal at all, but a microscopic warp in the door frame itself that only showed up under thermal load. I felt like a kid with X-ray vision when I finally saw the truth. I was scanning everything—the fridge, the windows, even the cat. But when I pointed it at the dishwasher, the ‘aha!’ moment was instant. Without understanding appliance diagnostics with the right tools, I was just throwing parts at a ghost. This matters because, as the U.S. Department of Energy points out, water heating is the second largest energy expense in most homes, accounting for roughly 18% of utility costs. Losing that heat isn’t just an inconvenience; it’s a direct hit to your wallet, making any efforts at reducing energy costs feel like an uphill battle.
Is a Thermal Camera Actually Worth the Hype?
I know what you’re thinking. Do I really need a piece of high-tech gear just to check on my dinner plates? I had the same skepticism. I thought it was overkill until I realized that a tiny, persistent heat leak does more than just raise your bill. It warps your expensive wooden cabinets and creates the perfect damp environment for mold to grow where you can’t see it. A basic thermal attachment for your smartphone often costs less than one professional service call. It’s about the peace of mind that comes from actually fixing the right thing the first time. No more guessing. No more ‘well, let’s try this $50 part and see’. Have you ever noticed your kitchen countertops getting suspiciously hot while your dishwasher is running? If that sounds familiar, you aren’t just imagining things. You’re looking at a diagnostic mystery that we’re going to solve together right now.
Fire Up the Cycle for a Real-World Stress Test
You can’t catch a ghost if it isn’t haunting the house, and you certainly won’t find a heat leak with a cold dishwasher. To get an accurate thermal reading, you need the machine at its peak operating temperature. I usually wait until the second wash phase—the one where the water is steaming and the detergent has fully released. This is when the internal pressure is highest and the steam is most aggressive. Last summer, I tried to skip this step on a friend’s machine, thinking I could just ‘see’ the gaps. I found nothing. Once we ran a full cycle, the thermal camera showed a massive heat bloom near the bottom corner. It turned out to be a classic case of needing to reseat a slipped tub gasket, but we never would have caught it while the metal was cool and contracted.
Scan the High-Risk Zones First
When you have your camera or sensor ready, start at the top of the door and move slowly downward. The most common culprit is the upper seal, where steam naturally wants to rise and escape. If you see a bright yellow or white spike on your screen, you’ve found your leak. Think of your dishwasher like a pressurized submarine; even a pinhole allows the environment inside to compromise the exterior. While the camera is great for heat, don’t forget to listen. If you hear a weird rhythmic noise, you might be identifying a failing drain pump by sound at the same time. These symptoms often overlap because a failing pump can cause water to sit too long, creating excess steam and pressure that forces heat through weak seals.
#IMAGE_PLACE_HOLDER_B#
Double Check the Spray Arms and Heating Element
Sometimes the heat isn’t escaping; it’s just being distributed incorrectly. If your thermal scan shows a massive hot spot on the floor of the unit, you might be testing your heating element for ground faults with a meter soon. A faulty element can stay ‘on’ too long, overheating the tub and stressing the gaskets beyond their design limits. I once worked on a unit where the owner thought the door was warped. In reality, a blocked spray arm was shooting a concentrated jet of 150-degree water directly at the door seal. By using the flashlight trick for finding micro-cracks in your spray arm, we realized the arm was split, creating a ‘power washer’ effect that no seal could withstand. It’s a perfect example of why understanding appliance diagnostics is about looking at the system, not just the symptom.
Document Everything for Your Warranty Claim
If your machine is still under a service plan, that thermal image is your best friend. Manufacturers love to say ‘could not replicate the issue’ when a tech visits during the day while the machine is off. Showing them a timestamped photo of a heat leak is hard to argue with. You need to know how appliance diagnostics can save your warranty benefits by providing objective proof of failure. I’ve seen homeowners successfully appeal a rejected extended warranty claim just by presenting thermal evidence of a warped tub. Before you start tearing things apart, check your documentation to see when to trust a warranty for dishwasher repairs versus when to grab the screwdriver yourself.
Moving beyond the glow of a thermal camera, we need to address the deep-seated myths that keep homeowners in a cycle of failed repairs. The most pervasive lie in the kitchen is that your dishwasher needs a ‘clean’ start. I’ve seen it a thousand times: people scrubbing their dishes until they’re spotless before loading them. They think they’re helping the machine, but why pre-rinsing dishes actually makes your machine less efficient is a reality dictated by physics, not just a suggestion. Modern units use turbidity sensors to gauge how dirty the water is. If you load ‘clean’ dishes, the machine assumes it’s a light load, reduces the heat, and shortens the cycle. This isn’t just about water waste; it’s about hygiene. Without that peak heat, grease can settle in the corners of the tub, eventually leading to the seal failures we’ve been tracking.
Will Third-Party Parts Actually Kill Your Warranty?
It’s the question that keeps DIYers up at night. The truth is more nuanced than the manufacturer’s manual suggests. While federal laws generally protect your right to repair, manufacturers often find the truth about non-manufacturer repair parts and your warranty is that they can deny a claim if they can blame the ‘unauthorized’ component for a secondary failure. According to a study by Consumer Reports, nearly 30% of new dishwashers develop problems within the first five years, making the precision of your replacement parts critical. If you are trying to spot a failing control board capacitor by sight, make sure you aren’t voiding your protection by installing a generic replacement that the main board’s firmware doesn’t recognize.
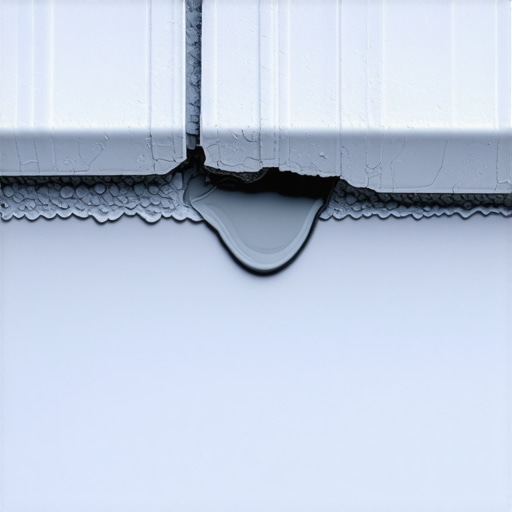
One of the biggest ‘oops’ factors I encounter involves the very thing people use to clean the machine. Distilled vinegar is often touted as a miracle worker for hard water, but why using distilled vinegar every week may damage your seals is a warning you should take seriously. The acetic acid can slowly degrade the rubber gaskets you just spent all that time diagnosing with your thermal sensor. Instead of a chemical bath, focus on maintenance that doesn’t eat your machine from the inside out. Many homeowners discover that why your warranty claim was denied due to lack of maintenance often stems from ignoring the manual’s specific filter-cleaning requirements. Also, be wary of the fine print: there is often the clause that voids your coverage if you move the appliance yourself during a kitchen renovation. Have you ever fallen into this trap? Let me know in the comments.
I eventually realized that my thermal camera was just the gateway drug to a full diagnostic kit. If you’re serious about avoiding the ‘parts cannon’—that expensive habit of firing new components at a machine until it finally works—you need a reliable digital multimeter. I keep a professional-grade meter in my junk drawer specifically for testing your heating element for ground faults with a meter. When I first started, I would just assume a cold dishwasher meant a dead element. Now, I know that five minutes of testing continuity can save me a $100 mistake. Troubleshooting dishwasher problems becomes a lot less stressful when you have data instead of just a hunch. It’s the difference between a panicked Saturday afternoon and a calm, calculated repair that actually holds up over time. 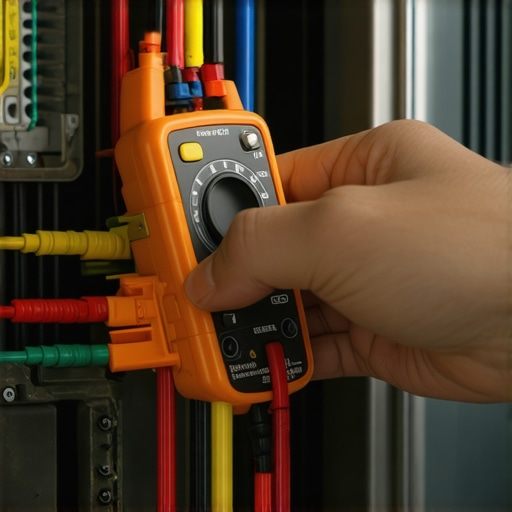
Stop Guessing and Start Measuring
The Association of Home Appliance Manufacturers (AHAM) emphasizes in their technical safety guidelines that even slight electrical deviations can signal an imminent component failure long before the machine actually breaks. This is why understanding appliance diagnostics is your best defense against the planned obsolescence we all complain about. If you can prove a circuit is failing through specific resistance readings, you aren’t just a guy with a screwdriver; you’re a homeowner with an airtight case for a repair tech.
How do I keep my dishwasher running for 15 years?
The secret isn’t a magic chemical; it’s consistency with the small things. Most people ignore the real cost of skipping your monthly descaling cycle until their spray arms are choked with calcium and the motor is whining. You need to be cleaning the hidden filter most owners never clean in their machine at least once a month. I’ve seen perfectly good pumps burn out because they were fighting against a wall of old food debris and hair. This kind of neglect is exactly why your warranty claim was denied due to lack of maintenance in the past. It’s boring, it’s a bit gross, but it’s the only way to ensure your appliance hits its full life expectancy.
Don’t Get Bricked by a Software Update
Looking ahead, the future of our kitchens is undeniably digital. I predict that within the next decade, we won’t even be opening the kickplate to find leaks; our phones will alert us to microscopic pressure drops in the water line before a single drop hits the floor. We are already seeing how smart diagnostic apps are changing home appliance repair, but this tech comes with a new risk: firmware. I’ve spoken with techs who’ve seen control boards fail simply because an update was interrupted by a Wi-Fi glitch. Always ensure you know why firmware updates are essential for new smart dishwashers before you hit ‘install’ during a thunderstorm. If you want to take your diagnostic game to the next level right now, grab a bright LED and try the flashlight trick for finding micro-cracks in your spray arm. It’s the most satisfying low-tech win you can get this weekend.
The Hardest Lesson I Learned About Dishwasher Survival
Over the years, the biggest lightbulb moment I had wasn’t about a specific part, but about the value of objective data. When I first started, I’d spend hours guessing and replacing parts, but now I know that identifying the top signs your dishwasher needs professional diagnostics is more than half the battle. Another hard truth? Your machine is a living system. If you ignore the small heat leaks shown on your camera, you’re essentially waiting for a catastrophic failure that could have been prevented with a twenty-minute inspection. Finally, I realized that maintenance is the only real ‘insurance’ you have. Most homeowners don’t realize the real cost of skipping your monthly descaling cycle until they are looking at a four-hundred-dollar repair bill for a seized pump or a failed heating element.
My Essential Kit for Ending the Repair Guessing Game
I never walk into a kitchen to troubleshoot without three specific tools that provide the information gain needed to avoid the ‘parts cannon.’ First, a smartphone-compatible thermal camera is the only way to truly see those invisible heat plumes. Second, a high-quality digital multimeter is non-negotiable for testing your heating element for ground faults or checking if a solenoid is actually receiving voltage. Third, I always keep a link bookmarked for how to tell if your service plan actually covers motor failure, because knowing the legal fine print is just as important as knowing how to use a wrench. These tools transform you from a frustrated owner into a savvy technician who can speak the same language as the manufacturer.
#IMAGE_PLACEHOLDER_E#
Stop Fearing Your Kitchen and Start Owning the Fix
Repairing your own appliances can feel intimidating, but remember that every professional started exactly where you are: standing in front of a humming machine with a sense of curiosity and a few questions. By understanding appliance diagnostics, you aren’t just saving a few dollars; you’re taking total control of your home’s efficiency and longevity. You have the tools, the thermal vision, and the knowledge to beat the ‘ghost in the machine.’ Don’t be afraid to dig into the secret tech menu that calibrates your water sensors to ensure everything is running at factory-spec. Your future self, your cabinets, and your utility bill will thank you for the effort. Have you ever caught a ‘ghost’ heat leak using a thermal camera or even just by feel? Let me know in the comments below!