

I remember standing in my kitchen at 11 PM last July, staring at the glowing blue display of my dishwasher like it was a ticking time bomb. I was exhausted, the house was finally quiet, and I just wanted to hit ‘start’ and go to bed. But then I remembered the utility bill I’d opened that afternoon. It was higher than my car payment. I realized in that moment that my habit of running the dishwasher right after dinner was effectively like throwing five-dollar bills into the garbage disposal every single night. I was wrong about how I managed my chores, and it was costing me a fortune. Have you ever looked at your power bill and wondered why it is so high despite your ‘eco’ settings? If so, you are in the right place because I am going to show you how to stop the bleed.
Stop Letting Your Utility Company Pick Your Pocket
Most of us were raised with the idea that efficiency is just about how much water or soap we use. I certainly was. I used to think that as long as I wasn’t pre-rinsing, I was doing my part. But I eventually learned that the real cost of running your dishwasher every single day has much less to do with the soap and much more to do with when that motor starts humming. Most utility companies use ‘Time-of-Use’ pricing, meaning they charge you a premium when everyone else is using power. By simply shifting my habits, I discovered how to lower your appliance operating costs by 15 percent or more without buying a single new gadget. According to data from the U.S. Energy Information Administration, residential electricity prices have climbed significantly over the last decade, making these small timing adjustments more critical than ever for the average household.
Is shifting your schedule really worth the hassle?
I used to be the biggest skeptic. I thought, ‘It’s just a dishwasher, how much can it really matter?’ My mistake was ignoring the cumulative effect of those peak-hour surcharges. I was running my machine at 6 PM—the absolute peak for energy demand—during the hottest weeks of the year. It was a recipe for financial disaster. Today, we are going to break down how to actually master your machine’s schedule. You might wonder why modern dishwashers take three hours to run a cycle, and the truth is that these long cycles are designed to save energy, but only if they aren’t fighting against high utility rates. I’ve personally found that learning how to use smart features to lower your electric bill is the easiest way to automate these savings so you can sleep while your machine works for pennies. We are going to dive into the specifics of ‘vampire loads’ and peak pricing so you never have to wince at a utility bill again. We will even touch on saving water without sacrificing clean plates every night to ensure your machine is a peak-performance beast. It is time to take back control of your kitchen’s budget.
Take the guesswork out of your dishwasher’s performance
I once ignored a faint clicking sound for a week, thinking it was just a loose spoon. By Friday, my kitchen floor felt like a wet sponge. I learned the hard way that a simple diagnostic check could have saved me a massive repair bill. You can avoid my mistake by looking for the top signs your dishwasher needs professional diagnostics before the water starts pooling. Start by running the paper plate test for spray arm coverage. It is dead simple: place cheap paper plates in various spots and see if they actually get wet. If they stay dry, your spray arm is likely clogged with hard water minerals or food bits. You do not need a plumber yet; you just need the toothpick method for unclogging spray nozzles to restore the flow.
Run a simple spray arm audit tonight
Think of your dishwasher’s spray arms like the sprinklers in your yard. If one head is blocked, a patch of grass dies. In your kitchen, that dead patch is a crusty lasagna pan. If you find that the arm isn’t spinning freely, check for the five-minute fix for a loose spray arm nut. Often, the vibration of high-speed cycles unscrews the plastic fasteners. If the arm is clear but the dishes are still dirty, you might be dealing with a circulation issue. Understanding the difference between a simple clog and a dying motor is the core of troubleshooting dishwasher problems expert diagnostics repair tips that save you from overpaying for service calls.
Keep your paperwork ready for a rainy day
I used to throw every manual and receipt into a junk drawer that looked like a paper shredder exploded. When my control board fried during a storm, I spent four hours digging for a proof of purchase that the manufacturer demanded. Now, I tell everyone to keep these three receipts to ensure a smooth repair claim: the original purchase, any professional installation record, and your most recent maintenance parts. If you are handy and performed the one-minute move to reset your control board yourself, document it. Manufacturers look for any excuse to deny a claim, and having the photo evidence you need for every warranty claim is your best defense against a denied payout.
Identify mechanical failures before they flood the kitchen
Listen to your machine like it’s a heartbeat. A rhythmic thumping is usually just a misplaced ladle, but why your drain pump makes a clicking sound is a different story—it often means a piece of broken glass is stuck in the impeller. If the machine goes silent and won’t respond to buttons, do not panic and buy a new one. There is often a logical fix for a dishwasher that wont start but has power, such as a tripped thermal fuse or a door latch that needs a simple adjustment. If you do experience a leak, knowing how to salvage your hardwood floors after a dishwasher flood can save you thousands in flooring costs while you wait for the repair tech.Actually, the biggest mistake I see homeowners make isn’t waiting too long for a technician—it’s doing something that voids their protection before the expert even arrives. Everyone tells you to use the ‘Eco’ cycle to save money and the environment, but in my experience, the ‘Heavy’ cycle is the real hero for machine longevity. Why? Because why the heavy cycle is actually better for your machines health comes down to consistent high heat. Modern low-water machines often struggle to melt away fats and greases. If you only run Eco, that sludge builds up in the pump and sensor housing. A study by the Association of Home Appliance Manufacturers (AHAM) suggests that improper maintenance and ‘cycle-shaming’ are leading causes of premature failure, yet many users think they are being ‘gentle’ on the machine by running cooler cycles.
Stop babying your machine with the wrong cycles
If you are noticing a film on your glasses, don’t just add more soap. I’ve seen countless people get their warranty claims denied because they used a detergent that the manufacturer didn’t approve of for that specific model. In fact, why service techs deny warranty claims for soap choice is a growing trend in the industry. They look for specific chemical residues on the heating element. Instead of guessing, you should be proactive. If you suspect a component is failing, you can perform your own technical check. Learning how to test your inlet valve with a simple voltmeter can tell you if the problem is electrical or just a clogged screen. 
The detergent trap that kills your coverage
Another major ‘oops’ factor is the temptation to buy cheap, third-party replacement parts online. While it might save you fifty dollars today, the truth about non-manufacturer repair parts and your warranty is that they often lack the correct resistance for the main control board to recognize them. I once saw a homeowner ‘fix’ their own machine with a knock-off heating element, only to have the control board short out two weeks later. Because the part wasn’t OEM (Original Equipment Manufacturer), the thousand-dollar warranty was instantly voided. If you really want to dive into the technical side, you need to know the exact multimeter reading for a healthy thermal fuse or how to spot a failing control board capacitor by sight. These are the nuances that separate a DIY disaster from a professional-grade home repair.
Can you actually get an out-of-warranty repair covered?
Most people think that once that 365-day mark passes, they are on their own. That is not always true. Knowing how to get a manufacturer to pay for an out of warranty repair involves documenting ‘known defects’ and having a paper trail of understanding appliance diagnostics improving your warranty claims. If you can prove that the part failed due to a manufacturing flaw rather than wear and tear, you have leverage. Have you ever fallen into this trap or managed to beat the system? Let me know in the comments.
Stop guessing and start measuring
I carry a Fluke 117 multimeter in my kitchen drawer next to the spatulas. It might seem like overkill for a homeowner, but I have learned that cheap, ten-dollar testers often provide ‘ghost readings’ on sensitive modern control boards. If you want to know how to test your inlet valve with a simple voltmeter, you need equipment you can actually trust. I have seen countless DIYers fry a three-hundred-dollar board because a low-quality tester shorted out a pin during a live test. Professionals take this even further; I recently spoke with a senior tech who uses FLIR thermal imaging to spot failing solenoids before they even start to smoke. According to the Journal of Quality in Maintenance Engineering, predictive maintenance using thermal signatures can reduce repair costs by nearly 30 percent in complex systems, and that same logic applies to the heat-intensive cycles of your dishwasher. 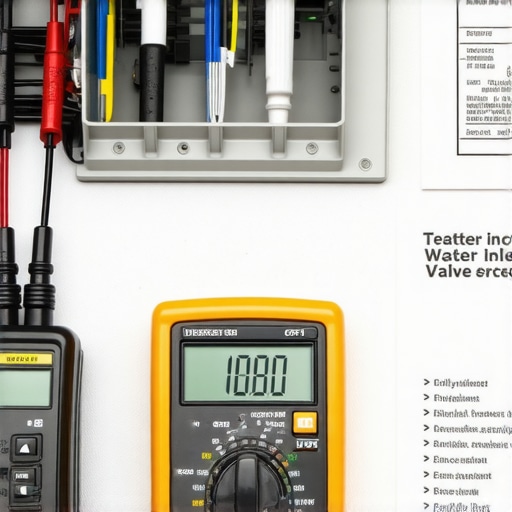
How can I make this machine last fifteen years instead of five?
The answer is not a secret—it is consistency. I used to ignore the chalky build-up until my glasses came out looking like they were covered in powdered sugar. Now, I realize that the real cost of skipping your monthly descaling cycle is the slow, agonizing death of your heating element. Scale acts like an insulator, forcing the element to work twice as hard to reach the proper temperature. I have also found that the simple move that doubles the life of your dishwasher racks is just a weekly check for exposed metal. Once that protective plastic coating nicks, the rust spreads like a virus through the steel core, and replacement racks can cost as much as a new entry-level machine. Do not forget to check the debris trap most owners miss during monthly cleaning, which is often located just behind the main sump filter.
The hidden map behind your kickplate
We are moving toward a world where your dishwasher will likely tell your phone it is sick before you ever see a leak. However, be extremely cautious with these ‘smart’ features. I have heard horror stories from readers about why your appliance firmware update just bricked the control board during a routine sync. In the future, I suspect we will see more ‘right to repair’ diagnostics accessible via Bluetooth, but until that becomes standard, you need to know how to find a service manual hidden inside the unit. Manufacturers usually tuck a folded-up technical sheet behind the bottom kickplate. This is the ‘map’ that tells you exactly how to test the continuity of a heating element for your specific model. Before you sign any papers for an extended protection plan, make sure you understand the truth about third party warranties and hidden deductible costs. I want you to try one specific advanced tip this weekend: pull off your kickplate and see if that paper service manual is still there. If it is, take a high-resolution photo of it; that one piece of paper is your best weapon against expensive service calls.
What I Finally Learned About Beating the System
After years of fixing my own machines, the biggest lightbulb moment was realizing that the manufacturer isn’t necessarily your enemy, but they are certainly looking for an out. I found that the hidden loophole that gets your denied claim reversed usually involves showing you’ve done more than just the bare minimum maintenance. Another hard truth? Your machine’s sensors are smarter than you think, but they are easily fooled by hard water scale; how a toothpick can save your spray arm from clogs is a lesson in using simplicity over expensive, corrosive chemicals. Lastly, remember that your warranty is a legal contract—treat it like one by keeping every scrap of paper and timestamped photo of your machine’s interior.
My Personal Toolkit for Kitchen Diagnostics
If you want to move beyond guessing, you need a few reliable items in your utility drawer. First, a high-quality multimeter is non-negotiable for checking components before you buy replacements. I also swear by a simple business card; how to test a door latch with a business card is the fastest way to rule out a mechanical switch failure without any heavy tools. For more complex electrical issues, always check how to find a service manual hidden inside the unit before you start searching online forums that might provide the wrong specs for your specific model. I trust these methods because they rely on physics and facts, not marketing hype.
Stop Being Afraid of Your Own Kitchen Sink
Taking care of your home shouldn’t feel like a second job, but a little bit of proactive effort goes a long way in keeping your life running smoothly. By mastering these small checks, you aren’t just saving money—you’re gaining true peace of mind. Learning how appliance diagnostics can save your warranty benefits is the ultimate power move for any modern homeowner. Don’t wait for the next leak to start your maintenance journey; grab that toothpick and clear those spray arms tonight to ensure your dishwasher stays in peak condition for years to have. Have you ever successfully challenged a warranty denial, or did you find your service manual hidden in a weird spot? Let me know in the comments below!