

I’ll never forget the Tuesday night I stood in my kitchen, staring at my electric bill with a mix of confusion and pure annoyance. It felt like I was paying a second mortgage just to keep the lights on and the dishes clean. For a long time, I treated my dishwasher like a basic box—I’d stuff it full, hit ‘Normal,’ and walk away while it hummed through the most expensive hours of the day. I even made the mistake of manually rinsing every fork, convinced I was helping, but really I was just wasting hot water and energy. Eventually, I realized that those ‘smart’ buttons I’d been ignoring were actually the secret to lower utility costs. Today, I’m going to show you how to stop guessing and start using your appliance’s brain to keep more money in your pocket. [image_placeholder]
Stop Letting Your Kitchen Drain Your Wallet
In my early days of homeownership, I was skeptical of technology. I thought ‘High Efficiency’ was just a marketing buzzword used to justify a higher price tag. It wasn’t until I started diving into 4 ways to reduce water consumption without losing cleaning power that I saw the math. Modern units are designed to be efficient, but they only work if you let them. One of my biggest blunders was thinking I knew better than the sensors. I would override the auto-cycles because I didn’t understand why modern dishwashers take three hours to run a cycle. The truth is, those long, slow cycles use significantly less energy and water than the ‘Quick Wash’ setting we all love. When you use the smart sensors correctly, the machine adjusts the water temperature and pressure based on how dirty the dishes actually are. This is why you should stop pre-washing and let your sensors do the work instead of wasting gallons of heated water at the sink.
Will These Smart Settings Actually Save Me Money?
You might be thinking that a few cents here and there won’t make a difference, but it adds up fast. According to the U.S. Department of Energy, using a dishwasher instead of hand-washing can save the average homeowner over $1,300 in energy and water costs over the lifetime of the appliance. However, if you run your machine during peak demand hours, you’re basically throwing money into the garbage disposal. Most smart dishwashers now feature a ‘Delay Start’ or ‘Smart Grid’ integration. This allows the machine to wait until 2 AM—when electricity is cheapest—to start the heavy lifting. Have you ever checked your utility company’s website to see when your off-peak hours actually start? It’s a simple move that can cut your appliance’s running costs by half. By mastering these diagnostics and settings, you aren’t just saving money; you’re also reducing the wear and tear on your internal components. It’s time to stop treating your dishwasher like a relic and start using it like the energy-saving tool it was meant to be.
Make Sure Your Water Is Hot Enough to Work
Think of your dishwasher like a professional chef; if the ‘pan’ isn’t hot, the meal is ruined. Most people don’t realize that the first splash of water into the tub is often cold because it’s been sitting in the pipes. If that initial water is lukewarm, your detergent won’t activate properly. To get the most out of every cent you spend on electricity, you should verify your water heater temperature at the tap before starting a cycle. If it’s below 120°F, you are wasting money because the machine’s internal heater has to work overtime to compensate. I learned this the hard way after a month of ‘clean’ dishes coming out with a greasy film. I realized the impact of cold water on detergent breakdown was essentially nullifying the expensive pods I was buying. Now, I always run the kitchen sink until the water is hot before hitting ‘Start’ on the dishwasher.
Give Your Turbosity Sensor a Clean Slate
Inside that machine is a tiny, clear eye called a turbosity sensor. It’s the brain that tells the unit if the water is dirty or clean. If this ‘eye’ gets coated in hard water scale or grease, it thinks your dishes are filthy even when they aren’t, forcing the cycle to run longer and hotter than necessary. I once spent an entire Saturday afternoon convinced my pump was failing because my cycles were lasting four hours. Instead of calling for a repair, I learned how to get professional-grade diagnostic codes from your interface. The code pointed straight to a sensor error. I followed the steps to recalibrate your turbosity sensor manually, and just like that, my cycle times dropped by forty minutes. 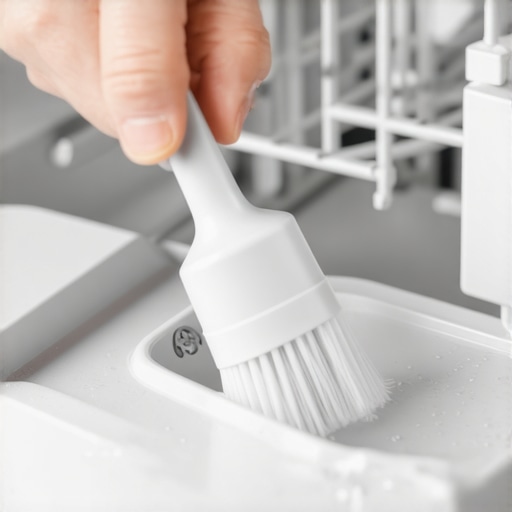
Stop Fighting the Racks and Load Smarter
We’ve all played ‘Dishwasher Tetris,’ but if you block the spray arms, you’re just paying for a machine to splash the back of a single plate for two hours. You need to ensure water can reach every surface. This is especially true for lightweight items that tend to migrate during the wash. Learning the secret to loading plastic bowls without them flipping over saved me from constantly re-washing ‘clean’ bowls that had filled up with dirty, stagnant water. Also, don’t forget that the simple move that doubles the life of your dishwasher racks involves not overloading the tines, which prevents the protective coating from cracking and rusting. If you’re struggling with larger items, the trick for fitting oversized pots without breaking the rack is usually hidden in your user manual—most modern machines have adjustable heights you’ve probably never noticed.
Identify Small Issues Before They Become Floods
Actionable maintenance isn’t just about settings; it’s about listening. If you hear a high-pitched squeal, it might be the specific noise that means your circulation pump is dying. Ignoring these signals is how a $20 part turns into a $500 floor repair. Regularly check your filters; knowing the proper way to clean a coarse filter vs a fine filter ensures that food particles don’t recirculate back onto your glasses. If you ever see water pooling, don’t panic—learn how to find the slow leak hiding under your kickplate before it rots your subfloor. By staying proactive with expert diagnostics and repair tips, you keep the machine running in its peak efficiency window, saving you more on your monthly utility bill than any ‘eco’ button ever could.
Don’t mistake a service plan for a real warranty
Most homeowners assume that if they have a piece of paper with the word ‘Warranty’ on it, they’re protected against any mechanical failure. This is where the expensive lessons begin. In my experience, the biggest nuance people miss is the difference between a service plan and a manufacturer warranty. A manufacturer’s warranty usually covers defects in materials, while a third-party service plan often has loopholes regarding ‘normal use.’ I’ve seen claims denied simply because the homeowner didn’t realize the fine print about normal wear and tear on appliances often excludes things like rack rust or handle pivots. If you want to actually get your money’s worth, you need to be proactive rather than reactive.
Why did the technician deny my claim over a box of soap?
It sounds like a myth, but it’s a cold reality in the appliance world: why service techs deny warranty claims for soap choice is a frequent topic in professional circles. According to data from Consumer Reports, a significant percentage of service calls are categorized as ‘no-fault’ or ‘user-error,’ which can lead to the homeowner being stuck with the labor bill. If a technician finds residue from non-approved detergents or oversized pods that have gummed up the internal sensors, the manufacturer can claim you haven’t maintained the unit according to the manual. This is why I always tell people that understanding appliance diagnostics and improving your warranty claims starts with keeping your receipts for the specific detergent brands recommended by the manufacturer. [image_placeholder]
The ‘No Failure Found’ trap that costs you $150
Here is the ‘oops’ factor that almost nobody talks about: the dreaded ‘No Failure Found’ (NFF) charge. If you call a technician because your dishwasher ‘isn’t cleaning right,’ but the machine’s internal computer shows no error codes, the warranty provider will likely refuse to pay the service call fee. This is why why your warranty provider might deny a no-failure-found claim is the most common reason for unexpected repair costs. You must prove there is a specific mechanical failure before the van pulls into your driveway. I’ve learned that the photo evidence you need for every warranty claim—including shots of the error codes on the display and the resulting dirty dishes—is your best leverage. Before you pick up the phone, use the built-in interface to pull the history of the machine. It turns the conversation from ‘I think it’s broken’ to ‘The machine has logged a circulation pump failure three times this week.’ Have you ever fallen into this trap and been stuck with a service fee for a machine that was ‘working fine’ when the pro arrived? Let me know in the comments.
If you’re serious about dodging those service fees, you need to transition from a passive owner to a proactive troubleshooter. I used to be terrified of the wires under the kickplate until I realized they aren’t nearly as complex as they look. Most of the ‘magic’ technicians perform comes down to basic electrical tests that you can do yourself with a ten-dollar tool from any hardware store. If you really want to take control, you need to learn how to use a multimeter to find a shorted wire instead of just replacing parts blindly.
Get yourself a cheap multimeter and stop guessing
The moment I bought my first digital multimeter, my relationship with my appliances changed. Instead of wondering if the heating element was burnt out, I could check for continuity in thirty seconds. For instance, knowing the exact multimeter reading for a healthy thermal fuse can save you from a ‘dead’ dishwasher that just needs a $5 part. Professionals often use even more advanced tech, which is why your service technician carries a thermal camera to spot hot spots on the control board before they melt. While you don’t need a FLIR camera, a basic meter is your best friend when you are diving into expert diagnostics and repair tips. 
Your kitchen cabinet holds the ultimate cleaning tool
You don’t always need specialized gadgets to keep things running. Sometimes, the most high-tech problem has a low-tech solution. I have seen people replace entire pump assemblies when the real culprit was a single popcorn kernel stuck in a sprayer. This is where how a toothpick can save your spray arm from clogs becomes a literal lifesaver. According to technical documentation from the Association of Home Appliance Manufacturers (AHAM), even a 10% blockage in the spray arm orifices can lead to a 25% drop in cleaning performance because of reduced water pressure. I make it a habit every three months to learn how to clean the tiny holes in your spray arms to ensure the water actually hits the dishes at full force. It is a five-minute job that prevents the need for a professional deep clean later and gives you a chance to inspect the plastic for cracks before they turn into major leaks.
How do I keep this machine alive for fifteen years?
Long-term reliability is about consistency, not just fixing things when they break. The most successful DIYers I know have a hidden weapon: they know how to find a service manual hidden inside the unit. Most manufacturers tuck a ‘tech sheet’ behind the kickplate or inside the door panel that gives you the specific diagnostic sequences for that exact model. In the future, I predict we will see dishwashers with built-in AI that monitors the vibration of the motor to predict a failure weeks before it happens. Until that technology is perfected, you are the AI. If you hear a weird hum, do not ignore it. I want you to try this right now: go to your machine, open the door, and look for that hidden tech sheet or try to access the diagnostic mode using the buttons on the front. Once you see those codes, you are no longer a victim of your appliance—you are the master of it.
What I Learned After My Third Denied Warranty Claim
If there’s one thing that keeps me up at night, it’s the thought of homeowners paying for repairs that should have been free. I used to think a warranty was a safety net, but it’s actually a chess game. One major lightbulb moment for me was realizing that the fine print about normal wear and tear on appliances is often intentionally vague. If you don’t document the issue with specific error codes, you’re usually stuck footing the bill. I also discovered that even if you’re past your coverage date, there’s often a path forward if you know how to get a manufacturer to pay for an out-of-warranty repair. It usually involves proving that a specific part, like a control board, failed prematurely due to a design defect rather than user error. Don’t take a ‘no’ from a call center representative as the final word.
The Simple Gear That Saves Me Hundreds in Repairs
You don’t need a van full of expensive tools to be your own kitchen hero. My go-to resource is always the hidden tech sheet; learning how to find a service manual hidden inside the unit changed everything for me. Beyond that, a basic multimeter is non-negotiable. It allows you to skip the guesswork and identify a faulty control board without a technician having to charge you a diagnostic fee. I also swear by a simple pack of toothpicks and a high-lumen flashlight. These let you clear out the spray arm orifices and find that slow leak hiding under your kickplate before it ever has the chance to ruin your subfloor. [image_placeholder]
You Are More Capable Than You Think
Taking care of your kitchen shouldn’t feel like an expensive burden. It’s about small, intentional actions that extend the life of your machines and keep your utility bills low. When you embrace these expert diagnostics and repair tips, you aren’t just fixing a machine; you’re gaining total control over your home’s efficiency. You’ve got the tools, the knowledge, and now the confidence to handle whatever flashing error code comes your way. Don’t let the fear of a service fee intimidate you into silence or unnecessary spending. Have you ever felt like your warranty provider was looking for any excuse to deny your claim? I’d love to hear your experiences in the comments below.