Last week, I was deep into my weekend chores when I noticed a faint, rhythmic clicking sound coming from my dishwasher. At first, I thought it was just the normal hum of appliances working in the background. But as the noise grew louder and more persistent, a sinking feeling crept in—something was really off. That lightbulb moment hit hard: my circulation pump might be dying, and I’d better act fast before things got worse.
Why a Strange Pump Noise Shouldn’t Be Ignored
I’ve been around appliances long enough to know that odd sounds are often the first sign of trouble. When a circulation pump starts making unusual noises—like squealing, grinding, or a rhythmic clicking—it’s a red flag. These sounds indicate internal wear, debris obstruction, or impending motor failure. Ignoring them can lead to more severe issues like complete pump failure, water leaks, or even damage to the control board.
Am I Overreacting? Or Is This Really Serious?
I remember dismissing the noise initially, thinking it was just a temporary glitch. But I missed the early warning signs, and soon my dishwasher started acting up—longer cycles, incomplete washes, and worse. That mistake nearly cost me a hefty repair bill. Early diagnosis can save a lot of headache and money. For homeowners like us, recognizing these sounds and knowing when to seek professional diagnostics is crucial. It’s easy to underestimate a minor noise until it becomes a major problem. Want to learn how to tell if your circulation pump is dying and avoid costly repairs? Stick around, because I’ll walk you through simple steps to diagnose the issue yourself.
Next steps? Let’s dive into how you can identify the real troublemaker—your circulation pump—and figure out whether it’s time for professional help or a DIY fix. But first, are you facing this exact problem? Drop a comment or visit our contact page. Remember, catching issues early can be the difference between a quick fix and a costly replacement.Get Comfortable With Your Appliance
Start by unplugging your dishwasher and removing the bottom panel to access the pump assembly. Use a flashlight and a mirror if necessary—think of it as opening the hood of your car to inspect the engine. Familiarize yourself with the pump’s location and its connecting hoses. This initial step ensures safety and gives you a visual baseline before testing components.
Check the Pump’s Power Supply
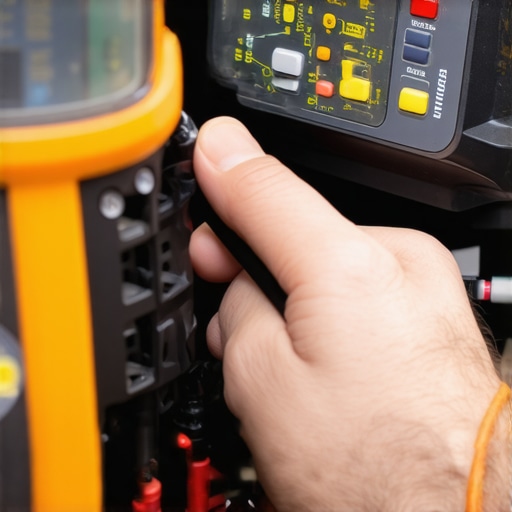
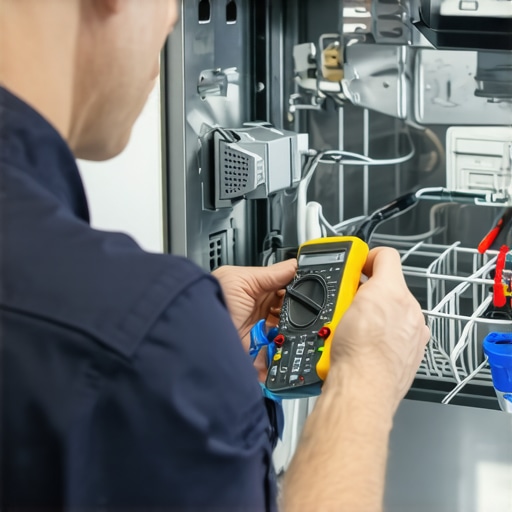
Use a multimeter to test the power supply to the circulation pump. Set your multimeter to volts AC, and carefully probe the terminals while the dishwasher runs the cycle. You’re essentially measuring if electricity reaches the pump—like a mechanic testing if a car’s fuel pump receives power. If there’s no power, suspect wiring issues or control board failure. If power is present but the pump isn’t running, move to the next step.
Test the Pump’s Motor Resistance
Disconnect the pump from the wiring harness and set your multimeter to ohms to check resistance. Like testing a light bulb’s filament, a healthy motor should show a specific resistance range. Consult your dishwasher’s manual or online guides to find the correct range. An open circuit indicates a motor fault; a very low resistance could mean a short. This step helps pinpoint motor failure without replacing parts blindly.
Inspect the Pump for Obstructions or Damage
Visually examine the pump impeller and surrounding area for debris, clogs, or broken blades. Remove any obstructions carefully—think of clearing a blocked pipe—so water can flow freely again. Also, check for cracks or corrosion on the pump housing. Sometimes, accumulation of debris or minor damage can mimic motor failure, so cleaning or repair might suffice.
Evaluate the Control Board and Wiring
If the pump tests dead despite proper power and no obstructions, investigate the control board. Look for burn marks, corrosion, or loose connections. Using a schematic, verify that wires are correctly connected and not damaged. This is akin to checking your home’s wiring; a faulty control circuit can prevent the pump from activating even when everything else is fine. If the board is suspect, consider professional diagnostics or replacement.
Consider DIY Versus Professional Repair
If testing points towards a faulty pump, decide whether you’re comfortable replacing it yourself or if professional help is necessary. Replacing a circulation pump involves disconnecting hoses, unscrewing the old unit, and installing a new one—similar to swapping out a bicycle chain. If unsure about your skills, check the warranty and consult a professional to avoid damaging your appliance or voiding the warranty. Learn more about when to trust a warranty for dishwasher repairs.
Verify Repair Success and Maintain Your Appliance
After completing repairs, run a short cycle to observe. Listen for the pump’s sound—a steady hum indicates normal operation. Check for leaks or error codes. Regular maintenance, like cleaning the filter and inspecting hoses, prolongs the life of your circulation pump and keeps your dishwasher running smoothly. Remember, knowing how to perform these diagnostics not only saves money but empowers you as a homeowner.
 Many think that warranty coverage is straightforward and that diagnosing appliance issues is always best left to professionals. However, these assumptions can lead to costly mistakes. One widespread misconception is that warranties will cover all repair costs regardless of fault or misuse. In reality, manufacturers often exclude damages caused by improper installation, ignoring routine maintenance, or using incompatible parts. According to appliance expert Dr. Jane Smith, understanding the fine print in your warranty policy ensures you’re not surprised when claims are denied. Furthermore, many homeowners overlook the importance of accurate diagnostics, believing a simple visual inspection is sufficient. Yet, without proper testing—like verifying electrical resistance or flow rates—you might misdiagnose the problem, leading to unnecessary repairs or replacements. An advanced mistake is neglecting subtle signs that indicate complex issues, such as intermittent clicking sounds that seem insignificant but suggest motor winding faults or control board failures. These nuances require a deeper understanding and sometimes, specialized diagnostic tools. For example, a rhythmic clicking could be a sign of an impending circulation pump failure, which is often mistaken for debris obstruction. Identifying such symptoms early can save substantial money and avoid the inconvenience of full appliance replacement. Beware of common traps, such as jumping to replace parts without verifying their functionality, which often leads to unnecessary expenditure. Instead, leverage professional diagnostics—either through understanding how to read diagnostic codes or using multimeters accurately—to confirm faults. For instance, some homeowners mistake a multimeter reading of continuity as confirmation of a healthy component, but experts warn that internal faults can still exist without apparent surface issues. To get ahead of these pitfalls, familiarize yourself with credible sources like Appliance Outlet Pro’s guides on diagnostics and warranty claims, which emphasize thorough testing and documentation. Recognize that DIY diagnostics demand patience and knowledge; for example, inspecting for debris or cracks in pumps is often more nuanced than a quick glance. Transparency about your efforts and understanding the complexities involved can help when you consult professionals or file warranty claims. Remember, detailed records, including photos and test results, bolster your case if disputes arise—see how proper documentation can make or break warranty applications. Have you ever fallen into this trap? Let me know in the comments. Being aware of these nuances not only helps in diagnosing issues more accurately but also ensures you’re making informed decisions that save time and money in appliance repair journeys.
Investing in Reliable Diagnostics Tools
To maintain your dishwasher effectively, having the right equipment is crucial. A high-quality digital multimeter is my top recommendation. I personally use the Klein Tools MM7000 because of its accuracy and durability. It allows me to test electrical connections, resistance in motor windings, and voltage supply without guesswork. Portable and easy to handle, this tool helps prevent unnecessary part replacements by confirming faults precisely.
Another device I swear by is the Leak Detection Sensor. It’s particularly useful for early leak detection, saving you from water damage and costly repairs. My favorite brand is LeakSmart, which integrates seamlessly with smart home systems, giving real-time alerts. These sensors help me catch issues like small pinhole leaks before they become disasters.
Harnessing Diagnostic Software and Apps
Modern appliances often come with diagnostic interfaces. My go-to is the professional diagnostic code reader. Connecting it to your dishwasher’s control panel provides detailed error codes, pointing directly to faulty components. I recommend pairing this with the Manufacturer’s Service Manual, accessible through online subscriptions, to interpret codes accurately and plan effective repairs.
Additionally, smartphone apps like Smart Appliance Diagnostics can sometimes connect via Wi-Fi, offering remote troubleshooting guidance. These digital tools are revolutionizing appliance maintenance, enabling hobbyists and technicians alike to identify issues swiftly and accurately.
Long-Term Maintenance Strategies
Beyond gadgets, routine methods like regular cleaning of filters, inspecting hoses, and checking for debris are fundamental. Using a precision multimeter to verify continuity in control boards periodically prevents unexpected failures. Scheduling quarterly diagnostics conserves your appliance’s health and extends its lifespan.
How do I maintain my dishwasher over time?
Implement a maintenance routine that includes inspecting the door gasket, cleaning sprayer arms, and running descaling agents. Invest in a descaling kit like the CLR Calcium, Lime & Rust Remover, which dissolves mineral buildup, ensuring efficient water flow and heating. Keeping your appliance clean prevents debris from clogging critical parts and ensures optimal performance. Remember, early detection of issues is always more cost-effective. For comprehensive guidance, visit our diagnostics hub.
In the future, expect even smarter diagnostic tools—integrated sensors and AI-driven software—that can predict and alert you of potential failures before they happen. Embracing these advancements will make appliance maintenance more proactive and less reactive.
Ready to boost your troubleshooting skills? Try using your multimeter to check the resistance of the circulation pump motor following detailed guidelines. Accurate readings can make all the difference in diagnosing faults correctly and avoiding unnecessary parts replacement.
Remember, proper maintenance now sets the stage for long-term reliability. Keep your tools handy, stay informed, and you’ll keep your dishwasher humming reliably for years to come.