

I still remember the midnight squelch. Walking into the kitchen for a glass of water and feeling that cold, rhythmic “squish” between my toes. My beautiful oak floors were swimming because a tiny rubber seal had finally given up. It’s a gut-punch moment. You see the reflection of the overhead light in a pool of gray water and immediately start calculating the cost of a full renovation. I’ve been there, standing in a puddle, frantically grabbing every beach towel I owned while the dishwasher hummed along like nothing was wrong. But here is the good news: your floors aren’t necessarily toast. Today, I’m going to walk you through the immediate, high-stakes steps to take when your kitchen floor is suddenly damp and you’re staring at potential disaster. We are going to talk about extraction, airflow, and why your first instinct to “crank the heat” is actually your worst enemy.
Your Kitchen Floor is Not a Swimming Pool
When that water hits, time is your only real currency. I learned this the hard way during my first major leak. I spent twenty minutes trying to fix a dishwasher that wouldn’t drain while the water was actively migrating under my baseboards. Huge mistake. You have to stop the source and start the soak-up immediately. Hardwood is resilient, but it’s also a sponge. According to the National Wood Flooring Association, wood reaches a “fiber saturation point” where it begins to physically change shape once it absorbs more than 30% of its weight in moisture. If you don’t act within the first few hours, that’s when the permanent cupping starts.
Is My Expensive Floor Actually Ruined Forever?
I know what you’re thinking—once wood gets wet, it’s game over, right? That’s the fear that keeps us up at night. I used to think the same thing until I saw a professional restoration crew work their magic on a flooded high-end cherry floor. The secret isn’t just mopping; it’s sub-surface moisture management. If you can pull the water out of the grain before the cells collapse, you can save thousands of dollars. Have you ever walked into your kitchen and felt that ominous “bounce” in the floorboards? Drop a comment below and let me know if you’ve ever had to deal with a surprise indoor pond.
The Damage Often Starts with the Stuff You Can’t See
Most of the time, the flood isn’t a sudden tidal wave. It’s a slow, insidious drip from a brittle door seal or common plumbing errors behind the kickplate. My biggest blunder early on? I ignored a tiny, half-inch damp spot for a week, thinking it was just a spill from the dog’s bowl. By the time I checked, the subfloor was a soggy mess. To prevent this, you need more than just a mop; you need a strategy for drying the wood from the inside out. We’re going to dive into the exact tools you need—most of which you probably already have in your garage—to stabilize the environment before the mold takes hold.
Kill the Power Before You Touch the Water
The very first thing you need to do—before you even grab a towel—is head to your circuit breaker. Water and electricity are a lethal combination, and a dishwasher leak often pools around the electrical junction box under the unit. Once the power is killed, you can safely approach the ‘swimming pool.’ I remember the time I rushed in with a mop while the dishwasher was still humming; I felt a distinct tingle in my arm when I touched the metal frame. That was my wake-up call. Safety isn’t just a suggestion; it’s the only way to ensure you’re around to enjoy your repaired kitchen.
Suck the Water Out Instead of Pushing It In
Most people start by throwing every towel they own onto the floor. While that helps with the surface, it does nothing for the water that has already seeped into the tongue-and-groove joints of your hardwood. You need a wet/dry shop-vac. Set the nozzle directly against the seams and let it pull the moisture out of the grain. If you just mop, you’re essentially pushing tiny amounts of water deeper into the cracks.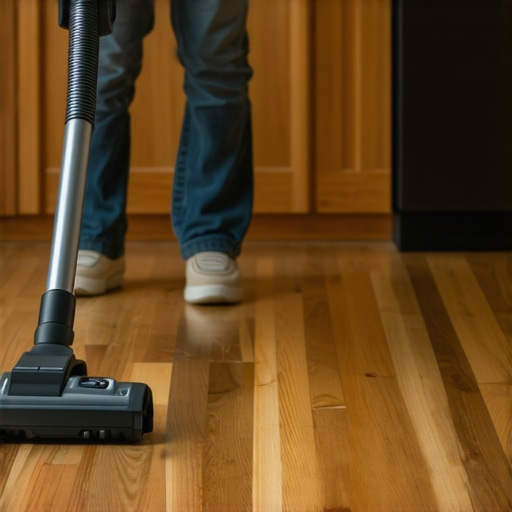
Why High Heat is the Enemy of Wet Wood
Your instinct might be to point a space heater at the damp spot. Don’t do it. Rapidly drying wood with high heat causes the top of the board to shrink faster than the bottom, which is the fastest way to guarantee permanent cupping. Instead, you want high-volume airflow at room temperature. Use a high-velocity floor fan and keep it running for 48 hours straight. I once tried to ‘speed up’ the process with a hair dryer on a cherry floor and ended up with boards that looked like Pringles. Steady, cool air is what saves the finish.
Locate the Drip Under the Kickplate
You can’t fix the floor until you stop the bleed. You need to find the slow leak hiding under your kickplate immediately. Most leaks aren’t from the tub itself but from the connections beneath it. This is where the simple paper towel test for checking leak locations becomes your best friend. Lay dry sheets of paper towel under the water inlet valve, the pump, and the drain hose. If you notice your unit keeps filling with water when off, you likely have a faulty inlet valve that’s slowly weeping onto your subfloor.
Document Everything for Your Protection
While you’re down there with a flashlight, take photos. This isn’t just for your own sanity; understanding appliance diagnostics improving your warranty claims depends on having proof of where the failure occurred. If a technician arrives and the floor is dry, they might claim ‘no failure found.’ Having clear evidence of a dripping solenoid or a cracked hose ensures they can’t brush off your claim. I’ve seen homeowners save $3,000 in floor repairs simply because they had a photo of the specific part that failed, proving it wasn’t ‘user error’ or ‘lack of maintenance.’The biggest mistake I see isn’t the repair itself; it’s the assumption that a warranty is a safety net. Most homeowners treat a warranty like an all-access pass to free repairs, but the industry operates on a very different set of rules. For example, did you know that roughly 30% of service calls are categorized as ‘No Failure Found’ (NFF)? According to data from the United Appliance Servicers Association, these NFF calls are the leading cause of denied warranty claims. If a technician can’t reproduce the leak in the 15 minutes they are at your house, you’re often stuck with the bill for the service call—and a floor that is still getting wet.
Can Your Choice of Soap Actually Void a Manufacturer Warranty?
It sounds like a myth, but it’s a cold reality in the fine print. I’ve seen claims denied because the homeowner was using generic pods that caused ‘oversudsing,’ which technically qualifies as ‘misuse’ rather than a mechanical defect. This is why your service technician wants to see your detergent box the moment they walk in. They aren’t judging your shopping habits; they’re looking for a reason to categorize the repair as a non-warranty issue.
Stop Guessing and Start Decoding Your Machine
Before you even call for help, you need to speak the machine’s language. Most modern units have a secret ‘service mode’ that provides a history of every hiccup the appliance has had in the last 50 cycles. You can usually get professional-grade diagnostic codes from your interface by pressing a specific sequence of buttons. If you have an E15 or an F2 code ready when you call, you’re no longer just ‘a person with a wet floor’; you’re a prepared claimant.  The ‘Oops’ factor that catches everyone is the ‘Normal Wear and Tear’ trap. Many people think a leaky seal is a defect. However, if that seal is over five years old, many providers will argue it’s a maintenance item. The fine print about normal wear and tear on appliances is designed to protect the manufacturer, not your kitchen floor. Have you ever had a warranty claim denied for a reason that seemed totally unfair? Let me know in the comments—I’m curious how many of you have been told a part was ‘disposable’ when it felt like a major failure. To truly protect yourself, you need to understand that how appliance diagnostics can save your warranty benefits is about more than just finding the leak; it’s about proving the failure was spontaneous and mechanical. Don’t let a ‘No Failure Found’ report be the reason you’re paying for new hardwoods out of pocket.I’ve spent thousands of hours under kitchen sinks, and if there’s one thing I’ve learned, it’s that your eyes often lie to you. A slow leak can hide in the insulation for months before it shows its face. This is precisely why your service technician carries a thermal camera. I personally use a compact thermal imager because it highlights the ‘cold’ spots where moisture is evaporating behind a cabinet wall long before a visible stain appears. If you’re serious about protecting your home, you need to move beyond basic surface checks and embrace troubleshooting dishwasher problems with expert diagnostics. The goal isn’t just to fix what’s broken today, but to see what’s about to fail tomorrow. One of the most effective ways to do this is to how to find a service manual hidden inside the unit. Manufacturers usually tuck these into a plastic sleeve behind the kickplate or taped to the underside of the tub. That document contains the precise ohm readings for your specific heating element and pump, allowing you to use a multimeter with surgical precision.
How can I keep my dishwasher running like new for a decade?
Maintenance isn’t just about cleaning the filter; it’s about the chemistry of the machine. I’ve found that many modern issues stem from the fact that we try to be too ‘green.’ Interestingly, why the heavy cycle is actually better for your machines health comes down to temperature. According to technical bulletins from the Association of Home Appliance Manufacturers (AHAM), consistently running low-temp cycles allows fatty deposits to build up in the internal sump, which eventually leads to seal failure. I make it a habit to run a high-heat ‘Heavy’ cycle once a week to thermally shock the system and flush out those grease residues.  Looking ahead, I predict we are moving toward a ‘predictive maintenance’ era where your dishwasher will use AI-driven sound analysis to alert you before a bearing fails. We are already seeing prototypes that can detect the specific frequency of a struggling motor. For now, the best tool you have is your own ears. Listen for the specific noise that means your circulation pump is dying—it usually starts as a faint, high-pitched whine during the wash cycle. My advanced tip for you today: grab a cheap multimeter and test the continuity of a heating element yourself. It takes five minutes and tells you more about your machine’s health than any visual inspection ever could.
The Hardest Lessons Learned While Mopping My Kitchen Floor
After years of dealing with soggy wood and stubborn service agents, I’ve realized that being ‘right’ about a leak isn’t enough; you have to be prepared. First, never assume a small drip is just a spill. I’ve seen tiny leaks turn into $10,000 floor replacements because the homeowner didn’t know the top signs your dishwasher needs professional diagnostics before the water hit the subfloor. Second, your warranty isn’t a safety net—it’s a contract. You need to know when to trust a warranty for dishwasher repairs and when to take matters into your own hands. Finally, the best repair is the one you catch early by checking your kickplate once a month. I once ignored a faint smell of mildew for weeks, only to find the subfloor had turned to oatmeal beneath the tile. Don’t be like past-me.
The Survival Kit for Your Kitchen Subfloor
If you want to avoid the ‘No Failure Found’ trap, you need a few items in your junk drawer. A quality multimeter is non-negotiable for checking components like the heater or pump. If you suspect the brains of the operation are failing, learning how to identify a faulty control board without a technician can save you a $150 service fee. I also recommend keeping a digital folder with your original receipts and photos of your plumbing setup; even if you’re past your coverage date, there are ways how to get a manufacturer to pay for an out-of-warranty repair if you have the right documentation. My personal toolkit always includes a moisture meter—it’s the only way to be 100% sure the wood is dry before you stop the fans.#IMAGE_PLACEHOLDER_E#
Take Control of Your Kitchen Before the Drip Starts
You don’t have to be a master plumber to protect your home. By mastering basic appliance repair techniques and staying ahead of the “wear and tear” curve, you turn a potential catastrophe into a minor weekend project. Your kitchen is the heart of your home, and keeping it dry starts with your willingness to look under the kickplate and listen to what your machine is trying to tell you. Don’t let a small mechanical failure become a structural disaster. You’ve got the tools and the knowledge now—go use them. Have you ever had a “mystery leak” that turned out to be something incredibly simple? Let me know in the comments below—I’d love to hear your survival stories!