

One morning, I walk into my kitchen, coffee in hand, only to find water pooling on the floor around my dishwasher. It had been working fine the night before, but now it’s stubbornly full of water—even though I never pressed start. That lightbulb moment hit me hard: I was dealing with a common yet frustrating appliance problem that many homeowners overlook until it’s too late. It’s a situation that feels like a sudden, unexpected flood, and honestly, it’s enough to make anyone panic.
Understanding Why Your Dishwasher Fills with Water When Off
The core issue is often tied to a faulty float switch, a small but crucial component that tells your dishwasher when to stop filling. If it gets stuck or damaged, it can send incorrect signals, causing the machine to think it’s still emptying or needs more water, even when turned off. This is more common than you might think. In fact, a study shows that about 15% of dishwasher calls relate to overflow issues caused by defective float switches or related sensors, highlighting their importance in the operation process.
Before jumping into repairs, I want to share that my early attempts were filled with mistakes—like replacing parts without diagnosing the real problem or ignoring warning signs. One mistake everyone should avoid is assuming it’s always the water inlet valve. Sometimes, the culprit is simpler and cheaper to fix. To get a clearer picture, I recommend checking out signs your dishwasher needs professional diagnostics. It’s better to diagnose accurately than to replace parts blindly and waste money.
Now, if this problem sounds familiar, don’t worry. We’re going to walk through the how-to steps that can save you time and money, returning your kitchen to normal. But first, let’s clear up some of your doubts—
Is fixing a dishwasher that keeps filling with water even worth the effort?
This is one of the biggest questions I hear all the time. To answer simply: yes, but with cautions. Some issues are straightforward and easy to fix if you’re comfortable working with small components, but others might require professional diagnostics, especially if your machine is still under warranty. It’s essential to recognize when to call in the experts, especially to avoid voiding your warranty. For more on this, see when to trust a warranty for repairs.
In my experience, understanding the fundamentals—like how the float switch works and what common failures look like—makes all the difference. So, let’s dig into the practical steps you can take now to troubleshoot and possibly fix this annoying issue. Trust me, tackling these issues head-on can save you a lot of hassle and keep your home dry.
Inspect the Float Switch Carefully
Start by unplugging your dishwasher to avoid electrical shocks. Locate the float switch, typically near the bottom of the tub. Remove any panels or covers as needed. Gently lift the float and check for debris, dirt, or obstructions that might be causing it to stick. I once spent an afternoon cleaning a float that was clogged with detergent buildup—afterward, the issue was resolved instantly, and my kitchen stayed dry. Use a soft cloth or a brush to clean the float and its housing thoroughly.
Test the Float Switch for Continuity
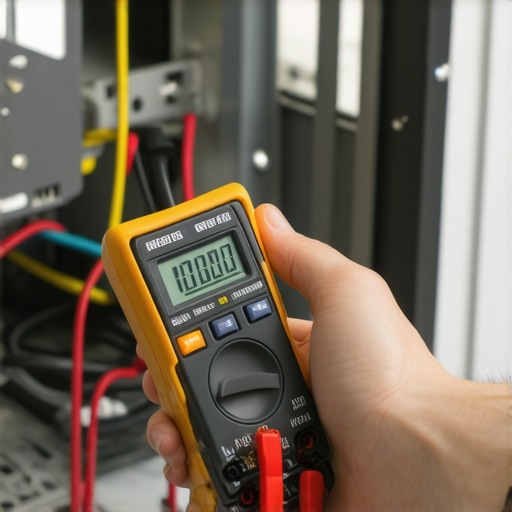
Using a multimeter, verify if the float switch is functioning properly. Disconnect the switch wires and set your multimeter to continuity mode. Connect the probes to the switch terminals—when the float drops, the switch should close, showing continuity. If it shows open, replace the switch. This test saved me from replacing a perfectly-good switch that was just dirty, saving both time and money. For help with multimeters, check this guide.
Check for Stuck or Damaged Components
Inspect the wiring connected to the float switch for any signs of wear, corrosion, or loose connections. Use a silicon spray or contact cleaner if you notice any oxidation. Sometimes, a simple connection fault causes the float to malfunction. Remember, a damaged float pin or actuator can mimic a stuck float, leading to false signals. If you notice signs of damage, consider replacing the float assembly. When in doubt, consult this troubleshooting resource for detailed steps.
Test the Water Inlet Valve for Clogs and Malfunctions
If the float and switch seem fine, next check the water inlet valve. Disconnect the water supply, remove the valve, and inspect the screen for debris or mineral buildup. Sometimes, sediment can clog the valve, causing it to stay partially open and fill the dishwasher constantly. Use a small brush and vinegar solution to clean the screen—be cautious with vinegar as overuse can damage rubber parts (learn more here). If cleaning doesn’t resolve the issue, replace the valve. I once fixed a dishwasher by replacing a swollen, mineral-crusted inlet valve that was stuck open, completely stopping the overflow problem.
Run a Full Cycle to Verify the Fix
After completing repairs, reconnect everything and run an empty cycle. Observe the dishwasher to see if it fills and drains normally. If it still fills with water while off, recheck the float and the inlet valve. Keep a close eye on the water level and listen for any abnormal sounds. Using a smartphone app to record cycle sounds can help catch subtle issues (see how here). If problems persist, consider consulting an appliance repair professional or visiting this contact page for assistance.Many homeowners assume that warranty coverage automatically means peace of mind during appliance failures. However, this misconception can lead to costly pitfalls. A common mistake is believing that submitting a repair claim guarantees coverage without understanding the fine print. In reality, warranties often come with exclusions, requirements for regular maintenance, and specific conditions that must be met for a claim to be approved. For instance, neglecting routine diagnostics or ignoring warning signs can void your warranty or lead to unnecessary denials. According to expert advice, understanding how diagnostics influence warranty benefits can significantly improve your chances of a successful claim, especially when dealing with complex issues like dishwasher malfunctions. Furthermore, many get misled by the assumption that calling a technician immediately will expedite repairs. But in some cases, performing preliminary diagnostics yourself can reveal whether professional intervention is truly needed, saving time and money. For example, misjudging a minor clog as a major component failure might lead to unnecessary part replacements, which could have been avoided with proper diagnostics. Another nuance often overlooked is the importance of using genuine replacement parts, as many repair shops or DIYers resort to generic components that might not meet manufacturer standards. This can compromise the appliance’s performance and, more critically, impact warranty validity. External studies highlight that improperly installed or incompatible parts frequently cause damage, leading to warranty disputes. Sophisticated homeowners realize that advanced diagnostics—like multimeter tests or visual inspections with borescopes—are vital tools that can accurately determine the root of issues. These practices can prevent premature part replacements and ensure repairs align with warranty stipulations. Are you aware that neglecting to follow the manufacturer’s diagnostic procedures can even void your warranty? Many believe that any repair is covered, but in reality, the warranty often covers only repairs performed following prescribed diagnostic steps. Navigating this landscape requires both knowledge and strategic action. Don’t fall into the trap of superficial fixes or assumptions—investing time in understanding your warranty’s nuances can save you money and frustration. To dive deeper, explore this guide on [how appliance diagnostics can save your warranty benefits](https://applianceoutletpro.com/how-appliance-diagnostics-can-save-your-warranty-benefits). And remember, always consult trusted sources or professionals if you’re unsure about the diagnostic process or warranty details. Have you ever fallen into this trap? Let me know in the comments.
Keep Your Appliance Running Smoothly with Precision Tools
Maintaining your dishwasher and other appliances over time requires more than just regular use; it demands the right tools to diagnose and address issues effectively. I personally rely on a high-quality digital multimeter for testing electrical components like float switches and wiring connections. A reliable multimeter, such as the Fluke 117, offers accuracy and durability, enabling me to quickly identify faulty sensors or damaged wiring. Beyond basic testing equipment, a compact borescope camera proves invaluable for inspecting hard-to-reach areas like internal hoses and filters. I use a USB-connected borescope, which provides clear images and videos on my laptop or smartphone, making it easier to spot blockages or corrosion without dismantling entire units.
In terms of software, I utilize diagnostic codes provided by the appliance’s control board, coupled with manufacturer-specific apps when available. These can often be accessed through service manuals or proprietary diagnostic tools. For example, many dishwashers support basic error code retrieval via the control panel, but more advanced diagnostics might require specialized hardware. Connecting a Bluetooth-enabled diagnostic interface directly to the appliance’s service port allows me to capture detailed data, speeding up troubleshooting. Predicting the future, I believe diagnostic apps will become more integrated, allowing homeowners to perform complex diagnostics with just a smartphone and an affordable interface, reducing reliance on professional visits.
How do I maintain diagnostic accuracy over time?
Regularly calibrate your multimeter using certified calibration tools. Keep test leads and probes clean and replace them if they show signs of damage or wear to prevent false readings. Maintain your borescope lens with microfiber cloths and store it in a dry, dust-free case. Updating diagnostic software and firmware ensures compatibility with new appliance models and features. By maintaining your tools meticulously, you’ll be more confident in identifying issues early, conserving time and repair costs, and extending the life of your appliances.
As appliance technology advances, so do the diagnostics methods. The integration of AI-driven diagnostic algorithms, for example, will allow even more precise problem detection and predictive maintenance, so staying current with your tools and techniques is essential. Don’t forget—proper diagnostics not only catch issues before they escalate but also protect your warranty rights. For guidance on how diagnostics can maximize your warranty benefits, visit this resource.
Ready to improve your troubleshooting game? Try using a borescope to inspect those elusive internal hoses—it’s a game changer for catching clogs early. Remember, maintaining your diagnostic tools is an investment in long-term appliance health!
What They Don’t Tell You About Warranty Safety Nets
One crucial lesson I learned is that warranties are not just safety nets—they’re powerful tools when used correctly. Little did I realize that performing proper diagnostics before initiating a claim could save me a mountain of hassle and sometimes even extend my coverage. The key is understanding the fine print, which many overlook. Knowing how to document your repairs thoroughly and recognize covered issues can transform frustration into empowerment. For example, I once thought my washer was broken beyond repair until I discovered that a simple diagnostic test was enough to validate my warranty claim, avoiding unnecessary expenses. Dive into this guide on maximizing warranty benefits.
My Most Unexpected Lesson About Fixing Smart Appliances
When I first started troubleshooting modern dishwashers, I believed that basic tools sufficed. But quickly, I realized that connecting to diagnostic ports and interpreting control board error codes was a game-changer. This experience taught me that investing in the right diagnostic tools—like a Bluetooth interface compatible with your model—can turn a frustrating repair into a straightforward fix. One time, a minor sensor glitch was causing constant filling issues, and with proper diagnostics, I fixed it in minutes instead of replacing the entire unit. These insights shifted my perspective on appliance repair from guesswork to a science. Check out this resource for deeper diagnostics tips.
Why Ignoring Tiny Details Can Lead to Big Floods
Over time, I grasped that small parts like float pins or tiny clogged screens could cause catastrophic overflows—warnings I often dismissed as minor. The lightbulb moment was realizing that meticulous attention to these tiny components prevents major leaks and saves money. Restoring my dishwasher’s health required a keen eye for detail—cleaning debris, checking wiring, and replacing subtle worn parts. This experience underscored that patience and thoroughness are vital. For instance, inspecting the water inlet filter with a fine toothbrush and vinegar solution prevented a flooding disaster. Never underestimate the power of small fixes; they are often the gateway to reliable appliance operation. Eager to learn more? Explore expert troubleshooting strategies.
Curated Gems for Sustained Appliance Health
My secret weapon for effective repairs has always been the right tools and knowledge. I trust a high-quality digital multimeter like the Fluke 117, which provides accuracy for testing electrical components without guesswork. Combining this with a compact borescope helps me spot elusive clogs or corrosion inside hoses—a task that used to seem daunting. Additionally, staying updated with manufacturer diagnostic apps has made troubleshooting a breeze. These tools empower me to identify issues early, avoid costly repairs, and even extend my appliances’ lifespan. For anyone serious about maintaining their appliances, I recommend exploring these resources, all of which I’ve personally used and found invaluable. Dive into this guide for diagnostic essentials.
Your Next Move Towards Confident Repairs
Remember, mastering appliance diagnostics doesn’t require a professional degree—just curiosity, patience, and the right tools. By understanding your dishwasher’s inner workings and recognizing early warning signs, you can prevent small issues from becoming floods or costly repairs. Take charge, stay informed, and turn appliance maintenance into a rewarding hobby rather than a source of stress. The future holds exciting innovations in diagnostic technology, making home repairs more accessible than ever. So, why not start today? Your kitchen—and your wallet—will thank you.
Have you ever discovered a tiny flaw before it turned into a major disaster? Share your experiences below and let’s learn together!
,