

I stood there with a soggy dish towel draped over my shoulder, staring at a dishwasher that refused to even blink. It is a gut-wrenching feeling. You immediately start calculating the cost of a new machine or, at the very least, a massive repair bill. My first big mistake—and I am still a bit embarrassed by this—was ordering a brand-new $220 control board without even opening the door panel. I was so sure the ‘brain’ of the unit had fried. Two days and one non-refundable part later, the machine was still dead silent. That was my lightbulb moment about the humble thermal fuse. Today, I am going to show you how to avoid that expensive headache by performing a five-minute check that most people completely overlook. Have you ever felt that sinking feeling when you press the ‘Start’ button and absolutely nothing happens?
Your Control Board Probably Is Not Dead
I have seen so many neighbors and friends jump the gun when troubleshooting dishwasher problems and end up wasting money on parts they do not need. The thermal fuse is a tiny, inexpensive safety device designed to cut power if the machine gets too hot. It is essentially a sacrificial lamb. If it blows, your dishwasher looks like it has been hit by a localized EMP. Before you even think about how to spot corrosion in your control board wiring, you need to check this little guy. According to industry data from the National Association of Service Dealers, a significant percentage of ‘no-power’ service calls are resolved by simply replacing a blown fuse rather than a main logic board. It is the appliance equivalent of checking if a lamp is plugged in before calling an electrician.
Is it actually worth the hassle to test this yourself?
You might be worried that you will mess something up or that you need a degree in electrical engineering to handle testing your thermal fuse for continuity. I used to be terrified of anything with a wire until I realized that these machines are just like Legos for grown-ups. If your machine stops mid-cycle with a flashing clean light or just refuses to power on, the fuse is your most likely culprit. Checking it yourself not only saves you a couple hundred dollars but also gives you the satisfaction of knowing exactly how your home works. Trust me, the first time you hear that motor hum back to life after a $15 fix, you will feel like a DIY rockstar.
Get Inside the Control Panel Without Wrecking the Finish
Before you even touch a screwdriver, flip the breaker. I cannot stress this enough. I once skipped this step and got a nasty reminder that 120 volts of electricity doesn’t care about my DIY ambitions; the spark nearly singed my eyebrows. Once the power is dead, open the door and look for the Torx screws lining the inner perimeter. Most modern units require a T15 or T20 bit. As you loosen these, hold the outer door skin with your free hand; otherwise, it might slide right off and hit your toes. If you find your door feels heavy or clunky during this process, you might actually be looking at how to replace a snapped door cable using a fishing line hack rather than a fuse issue.
Isolate the Fuse Before You Start Swapping Boards
Once that panel is off, you will see a mess of wires. Do not panic. It looks like a technicolor spaghetti factory, but we are only looking for one small part. The thermal fuse is usually tucked right near the top of the control board. It’s a small, cylindrical component about the size of a pill, usually encased in a plastic housing with two wires plugged into it. It acts like a bouncer at a club; once the internal temperature hits a dangerous threshold, it cuts the line and refuses to let any power back in. #IMAGE_PLACE_PLACEHOLDER_B#
The Five-Second Test That Saves Two Hundred Bucks
This is where the magic happens. You need a multimeter set to the lowest Ohms (Ω) setting. Pull the two wires off the fuse—use needle-nose pliers if they are stubborn—and touch the probes to the metal terminals. If the meter shows zero or close to it, your fuse is fine, and you might need to check top signs your dishwasher needs professional diagnostics. If it reads ‘OL’ or ‘1’ (infinity), the circuit is broken. That $15 part is your only problem. When I first did this, I was so skeptical that I tested it three times, convinced I was doing it wrong. I wasn’t. It really was that simple. If you are worried about your coverage while poking around, remember how appliance diagnostics can save your warranty benefits by providing proof of the actual failure point rather than guessing.
Why You Should Never Bypass the Safety
You might see some ‘hacks’ online suggesting you can just twist the wires together to bypass the fuse. Do not do this. That fuse blew because the machine overheated. Bypassing it is like taking the batteries out of a smoke detector because the beeping is annoying; you are removing the only thing preventing a fire. Instead, focus on testing a thermal fuse for continuity without a pro kit and then replace it with an OEM part. Using cheap knock-offs is a gamble because why third party parts frequently void your service plan is a very real concern for manufacturers. If your machine is older, this is also a great time to check other small things, like how to test your dishwashers float switch with a pencil, just to ensure the rest of the safety loop is solid while you have the guts exposed.
Even if your fuse tests fine, do not rush to buy a new machine. I see a lot of folks get discouraged when the simple fix does not work, but there is a nuance to troubleshooting dishwasher problems that experts rarely share upfront. Everyone tells you that a manufacturer warranty is your best friend, but in my experience, those parts-only coverages are often a psychological safety net that actually costs you more in the long run. When you realize why your appliance warranty covers parts but not labor costs, you will see that a $100 service call for a $15 part is a losing game. According to a report from the Service Contract Industry Council, labor accounts for a massive portion of total repair expenses, meaning that ‘free’ part is the smallest portion of your bill.
What if the fuse is fine but the machine is still dead?
This is where the ‘oops’ factor usually kicks in. I once spent three hours tracing wires only to realize the homeowner had recently installed a new garbage disposal. If you did not knock out the drain plug, or if the electrical connection is shared and tripped a specific sub-breaker, you are looking at a systemic failure rather than a machine failure. This is exactly why your warranty claim got denied because of your garbage disposal in many DIY scenarios. The technician arrives, sees the improper installation, and hands you a bill for a ‘non-covered’ visit. 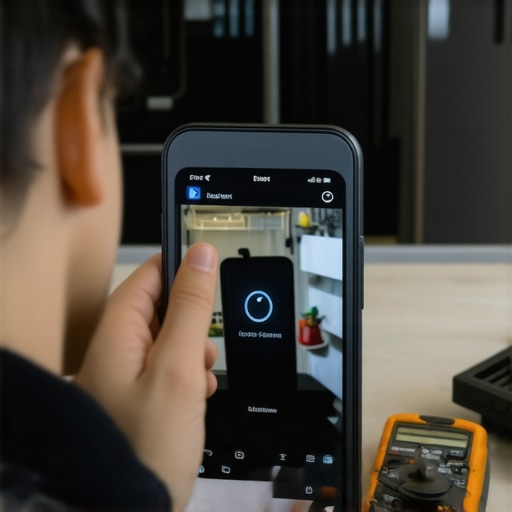 Before you give up, you should try to access the secret diagnostic mode hidden on your touch control panel. Most high-end brands have a series of button presses that force the machine to spit out a specific numeric code. This is the fastest way to start fixing the dreaded error code that stops everything without guessing. It moves you from being a tinkerer to having professional-grade data. Have you ever fallen into this trap where a simple installation error was masked as a broken machine? Let me know in the comments. If you are trying to focus on understanding appliance diagnostics improving your warranty claims, keep a detailed paper trail. Manufacturers look for any reason to say ‘no,’ and why your warranty claim was denied due to lack of maintenance is a common fallback. Show them photos of your clean filters and your multimeter readings. Knowing when to trust a warranty for dishwasher repairs versus when to grab your own screwdriver is the real secret to home ownership.To move beyond the ’emergency repair’ phase and into true home mastery, you need a dedicated diagnostic kit. I don’t mean a $500 professional chest; I mean a few targeted items that live in a specific drawer. My go-to is a decent digital multimeter with thin probes. This allows for testing your thermal fuse for continuity without fumbling. If you want to get really tech-heavy, I’ve started using a thermal camera to find heat leaks in your dishwasher door. It sounds overkill until you realize that a tiny heat leak is why your kitchen cabinets are starting to peel. By catching a failing gasket early, you can learn how to replace a frayed door seal for under twenty dollars before the moisture causes structural damage to your kitchen.
How do I keep my dishwasher running like new for a decade?
Maintenance isn’t a once-a-year event; it is a rhythm. Every month, I run a cycle with a heavy dose of citric acid. This isn’t just for aesthetics; how to remove cloudiness from glasses using citric acid is actually a side benefit of descaling the internal heating element. If that element gets coated in calcium, it works twice as hard and burns out twice as fast. I also keep a paperclip in my junk drawer specifically for the proper way to clean spray arm nozzles using a paperclip. Those tiny holes get clogged with seeds and plastic bits that no chemical cleaner can touch. The Association of Home Appliance Manufacturers (AHAM) notes in their technical standards that even a 10% blockage in spray arm nozzles can lead to a 30% drop in cleaning efficiency, which usually leads people to wrongly assume their pump is dying. 
The shift toward software-driven repairs
The biggest trend I am seeing—and where the industry is headed—is the ‘software-fication’ of the kitchen. We are moving away from purely mechanical failures and into the realm of digital glitches. This is why firmware updates are essential for new smart dishwashers. I’ve seen machines that refused to drain simply because a sensor needed a software recalibration, not a physical replacement. If your newer unit is acting ‘possessed,’ you might need to access the secret tech menu that calibrates your water sensors rather than grabbing a wrench. It’s a different kind of DIY, but it’s just as satisfying. If you are struggling with a machine that seems to have a mind of its own, start by checking for an update in your brand’s app. Before you do anything else today, I want you to grab a flashlight and check those spray arm holes; you’ll be shocked at what’s hiding in there.
Lessons Bought with a $200 Mistake
The most expensive lesson I ever learned wasn’t from a textbook; it was from a non-refundable control board that sat on my counter while my dishwasher remained dead. I realized that diagnostic data beats guesswork every single time. One lightbulb moment was discovering that a ‘dead’ machine is often just a safety feature doing its job. Before you surrender to a repair bill, check if you can identify why your dishwasher screen shows a numeric error code, which is the machine’s way of asking for help. Also, keep in mind that many ‘broken’ units are just victims of a power fluctuation; learning how to prove your appliance failure was caused by a power surge can be the difference between paying out of pocket and getting a free repair.
Tools That Belong in Every Kitchen Junk Drawer
You don’t need a professional workshop to maintain your appliances. My essential kit includes a reliable digital multimeter, needle-nose pliers, and a simple paperclip. Why the paperclip? Because it’s the only tool fine enough for the spray arm nozzles. #IMAGE_PLACEHOLDER_E# I also suggest keeping a record of your machine’s behavior; knowing the real difference between service plans and manufacturer warranties ensures you don’t call the wrong person when things go south. If you’ve already paid for a fix that should have been covered, don’t take it lying down—learn how to claim a repair refund from your appliance manufacturer to recoup those costs.
Stop Guessing and Start Fixing Today
Tinkering with your own dishwasher isn’t just about saving a few bucks; it’s about taking back control of your home. The transition from being frustrated to being a DIY rockstar happens the moment you stop seeing a complex machine and start seeing a series of solvable puzzles. Whether you are dealing with a blown fuse or a software glitch, remember that most issues are designed to be fixed, not just replaced. Every repair you finish builds the confidence you need for the next one. Have you ever felt that surge of pride when a ‘dead’ machine finally hums back to life after your intervention? Let me know about your biggest DIY win below!