

I’ll never forget the Tuesday evening my kitchen floor turned into a shallow pond. I stood there, soaking wet socks and all, staring at my dishwasher while it hummed away, oblivious to the mess it was making. My first instinct was to panic and call a professional, convinced the whole control board had fried. But after a deep breath and some digging, I realized I didn’t need a massive toolbox—I just needed a pencil. We are going to dive into how this humble bit of graphite can tell you everything you need to know about your float switch before you spend a dime on parts. [image_placeholder_1]
Your Dishwasher Might Just Be Having a Communication Crisis
Most of us do not even think about the float switch until it fails. It is that little plastic mushroom or cylinder sitting in the bottom of the tub. Its job is incredibly simple: it tells the machine when the water level is high enough. If it gets gunked up with old soap or the internal switch fails, your machine either won’t fill or won’t stop filling. When I was first starting out with DIY repairs, I once spent eighty dollars replacing a cracked water inlet valve only to find out the float was just stuck on a stray piece of petrified kale. It was a classic case of troubleshooting dishwasher problems gone wrong. Today, I will show you how to avoid that wasted cash and get your machine back in order using a simple mechanical check.
Does a pencil really work better than a multimeter?
I know what you are thinking: “Surely a professional diagnostic requires specialized electronic tools.” While a meter is great for understanding appliance diagnostics, the pencil test is a mechanical check that anyone can do to verify the physical movement of the switch. It is all about the resistance and the audible “click” that confirms the internal component is engaging. According to a report by HomeAdvisor, the average appliance repair service call costs between $100 and $300, which is a steep price for a check that takes less than thirty seconds. If your dishwasher won’t start but has power, this is the very first thing I check every single time. Have you ever been ready to toss your whole machine out the window because of a simple mystery leak? Let me know if you have faced that frustration! Now, let’s get into the nitty-gritty of why this trick works and how you can perform it without breaking a sweat.To get started, you need a standard wooden pencil—and no, a mechanical one won’t cut it because we need the rigidity of wood to feel the subtle resistance of the switch. This isn’t about writing; it’s about leverage and tactile feedback. Think of your float switch like a gatekeeper. When water enters, the float rises like a boat in a harbor. Once it hits its peak, it clicks a tiny switch that tells the water valve to shut off. If that “boat” is weighed down by soap scum or stuck on a stray bone, the gatekeeper never gets the message. It is a simple mechanical failure that looks like a high-tech disaster.
Master the Pencil Test to Save Your Saturday
Before you start tearing off panels or researching how to deep clean a dishwasher sump without pulling the machine, you need to verify the float’s range of motion. The pencil is your extension. It allows you to reach into the cramped, often gross, corners of the tub without getting your hands covered in last week’s lasagna. You are looking for two things: freedom of movement and the audible “snap” of the microswitch. If either is missing, your dishwasher is essentially flying blind.
Spot the Plastic Mushroom in Your Tub
Look at the bottom front corner of your dishwasher tub. You will see that plastic cap, usually white or grey. That is the float. Reach in with the eraser end of your pencil. Slide it under the edge of the float and gently lift it upward. This is the moment where you need to be sensitive.  You should feel almost zero resistance as it slides up. If it feels gummy, heavy, or gritty, you have found the culprit. During one particularly frustrating repair on an old KitchenAid, I was convinced the machine had a fried brain. I was already researching how to spot a failing control board capacitor by sight. But when I slid my pencil under the float, it wouldn’t budge. I realized a piece of a broken glass had wedged itself under the rim. Total repair cost? Zero dollars. Total time saved? Two hours of swearing at a circuit board.
Listen for the Click That Saves You Money
Once you know it moves, lift it all the way to the top and let it drop. You are listening for a crisp, metallic “click.” That is the sound of the switch underneath doing its job. If you hear the click but the machine still won’t fill, you might be looking at a more complex electrical issue, or perhaps it’s one of the top signs your dishwasher needs professional diagnostics. However, nine times out of ten, the “pencil lift” reveals that the switch is either physically stuck or the contact is worn out.
Why This Beats Tearing the Machine Apart
It’s easy to get overwhelmed by modern appliances, especially when you start worrying about testing your heating element for ground faults with a meter. But most dishwasher issues are actually debris-related. If your float is stuck, you don’t need a new machine; you just need to clear the area. I’ve seen everything from build-up of fatty soaps to stray rubber bands causing these switches to fail. If your trick to identifying a failing drain pump by sound doesn’t yield results, always circle back to the float. By using the pencil, you are bypassing the guesswork and getting a physical confirmation of the part’s health. This allows you to rule out the mechanical side before you start worrying about whether you need to trust a warranty for dishwasher repairs or call in the cavalry.
It is easy to get a high from a successful five-minute fix, but this is where I see most homeowners trip up. They assume that because they fixed a mechanical jam with a pencil, they are ready to tackle the entire electrical harness. Here is a contrarian truth: Most people actually over-maintain their machines into an early grave. We have been told for years that vinegar is the miracle cure for everything, but in my experience, over-relying on it is a disaster. While a quick soak is fine for a showerhead, using distilled vinegar every week may damage your seals, turning a simple maintenance habit into a slow-motion flood. You think you are being proactive with troubleshooting dishwasher problems, but you are actually degrading the very components meant to keep the water inside the tub.
The biggest oops factor I encounter isn’t even the repair itself—it is the paperwork. I once worked with a homeowner who spent hours perfectly replacing a heating element, only to have a major motor failure two months later. Their warranty claim was denied due to lack of maintenance records and evidence of unauthorized tampering. This is the hidden nuance of understanding appliance diagnostics: knowing when to stop. If you open a sealed component or use non-manufacturer repair parts, you might save fifty dollars today but lose a thousand-dollar safety net for tomorrow. #IMAGE_PLACE_HOLDER_C#
How do you know when DIY crosses into professional-only territory?
This is the million-dollar question. According to a report by the Digital Right to Repair Coalition, while consumers are increasingly capable of basic fixes, the complexity of modern sensors means that visual fixes are becoming rarer. When you move from a mechanical check—like our pencil test—to something involving the main control board, you are entering a high-stakes zone. You need to be able to identify the top signs your dishwasher needs professional diagnostics before you accidentally brick your machine’s firmware. Have you ever fallen into this trap of trying to fix one thing only to break three others? Let me know in the comments! Before you dive back in, always decide when to trust a warranty for dishwasher repairs versus when to grab your own tools. Sometimes, the most expert move you can make is keeping your hands in your pockets.
Knowing when to keep your hands in your pockets is a sign of a seasoned DIYer, but staying passive doesn’t mean you should ignore the machine’s long-term health. If you have mastered the pencil test and confirmed your float switch is clicking, you are already ahead of 90% of homeowners. However, true longevity comes from the tools and routines that prevent those mechanical jams from ever happening again. For me, the most indispensable tool in my kit isn’t a complex computer—it is a simple nylon soft-bristle brush. I use it specifically because it is gentle enough to clear the microscopic mesh of the filtration system without causing the tears that lead to pump failure.
Scrub your sump filter with a soft brush
Many people wait until they smell something funky before they look at the bottom of the tub. By then, the damage to your circulation pump may already be starting. I recommend cleaning your sump filter with a soft brush every single month. This prevents those tiny bone fragments and labels from migrating into the delicate impeller. According to the Association of Home Appliance Manufacturers (AHAM), proper filter maintenance can significantly extend the lifespan of your appliance’s core components by reducing the load on the motor. When the filter is clear, the motor doesn’t have to strain to move water, which keeps it running cooler and longer. 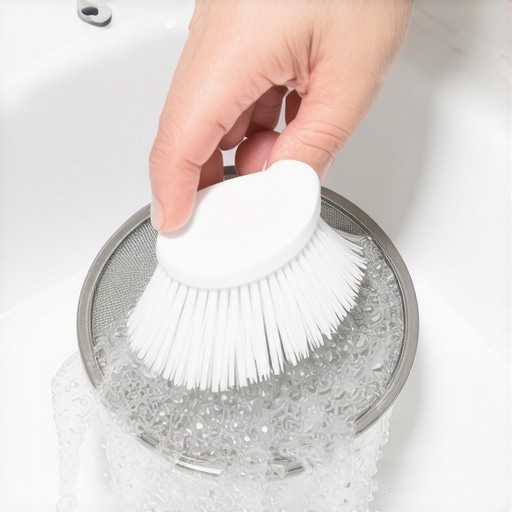
Skipping the descaling cycle will cost you a fortune
We often focus on the big parts, but the invisible enemy is limescale. If you live in an area with hard water, those minerals act like sandpaper on your seals and sensors. You might not see it, but the real cost of skipping your monthly descaling cycle shows up in your energy bill and eventually in a dead heating element. I personally run a high-temp cleaning cycle with a dedicated descaler once every thirty days. It keeps the internal sensors calibrated and ensures the water temperature stays consistent. If you want to dive deeper into the electrical side, you should also learn the specific way to test a thermal fuse for continuity, as this is often the component that blows when a machine overheats due to scale-clogged spray arms.
How do I maintain my machine’s performance as it ages?
The secret to keeping an older dishwasher efficient is a combination of physical cleaning and digital awareness. As your machine ages, you need to transition from just ‘fixing things’ to managing its environment. This means ensuring your detergent choice matches your water hardness and checking that your firmware is current. We are entering an era where how smart diagnostic apps are changing home appliance repair is becoming the new standard. I predict that within the next five years, we won’t even need a pencil to test a float switch; the machine will send a notification to your phone the moment it feels a 1% increase in resistance.
Smart apps are the future of home repair
Even if you have an older model today, the trend is clear: appliances are becoming more data-driven. This is why I always emphasize that why firmware updates are essential for new smart dishwashers cannot be ignored. These updates often include better algorithms for sensor sensitivity, which can prevent the very floods I mentioned earlier. My advanced tip for you today? Don’t wait for a leak. Go pull your bottom rack out right now, remove that circular filter, and give it a thorough scrub with a soft brush. You might be surprised at what is hiding down there, waiting to ruin your Saturday.
What I Learned After Spending $300 on a Clogged Float
The most expensive lesson I ever learned was that a multimeter can lie, but physics won’t. I have seen homeowners replace entire control boards because they saw a ‘ghost’ voltage reading, while the float switch was simply bound up by a tiny plastic bread tie. My lightbulb moment was realizing that the majority of dishwasher failures are mechanical obstructions, not electronic fry-outs. It taught me to always start with the simplest physical interaction before suspecting the brain of the machine. Trusting your senses—the click of a switch or the grit of old soap—is often more reliable than chasing a wiring diagram for hours.
#IMAGE_PLACEHOLDER_E#
The Bare-Minimum Kit for Every Dishwasher Owner
Besides the pencil and the soft brush, I always keep a business card taped to the inside of my utility cabinet. It is my favorite tool for learning how to test a door latch with a business card, ensuring the seal is tight enough to engage the sensor without damaging the gasket. I also recommend hunting for the original manufacturer’s tech sheet—that folded piece of paper usually tucked behind the bottom kickplate. It contains the specific diagnostic codes you will need when identifying the top signs your dishwasher needs professional diagnostics. Between that sheet and your pencil, you are better equipped than many entry-level techs.
Master Your Machine One Click at a Time
The journey from a flooded kitchen to a confident DIYer starts with a single click. Don’t let the complexity of modern machines intimidate you; they are essentially just boxes of water and sensors. By focusing on simple mechanical checks first, you protect your wallet and your appliance’s lifespan. Mastering troubleshooting dishwasher problems is really just about patience and observation. If you ever hit a wall and your machine is still under contract, you can appeal a rejected extended warranty claim by providing the documented maintenance records you have been keeping. Have you ever found something bizarre wedged under your float switch? Let me know below.