

I remember standing in my kitchen at midnight, staring at a flashing “F4” on my control panel like it was a countdown timer for a bomb. I’d just finished a massive batch of lasagna for the neighbors, and the thought of hand-washing those oily, cheese-crusted pans made me want to sit on the floor and weep. My first instinct? I panicked and started pressing every button at once, which—pro tip—is exactly how you accidentally lock the child safety feature and make your life ten times harder. I spent years thinking these codes were just a manufacturer’s way of forcing an expensive service call, but I was dead wrong. That moment was my wake-up call that I needed to stop guessing and start learning the language of my appliances.
Stop Ignoring the Numbers and Start Listening to Your Machine
Those numeric error codes aren’t just there to annoy you; they are actually your dishwasher’s only way of asking for help. After I once spent two hundred dollars on a technician just to find out a tiny peach pit was stuck in my pump, I realized that troubleshooting dishwasher problems myself was the only way to keep my sanity and my savings account intact. These codes are specific map coordinates for a failure. For instance, did you know that modern appliances are designed to last significantly less time than the steel-heavy beasts our parents owned? According to a report by the Association of Home Appliance Manufacturers (AHAM), the average lifespan of a dishwasher is now only about 9 to 12 years. This shift means that understanding appliance diagnostics is no longer just a hobby for the handy—it’s a survival skill for any modern homeowner. When that screen flashes, it is giving you a shortcut to the problem, whether it’s a drainage issue or a heating failure.
Is a DIY Repair Actually Going to Save Me Money?
You might be worried that poking around in the guts of an eight-hundred-dollar machine will just result in a flooded kitchen or a voided warranty. Believe me, I’ve been there. I once tried to test a door latch using a screwdriver handle and almost snapped the delicate plastic housing because I didn’t know my own strength. But here is the secret: most error codes are related to simple maintenance issues that don’t require a degree in engineering. Often, it’s as simple as clearing the air gap to stop water from backing up or cleaning spray arm nozzles that have become choked with mineral deposits. Today, I’m going to show you how to read these codes so you can decide if it’s a five-minute fix you can do in your pajamas or if you really need to reach out to a professional. Have you ever seen a code on your screen and just walked away, hoping it would disappear if you ignored it long enough? Tell me your most frustrating “machine-won’t-start” story. We’re about to dive into the most common codes and what they actually mean for your Saturday afternoon plans. Whether you are fixing the dreaded error code that halts a cycle or just trying to figure out the secret diagnostic mode hidden in your panel, I’ve got your back. Let’s get that machine back to work.
Force Your Dishwasher to Tell the Truth
Entering the diagnostic mode is like having a secret handshake with your appliance. Most modern machines won’t just volunteer their internal status; you have to coax it out of them. I remember the first time I successfully unlocked the secret diagnostic mode on my Samsung. I felt like a hacker in a cheesy 90s movie, but instead of breaking into a bank, I was just trying to figure out why the water wouldn’t heat up. Usually, this involves a specific sequence of button presses—like ‘Normal-Heated Dry-Normal-Heated Dry’—within a few seconds. Once you are in, the machine runs a self-test that cycles through the drain pump, the heating element, and the water inlet valve. This is where you stop guessing. If the machine hums during the drain cycle but no water moves, you aren’t looking at a computer glitch; you’re looking at a mechanical block.
Hunt Down the Clog Before It Hunts You
Water drainage is the number one cause of those 4E or F-series error codes. Think of your drain hose like a straw; if there is a kink or a piece of plastic wrap stuck in it, the pump can spin until it dies, but the water stays put. I once spent an entire Saturday afternoon pulling my machine out of the cabinet only to realize I had a tiny piece of a broken glass wedged in the pump impeller. If I had known how to clear a blocked impeller with a shop vacuum, I could have sucked that glass shard out through the filter housing in five minutes flat. Before you buy a single part, check the easy stuff. Ensure you are clearing the air gap or checking the garbage disposal connection, as these are the most common bottlenecks. 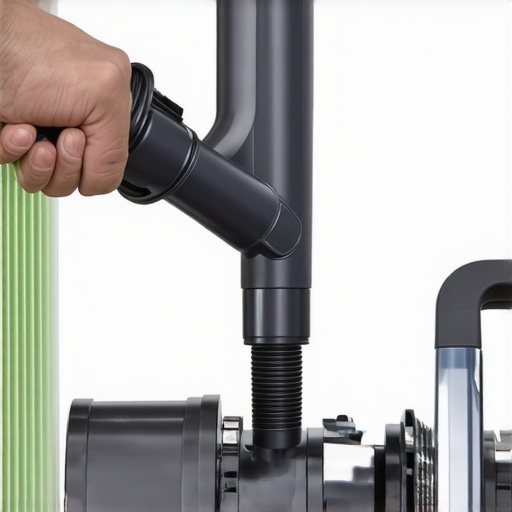
Why Your Float Switch is the Brain of the Operation
If your dishwasher refuses to fill, or if it overflows like a bubble bath gone wrong, your float switch is likely the culprit. This little plastic mushroom-shaped piece at the bottom of the tub acts as the machine’s flood gate. When the water rises, the float lifts, clicking a switch that tells the water valve to shut off. If it’s stuck because of a stray spoon or a layer of grease, the machine gets ‘confused.’ You don’t need a degree to check this. You can actually learn how to test your dishwasher’s float switch with a pencil just by clicking it up and down to hear for a crisp ‘click’ sound. If it’s silent, the electrical continuity is gone, and you’ve found your culprit.
Avoid the Maintenance Mistakes That Void Your Warranty
Here is the hard truth: being a DIY hero can sometimes backfire if you aren’t careful about documentation. I’ve seen homeowners lose out on a free motor replacement because they couldn’t prove they’d performed basic upkeep. Knowing how appliance diagnostics can save your warranty benefits is vital. If you find a code, write it down and take a photo of the display. Many manufacturers will deny a claim if they see lack of maintenance, such as a completely clogged sump filter or a calcified heating element. While you are poking around, listen to the machine. Being able to identify a dying circulation motor by its pitch—that high-pitched squeal like a jet engine—can help you tell the warranty provider exactly what is wrong before they even send a tech out. If the issue is electrical, like the machine won’t power on at all, you might be testing your thermal fuse for continuity before calling it quits. This little fuse is a safety guard that blows if the machine overheats, and replacing it is often a ten-dollar fix compared to a five-hundred-dollar new control board.Everyone tells you to scrape and rinse every single speck of food before loading the rack, but I’m here to tell you that’s the fastest way to get cloudy glasses and a poorly cleaned load. Modern dishwashers are smarter than we give them credit for. They use turbidity sensors to measure how ‘dirty’ the water is during the first rinse. According to research from Consumer Reports, pre-rinsing is not only a waste of water—thousands of gallons a year—but it also tricks your machine into thinking the load is cleaner than it is. When this happens, the sensors tell the control board to use a shorter, cooler cycle, which often leaves real grease behind. This is exactly why pre-rinsing dishes actually makes your machine less efficient and can lead to a ‘gritty’ residue on your plates.
Why Does Your High-End Machine Suddenly Take Three Hours to Finish?
It feels counterintuitive, but the longer your machine runs, the less energy it’s usually consuming. I often hear from people frustrated that their new ‘Eco’ model takes twice as long as their 1995 powerhouse. The nuance here is in the water heating and the pump speed; lower pressure and slower heating are significantly more energy-efficient than a high-blast, high-heat thirty-minute cycle. You’ll see this when your new machine takes longer but uses less power. However, there is a trap: if you rely exclusively on these low-temp cycles, you’ll eventually deal with ‘fatty’ buildup in the drain lines. I once had a client who only used ‘Eco’ mode for a year, and her internal plumbing looked like a cholesterol-clogged artery. You have to run a hot ‘Heavy Duty’ cycle occasionally just to blast out the sludge. 
Avoid the ‘Natural’ Cleaning Advice That Ruins Hardware
One of the most common myths I see on social media is that a bowl of vinegar in every load will keep your machine sparkling. Stop doing that immediately. While vinegar is a great descaler for coffee pots, its high acidity can degrade the specialized rubber gaskets and seals inside a dishwasher over time. I’ve seen countless leaks caused by people using distilled vinegar every week until their door seal literally turned to mush. If you really want to protect your investment, focus on understanding appliance diagnostics so you can catch real mechanical failures rather than relying on home remedies. Also, be incredibly wary of cheap replacement parts from giant online marketplaces. They look identical, but third-party parts frequently void your service plan. If a tech comes out and sees a non-OEM heating element, they’ll close your claim faster than you can say ‘warranty.’ Have you ever tried a ‘hack’ you saw online only to have it backfire? I’d love to hear your horror stories in the comments—we’ve all been there.
Stop Guessing and Start Measuring with Real Tools
If you really want to graduate from ‘handy neighbor’ to ‘home appliance expert,’ you need to stop relying on your eyes alone. I eventually invested in a basic multimeter, and it changed everything. Instead of replacing a control board because I assumed it was dead, I started using a voltmeter to check your power cord connection safely. It turns out, about 20% of the ‘dead’ machines I’ve looked at just had a loose wire nut in the junction box. If you’re feeling extra adventurous, I recommend using a thermal camera to find heat leaks in your dishwasher door. It sounds like overkill, but seeing that bright orange heat bleed through a worn-out seal tells you exactly where your energy—and your money—is escaping. This kind of data-driven repair is the only way to avoid the ‘parts cannon’ approach, where you just keep buying new components until the machine finally starts.
How do I keep my dishwasher alive for another ten years?
The secret to longevity isn’t just cleaning the filter; it’s about maintaining the systems that interact with the water. If you live in an area with hard water, you must learn how to unclog the internal water softener valve. Mineral scale is a silent killer that eats through heating elements and seizes up pumps from the inside out. According to technical bulletins from the Energy Star program (U.S. Department of Energy), even a slight calibration error in a turbidity sensor can increase annual energy consumption by over 15%. This is why the secret tech menu that calibrates your water sensors is more than just a novelty—it’s a precision tool for efficiency. You should also be proactive about how to spot corrosion in your control board wiring early, especially if you notice any steam escaping from the top of the door. 
Digital Diagnostics are the New Standard
The trend I’m seeing—and where the industry is heading—is a shift away from mechanical switches toward software-driven maintenance. In the next few years, you won’t just listen for a rattle; your phone will alert you that a bearing is vibrating at a frequency that suggests failure in three weeks. This is why why firmware updates are essential for new smart dishwashers. A software patch can literally change the way a pump operates to prevent cavitation and extend its life. However, even with all this tech, you need to know when to trust a warranty for dishwasher repairs versus when to pick up the screwdriver. If you see top signs your dishwasher needs professional diagnostics, such as a burning smell or persistent electrical faults, don’t risk your safety. My advice? Try entering your machine’s tech mode tonight just to see what the sensors are reporting. It’s the best way to get a pulse on your machine’s health before a real crisis hits.
Three Hard Truths About Living With Modern Dishwashers
Looking back at my years of fixing my own kitchen gear, the biggest “lightbulb” moment was realizing that most appliance failures aren’t actually failures—they’re just neglected conversations. First, your machine is cleaner when you don’t pre-rinse, but it will live longer if you clean the filter every single month. Second, if you don’t learn how to document intermittent noises for a repair claim, you’ll likely get a “could not replicate issue” note from a technician. Lastly, the best repair is the one you do before the water is on the floor. I’ve learned that staying proactive is the only way to avoid the stress of an emergency repair bill.
My Secret Weapons for Household Repairs
You don’t need a professional workshop, but a few specific items will make troubleshooting dishwasher problems significantly less intimidating. I always keep a digital multimeter in my junk drawer for using a voltmeter to check your power cord connection safely; it eliminates the guesswork of electrical faults instantly. I also swear by a high-quality shop vacuum—it’s better than any towel for clearing out a flooded sump. Finally, keep your manufacturer’s digital service manual bookmarked on your phone so you aren’t scrolling through random forums when a code pops up.
Save Your Kitchen and Your Sanity Today
Don’t let a blinking light convince you that you need to spend a thousand dollars on a new unit. Most of the time, your dishwasher just needs a little bit of your time and attention to get back to peak performance. Whether it’s a simple cleaning or a deep dive into the electronics, you have the tools to handle it. Knowing when to trust a warranty for dishwasher repairs versus when to pick up a screwdriver is the mark of a smart homeowner. You’ve got this—get back in there and fix it! Have you ever found a weird object—like a toothpick or a cherry pit—inside your pump that was causing an error code? Let me know in the comments below!