

It was a Tuesday evening, and I was staring at a stack of lasagna-caked plates that I really didn’t want to wash by hand. I hit the ‘Start’ button on my trusty dishwasher, but instead of that familiar hum, I got a pathetic little click and a flickering light. My heart sank. I’d been through this before, and my first instinct was to assume the motor had given up the ghost. But after pulling off the front panel and squinting at the control board, I saw it: a tiny, fuzzy patch of turquoise crust creeping along the wire harness. That ‘green death’ had quietly eaten through a three-cent connection, turning my expensive appliance into a very heavy cabinet. If I’d looked just a month earlier, I could have saved myself a massive headache. Today, I’m going to show you exactly how to catch these signs of corrosion before they leave you scrubbing plates in the sink.
Keep the Green Death Away From Your Control Board
Steam is a sneaky thing. We love it for getting our dishes sanitized, but for the delicate electronics hidden behind your buttons, it’s a constant assault. Most people think their appliances are sealed tight, but the reality is that moisture and heat are always looking for a way in. I remember one of my biggest rookie mistakes: I once spent nearly $400 on a brand new motherboard because I didn’t realize that troubleshooting dishwasher problems often starts with just looking at the copper. I replaced the whole brain when all I needed was to clean a single pin.
Does a little bit of discoloration actually matter?
You might be tempted to ignore a tiny speck of rust or a slightly dull wire. Don’t. Corrosion in electronics is autocatalytic, meaning once it starts, the chemical reaction actually produces more of the environment it needs to grow. According to the experts at the Association for Materials Protection and Performance (AMPP), corrosion is a multi-billion dollar problem in the consumer sector, and most of it is preventable through early detection. In your kitchen, that tiny green dot is a high resistance point. It generates heat, which causes more damage, until the trace finally snaps. If you’ve noticed that your secret diagnostic mode is throwing weird, inconsistent codes, you are likely looking at a connectivity issue rather than a component failure. Have you ever opened your machine only to find a weird ‘burnt sugar’ smell or a fuzzy wire? It’s much easier to catch this if you know the top signs your dishwasher needs professional diagnostics versus a simple DIY cleaning. If we catch it now, we can save the board. If we wait, you’re shopping for a new machine. Let’s get into the specifics of what that early damage actually looks like.
Kill the Power and Open the Hood
Before you even think about touching a circuit board, you have to cut the juice. This isn’t just about safety; it’s about preventing a short circuit that could instantly fry the components you are trying to save. I once forgot this step and watched a tiny spark jump from my screwdriver to a capacitor—it was a $150 mistake I’ll never make again. Unplug the unit or flip the breaker. Once the power is dead, you’ll usually find the control board tucked behind the front door panel. You will need a Torx or Philips head screwdriver to remove the inner door liner screws. Be careful as you lower the panel; the wire harnesses are often short, and you don’t want to put tension on the plugs. While the door is open, it’s a great time to check if you need to test a door latch using a screwdriver handle, as a loose latch often allows the very steam into the panel that causes the corrosion in the first place.
Hunt for the Tell-Tale Green Residue
Now that the board is exposed, grab a bright LED light. You are looking for ‘The Green Death’—that chalky, turquoise oxidation that forms on copper pins. Think of it like a slow-moving digital cancer. It starts at the edge of a connector and works its way toward the sensitive chips. I like to use the flashlight trick for finding micro-cracks, but instead of looking at spray arms, you are looking for dull, grayish spots on the silver solder joints. If a joint looks ‘frosty’ instead of shiny, the corrosion has already started beneath the surface. If the board looks clean but the machine won’t start, you might actually be testing your thermal fuse for continuity without a pro to see if a simple overheat killed the circuit. 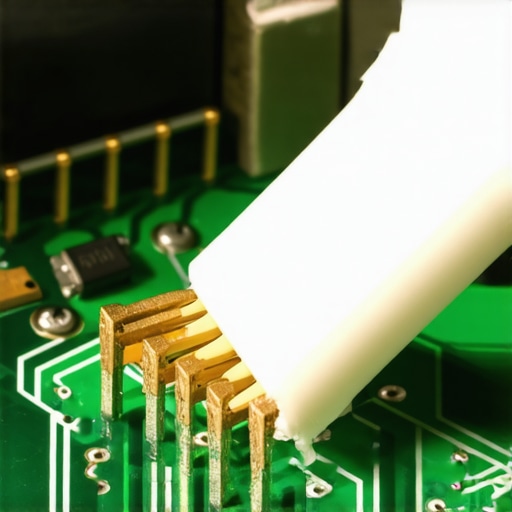
Scrub Away the Crust Without Killing the Electronics
If you find corrosion, do not use water or a wire brush. You need 91% or higher isopropyl alcohol and a soft-bristled toothbrush. I once tried using a standard kitchen scrub pad on a control board, and I ended up scratching the protective ‘conformal coating’ right off the traces, making the problem ten times worse. Dip the brush in alcohol and gently vibrate the bristles over the affected pins. The goal is to dissolve the salt and oxidation without bending the pins. Once the green is gone, dry it with a blast of canned air. This is the foundation of understanding appliance diagnostics; if the physical connection is broken, no software reset in the world will help you.
Stop the Moisture From Coming Back
Cleaning is only half the battle. You have to address why the steam got in there. Often, it’s a microscopic leak in the keypad overlay or the gap in your door gasket you cant see with the naked eye. To prevent future ‘Green Death,’ apply a tiny amount of dielectric grease to the wire harness connectors before plugging them back in. This grease doesn’t conduct electricity, but it creates a waterproof seal that keeps moisture away from the metal. It’s like putting a raincoat on your electronics. If you skip this, the humidity from the next ‘High Temp Wash’ will start the corrosion process all over again before the month is out.
The common wisdom in the DIY community is that if you have an extended service plan, you are bulletproof. That is a dangerous myth. I have seen countless homeowners get stuck with a $600 bill because they assumed their contract covered everything. In reality, the warranty company is not your friend; they are a business looking for a way out. The moment a service technician opens your machine, they are looking for ‘The Red Flag’ that shifts the cost from the company to your credit card. Most people think understanding appliance diagnostics is just about fixing the machine, but it is actually about protecting your wallet during a claim.
Your Error Code is Probably Lying
Most beginners trust the digital display like it is the gospel truth. If the screen says ‘Drain Error,’ they buy a new pump. This is a massive mistake. In my experience, a sensor error is often a symptom, not the cause. For example, a machine stopping mid-cycle might look like a control board failure, but it could be that the eco dry setting is interacting poorly with your local humidity levels, causing the sensors to trip. According to data from Consumer Reports, nearly 20% of new dishwashers require a major repair within five years, yet many of these are misdiagnosed. I once saw a guy replace his entire motor because of a ‘circulation’ code, when the real culprit was just a buildup of grease in the impeller. If you learn how appliance diagnostics can save your warranty benefits, you will know to verify the mechanical failure before the tech arrives.
Why did the warranty provider deny your claim?
The number one reason for a rejected claim is ‘maintenance neglect.’ If the technician finds a single bone fragment or a collection of glass shards in the sump, they can claim you didn’t maintain the unit. This is why why your warranty claim was denied due to lack of maintenance is the most common story I hear. They treat your dishwasher like a luxury car; if you don’t change the oil, you pay for the engine. Before you call for service, make sure the interior is spotless. Have you ever fallen into this trap? Let me know in the comments. I have seen claims denied for the weirdest reasons, including why your warranty claim got denied because of your garbage disposal. If your disposal is backed up, it creates backpressure that the dishwasher interprets as a pump failure.
The Trap of the Service Plan Fine Print
Don’t assume that ‘Full Coverage’ means what you think it means. You need to understand the real difference between service plans and manufacturer warranties. A manufacturer warranty covers factory defects, while a service plan is essentially an insurance policy. Many plans have a ‘no lemon’ clause, but they also have a ‘hard water’ exclusion. If you live in an area with high mineral content and haven’t used a softener, they can void the entire repair. If you are already in a dispute, knowing how to appeal a rejected extended warranty claim is your only recourse. Keep your receipts for detergent and rinse aid; proving you used high-quality supplies can sometimes be the leverage you need to get a denial overturned. Remember, the goal of the diagnostic phase is to prove the machine failed despite your perfect care, not because you ignored the ‘Green Death’ we discussed earlier.
If you really want to stop being at the mercy of a warranty technician, you need to own the tools they carry. I am not talking about a massive chest in the garage; you just need three specific items to handle 90% of what we have discussed. First and foremost, ditch the ‘test light’ and get a digital multimeter. I personally use a Klein or a Fluke because I need to know the exact ohms of resistance, not just if a circuit is ‘live.’ When you are testing your heating element for ground faults with a meter, a difference of five ohms is the gap between a working heater and a fire hazard. The same applies to your safety sensors; testing a thermal fuse for continuity without a pro kit is incredibly simple once you realize a ‘0’ on the screen means your machine lives to wash another day.
Ditch the Guesswork with Real Tools
Beyond the meter, I recommend a set of long-reach Torx drivers and a telescopic inspection mirror. That mirror is how I find the leaks that the ‘Green Death’ feeds on before they reach the control board. If you can see water tracking down the side of the tub, you have caught the problem before it becomes an electrical nightmare. I have also found that keeping a small tube of dielectric grease in the kitchen drawer is better than any insurance policy. By applying it to the harness connections, you are creating a physical barrier against the humidity that ruins modern electronics. 
Stop Killing Your Seals with Over-Concentrated Pods
We need to talk about the ‘soap trap.’ Most of us use those convenient multi-action pods, but in my experience, they are a primary cause of premature component failure in soft-water environments. They are often too concentrated for a standard cycle, leading to an over-sudsing condition that pushes moisture into places it shouldn’t be. When you look at the impact of powder vs pods on your machines lifespan, you will see that high-quality powder allows you to dose for your specific water hardness. According to the 2023 Yale Appliance Reliability Report, dishwashers remain one of the most serviced appliances in the home, often due to user error regarding detergents and maintenance. If you switch back to traditional powder, you reduce the chemical stress on your door gaskets and internal seals significantly.
How do I maintain my machine’s peak performance over time?
Maintenance isn’t a once-a-year event; it is a series of small habits. Every three months, you should be doing a deep dive. This means more than just rinsing the filter. You need to know how to deep clean the hidden spray arm bearings where grit and hair tend to wrap around the plastic spindles. While you are down there, check the plumbing. I cannot tell you how many ‘pump failures’ I have fixed just by ensuring the drain line is positioned correctly. Understanding why your service tech always checks the drain hose high loop is the easiest way to prevent dirty sink water from backflowing into your clean dishes. If you keep the water flowing out and the steam sealed in, your control board will never see that green oxidation.
The Future of Kitchen Diagnostics
Looking ahead, the trend is moving toward ‘self-healing’ appliances and AI-driven troubleshooting. We are already seeing machines that can detect a slight increase in motor amperage and alert your phone before the pump actually seizes. This is why why firmware updates are essential for new smart dishwashers; they often contain new sensor calibration data that prevents the ‘Green Death’ by managing fan speeds and humidity more effectively. I predict that within five years, we won’t be looking for green crust at all—the machine will tell us exactly which pin is corroding before the dishwasher even stops running. For now, your best bet is to take control yourself. Go ahead and enter the secret diagnostic mode hidden on your touch control panel right now—just to see what your machine is trying to tell you before it is too late.
The Costly Mistake That Taught Me to Trust My Eyes Over the Manual
Over the years, I have learned that the ‘obvious’ fix is rarely the right one. Here are the most important lessons I have gathered from hundreds of repair hours:
- The board is often salvageable: Manufacturers want you to buy a whole new $300 module, but many ‘dead’ boards are simply suffering from surface oxidation. Cleaning it is essentially free; replacing it is a choice.
- Maintenance is your best defense in a claim: If you want to know when to trust a warranty for dishwasher repairs, look at your records. Proving you did not neglect the unit is the only way to win a denied claim appeal.
- Documentation saves real money: Always take photos of the corrosion before you clean it. If you need to how to prove your appliance failure was caused by a power surge rather than wear and tear, that ‘before’ photo is your strongest evidence.
Three Tools That Saved My Sink from Eternal Piles of Dishes
You do not need a professional workshop to handle these repairs. These are the three items I never open a dishwasher without:
- A Digital Multimeter: Stop guessing if a part is broken. Whether you are checking for voltage or testing your dishwashers float switch with a pencil to check for mechanical hang-ups, the meter gives you a definitive ‘yes’ or ‘no’ on the component health.
- Dielectric Grease: This is my secret weapon against the ‘Green Death.’ A tiny dab on your wire harness pins creates a moisture-proof seal that prevents steam from ever touching the copper.
- A Voltmeter: I always recommend using a voltmeter to check your power cord connection safely before you assume the control board has fried. Often, the problem is just a loose wire nut in the junction box.
Take Control of Your Kitchen Before the Rust Takes Over
Do not let a flickering light or a strange error code intimidate you into a multi-thousand-dollar purchase. Most of these machines are simpler than they appear, and with a little patience and a soft toothbrush, you can extend the life of your appliance by years. Mastering troubleshooting dishwasher problems is not just about saving money; it is about the satisfaction of knowing you are the master of your own domain. Go grab your screwdriver and take a peek behind that panel today—you might just save your dishwasher’s life. Have you ever found a mysterious green crust or a ‘burnt sugar’ smell inside your control panel? Let me know your repair stories in the comments below.