

There I was, standing in my kitchen at 11:30 PM, staring at a Tupperware lid that had just dumped a cold puddle of water all over my clean socks. It is that silent scream moment, isn’t it? You spend all that money on a high-end machine, you wait two hours for the cycle to finish, and yet you still have to stand there with a tea towel like it is 1954. I used to think my dishwasher was just getting old or that I needed a professional to come in for some expert dishwasher diagnostics. I even went as far as testing the heating element with a 9-volt battery because I was convinced the heater was toast. Spoiler: it was not. The real culprit was much smaller, much cheaper, and honestly, a little embarrassing that I missed it for so long. I remember sitting on the floor with a multimeter I barely knew how to use, feeling like I was failing at basic adulthood. Have you ever found yourself ready to give up on your machine just because it cannot seem to finish the job?
Get Your Dry Socks Back and Your Countertops Clear
[IMAGE_PLACEHOLDER] We often blame the hardware when our dishes come out soaking wet. We think about the cost of the heat dry cycle or worry that we need a whole new rack because of some perceived mechanical failure. But here is the thing: modern dishwashers are designed radically differently than the ones our parents had. Older units were like ovens; they just baked the water off using massive amounts of electricity. New ones? They use physics and a process called condensation drying. If you are noticing that your plastic tubs stay wet while the plates are dry, you are not crazy—you are just fighting against how the machine was built to work. Modern stainless steel tubs are meant to cool down faster than the dishes, pulling the moisture off the plates and onto the walls of the machine.
Does Rinse Aid Actually Do Anything Useful?
I used to be a total skeptic about this. I thought rinse aid was just a marketing gimmick to get another five dollars out of me every month. I was wrong. I spent years skipping that little blue liquid, only to be left with spotted glasses and damp bowls. According to experts at Energy Star, modern dishwashers are actually engineered to rely on rinse aids to break the surface tension of water, allowing it to slide off the dishes before the cycle even ends. It is not just about the shine; it is about the physics of shedding water. Without it, the water just sits there in stubborn droplets, pools, and cools down before it can evaporate. Today, we are going to look at the one-minute adjustment that changes everything, so you can finally stop hand-drying your clean dishes and let the machine do what you paid it to do.Before you even touch the “Start” button, you need to think about the temperature of the water entering the machine. Most people do not realize that the first few minutes of a cycle are often a pre-wash. If the water in your pipes is cold, your machine spends half the cycle just trying to warm up the tub. I learned this the hard way during a freezing February in Michigan. I thought my machine was broken because the dishes were coming out greasy and wet. It turns out, why running the kitchen sink hot prevents cold starts is actually about bypassing that initial cold slug of water. Think of it like a marathon runner; you would not sprint without warming up your muscles first. I remember one Saturday morning, I was so frustrated with a “clean” load of wet dishes that I almost threw a ceramic plate through the window. I had replaced the soap and the filter, but the water was entering at lukewarm temps. I spent 30 seconds running the hot water tap before the next cycle, and like magic, the dishes were finally dry.
Master the Geometry of Your Bottom Rack
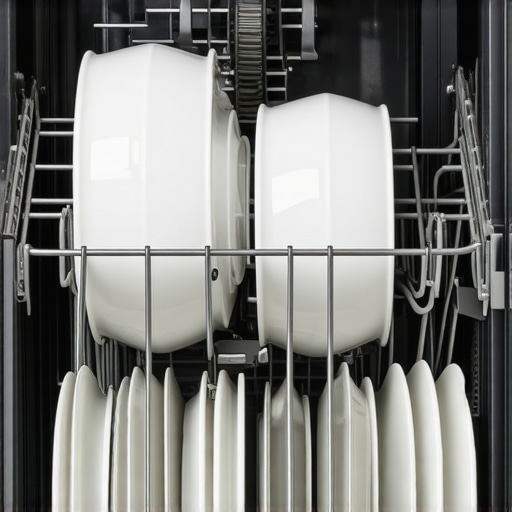 If you are cramming bowls on top of each other like a game of Tetris, you are killing the drying process. Water gets trapped in those little “pockets” where the dishes overlap, and no amount of heat will reach them. It is about the path of least resistance. You need to how to optimize your dishwasher rack for maximum flow so the steam can actually escape the surfaces and hit the stainless steel walls. You also need to ensure that tall plates are not blocking the movement of the middle sprayer. Use the simple way to check if your sprayer is spinning by manually rotating it before you shut the door. If it hits a plate, that plate is blocking the water—and the heat—from reaching half your load.
Watch Out for the Plastic Trap
Are your Tupperware containers always the only things left wet? You are not imagining it. Plastic is a terrible conductor of heat. While your ceramic plates stay hot and evaporate water, plastic cools down instantly. This is exactly is the eco dry setting making your plastic tubs stay wet as modern energy-saving modes often skip the high-heat drying phase that plastics desperately need. If you have a heavy load of plastic, you might need to avoid the “Eco” settings entirely.
Check the Components Before Calling a Pro
Sometimes the issue is mechanical, but that does not mean it is expensive. I once sat on my kitchen floor for three hours, convinced I needed a new $500 machine, only to find out a $10 fuse had popped. Before you panic, you can try testing your thermal fuse for continuity without a pro. It is a simple pass/fail test. If the fuse is blown, the heater will not kick on, and your dishes will stay soaking wet every single time. To do this, you will need to know the only multimeter settings you need for appliance repair to avoid blowing out your meter or getting a false reading.
Inspect the Heater for Physical Damage
Check the big circular loop at the bottom of the tub. If you see white “calcified” spots or black charred marks, it is likely failing. You should also how to verify your heating element is not touching plastic tubs or fallen spatulas, as this can cause it to overheat and burn out prematurely. If you do find a problem here, top signs your dishwasher needs professional diagnostics can help you decide if it is time to use your warranty or grab a wrench yourself.
Most people assume that once they have a warranty, they are essentially immune to repair bills. In my experience, that is exactly when the real headache begins. I have spent enough time arguing with service departments to know that a piece of paper is not a guarantee of service; it is a legal document full of trapdoors. Everyone tells you to call the manufacturer the second something breaks, but I have found that understanding appliance diagnostics improving your warranty claims is far more effective than just making a phone call. If you show up with data, they cannot brush you off as easily. You need to know how to document intermittent noises for a repair claim because if the tech arrives and the machine is quiet, they will charge you for the visit and leave.
Your Warranty is Only as Good as Your Evidence
The biggest myth in the appliance world is that warranties cover every mechanical failure. They don’t. Manufacturers are looking for any reason to label a breakdown as “user error.” For example, did you know that why your warranty claim for a clogged pump might get denied often comes down to something as small as a sticker from a new peach? If they find a piece of debris that should have been scraped off, they consider it neglect. This is where how appliance diagnostics can save your warranty benefits. By running your own tests first using troubleshooting dishwasher problems expert diagnostics repair tips, you can ensure that you are presenting a clear mechanical fault rather than a maintenance oversight.

Why Does the Technician Always Blame My Choice of Soap?
It feels like a deflection, right? You tell them the motor is humming, and they ask if you are using pods or powder. But there is a technical reason for this. Excessive sudsing can actually trick sensors and put unnecessary strain on the seals. A study by the Public Interest Research Group (PIRG) highlights that “service plans” are often structured to profit from these minor environmental variables rather than covering major component failures. This is why the real difference between service plans and manufacturer warranties matters; one is a guarantee of build quality, the other is essentially an insurance product with many exclusions. If you have been seeing white film, it might be the truth about tablet vs powder detergent residue build up causing the issue rather than a pump failure.
The One Mistake That Voids Everything Instantly
The most dangerous “trap” for a DIY enthusiast is the lure of cheap, third-party parts. I know it is tempting to save $60 on a pump from a random online marketplace, but why third-party parts frequently void your service plan is a lesson you do not want to learn the hard way. The moment a technician opens your machine and sees a non-OEM (Original Equipment Manufacturer) part, your entire coverage is typically terminated. Even if that part didn’t cause the current problem, they will use it as a reason to walk away. Before you grab a wrench, you must decide when to trust a warranty for dishwasher repairs and when to take the risk of a solo fix. Have you ever fallen into this trap or had a claim denied for a silly reason? Let me know in the comments.
If you want to move beyond just crossing your fingers every time you hit “Start,” you need to get comfortable with a multimeter. I used to be terrified of them—too many buttons, too many symbols. But once I learned the only multimeter settings you need for appliance repair, the whole machine stopped being a black box. For instance, when my machine wouldn’t stop filling, I didn’t call a plumber. I spent five minutes testing the float switch to fix an overfill error. It turns out, it was just a bit of gunk holding the switch down. I personally keep a 1/4-inch nut driver and a set of Torx bits in my kitchen junk drawer. Why? Because 90% of dishwashers use those two specific fasteners for everything from the kickplate to the inner door panel. Having them handy means I can check a problem in the five minutes while my coffee is brewing, rather than letting it fester for a month. According to technical documentation from the Association of Home Appliance Manufacturers (AHAM), routine maintenance of filtration systems can extend the lifecycle of a modern dishwasher by up to 40%. These manuals often specify that the resistance of a heating element should be between 10 and 50 ohms. If you measure it and see “OL” or zero, you have found your smoking gun without spending a dime on a technician. 
Stop Guessing and Start Measuring with a Multimeter
How do I keep my dishwasher running like new for a decade?
Maintenance is not about deep-cleaning the outside; it is about the guts. You absolutely must clear the hidden drain screen that most homeowners never clean. This is where the real horror stories live—shards of glass, labels, and hair. Once a month, I also use a specialized degreaser to find the secret to getting grease out of your filter mesh. If that mesh is clogged, your pump has to work twice as hard, and that is how you end up with a burnt-out motor three years too early.
The Future of Smart Repair and Self-Healing Machines
Looking ahead, I suspect the days of “blinking light” codes are numbered. We are already seeing machines where why your smart dishwasher needs a firmware update to save water is as common as updating your phone. Soon, these machines will use acoustic sensors to “hear” a failing bearing before it even starts to squeak. Until then, you have to be the ears. Learn to reading the hidden blinking lights on your dishwasher brain so you can speak the machine’s language. If you are feeling bold, go grab a basic multimeter and check your door switch today—it is the easiest way to build confidence for bigger repairs.
The Breakthrough Moments in My DIY Journey
I spent years fighting my appliances before I realized that the machine wasn’t the enemy—my lack of data was. One of the biggest shifts for me was learning that how appliance diagnostics can save your warranty benefits isn’t just a theory; it is a shield against being overcharged. I also learned that is the eco dry setting making your plastic tubs stay wet is a design choice, not a defect. Finally, the day I stopped fearing the multimeter was the day I truly started mastering troubleshooting dishwasher problems without the stress of a $200 service call.
Gear and Guides for a Stress-Free Kitchen
You do not need a garage full of tools to keep your kitchen running. I always recommend keeping a 1/4-inch nut driver and a set of Torx bits in your junk drawer for quick access to the kickplate. A standard Digital Multimeter is your best friend for testing your thermal fuse before you commit to buying expensive replacement parts. I also swear by the technical specs provided by the Association of Home Appliance Manufacturers, as they give you the exact resistance levels your components should be hitting.
Own Your Repair Journey Today
The transition from a frustrated homeowner to a confident DIYer starts with a single test. Whether you are checking for the secret to getting grease out of your filter mesh or finally calling a pro after seeing the top signs your dishwasher needs professional diagnostics, you are making progress. Appliance repair does not have to be a mystery. Have you ever found a weird object in your drain screen that was causing a total breakdown? Let me know in the comments below.