

It started with a smell—a faint, funky odor that I tried to ignore by adding more detergent. Big mistake. One night, after a particularly greasy taco Tuesday, my kitchen floor became a swamp. I stood there, soaking wet socks and all, staring at my “clean” dishwasher in betrayal. I’d been diligent, or so I thought, about rinsing my plates. I even knew the secret to getting grease out of your filter mesh, but I was only looking at the top layer. I didn’t realize that underneath the main filter assembly lies a secondary, flat drain screen that acts like a magnet for everything the first filter misses. It was a humbling moment of realization. I was the “handy” guy on the block, yet I was failing at the most basic maintenance. Today, we’re going to find that hidden screen together and save your kitchen floor from a similar fate.
The Day I Realized My Maintenance Routine Was a Lie
My first big mistake was assuming that “self-cleaning” actually meant “I never have to touch this.” I spent years relying on those heavy-duty cycles, thinking the machine was a magical portal that vanished grime into the ether. When the drainage finally failed, I tried to run some appliance diagnostics to save my warranty benefits, only to find that the problem wasn’t a computer error—it was a thick, grey carpet of debris. This hidden screen is often held down by a couple of screws or a plastic clip, and it’s the gateway to your drain pump. If your dishwasher smells like a damp basement despite your best efforts, this is almost certainly the culprit. It’s not just about the smell, though. According to data from the Association of Home Appliance Manufacturers (AHAM), regular maintenance of internal filtration systems can extend the life of your unit by up to four years, yet fewer than 15% of owners ever venture past the primary filter. I was part of that 85% for way too long. I remember pulling out the bottom rack, reaching into the sump, and pulling out a handful of what looked like wet cardboard and dog hair. It was visceral. It was gross. And it was exactly why my dishes looked like they’d been washed in a pond.
Is this hidden screen actually worth the effort to reach?
You might be worried about breaking something or voiding a service plan. I get it. I once spent three hours trying to figure out why my dishwasher detergent door was stuck open, only to realize I’d jammed it with a stray chopstick. We all make silly errors. But reaching this screen isn’t rocket science; it’s just hidden behind a bit of plastic that most people never think to move. Skipping this doesn’t just lead to bad smells; it leads to stagnant water and expensive pump failures. Have you ever noticed a layer of “sand” on your clean coffee mugs? That’s the classic sign your hidden screen is full and recycling junk back onto your dishes. If you’ve ever dealt with a machine that just won’t finish its cycle, this might be the missing piece of the puzzle. Let’s get in there and fix it before you’re forced to call a pro and spend money you could use on literally anything else.
Clear the Deck Before You Dive In
Start by yanking that bottom rack out entirely and setting it on the floor. You need room to breathe. I remember the first time I attempted this; I thought I could just lean over the door and reach. Three minutes in, my lower back was screaming, and I’d dropped a screw into the dark abyss of the sump. Save yourself the headache: get the racks out of the way. Once you have a clear view, look at the bottom spray arm. Most simply pop off with a firm tug or a quarter-turn. If yours is stubborn, check the center hub for a plastic nut. This is the first gatekeeper. If this area is blocked, you’ll likely find the simple way to check if your sprayer is spinning isn’t working because the water pressure is being choked at the source.
Pull the Pin on the Primary Filter
Next, twist out the cylindrical mesh filter you’re probably already familiar with. This is the one most people rinse under the tap. But we aren’t stopping there. Underneath that cylinder is the flat, stainless steel or plastic plate—the secondary screen. This is where the real horror show happens. In my case, I found a petrified piece of bacon and several shards of a broken wine glass that had been pulverized into a fine, sharp silt. To get this plate out, you might need a T15 Torx driver or just to unclip a few plastic tabs. Be gentle. If you force it and crack the plastic, you’ll be searching for how to replace a cracked sump housing without calling a plumber, which is a much bigger Saturday project than we signed up for.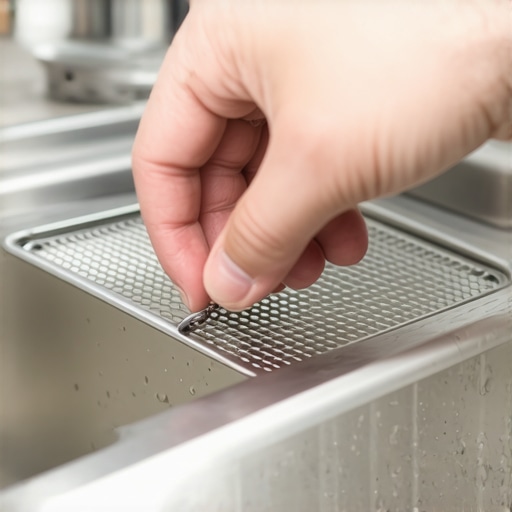
Clean it Right to Avoid a Costly Sump Repair
Once that screen is out, take it to the sink and use an old toothbrush. Don’t just rinse it; scrub it with hot water and a bit of degreasing soap. You might notice a waxy, white buildup—that’s often a sign that why dishwasher pods might be clogging your drain lines is becoming a reality for you, as the outer casing of some pods doesn’t always dissolve at lower temperatures. While the screen is soaking, take a flashlight and peer into the drain hole. This is the ‘sump.’ If you see standing water filled with hair or gunk, use the simple tool for removing hair from a drain pump (even a pair of long-nose pliers works) to clear it out.
How to Prove Your Maintenance Without Voiding the Warranty
Many people are terrified that opening these components will void their coverage. However, knowing how appliance diagnostics can save your warranty benefits actually relies on you performing this basic upkeep. A technician will charge you $150 just to tell you your screen was dirty, and most warranties won’t cover a service call for ‘lack of maintenance.’ By keeping this screen clear, you ensure the motor isn’t overworking, which prevents the kind of hardware failure that requires troubleshooting dishwasher problems with expert diagnostics. Think of this screen like the lint trap in your dryer; if it’s full, the whole system works twice as hard for half the result. Scrub it until you can see light through every single hole in that mesh.Now that your screen is spotless, we need to tackle the most common myth in kitchen maintenance. Most people believe that ‘more is better’—more rinsing, more detergent, and more heat. In reality, being too helpful can actually damage your appliance. For years, I was a serial pre-rinser, thinking I was helping the machine. But here is the contrarian truth: modern dishwashers are smarter than you think. They use turbidity sensors to measure how dirty the water is. If you pre-rinse every plate until it’s spotless, the sensor assumes the load is light and reduces the water temperature and cycle time. This causes a major problem: the fats and oils that are left on the plates don’t reach a high enough temperature to liquefy, leading to a wax-like buildup on that very screen you just cleaned. In my experience, why pre-washing dishes is a waste of time and money isn’t just about saving water; it’s about making sure the machine’s sensors work as intended.
Stop Scrubbing Your Plates Before the Wash
This isn’t just a hunch. A study by the Association of Home Appliance Manufacturers (AHAM) confirms that modern soil sensors are calibrated for dirty plates; removing too much debris prevents the enzymes in your detergent from having anything to latch onto, which can lead to the etching of your glassware. You also need to consider the impact of powder vs. pods on your machine’s lifespan. If you use a high-potency pod on a ‘clean’ load, the excess chemical concentration can eat away at your rubber gaskets over time.
Why Is My Smart Dishwasher Taking Forever to Finish?
If your machine seems to get stuck on the last ten minutes of a cycle for an hour, it might not be a mechanical failure at all. This is often a logic error caused by the machine trying to compensate for poor drainage or a temperature spike. Sometimes, why your smart dishwasher needs a firmware update to save water is the answer. Manufacturers release software patches to fix these ‘phantom’ cycle delays. Before you assume the motor is dead, check for digital updates through your appliance’s app.
The Tiny Plug That Ruins Your Warranty
Here is the ultimate ‘oops’ factor that I see constantly. If you recently installed a new garbage disposal and now your dishwasher won’t drain, don’t call a repairman just yet. There is a plastic ‘knockout’ plug inside the disposal’s dishwasher inlet. If you forget to remove it, the water has nowhere to go. I’ve seen homeowners pay $200 for a service call just to have a pro poke a screwdriver through that plastic tab. Even worse, why your warranty claim got denied because of your garbage disposal is a very real threat; most manufacturers classify this as an ‘installation error’ rather than a ‘mechanical failure.’ 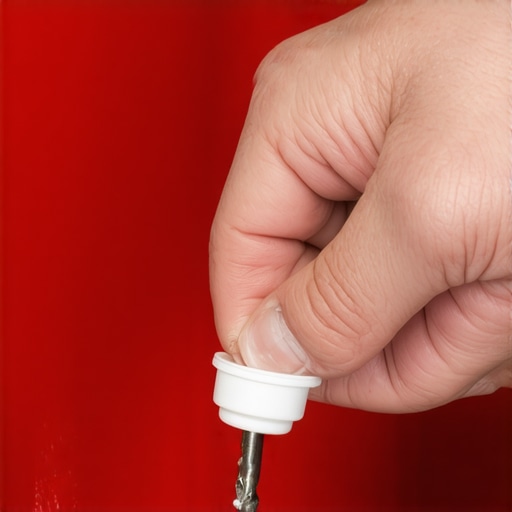
Master the Paperwork Before the Problem Happens
When you do run into an issue you can’t fix with a toothbrush and a screwdriver, you need to know when to trust a warranty for dishwasher repairs. Most people wait until the machine is dead to read their contract, but understanding appliance diagnostics and improving your warranty claims starts now. Keep a log of when you clean those filters. If a technician sees a pristine sump and a well-maintained screen, they are far more likely to code the repair as a ‘part failure’ rather than ‘owner neglect,’ which is the difference between a free repair and a massive bill. Have you ever fallen into the pre-rinse trap or forgotten a simple installation step? Let me know in the comments below!But avoiding those obvious installation blunders is just the baseline for a long-lasting kitchen. If you want to move from ‘accidental repairman’ to a true master of your appliances, you have to stop relying on hope and start using data. I used to think I could hear a failing motor, but my ears lied to me for months while the electricity bill climbed. Now, I never open the service panel without my multimeter in hand. It is truly the difference between a cheap fix and a massive mistake. You really only need to master the only multimeter settings you need for appliance repair—specifically the continuity setting. When my last machine wouldn’t start, I didn’t panic and order a new $200 board; I spent five minutes testing your thermal fuse before buying a new control board. It turned out to be a ten-dollar part. That is the power of specificity. If you are feeling bold, you can even use the multimeter trick for checking your dishwasher motor to see if the windings are actually shot or if you just have a stray toothpick jammed in the impeller.#IMAGE_PLACE_HOLDER_D#
How do I keep my dishwasher running like new for a decade?
Consistency beats intensity every single time. While that hidden screen is the most important component, you also need to look at the areas that accumulate grime slowly enough to be invisible. Twice a year, I take ten minutes to learn the secret to cleaning behind your dishwasher kickplate. Dust, pet hair, and kitchen grease love to clog the airflow to your motor and control board, which causes the electronics to overheat and fail prematurely. Don’t ignore the simple mechanical checks either; how to test your float switch using a plastic straw is a pro-level tip for preventing overflows before they ruin your hardwood floors. According to technical documentation from Whirlpool’s Job Aid service manuals, a significant percentage of ‘non-responsive’ units are simply stuck in a flood-protection loop that can be reset manually without replacing a single part. Looking ahead, the industry is shifting toward ‘predictive maintenance’ via AI. We are already seeing high-end machines that monitor the current draw of the drain pump to flag a failing component weeks before it actually dies. If you are struggling with a digital unit right now, don’t let a software glitch win. If your smart appliance app keeps losing connection, it is often a sign the control board is struggling with a low-voltage issue rather than a bad Wi-Fi signal. It is also worth reading the hidden blinking lights on your dishwasher brain to decode the manufacturer’s secret language before calling a technician. Ready to take the plunge into real diagnostics? I challenge you to try entering the secret diagnostic mode hidden on your touch control panel tonight just to see what your machine is thinking.
Lessons Learned After Too Many Soggy Kitchen Floors
I used to think my dishwasher was a ‘set it and forget it’ appliance, but I was wrong. The biggest takeaway from my maintenance journey is that your machine talks to you long before it breaks. If you notice why your dishwasher is louder than it used to be, it’s not just getting older; it’s often asking for a deep cleaning of that secondary mesh. I also realized that the warranty isn’t a safety net for neglect. There is a real difference between service plans and manufacturer warranties, but neither will save you if the pump is choked with years of grease and debris. Finally, trust your eyes: if the water in the sump isn’t clear, your dishes aren’t clean, regardless of how many detergent pods you use.
The Minimalist Toolbag for Every Homeowner
You do not need a van full of expensive gear to keep your kitchen running smoothly. I keep a dedicated ‘rescue kit’ under my sink that includes a T15 Torx driver for stubborn filter screws and a simple multimeter. Honestly, mastering the only multimeter settings you need for appliance repair has saved me more money on service calls than any coupon ever could. I also recommend a pair of long-nose pliers for reaching into the sump and a high-intensity flashlight to spot those tiny shards of glass that love to hide in the corners. Most ‘repairs’ are actually just simple unclogging tasks that require visibility more than mechanical expertise.
Become the Hero of Your Own Sump Pump
Taking that first dive into the guts of your machine can feel intimidating, but you are more than capable of handling it. You now have the map to the hidden screen and the logic to troubleshoot the most common errors before they escalate. By taking twenty minutes once a month to check these basic components, you effectively bypass the top signs your dishwasher needs professional diagnostics and keep your hard-earned money in your own pocket. Your dishwasher works hard for you every single day; a little bit of reciprocity goes a long way in ensuring it lives a long, efficient, and leak-free life. Don’t wait for the floor to get wet to start caring for your appliance.
What is the strangest thing you have ever found stuck in your dishwasher filter during a cleaning? Let me know in the comments below!