

I will never forget the sickening sound of that first crunch. It was 11:30 PM on a Tuesday, and I was trying to be the hero by fixing a minor leak before bed. Instead, I overtightened a mounting bolt and heard the unmistakable snap of plastic. That tiny hairline fracture in the sump housing meant my dishwasher was officially a giant paperweight. I stood there in a puddle of lukewarm, soapy water, staring at a repair bill I absolutely did not want to pay. But here is the secret I learned the hard way: after the initial panic subsided, I realized that replacing that housing isn’t some dark art reserved for people with a plumbing license. You can actually do this yourself with a bit of grit and the right guidance.
Stop the Leak Before It Ruins Your Subfloor
Most of us treat the underside of our dishwasher like a black box we are too scared to open. We see water on the floor and immediately assume the entire machine is headed for the scrap yard. But before you spiral, you need to figure out if you are dealing with a simple hose leak or a structural failure. I spent hours troubleshooting dishwasher problems before I realized my own hubris had cracked the very part that holds the whole system together. The sump is the heart of the machine; it collects the water, filters it, and sends it back to the spray arms. If it is cracked, the cycle is broken, and your floor is at risk. [image_placeholder_1] According to data from HomeAdvisor, the average cost of a professional plumbing repair often starts around $175 just for the service call, and can easily climb to $450 depending on the complexity. By tackling this repair on my own, I saved nearly $300 in labor costs alone. We are going to dive into the nitty-gritty of the swap today so you do not have to live with a bucket under your kitchen counter for another week.
Can a total beginner really handle this?
I get the skepticism. Working with water and electricity in the same cramped space feels like a recipe for a very bad Saturday. I used to be terrified of touching anything behind the kickplate. In fact, early in my DIY journey, I made the classic mistake of ignoring the top signs that my dishwasher needed diagnostics, thinking I could just “patch” a crack with some waterproof tape I found in the garage. Spoiler alert: it did not work. The combination of heat and pump pressure makes short work of lazy fixes. But if you can use a screwdriver and have a little patience, you can manage a full housing replacement. You might even find that identifying a failing drain pump by sound becomes a new skill you can brag about. Before we grab the wrenches, take a moment to check your paperwork; it is always smart to know when to trust a warranty for dishwasher repairs before you start pulling components out of the chassis. Have you ever stepped into a mysterious kitchen puddle and felt that immediate spike of “how much is this going to cost me” anxiety? Let’s turn that dread into a plan of action.
Kill the Power Before You Touch a Wrench
Safety isn’t just a suggestion when you are working with an appliance that uses both electricity and water. Before you even think about grabbing your tools, head to the breaker box and flip the switch. I have seen too many people rely on the simple power button on the front panel, only to realize later that the board was still live. If you are unsure, you can look into the fix for a dishwasher that wont start but has power to understand how current flows through these machines even when they seem dead. Once the power is killed, shut off the water supply valve usually located under your sink. This prevents a high-pressure surprise if a hose slips during the removal process.
Gut the Interior to Reach the Sump
Now, open the door and remove the bottom dish rack entirely. You need a clear workspace. Most modern sumps are held in place by the spray arm assembly and a series of filters. Start by unscrewing the lower spray arm—it usually just pops off or requires a quarter-turn counter-clockwise. While you have it out, it is the perfect time to learn how to replace a cracked spray arm without calling a technician if you notice any wear and tear. Next, pull out the mesh filters. If they are coated in slime, give them a quick scrub. You want a clean view of the plastic housing sitting at the very bottom of the tub.
Avoid My Coastal Flood Disaster
The first time I attempted this, I thought I had drained the machine well enough by just letting the cycle finish. I was wrong. As soon as I started loosening the sump from underneath, about a quart of stagnant, gray water rushed out and soaked into the hardwood. It was a nightmare. Now, I always use a shop vacuum to suck every last drop out of the sump hole before I move to the next step. If you find debris while doing this, you might be interested in how to clear a blocked impeller with a shop vacuum to keep the system running smooth.
Pop the Old Housing Without Breaking the Clips
With the water gone, you will likely need to pull the dishwasher out from under the counter a few inches to access the mounting screws or clips. From the bottom, you will see the motor and the drain pump attached to the sump housing. You need to disconnect the wire harnesses and the rubber hoses. This is a critical moment where you should check for clogs, as there is a big difference between a clogged hose and a dead drain pump. Use a pair of pliers to squeeze the tension clamps on the hoses and slide them back. Once the connections are free, the sump is usually held by 3 or 4 plastic tabs or metal screws. Be gentle here. If you force it, you risk cracking the tub itself, which is a far more expensive mistake. Use the flashlight trick for finding micro-cracks around the seal area to ensure your new part sits perfectly flush. When you slide the new housing in, focus on the gasket. If it isn’t seated perfectly, it will leak the moment you run a test cycle. Knowing the correct way to reseat a slipped tub gasket can save you from having to take the whole machine apart a second time.Everyone tells you to just look up the error code on Google, find the corresponding part, and hit ‘buy’ on Amazon. In my experience, that is the fastest way to waste money. I once replaced an entire drain pump because of an ‘OE’ error code, only to realize later the real culprit was a tiny piece of plastic stuck in the air gap. We often forget that troubleshooting dishwasher problems is about the system, not just the components. Most people think these machines are purely mechanical, but the modern dishwasher is basically a computer that happens to spray water.
Could Your Smart Dishwasher Just Need a Software Refresh?
In the world of high-end appliances, we are seeing a shift where mechanical failure isn’t the primary issue. According to a 2023 technical report from the Association of Home Appliance Manufacturers (AHAM), a significant percentage of service calls are resolved through resets rather than part replacements. This is where understanding appliance diagnostics becomes your superpower. If you jump the gun and start tearing things apart, you might miss the fact that a firmware update could brick the control board if handled incorrectly, or even simpler, that updating firmware on your connected kitchen appliances might solve that ‘mystery’ leak by recalibrating the pressure sensor. 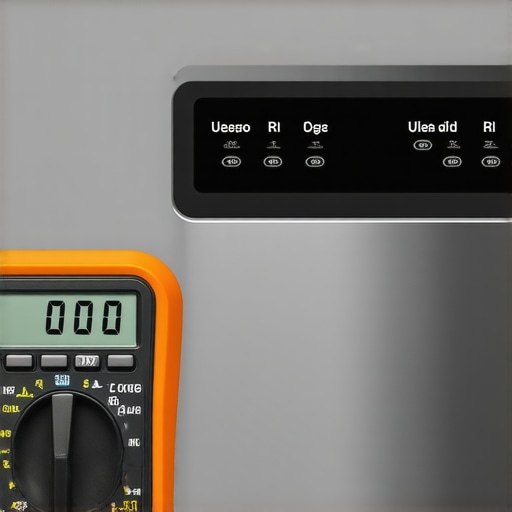 Here is the ‘oops’ factor nobody talks about: your warranty is a fragile thing. If you install a non-OEM part, even if it fits perfectly, you might find the truth about non-manufacturer repair parts is that they provide an easy out for the manufacturer to deny future claims. I’ve seen homeowners lose thousands in coverage because they used a generic gasket instead of the branded version. Worse yet, many find that their warranty claim was denied due to lack of maintenance, like never cleaning the hidden filters we discussed earlier. It is a bit of a chess game. Have you ever fallen into this trap of ‘fixing’ one thing only to void your protection on everything else? Let me know in the comments. Before you finalize any repair, it is worth learning how appliance diagnostics can save your warranty benefits by providing the paper trail you need to prove the failure was a manufacturing defect and not your own handiwork.Once you realize that a dishwasher is just a complex loop of sensors and relays, you start to look at your toolbox differently. I no longer reach for a hammer; I reach for my multimeter. If you want to get serious about DIY, you need to learn the specific way to test a thermal fuse for continuity before you start replacing expensive boards. I personally use a digital multimeter with a continuity beep—it is the fastest way to verify if a part is actually dead or if you just have a loose wire. I have saved countless hours by simply testing a door latch with a business card to see if the microswitch is engaging properly. It sounds low-tech, but in a world of high-tech sensors, sometimes the simplest physical tests are the most revealing.
How do I maintain my dishwasher performance over the long haul?
The set-it-and-forget-it mentality is exactly what leads to that $400 repair bill I mentioned earlier. Maintenance is not just about cleaning the visible filter; it is about the chemistry and the mechanical moving parts you cannot see. For example, did you know that deep cleaning the hidden spray arm bearings can prevent the motor from overworking and burning out prematurely? I also recommend a monthly descaling cycle. While many people use vinegar, I have found how to remove cloudiness from glasses using citric acid is actually much safer for the internal rubber seals. If you are a heavy user, you also need to be aware of the real cost of skipping your monthly descaling cycle, which usually manifests as a failing heating element. According to technical service bulletins from major manufacturers like Whirlpool and Bosch, the number one cause of pump failure is not wear and tear—it is debris bypass. This happens when the sump is not seated perfectly or the filter is damaged. If you want to be a pro, you need to look for the red flag your service tech looks for in your drain line, such as grease solidification. I always keep a bottle of high-quality degreaser and a long, flexible brush specifically for cleaning out grease build-up in a drain impeller. The trend for the next five years is clearly moving toward predictive maintenance. We are already seeing how smart diagnostic apps are changing home appliance repair by telling you exactly which part is failing before the machine even stops working. I predict that soon, your dishwasher will automatically order its own replacement filters or gaskets when its internal sensors detect a drop in pressure. Until then, you are the sensor. My best advice? Try the secret to unclogging a dishwasher air gap with a straw today—it takes thirty seconds and could prevent your next sink backup.
Realities of DIY Sump Swaps
The most important thing I realized after my first flooded kitchen is that a “broken” machine is rarely a death sentence. It is usually just a single point of failure that needs an hour of your time. One major lightbulb moment was discovering that troubleshooting dishwasher problems is about 80% observation and 20% actual wrench-turning. If you look closely at the old housing, the failure pattern often tells you exactly what went wrong—like a warped seal from too much heat or a crack from a loose mounting bolt. I also learned that the top signs your dishwasher needs professional diagnostics are often subtle, like a slightly longer drain cycle or a faint hum that wasn’t there last month. Learning to catch these early can save you from a full housing swap entirely. Finally, don’t rush the reassembly; the way the new housing seats against the tub is the difference between a dry floor and a midnight disaster.
The Kit That Makes Repairs Faster
You do not need a professional van full of gear, but a few specific tools will change your experience from frustrating to satisfying. I never start a repair now without a digital multimeter. It is the only way to accurately follow the specific way to test a thermal fuse for continuity, ensuring the problem is actually the sump and not a simple electrical break. Secondly, a small shop vacuum is your best friend for how to clear a blocked impeller with a shop vacuum and removing stagnant water from the housing before you disconnect the hoses. Lastly, keep a jar of citric acid on hand. It’s safer for your new gaskets than harsh chemicals and is the gold standard for how to remove cloudiness from glasses using citric acid once the machine is back in action. These three items have saved me more money on service calls than I care to admit.
Confidence in the Face of a Flood
There is a specific kind of pride that comes from hearing your dishwasher hum through a perfect, leak-free cycle after you’ve had it in pieces on the kitchen floor. You’ve moved past the stage of being a passive user and become the master of your own appliances. By taking this on, you’re not just saving a few hundred dollars; you’re gaining the data you need for the future. Understanding how appliance diagnostics can save your warranty benefits is your final layer of protection, giving you the vocabulary to talk to manufacturers with authority. You’ve successfully navigated the complexities of troubleshooting dishwasher problems, and your kitchen—and your wallet—will thank you for it. Did you run into any trouble with those plastic mounting clips, or did your new sump housing pop right into place? Let me know in the comments below!