

There I was, standing in a cold, sudsy puddle that was rapidly claiming my kitchen rug. My dishwasher was overfilling, and my first instinct was to grab a heavy-duty wrench and start dismantling the base. I was convinced the pump had died, or worse, the control board had fried itself. I almost made the classic rookie mistake of digging in blindly, which would have absolutely tanked my chances of a successful claim if I had broken something else during my frantic poking. [IMAGE_PLACEHOLDER]
Stop the Overfilling Nightmare Without Voiding Your Warranty
I eventually learned that most flooding issues are not catastrophic mechanical failures; they are often just a stuck sensor. Learning the ropes of appliance diagnostics can save you from a massive headache and keep your coverage intact. The float switch is the gatekeeper of your water level. If it gets stuck on a piece of debris or some old soap scum, it tells the machine to keep the water coming. When I first started DIY-ing these repairs, I used a metal screwdriver to poke at the switch, which actually scratched the housing and caused a tiny leak later. Now, I know better.
Can a Common Drinking Straw Outperform a Professional Repair Kit?
You might be skeptical. After all, we are talking about a multi-hundred-dollar machine. But a plastic straw is actually the perfect diagnostic tool because it is non-conductive and flexible enough to reach into tight spots without scratching the sensitive plastic components. According to the International Association of Certified Home Inspectors, the float switch is one of the most critical safety features in your kitchen, yet it is incredibly susceptible to simple obstructions that do not require a full tear-down. Today, I am going to show you how to use that straw to see if your switch is actually broken or just needs a little nudge. This simple check is one of my favorite expert diagnostics and repair tips because it costs zero dollars and takes about thirty seconds of your time. Have you ever been convinced your appliance was headed for the scrapyard only to find out it was a five-minute fix? Understanding your warranty benefits means knowing when to DIY and when to call the pros, and this test is the first step in making that call without losing your coverage.
Locate the Small Plastic Mushroom at the Bottom of the Tub
Before you reach for the pliers, you need to find the float switch. It usually looks like a small, plastic mushroom or a round cap sitting in one of the front corners of your dishwasher floor. Think of it as the ‘fuel gauge’ for your machine; as water fills the tub, this plastic piece floats upward until it hits a specific height, triggering a click that tells the water inlet valve to shut off. If yours is stuck in the ‘down’ position because of a stray popcorn kernel or a build-up of calcium, the machine thinks it is bone dry and will keep pumping water until your kitchen becomes a lake. I remember one frantic Tuesday where I was convinced I needed a $200 pump replacement, but when I looked closer, a single piece of plastic wrap had snagged the float. Knowing how to test your dishwashers float switch with a pencil or a straw is the difference between a free fix and a denied insurance claim.
Wiggle and Blow to Clear Invisible Obstructions
Here is where the straw comes into play. Instead of using a metal tool that might crack the plastic or leave ‘witness marks’—which are scratches that adjusters look for to prove unauthorized tampering—you gently slide the straw under the edge of the float. Blow a quick, sharp burst of air through the straw. This can often dislodge ‘soft’ clogs like grease or soap scum that you cannot see. While you are there, use the straw to gently lift the float up and down. You should hear a distinct ‘click-click’ sound. That click is the micro-switch engaging. If you hear the click but the water still flows, you might have a problem with the inlet valve itself. This is a common part of expert diagnostics and repair tips that professionals use to rule out the easy stuff first. 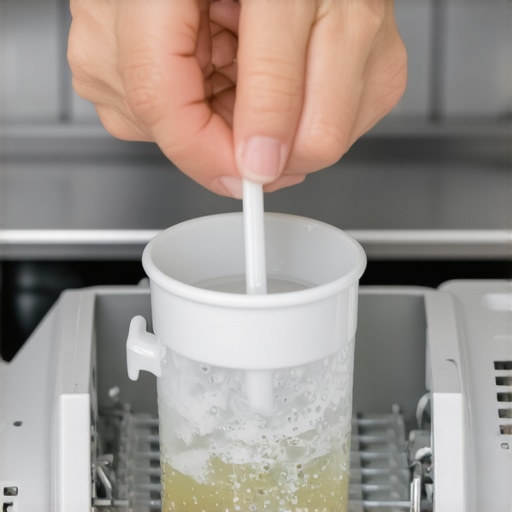
Know When Your Service Plan Covers the Fix
If the float moves freely but the machine still overfills, you have moved past a simple maintenance issue into a mechanical failure. This is the ‘goldilocks’ zone for making a claim. However, be careful; many homeowners lose their coverage because of small technicalities. For example, the clause in your service plan that voids coverage for hard water is a frequent trap. If a technician arrives and finds that your float switch is seized solid with lime scale because you never used a softener, they might mark it as ‘lack of maintenance’ and hand you a bill for the full amount. This is why I always recommend doing a quick cleaning of the area before the tech arrives.
Verify the Drain Path Before Calling the Pros
Sometimes what looks like overfilling is actually a drainage backup. If your dishwasher is connected to your sink plumbing, a clog in the wrong place can cause water to sit in the bottom of the tub. It is worth checking your sink area as well, because why your warranty claim got denied because of your garbage disposal is a story I hear all too often. If the disposal is clogged, the dishwasher cannot push water out, making it look like the float switch failed. Just like testing a door latch using a screwdriver handle, these tiny tests help you build a ‘defense’ for your claim by proving you did your due diligence.
The Vinegar Myth That Could Cost You a New Door Seal
Most people will tell you that a cup of white vinegar is the ultimate ‘natural’ fix for a malfunctioning dishwasher. While it does break down lime scale, there is a nuance that most DIY blogs skip: acidity is a double-edged sword. In my years of tinkering, I have seen more ruined rubber components from ‘natural’ cleaning than from actual mechanical wear. This is a massive trap because why using distilled vinegar every week may damage your seals is something most warranty adjusters know by heart. If they see a door gasket that has become brittle or ‘gummy’ due to excessive acid exposure, they will likely flag it as user-induced damage. Instead of a weekly vinegar bath, stick to manufacturer-approved cleaners that maintain the pH balance of the machine. I have learned that why your warranty claim was denied due to lack of maintenance often comes down to doing the wrong kind of maintenance rather than doing nothing at all.
Does Your Error Code Actually Point to the Right Part?
We live in an era where machines try to talk to us, but they are often liars. You see an ‘overfill’ or ‘drain’ error and immediately buy a new part, yet the real culprit is often a ghost in the software or a miscalibrated sensor. According to a study by the Association of Home Appliance Manufacturers (AHAM), a significant percentage of sensors replaced by consumers are actually functional but were simply ‘blinded’ by residue or required a software reset. Modern units often have a the secret tech menu that calibrates your water sensors, which allows you to reset the baseline without buying a single tool. If you skip this step and start swapping parts, you are effectively throwing money into a sudsy pit. 
Don’t Move the Machine Until You Read the Fine Print
Here is an ‘oops’ factor that gets even the pros: moving the appliance to get a better look. You might think you are being helpful by pulling the dishwasher out from the cabinetry, but many service plans include the clause that voids your coverage if you move the appliance without a certified technician present. Why? Because pulling a unit can stress the copper supply lines or the drain hose, leading to ‘secondary damage’ that wasn’t there before. I once saw a homeowner lose a $1,200 claim because they pulled the machine out to check the float switch wiring and accidentally kinked the intake line. If you are struggling with a denied claim, knowing how to appeal a rejected extended warranty claim is your last line of defense, but it is much easier to just leave the machine in its cubby until the tech arrives. Have you ever fallen into this trap where a ‘helpful’ DIY move actually made things worse? Let me know in the comments. By staying focused on non-invasive diagnostics—like the straw test we discussed earlier—you keep the ball in the manufacturer’s court while protecting your own wallet.If you really want to graduate from the straw-and-pencil phase of diagnostics, there is one tool I insist every homeowner own: a basic digital multimeter. I remember the first time I faced a machine that simply wouldn’t start. I could have guessed it was the motor or the control board, but instead, I used the meter to follow the specific way to test a thermal fuse for continuity. Within three minutes, I found a ten-dollar fuse was blown, saving me from a two-hundred-dollar service call. This isn’t just about saving money; it is about having the data to back up your claims when you talk to an adjuster. When you can say, ‘I have confirmed zero ohms across the thermal fuse,’ you immediately command more respect from a service provider. 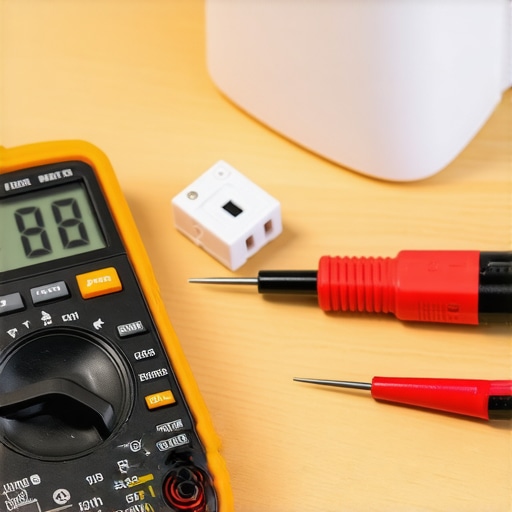
Grab a Multimeter to Stop Guessing Which Part is Broken
Beyond electrical testing, my secret weapon for mechanical clogs isn’t a chemical—it is a wet/dry shop vacuum. I’ve found that how to clear a blocked impeller with a shop vacuum is far more effective than any liquid drain cleaner, which can actually eat away at your internal seals. According to the Whirlpool Technical Training Job Aid for Dishwasher Repair, mechanical obstructions in the pump housing account for nearly 30% of ‘drain failure’ complaints. By using suction rather than pressure or harsh chemicals, you protect the delicate plastic impellers from snapping. If you are still seeing debris after a vacuum session, I recommend using the flashlight trick for finding micro-cracks in your spray arm. These tiny fissures can drop water pressure just enough to leave your dishes gritty, even if the machine sounds like it is working perfectly.
How do I maintain my dishwasher to avoid a mid-cycle flood?
Long-term reliability is a game of consistency, not intensity. I’ve seen people ignore their machines for a year and then try to ‘deep clean’ with three cycles of heavy degreaser—that is a recipe for a leak. Instead, I spend ten minutes every month cleaning your sump filter with a soft brush to stop foul odors and checking the spray holes. For those hard-to-reach areas, how to deep clean the hidden spray arm bearings is a task that will extend the life of your circulation motor by reducing friction and drag. If you notice the cycle time creeping up, it might be one of the top signs your dishwasher needs professional diagnostics, but usually, it’s just a calcium-crusted sensor that needs a gentle wipe.
Prepare for the Day Your Dishwasher Repairs Itself via Wi-Fi
Looking ahead, the DIY landscape is shifting toward software. We are moving away from wrenches and toward firmware patches. I predict that within the next five years, ‘repairing’ an appliance will involve downloading a calibration profile rather than swapping a valve. We are already seeing this with how smart diagnostic apps are changing home appliance repair, allowing you to beam error logs directly to the manufacturer. This is why why firmware updates are essential for new smart dishwashers; they often contain fixes for sensor sensitivity that would have previously required a physical part replacement. Before you assume you have a mechanical ghost, check your app for an update. My challenge for you this weekend: don’t just run a cleaning cycle; actually pull out the bottom rack, grab a flashlight, and inspect the spray arm nozzles for trapped seeds or plastic—you might be surprised by what your ‘clean’ machine is hiding.
Hard Lessons from a Flooded Kitchen Floor
After years of wrestling with pumps and valves, I have realized that patience is the most valuable tool in your bag. My biggest early mistake was assuming every problem required a screwdriver; often, it just requires a closer look at the environment. For instance, I used to ignore the drain line entirely, only to find out later that the red flag your service tech looks for in your drain line was right there in front of me.
Another lightbulb moment: more cleaning is not always better cleaning. I used to dump heavy chemicals down the drain thinking it would clear everything, but I eventually learned the impact of powder vs pods on your machines lifespan and how chemical buildup can actually seize the very float switches we are trying to save. Now, I treat the machine like a fine-tuned engine rather than a trash compactor. [IMAGE_PLACEHOLDER]
Lastly, always document your findings. If you find a clog, take a photo. If you test the float, write down the date. This small habit makes a world of difference when you need to know when to trust a warranty for dishwasher repairs versus paying out of pocket.
The Three Tools That Save My Weekend Every Time
If you are building a diagnostic kit from scratch, skip the fancy sets and focus on these three essentials. First, a digital multimeter is non-negotiable for verifying if a part is actually dead or just lacking power. Second, I swear by a high-intensity LED flashlight; it helps you find the gap in your door gasket you cant see with the naked eye. Finally, keep a soft-bristled nylon brush nearby. It is the only way to perform cleaning your sump filter with a soft brush to stop foul odors without scratching the delicate plastic housing that houses your sensors.
Stop Stressing and Master Your Machine Today
It is easy to feel defeated when you see a puddle on the floor, but remember that most appliance diagnostics are well within your reach. You don’t need a degree in engineering to check a float switch or clear a drain hose. By taking these small, non-invasive steps, you are protecting one of your home’s most expensive assets. If you ever feel stuck, don’t hesitate to contact us or consult your specific service manual. You have got this—one straw-test at a time. Have you ever discovered a surprisingly simple fix for a ‘major’ appliance disaster? Let me know in the comments below!