

It was 10:30 PM on a Tuesday when I realized my kitchen was about to smell like a swamp. I had just finished what I thought was a thorough ‘heavy duty’ cycle, but when I pulled the door down, there it was: a lonely, half-dissolved detergent pod staring back at me from a soap cup that refused to budge. The dishes were wet, but they were definitely still greasy. I felt that specific surge of frustration that only a malfunctioning appliance can trigger. I almost pulled the trigger on a service call, but I decided to poke around first.
Stop Staring at That Half-Melted Pod
I have been in your shoes more times than I care to admit. Usually, we assume the worst—that the wax motor is fried or the control board has finally given up the ghost. But after spending way too much time with my head inside a stainless steel tub, I have learned that the real reason your detergent cup won’t open is often something much sillier than a total mechanical failure. I once spent three hours researching expert diagnostics and repair tips only to realize my oversized dinner plate was physically blocking the door from swinging out. It was a humbling moment, to say the least! Today, I am going to walk you through exactly why your dispenser is acting up and how you can get it snapping open again without calling a professional.
Is my machine actually broken or am I just doing it wrong?
This is the big question that haunts every DIYer. You might be worried that a stuck door means the spring has snapped or the latch is warped. While there is often an easy fix for a door that won’t open, the fear that you are ‘killing’ your appliance is real. According to the Association of Home Appliance Manufacturers (AHAM), a significant percentage of dishwasher service requests are actually maintenance-related issues rather than actual component failures. My biggest early mistake? I used to ignore the sticky gunk building up around the edges of the dispenser. That residue build-up from certain tablets can act like a literal glue, sealing that door shut at the exact moment it needs to pop. Have you ever opened your machine only to find your dishes just as dirty as you left them because of a stubborn soap door? Let me know, because I bet we have made the same mistakes. We are about to look at the physics of your rack loading and how a loose gasket might be the secret culprit behind your cleaning woes.
Clear the path for the dispenser door
First things first, look at your lower rack. I once spent twenty minutes fruitlessly poking at a latch only to realize my favorite oversized pasta bowl was leaning just an inch too far forward. It acted like a deadbolt. Always ensure tall plates or cutting boards aren’t standing directly in front of the dispenser door. If the door hits something as it tries to flip up, it stays shut, and you end up with a soggy pod. You want to visualize the arc the door takes when it swings open; if that arc is interrupted by a cookie sheet or a large skillet, the soap stays trapped.
Wipe away the invisible glue holding the latch shut
Next, let’s talk about the ‘gunk factor.’ This is where the truth about tablet vs powder detergent residue build-up becomes painfully obvious. Over time, that rinse aid and detergent slurry dries into a tacky film. It’s essentially industrial-strength adhesive for your dispenser door. I take a damp microfiber cloth—never a scouring pad—and wipe the perimeter of the cup. If it feels even slightly sticky, you’ve found your culprit. While you are at it, the secret to clearing a gritty soap reservoir without scratches is using warm water and a bit of patience rather than brute force. I once used a butter knife to scrape out old soap and ended up gouging the plastic, which just created more places for gunk to hide.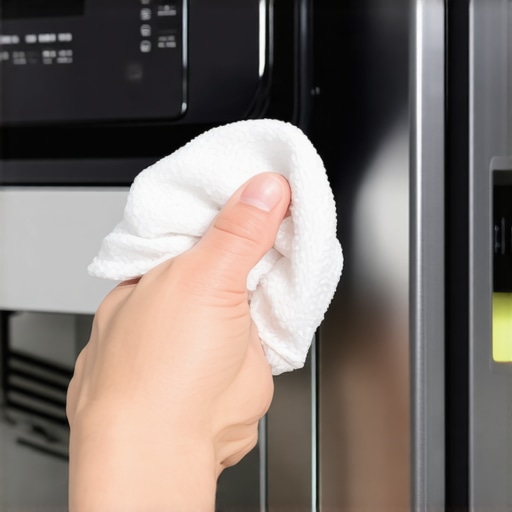
Check for friction against the door seal
Sometimes the problem is more ‘rub’ than ‘stick.’ I’ve seen cases where a slightly warped seal creates just enough friction to trap the door. You should check if the rubber is out of alignment; how to fix a loose gasket that interferes with the soap cup is a skill that saves you from a $150 service call. If that rubber lip is hanging even a millimeter too low, the door won’t have the clearance to swing. Think of it like a door frame that has shifted; no matter how hard you turn the knob, the door is stuck in the jam.
Test the mechanical snap of the latch
If the door is clear and clean but still won’t budge, it’s time to play detective with the hardware. You can actually test a door latch using a screwdriver handle by manually engaging the hook and seeing if the spring tension feels snappy. A ‘mushy’ response usually means the spring has lost its tension or the plastic catch is worn down. One afternoon, I was so convinced my wax motor was dead that I had already ordered the replacement part. While waiting for shipping, I decided to try the proper way to clean spray arm nozzles using a paperclip just to be thorough. It turned out a tiny seed was wedged in a nozzle, causing the water to spray directly at the dispenser door with enough pressure to keep it pinned shut during the release cycle.
Dig into the secret diagnostic menus
For those of you with modern machines, the answer might be digital. I remember the first time I found the secret diagnostic mode hidden on your touch control panel. It felt like unlocking a cheat code. By pressing a specific sequence of buttons—usually related to the ‘High Temp’ and ‘Start’ keys—you can force the machine to cycle the dispenser solenoid. This tells you instantly if the part is receiving power. If the solenoid clicks but the door stays shut, you have a mechanical jam. If there’s no click, you might be looking at how to spot corrosion in your control board wiring early before it kills the whole unit. This is also a good time to try the simple magnet test for your door latch sensor to ensure the machine even knows the main door is closed, as it won’t trigger the soap cup otherwise.Once you have mastered the physical blockages, there is a much deeper layer to this mystery that most homeowners completely overlook. Everyone assumes that if the machine is under a year old, any failure is automatically covered by the manufacturer. I hate to be the bearer of bad news, but in my experience, companies are getting incredibly savvy at finding reasons to say no. A common myth is that a ‘bumper-to-bumper’ warranty is a safety net for everything. In reality, there is a huge real difference between service plans and manufacturer warranties that usually comes to light only when you are staring at a $200 bill for labor because your plan only covered the $10 plastic latch.
The fine print that makes your warranty worthless
I have seen it happen a hundred times: a DIYer tries to save their machine, but because they did not document the process, the claim gets tossed. Understanding how appliance diagnostics can improve your warranty claims is the difference between a free fix and a total loss. According to a 2023 report from the Association of Home Appliance Manufacturers (AHAM), maintenance-related issues are the primary reason for service call rejections. If a technician finds that hard water build-up caused your dispenser to seize, they might categorize it as a ‘lack of maintenance’ rather than a manufacturing defect. This is precisely why your warranty claim was denied due to lack of maintenance, and it is a bitter pill to swallow when you realize a $5 bottle of citric acid could have saved you hundreds. Have you ever fallen into this trap? Let me know in the comments because I want to hear your horror stories!
Your garbage disposal might be sabotaging your soap cycle
This is the ‘Oops’ factor that catches even the most seasoned renovators off guard. If you recently installed a new sink or disposal, it might be literally fighting your dishwasher. Most people do not realize that the dishwasher drains through the disposal. If the ‘knock-out plug’ was not removed or if the disposal is partially clogged, it creates backpressure. This pressure can confuse the sensors in modern smart machines, causing them to stall the cycle before the detergent cup even gets the signal to open. It is a bizarre domino effect where your warranty claim was denied because of your garbage disposal, even though you were looking at the dishwasher door the whole time. 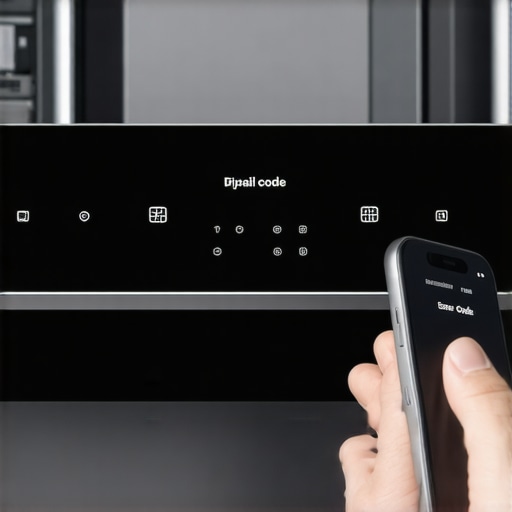
Does my smart dishwasher actually need a firmware update?
It sounds ridiculous to talk about ‘software’ for a machine that washes plates, but we live in a new era. I have encountered situations where a dispenser door failing to open was not a broken spring or a sticky latch, but a software glitch. Manufacturers frequently release patches to adjust how long a solenoid stays energized or to change the timing of the release during high-heat cycles. This is why firmware updates are essential for new smart dishwashers. If your machine is Wi-Fi enabled and the door is acting flaky, check the app before you grab the screwdriver. You might find that how appliance diagnostics can save your warranty benefits starts with a simple ‘Update’ button. Always remember that modern machines are essentially computers that occasionally get wet; treat the troubleshooting with that level of respect and you will save yourself a lot of frustration. If you are still stuck, it might be time to look for top signs your dishwasher needs professional diagnostics before you accidentally void your remaining coverage by digging too deep into the control board wiring.
Get the professional gear for your kitchen
If you are serious about skipping the service call, you need to stop reaching for the butter knife and start building a real diagnostic kit. I used to think a standard screwdriver was enough, but my perspective shifted the first time I had to navigate a tight space to see why a solenoid wasn’t firing. My number one recommendation is a decent digital multimeter. Learning the basics of testing a thermal fuse for continuity without a pro kit can save you from replacing a perfectly good control board. Another ‘secret weapon’ in my garage is a high-powered shop vacuum. It sounds aggressive, but knowing how to clear a blocked impeller with a shop vacuum is the only way to suck out those stubborn glass shards or popcorn kernels that a standard drain cycle just can’t budge. 
How can I keep my dishwasher running like new for years?
Long-term performance isn’t about luck; it is about a consistent schedule that prevents ‘biological’ failure. Most people wait for a smell to appear before they act, but by then, the grease has already hardened into the mesh. You need to master the secret to getting grease out of your filter mesh using a soft-bristled brush and degreasing soap at least once a month. I also keep a digital log on my phone of every weird sound the machine makes. This habit makes it much easier when you need to know how to document intermittent noises for a repair claim. If you can show a technician a video of a screeching pump from three weeks ago, they are far less likely to give you the ‘could not replicate’ brush-off. According to the technical service manuals from major manufacturers like Whirlpool, the ‘Tech Sheet’—usually hidden behind the bottom kickplate or inside the door—is your ultimate roadmap. It contains the specific resistance values for every motor and heater in your unit. Consulting this niche document is how the pros find the needle in the haystack.
The shift toward smarter, more repairable machines
We are entering an interesting era for home appliances. With the rise of ‘Right to Repair’ legislation, we are seeing a trend where manufacturers are forced to make expert diagnostics and repair tips more accessible to the average Joe. In the next few years, I predict we will see more machines that self-diagnose and even walk you through the fix via an augmented reality app. This will be a game changer for understanding how appliance diagnostics can save your warranty benefits. Instead of arguing with a call center, your machine will generate a verified health report that proves a part failed through no fault of your own. Under the federal Magnuson-Moss Warranty Act, manufacturers generally cannot void your entire warranty just because you performed your own basic maintenance or used a screwdriver to look inside, provided you didn’t cause the damage yourself. This is why I always tell my readers: don’t be afraid of your machine. My advanced tip for today? Grab a multimeter and check the resistance on your heating element. It takes five minutes and tells you everything you need to know about your machine’s health.
Lessons Learned from the Bottom of the Tub
After years of tinkering, I’ve realized that dishwasher repair is often 90% psychology and 10% mechanics. I used to panic at the sight of a closed soap door, but now I know that the real reason your detergent cup won’t open during the cycle is usually just a poorly placed cereal bowl or a bit of dried soap. One lightbulb moment for me was discovering that how appliance diagnostics can save your warranty benefits is actually about proving to the manufacturer that you aren’t the problem. I also learned the hard way that cleanliness isn’t just about the dishes; it’s about the machine itself. I’ve seen too many people frustrated because their warranty claim was denied due to lack of maintenance, and it’s a situation that is entirely avoidable with a simple monthly wipe-down of those dispenser seals.
Gear Up for the Next Stuck Latch
If you want to move from a frustrated homeowner to a confident appliance whisperer, you need more than just a standard toolbox. I personally swear by a few specific items that stay in my utility drawer. First, get a multimeter; testing a thermal fuse for continuity without a pro kit is a superpower that prevents you from overspending on control boards you don’t actually need. Second, keep a shop vacuum handy because how to clear a blocked impeller with a shop vacuum is a trick that works every time when water won’t drain. Lastly, always hunt for the “Tech Sheet” inside your machine’s kickplate—it is the literal roadmap for your specific model. #IMAGE_PLACEHOLDER_E#
Ready to Hear That Satisfying Snap?
There is nothing quite like the sound of a dishwasher detergent cup popping open exactly when it’s supposed to during the wash. It represents a job well done and a kitchen that is finally back in harmony. Don’t let a bit of gunk or a confusing legal policy stop you from taking charge of your kitchen equipment. You now have the tools, the knowledge, and the insider wisdom to keep your machine running for a decade or more. Have you ever found a truly bizarre object blocking your detergent door, like a stray spoon or a plastic toy? Let me know in the comments—I’m dying to hear what was standing in the way of your clean dishes!