

I will never forget the sound of silence. It was Thanksgiving, and my dishwasher decided that right after the main course was the perfect time to go on strike. I hit ‘Start,’ the light blinked, and then… nothing. Absolute silence. I was convinced the brain of the machine had fried. I even went as far as looking up the cost of a new control board—nearly three hundred bucks! I almost pulled the trigger on that purchase, but then I remembered a trick an old repairman told me years ago. It turns out, I was about to waste a lot of money on a problem that cost exactly zero dollars to identify. My mistake was assuming the worst before doing the simplest check possible. [image_placeholder]
Stop Reaching for Your Wallet and Grab a Magnet Instead
Most of us assume that when a dishwasher refuses to start, it is a catastrophic electronic failure. In reality, it is often just a confused door latch sensor. These sensors are usually magnetic reed switches. If the machine does not ‘feel’ that the door is closed, it will not move an inch, even if you have slammed it shut a dozen times. This is exactly why the fix for a dishwasher that wont start but has power often has nothing to do with the motor or the motherboard. I spent two hours scrubbing plates by hand because I did not know how understanding appliance diagnostics could save my sanity. Today, I am going to show you how to use a basic kitchen magnet to prove whether your sensor is dead or if your door is just misaligned.
Does This Simple Trick Actually Work?
It sounds too simple to be true, right? But the reality is that even the most expensive machines rely on basic physics. According to data from RepairClinic, door latch issues are among the top five reasons dishwashers fail to start. By using a magnet, you can bypass the physical latch and tell the sensor that the door is secure. This is a crucial step before you trust a warranty for dishwasher repairs or call out a pro. It helps you figure out if you need a ten-dollar part or a whole new machine. It is the same logic used when you test your float switch with a simple magnet to check for flooding issues. Have you ever stood there pressing a button over and over, hoping for a different result? It is incredibly frustrating, but we are going to fix that together.
Find the Hidden Sensor Without Tearing the Door Apart
Most dishwasher sensors are tucked away behind the top plastic trim or near the latch assembly. You are looking for the magnetic reed switch, a tiny component that reacts when the door’s magnet gets close. To find the exact spot, take a strong kitchen magnet and slowly slide it along the top edge of the control panel while the door is open. Watch the display or the status lights carefully. If the ‘Close Door’ light suddenly turns off or the blinking stops, you have found your target. It is a lot like finding a stud in a wall; once you hit it, the machine’s behavior changes instantly. This is a primary step in troubleshooting dishwasher problems expert diagnostics repair tips because it isolates the door alignment from the actual electronics.
Trick the Machine Into Thinking It is Closed
Once you have located the sensor, hold the magnet firmly against that spot and press the Start button. If the dishwasher starts filling with water or the motor hums to life, you just proved that your expensive control board is perfectly fine. The issue is simply that the door is not pushing its internal magnet close enough to the sensor when latched. This often happens because of a sagging door or a worn-out latch. You might even find that you can tighten a loose handle without taking the door apart to improve the alignment. If the magnet trick fails, you might be looking at a dead sensor or a blown fuse. In that case, you will need to know the specific way to test a thermal fuse for continuity before ordering any replacement parts. 
What to Do When the Magnet Does Nothing
I once tried this on a neighbor’s Bosch. I held the magnet in the wrong spot for ten minutes, feeling like an idiot, before realizing the sensor was on the top frame rather than the side. Once I hit the sweet spot, the motor roared to life. It saved them a $150 service call for a door that just needed a simple shim. However, if the machine stays dead even with a strong magnet pressed against the sensor, it is time to move to the electronics. Sometimes, the problem is a software glitch. I usually recommend the one-minute move to reset your control board by cutting the power at the breaker for sixty seconds. If a reset does not work, look at the board itself for physical damage. You can often spot a failing control board capacitor by sight if it looks swollen or leaked.
The Difference Between a Quick Fix and a Warranty Claim
Knowing whether the problem is a simple sensor or a fried board is vital for understanding appliance diagnostics improving your warranty claims. If you call a technician and they find a piece of debris stuck in the latch, your warranty usually will not cover the visit. However, if the reed switch itself is electrically dead, that is a manufacturer defect. Being able to tell the technician exactly what you tested makes you a more informed claimant and prevents you from being charged for a ‘no fault found’ visit. It is the same reason you should check for top signs your dishwasher needs professional diagnostics before the technician even knocks on your door. If your machine is still under a service plan, remember that the truth about non-manufacturer repair parts and your warranty is that some DIY attempts can actually void your protection if you start cutting wires, so keep your diagnostics non-invasive.Most people assume that a warranty is a static safety net, but it is actually a shifting maze. One of the biggest mistakes I see is homeowners assuming coverage remains the same throughout the life of the machine. In reality, you must understand why your warranty terms change after the first year. Often, the labor coverage vanishes entirely, leaving you with ‘free’ parts that still require a $200 service call to install. Even more frustrating is the clause that voids your coverage if you move the appliance. I once worked with a homeowner who had their entire claim denied simply because they pulled the unit out of the kitchen cabinet to check for a leak themselves. It seems unfair, but the fine print in modern service contracts is brutal. According to an industry study by Consumer Reports, nearly 20% of new dishwashers develop a fault within five years, yet the cost of an extended warranty often exceeds the actual price of common repairs. This is why knowing why your service plan renewal may cost more than the repair is essential for your wallet. 
Don’t Let a Software Glitch Cost You a New Motor
There is a dangerous ‘Oops’ factor in modern diagnostics: the belief that error codes are absolute truth. In my experience, ‘smart’ machines have a dirty little secret—software corruption. I have seen countless cases where a ‘drain error’ was actually a cached memory glitch. This is exactly why your smart appliance needs regular software cache clears just like a laptop or a smartphone. If you don’t try a soft reset first, you might find yourself paying for a pump you didn’t actually need. Furthermore, you should be wary of why your appliance firmware update just bricked the control board. If your home Wi-Fi drops during a mandatory update, the machine can lose its ‘brain’ entirely. This isn’t a mechanical failure, but manufacturers often argue it isn’t a warranty issue either if the connection was at fault.
Is Your Smart Dishwasher Just a Fancy Paperweight?
When the screen goes dark or the buttons stop responding, the technical nuances of your defense matter. You need to know how appliance diagnostics can save your warranty benefits by allowing you to document the failure before the technician arrives. If you can how to prove a power surge killed your main control board, you can often shift the financial burden back to your home insurance or the manufacturer. The industry secret is that many technicians rely on the same hidden service menus you can access yourself. Finding the hidden loophole that gets your denied claim reversed often just requires a little bit of evidence that you haven’t been negligent with the machine’s maintenance. Have you ever fallen into this trap? Let me know in the comments.
Don’t Guess at Electricity When a Multimeter Costs Twenty Bucks
While the magnet trick is a brilliant first step, eventually, you might have to face the wires. I used to be terrified of touching anything electrical until I realized that a basic voltmeter is essentially a ‘truth teller’ for your machine. If you suspect a component has failed, you need to know how to test your inlet valve with a simple voltmeter rather than just replacing it on a whim. I personally use a Fluke 117 because of its non-contact voltage detection, which is a lifesaver when you are working in the cramped, wet environment under a kitchen sink. According to technical documentation from HVAC-School’s appliance division, over 40% of DIY part replacements are unnecessary because the owner misdiagnosed a simple lack of continuity. Learning to read a resistance value (ohms) can be the difference between a successful fix and a pile of wasted plastic. 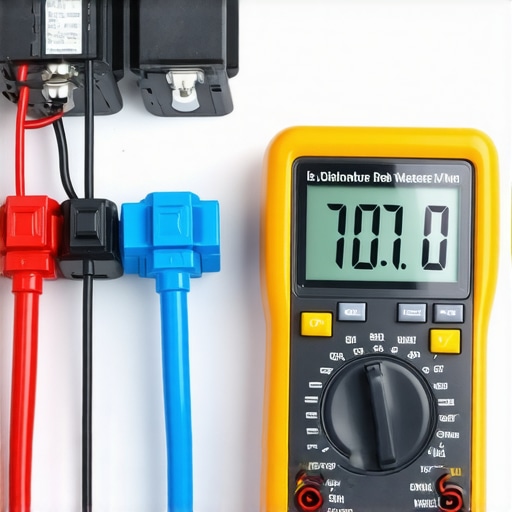
Clean These Three Parts or Face a Flood Later
Long-term results aren’t just about fixing what is broken; they are about preventing the slow decay that kills modern high-efficiency units. The number one culprit I see is the ‘invisible’ buildup. Most people realize they have a problem only when the real cost of skipping your monthly descaling cycle hits them in the form of a $500 heating element failure. Hard water is like cholesterol for your dishwasher’s ‘arteries.’ You also need to get comfortable with the grime; finding the hidden filter most owners never clean in their machine and giving it a hot soapy scrub every thirty days will extend the life of your motor by years. If you ignore the sludge, you will eventually need to learn the best way to degrease a clogged pump impeller, which is a much messier job than a simple filter rinse.
How do I maintain my dishwasher’s performance over time?
Consistency beats intensity every time. I recommend a ‘First of the Month’ ritual: clear the air gap, scrub the door gasket, and run a dedicated cleaning cycle. This isn’t just about smells; it is about maintaining the integrity of the seals so you don’t end up understanding appliance diagnostics the hard way after a kitchen floor is ruined.
The Day Your Dishwasher Fixes Itself is Coming
Looking ahead, the way we handle these failures is shifting rapidly. We are moving toward a ‘Predictive Maintenance’ era where your machine will alert your phone to a failing capacitor before the cycle even stops. We are already seeing how smart diagnostic apps are changing home appliance repair by allowing sensors to transmit acoustic signatures of a failing pump directly to a technician. In the next five years, I expect ‘self-healing’ software to become standard, where the machine can automatically re-calibrate its own sensors to bypass minor mechanical wear. Until that day comes, your best defense is a little bit of knowledge and the right tools. I challenge you to go find your dishwasher’s filter right now—if it’s slimy, you’ve got work to do.
Why I Stopped Fearing the Flashing Lights
The hardest lesson I learned is that modern appliances are often ‘too smart’ for their own good. My biggest lightbulb moment came when I realized that a sensor being off by just a millimeter can shut down a thousand-dollar machine. I used to panic at every error code, but now I know that testing a door latch with a business card is usually more informative than a factory reset. If a claim does get denied because of a ‘user error’ that you know is actually a component failure, you need to be ready to use the steps to appeal a rejected extended warranty claim. DIY repair isn’t about being a genius; it’s about being more patient than the machine.
Gear That Actually Makes Repairing Easier
You don’t need a professional workshop to keep your kitchen running. My essential toolkit includes a high-quality multimeter, a neodymium magnet for sensor testing, and a smartphone to access the secret tech menu that calibrates your water sensors. I also highly recommend keeping a physical log of your maintenance dates. Knowing exactly when you last cleaned the sump or checked the spray arms makes troubleshooting dishwasher problems expert diagnostics repair tips much more scientific and less like guesswork. If you’re ever truly stumped, don’t hesitate to reach out through a contact us page to get a professional’s perspective before you start tearing into the main harness.
Take Back Control of Your Kitchen Gadgets
Repairing your own appliances is an act of defiance against planned obsolescence. Every time you fix a sensor rather than replacing the unit, you’re winning. Remember that understanding appliance diagnostics is the key to long-term savings and peace of mind. Don’t let the wires intimidate you—you’ve got the tools and the knowledge to handle this. Have you ever managed to fix a major appliance with a simple household item like a magnet or a toothpick? Let me know your best ‘zero-dollar fix’ stories in the comments below!