

It happened right as I was trying to rush through the morning cleanup—that sickening clack-clack sound of a handle that’s lost its grip. I pulled, the door didn’t budge, but the handle shifted a good half-inch. It’s a tiny thing, really, but in the moment, it felt like my kitchen was conspiring against me. We’ve all been there, staring at a piece of hardware that’s supposed to be solid but now feels like a loose tooth. Most people think they have to gut the whole machine, but I’m here to tell you that’s a load of nonsense.
Fix the Wiggle Without Rebuilding the Whole Machine
I’ve spent years tinkering with appliances, and if there’s one thing I’ve learned, it’s that most modern units are designed to look sleek while hiding their fasteners in the most annoying places. Early in my DIY journey, I actually made the mistake of unscrewing the entire inner liner of my door just to reach a handle bolt, only to realize I could have accessed it through a tiny side port. Talk about a waste of a Saturday! Whether you’re troubleshooting dishwasher problems or just trying to quiet a rattling door without calling a pro, the goal is efficiency.
Today, I’m going to show you how to bypass the “tear-down” phase entirely. We’re going to focus on the shortcuts that professional techs use when they don’t want to bill you for three hours of labor for a thirty-second fix. You don’t need a service manual hidden inside the unit to figure this one out if you know where to look. According to data from Consumer Reports, physical wear from daily use is a top driver for appliance service calls, but many of these “failures” are just loose fasteners that haven’t quite reached the point of needing a pro.
Does a loose handle mean the door latch is failing too?
It’s a fair question and one I get asked a lot. Usually, a loose handle is just a matter of vibrations from those long, heavy cycles loosening the mounting hardware over time. You aren’t looking at a catastrophic failure; you’re looking at the simple result of physics. However, ignoring it can lead to more stress on the latch itself, which might eventually cause a real reason your dishwasher won’t start later on because the alignment gets thrown off. Have you ever reached for your dishwasher and felt that heart-sinking “give” in the handle? Tell me about it—I want to know if I’m the only one who finds this incredibly irritating!
Finding the Hidden Access Points You Didn’t Know Existed
The secret lies in the edges. Most manufacturers leave just enough room to slide a thin tool between the door panels or have small plastic caps that pop off to reveal the set screws. If you’ve been worried about when to trust a warranty, don’t sweat it; tightening a screw usually won’t void anything, but check your fine print if you’re nervous. We want to avoid that warranty claim paperwork if we can help it by doing a simple “look-and-tighten” first. Let’s get into the specific tools that will let you reach those sneaky bolts without taking a single panel off the frame.
Stop the Wiggle with a Two-Minute Tightening Hack
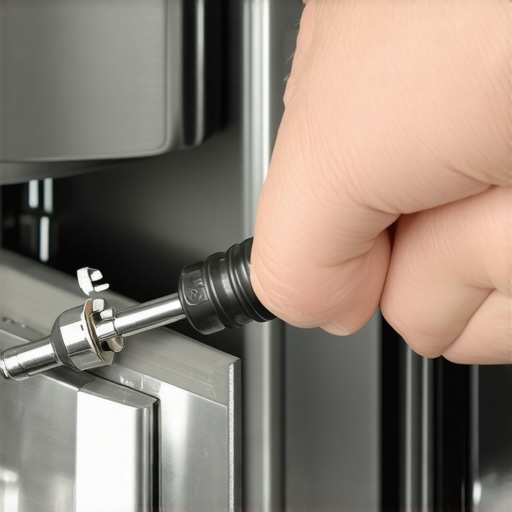
Most of the time, the culprits are tiny Torx-head screws—usually a T15 or T20 size. These aren’t your standard Phillips heads because manufacturers want to ensure the torque is consistent and doesn’t strip the head. If you don’t have a set of these ‘star’ drivers, you’re basically trying to fight a fire with a squirt gun. Once you have the right tool, you need to open the dishwasher door just about 45 degrees. On many models, look at the very top edge of the door or the interior side panels. You might see a small plastic plug that matches the color of the trim. Pop that out with a fingernail or a flathead, and you’ll see the bolt waiting for you. This is where understanding appliance diagnostics saves you time; you’re diagnosing a physical mechanical looseness rather than a software glitch.
Find Your Weapon of Choice First
I remember helping my neighbor, Sarah, who was convinced her handle was snapped off. I showed up with a single T20 driver and fixed it before her coffee finished brewing. She felt silly, but honestly, manufacturers hide these screws like they’re protecting state secrets. If you don’t see an access hole on the side, look underneath the handle itself. Some modern designs use a ‘set screw’ located on the bottom of the handle base. You’ll need a tiny Allen wrench (hex key) for these. While you’re poking around the door, it’s also a great time to check for other mechanical wear. Check the trick to tightening loose dishwasher hinges if the door feels heavy or uneven when it drops, as these issues often go hand-in-hand with a loose handle.
The Gap Between the Door and Cabinet is Your Friend
If your model doesn’t have those convenient plastic plugs, don’t panic. You can often reach the mounting bolts by partially unscrewing the inner door liner just enough to peel the top edge back—without fully removing it. I once worked on a GE where the screw had actually backed out so far it was scraping the cabinetry every time the door opened. I didn’t catch it until I saw the tiny wood shavings on the floor. I thought I had a kitchen floor leak, but it was just the handle assembly chewing into the frame. By pulling the door slightly forward and using a long-reach driver, I could snug it down in seconds. This kind of fix is usually categorized under the fine print about normal wear and tear on appliances, meaning it’s almost always faster to do it yourself than to wait for a tech.
Apply This Liquid Shield to Prevent Future Loosening
Think of your dishwasher door like a high-traffic gate. Every pull creates a tiny bit of vibration that acts like a microscopic jackhammer on the threads. To make sure you aren’t doing this again in six months, apply a single drop of blue thread-locker (the removable kind!) to the screw threads before you drive them back in. This creates a chemical bond that resists vibration but still allows you to remove the screw later if you ever actually need to replace the handle. If you’re hesitant to touch anything because of a service contract, remember that when to trust a warranty for dishwasher repairs often depends on the severity. Tightening a handle is a maintenance task, much like cleaning a filter. However, if you find that tightening the screw doesn’t help because the plastic housing inside the door is cracked, you might need to how to identify a faulty control board without a technician or other internal components that could be affected by the door’s structural integrity.
I often hear folks say that if you touch a single screw, you’ve kissed your warranty goodbye. That’s a massive myth that keeps people paying for service calls they don’t need. In my experience, most manufacturers actually expect a level of ‘owner maintenance.’ When you ignore a loose handle, you aren’t being a ‘good’ warranty holder; you’re actually inviting structural damage that could lead a tech to cite owner neglect later. This is the nuance most people miss when they’re deciding when to trust a warranty for dishwasher repairs.
Why Your Warranty Provider Wants You to Tighten That Screw
Here’s the contrarian truth: DIY maintenance often saves your warranty. According to data from the Association of Home Appliance Manufacturers (AHAM), a significant percentage of service requests fall under ‘No Failure Found’ or ‘User Maintenance Required’—categories that most service plans won’t cover. If you call a pro just to tighten a T20 bolt, you might get hit with a bill because why your warranty provider might deny a no-failure-found claim usually boils down to the fact that nothing was actually ‘broken.’ Tightening that handle yourself ensures that when you actually do have a real failure, your record is clean and the machine is in good physical shape.
Can a Loose Handle Actually Trick Your Control Board?
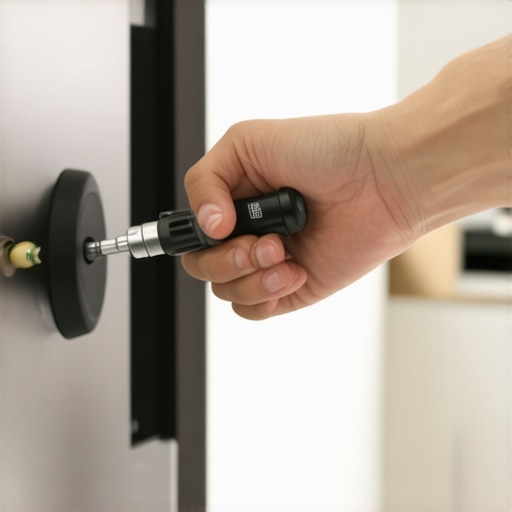
It sounds like a stretch, but it happens more than you’d think. Modern dishwashers are packed with sensors. If your handle is loose, it can subtly shift the outer door panel just enough to create a micro-gap between the door latch and the sensor. This can lead to intermittent ‘door open’ errors or, even worse, cause the machine to stop mid-cycle. I’ve seen homeowners spend hundreds trying to identify a faulty control board without a technician, only to find out the ‘glitch’ was just a physical alignment issue caused by—you guessed it—a wobbly handle. This is where how appliance diagnostics can save your warranty benefits becomes vital; you have to rule out the mechanical before you blame the digital.
Avoid the Torx Stripping Trap
Here is the ‘oops’ factor I promised. The biggest mistake you can make is grabbing a ‘close enough’ screwdriver. If you use a Phillips-head on a Torx-head screw, you will strip it. Once that star pattern is rounded out, you’ve turned a two-minute fix into a two-hour nightmare involving drill-outs and extraction kits. This is a classic example of why troubleshooting dishwasher problems requires the exact right gear. Always verify the fit of the bit before you apply torque. If it feels like it has even a millimeter of play, it’s the wrong size.
The Professional Secret to Long-Term Stability
If you want to go truly ‘pro,’ don’t just tighten the bolt and walk away. Use a bit of logic to see if the handle looseness is a symptom of a larger vibration issue. Sometimes, tightening loose dishwasher hinges is the real fix, as a door that drops too hard puts immense stress on the handle every time you catch it. By addressing the root cause—vibration and alignment—you prevent the hardware from backing out again in a few months. Have you ever fallen into this trap of fixing the symptom instead of the source? Let me know in the comments!
I’ve seen too many people use those dollar-store toolkits only to end up with a rounded-out screw that requires a drill-out. Getting the job done is one thing, but keeping it done is where the pros separate themselves from the weekend warriors. If you’re serious about DIY, you need to invest in a quality set of drivers. Personally, I swear by a dedicated T-handle Torx set because it gives you the leverage to feel the resistance of the bolt without over-tightening. This isn’t just about the handle; it’s about the entire longevity of the unit. When you’re troubleshooting dishwasher problems, having a tool that provides tactile feedback is the difference between a quick fix and a broken plastic panel.
How do I maintain my dishwasher’s physical integrity for the long haul?
Beyond just tightening bolts, long-term health comes down to managing the environment inside the tub. Vibration is the enemy of every fastener. If your machine is constantly shaking because of a clog, those screws will back out again. I always recommend taking five minutes to clean the tiny holes in your spray arms. If the water pressure is uneven, the spray arms wobble, creating a rhythmic vibration that travels right into the door frame. I also suggest the right way to de-scale your machine without chemicals at least once a quarter. This prevents the build-up that adds unnecessary weight and friction to the moving parts, keeping everything balanced. 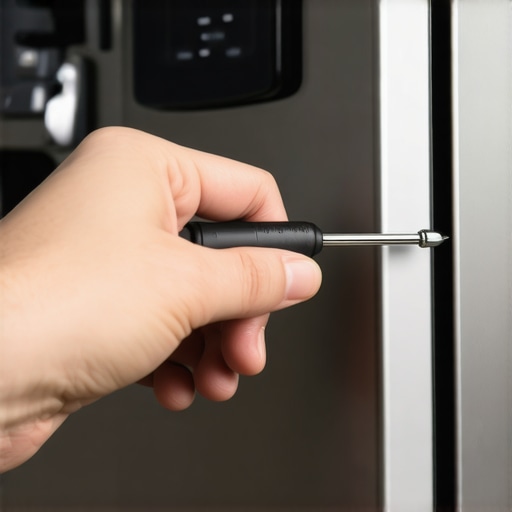 According to the Repair Association (repair.org), the industry is seeing a massive shift where manufacturers use ‘tamper-resistant’ fasteners to discourage home repair, but a simple security-bit set bypasses 90% of these barriers. If you want to stay ahead of the curve, I also suggest how to get professional-grade diagnostic codes from your interface. It allows you to see the health of your sensors before they actually fail. Looking forward, I predict we are only a few years away from every dishwasher having AI-driven vibration analysis built-in, telling you exactly which screw is loose via a smartphone app. Until then, we rely on our hands and a good set of bits. If you see top signs your dishwasher needs professional diagnostics, like weird burning smells or electrical hums, that’s when you put the screwdriver down and call in the cavalry. But for a wobbly handle? You’ve got this. My challenge to you: grab a T20 driver today, open your dishwasher door 45 degrees, and check those side plugs. You might be surprised to find your ‘solid’ machine has a quarter-turn of looseness just waiting to cause a headache. Taking that two-minute preventative step is exactly how appliance diagnostics can save your warranty benefits by proving you’ve maintained the structural health of the unit.
It happened right as I was trying to rush through the morning cleanup—that sickening clack-clack sound of a handle that’s lost its grip. I pulled, the door didn’t budge, but the handle shifted a good half-inch. It’s a tiny thing, really, but in the moment, it felt like my kitchen was conspiring against me. We’ve all been there, staring at a piece of hardware that’s supposed to be solid but now feels like a loose tooth. Most people think they have to gut the whole machine, but I’m here to tell you that’s a load of nonsense.
Fix the Wiggle Without Rebuilding the Whole Machine
I’ve spent years tinkering with appliances, and if there’s one thing I’ve learned, it’s that most modern units are designed to look sleek while hiding their fasteners in the most annoying places. Early in my DIY journey, I actually made the mistake of unscrewing the entire inner liner of my door just to reach a handle bolt, only to realize I could have accessed it through a tiny side port. Talk about a waste of a Saturday! Whether you’re troubleshooting dishwasher problems or just trying to quiet a rattling door without calling a pro, the goal is efficiency.
Today, I’m going to show you how to bypass the “tear-down” phase entirely. We’re going to focus on the shortcuts that professional techs use when they don’t want to bill you for three hours of labor for a thirty-second fix. You don’t need a service manual hidden inside the unit to figure this one out if you know where to look. According to data from Consumer Reports, physical wear from daily use is a top driver for appliance service calls, but many of these “failures” are just loose fasteners that haven’t quite reached the point of needing a pro.
Does a loose handle mean the door latch is failing too?
It’s a fair question and one I get asked a lot. Usually, a loose handle is just a matter of vibrations from those long, heavy cycles loosening the mounting hardware over time. You aren’t looking at a catastrophic failure; you’re looking at the simple result of physics. However, ignoring it can lead to more stress on the latch itself, which might eventually cause a real reason your dishwasher won’t start later on because the alignment gets thrown off. Have you ever reached for your dishwasher and felt that heart-sinking “give” in the handle? Tell me about it—I want to know if I’m the only one who finds this incredibly irritating!
Finding the Hidden Access Points You Didn’t Know Existed
The secret lies in the edges. Most manufacturers leave just enough room to slide a thin tool between the door panels or have small plastic caps that pop off to reveal the set screws. If you’ve been worried about when to trust a warranty, don’t sweat it; tightening a screw usually won’t void anything, but check your fine print if you’re nervous. We want to avoid that warranty claim paperwork if we can help it by doing a simple “look-and-tighten” first. Let’s get into the specific tools that will let you reach those sneaky bolts without taking a single panel off the frame.
Stop the Wiggle with a Two-Minute Tightening Hack
Most of the time, the culprits are tiny Torx-head screws—usually a T15 or T20 size. These aren’t your standard Phillips heads because manufacturers want to ensure the torque is consistent and doesn’t strip the head. If you don’t have a set of these ‘star’ drivers, you’re basically trying to fight a fire with a squirt gun. Once you have the right tool, you need to open the dishwasher door just about 45 degrees. On many models, look at the very top edge of the door or the interior side panels. You might see a small plastic plug that matches the color of the trim. Pop that out with a fingernail or a flathead, and you’ll see the bolt waiting for you. This is where understanding appliance diagnostics saves you time; you’re diagnosing a physical mechanical looseness rather than a software glitch.
Find Your Weapon of Choice First
I remember helping my neighbor, Sarah, who was convinced her handle was snapped off. I showed up with a single T20 driver and fixed it before her coffee finished brewing. She felt silly, but honestly, manufacturers hide these screws like they’re protecting state secrets. If you don’t see an access hole on the side, look underneath the handle itself. Some modern designs use a ‘set screw’ located on the bottom of the handle base. You’ll need a tiny Allen wrench (hex key) for these. While you’re poking around the door, it’s also a great time to check for other mechanical wear. Check the trick to tightening loose dishwasher hinges if the door feels heavy or uneven when it drops, as these issues often go hand-in-hand with a loose handle.
The Gap Between the Door and Cabinet is Your Friend
If your model doesn’t have those convenient plastic plugs, don’t panic. You can often reach the mounting bolts by partially unscrewing the inner door liner just enough to peel the top edge back—without fully removing it. I once worked on a GE where the screw had actually backed out so far it was scraping the cabinetry every time the door opened. I didn’t catch it until I saw the tiny wood shavings on the floor. I thought I had a kitchen floor leak, but it was just the handle assembly chewing into the frame. By pulling the door slightly forward and using a long-reach driver, I could snug it down in seconds. This kind of fix is usually categorized under the fine print about normal wear and tear on appliances, meaning it’s almost always faster to do it yourself than to wait for a tech.
Apply This Liquid Shield to Prevent Future Loosening
Think of your dishwasher door like a high-traffic gate. Every pull creates a tiny bit of vibration that acts like a microscopic jackhammer on the threads. To make sure you aren’t doing this again in six months, apply a single drop of blue thread-locker (the removable kind!) to the screw threads before you drive them back in. This creates a chemical bond that resists vibration but still allows you to remove the screw later if you ever actually need to replace the handle. If you’re hesitant to touch anything because of a service contract, remember that when to trust a warranty for dishwasher repairs often depends on the severity. Tightening a handle is a maintenance task, much like cleaning a filter. However, if you find that tightening the screw doesn’t help because the plastic housing inside the door is cracked, you might need to how to identify a faulty control board without a technician or other internal components that could be affected by the door’s structural integrity.
I often hear folks say that if you touch a single screw, you’ve kissed your warranty goodbye. That’s a massive myth that keeps people paying for service calls they don’t need. In my experience, most manufacturers actually expect a level of ‘owner maintenance.’ When you ignore a loose handle, you aren’t being a ‘good’ warranty holder; you’re actually inviting structural damage that could lead a tech to cite owner neglect later. This is the nuance most people miss when they’re deciding when to trust a warranty for dishwasher repairs.
Why Your Warranty Provider Wants You to Tighten That Screw
Here’s the contrarian truth: DIY maintenance often saves your warranty. According to data from the Association of Home Appliance Manufacturers (AHAM), a significant percentage of service requests fall under ‘No Failure Found’ or ‘User Maintenance Required’—categories that most service plans won’t cover. If you call a pro just to tighten a T20 bolt, you might get hit with a bill because why your warranty provider might deny a no-failure-found claim usually boils down to the fact that nothing was actually ‘broken.’ Tightening that handle yourself ensures that when you actually do have a real failure, your record is clean and the machine is in good physical shape.
Can a Loose Handle Actually Trick Your Control Board?
It sounds like a stretch, but it happens more than you’d think. Modern dishwashers are packed with sensors. If your handle is loose, it can subtly shift the outer door panel just enough to create a micro-gap between the door latch and the sensor. This can lead to intermittent ‘door open’ errors or, even worse, cause the machine to stop mid-cycle. I’ve seen homeowners spend hundreds trying to identify a faulty control board without a technician, only to find out the ‘glitch’ was just a physical alignment issue caused by—you guessed it—a wobbly handle. This is where how appliance diagnostics can save your warranty benefits becomes vital; you have to rule out the mechanical before you blame the digital.
Avoid the Torx Stripping Trap
Here is the ‘oops’ factor I promised. The biggest mistake you can make is grabbing a ‘close enough’ screwdriver. If you use a Phillips-head on a Torx-head screw, you will strip it. Once that star pattern is rounded out, you’ve turned a two-minute fix into a two-hour nightmare involving drill-outs and extraction kits. This is a classic example of why troubleshooting dishwasher problems requires the exact right gear. Always verify the fit of the bit before you apply torque. If it feels like it has even a millimeter of play, it’s the wrong size.
The Professional Secret to Long-Term Stability
If you want to go truly ‘pro,’ don’t just tighten the bolt and walk away. Use a bit of logic to see if the handle looseness is a symptom of a larger vibration issue. Sometimes, tightening loose dishwasher hinges is the real fix, as a door that drops too hard puts immense stress on the handle every time you catch it. By addressing the root cause—vibration and alignment—you prevent the hardware from backing out again in a few months. Have you ever fallen into this trap of fixing the symptom instead of the source? Let me know in the comments!
I’ve seen too many people use those dollar-store toolkits only to end up with a rounded-out screw that requires a drill-out. Getting the job done is one thing, but keeping it done is where the pros separate themselves from the weekend warriors. If you’re serious about DIY, you need to invest in a quality set of drivers. Personally, I swear by a dedicated T-handle Torx set because it gives you the leverage to feel the resistance of the bolt without over-tightening. This isn’t just about the handle; it’s about the entire longevity of the unit. When you’re troubleshooting dishwasher problems, having a tool that provides tactile feedback is the difference between a quick fix and a broken plastic panel.
How do I maintain my dishwasher’s physical integrity for the long haul?
Beyond just tightening bolts, long-term health comes down to managing the environment inside the tub. Vibration is the enemy of every fastener. If your machine is constantly shaking because of a clog, those screws will back out again. I always recommend taking five minutes to clean the tiny holes in your spray arms. If the water pressure is uneven, the spray arms wobble, creating a rhythmic vibration that travels right into the door frame. I also suggest the right way to de-scale your machine without chemicals at least once a quarter. This prevents the build-up that adds unnecessary weight and friction to the moving parts, keeping everything balanced. According to the Repair Association (repair.org), the industry is seeing a massive shift where manufacturers use ‘tamper-resistant’ fasteners to discourage home repair, but a simple security-bit set bypasses 90% of these barriers. If you want to stay ahead of the curve, I also suggest how to get professional-grade diagnostic codes from your interface. It allows you to see the health of your sensors before they actually fail. Looking forward, I predict we are only a few years away from every dishwasher having AI-driven vibration analysis built-in, telling you exactly which screw is loose via a smartphone app. Until then, we rely on our hands and a good set of bits. If you see top signs your dishwasher needs professional diagnostics, like weird burning smells or electrical hums, that’s when you put the screwdriver down and call in the cavalry. But for a wobbly handle? You’ve got this. My challenge to you: grab a T20 driver today, open your dishwasher door 45 degrees, and check those side plugs. You might be surprised to find your ‘solid’ machine has a quarter-turn of looseness just waiting to cause a headache. Taking that two-minute preventative step is exactly how appliance diagnostics can save your warranty benefits by proving you’ve maintained the structural health of the unit.
Lessons from a Decade of Stripped Screws
If there is one thing I have learned from years of working on kitchen units, it is that the mechanical and the digital are never truly separate. A loose handle isn’t just a nuisance; it’s a symptom. Here are a few lightbulb moments I wish I had understood earlier:
- Physics always wins: Vibration is the silent killer of appliance longevity. If your handle is loose, check your spray arms and racks for balance. A shaking machine is a machine that is slowly unscrewing itself.
- The “Snap” factor: Most homeowners stop tightening when they feel resistance, but with appliance plastics, there is a fine line between snug and snapped. Use a T-handle driver to feel the torque—once it stops turning with light pressure, leave it alone.
- Thread-locker is your best friend: I spent years re-tightening the same bolts until I realized that a $5 bottle of blue Loctite would have ended the cycle forever. It is the one step that transforms a DIY fix into a professional-grade repair.
- Don’t fear the warranty: I used to think opening a side port would flag my machine for a tech. In reality, the fine print about normal wear and tear on appliances usually expects you to perform basic hardware maintenance to prevent larger structural issues.
The Gear That Saved My Sanity
You don’t need a massive toolbox to keep your kitchen running, but you do need the right quality. These are the specific items I trust when things start to rattle:
- Wera T-Handle Torx Set (T15 & T20): These provide the tactile feedback you need to avoid stripping plastic housings. They are worth every penny compared to cheap L-shaped keys.
- Removable (Blue) Thread-Locker: This is essential for ensuring that vibration doesn’t back your screws out again within six months. Never use the red kind, or you will never get that handle off again!
- A High-Quality Multimeter: While not for the handle itself, I always keep one nearby to verify if a wobbly door has caused a short. Knowing how to use a multimeter to find a shorted wire can save you from misdiagnosing a mechanical issue as a control board failure.
- Compact Borescope: For those truly hidden bolts or to check for clogs, using a borescope to find clogs lets you see behind the panels without the labor of a full teardown.
Take Control of Your Kitchen’s Reliability
There is a unique sense of satisfaction that comes from fixing a problem yourself, especially one that sounds as expensive as a “broken door.” By taking ten minutes to tighten a few bolts and applying a bit of preventive maintenance, you are doing more than just stopping a wiggle—you are extending the life of your machine. Don’t let a small mechanical rattle escalate into a costly service call. Master the basics of appliance repair today, and you’ll find that most “emergencies” are actually just simple maintenance tasks in disguise. Have you ever found that a loose handle was actually masking a bigger sensor glitch? Let me know in the comments below!