

I used to think I was a ‘Dishwasher Tetris’ grandmaster. I’d shimmy a salad spinner between two cereal bowls and jam a heavy serving platter right against the door until it clicked shut with a satisfying thud. But then came the Tuesday of the Great Lasagna Disaster. I opened my machine expecting sparkling plates, only to find a crusty bowl staring back at me like a silent judgment. It wasn’t an appliance failure; it was a self-inflicted wound. I had packed the rack so tight that the water couldn’t actually reach the grime. If you’ve ever felt that sink-side defeat of having to hand-wash a ‘clean’ load, you’re not alone. I realized that pre-washing my dishes wasn’t the problem—my loading strategy was the culprit.
Your ‘Tetris’ Habits are Choking the Machine
The biggest mistake I made early on—and one I see my neighbors make constantly—is thinking that more dishes equals more efficiency. It’s actually the opposite. When you overlap plates or nestle spoons together, you create ‘blind spots’ where the spray can’t penetrate. Think of your dishwasher like a pressurized rainstorm; if you’re standing under an umbrella, you stay dry. In your dishwasher, that large mixing bowl is the umbrella, and everything beneath it is staying dirty. I learned the hard way that when you hear a rattle against the bottom rack, it’s usually a sign that your flow is compromised. According to a landmark study by the University of Bonn, improper loading is the leading cause of poor cleaning performance, regardless of how expensive your detergent is. Today, I’m going to show you exactly how to angle your dishes to ensure the spray arms hit every single surface without wasting a drop of water.
Is all this micro-managing really worth the extra minute?
I get the skepticism. You’re tired, the kids are screaming, and you just want the kitchen clear. You might wonder if taking five extra seconds to angle a bowl really matters. Trust me, it does. When I started paying attention to the ‘path of the spray,’ my re-wash rate dropped to zero. If you find your upper dishes are still gritty, you might even need to check if nozzles are clogged or if your third rack sprayer is being blocked by a tall plate below. Have you ever found a completely dry, dirty bowl right in the middle of a finished load? Let me know in the comments—I suspect many of us are secret ‘crammers’ who need a little rack intervention.
To turn your dishwasher from a glorified drying rack into a high-performance cleaning machine, you have to start with the foundation. Everything revolves around the center spray arm. Imagine the arm is a sprinkler in the middle of a yard; if you put a tall fence right next to it, the grass on the other side stays dry. This is exactly why your plates need to face the center at a slight downward angle. I remember the time I tried to shove a massive, soot-covered cast-iron skillet into the bottom rack. Not only did it block the spray for every other dish, but the vibration caused it to tip and chip my favorite ceramic mug on the rack above. It was a double failure that taught me a hard lesson: space is non-negotiable.
Get the Heavy Hitters in Line
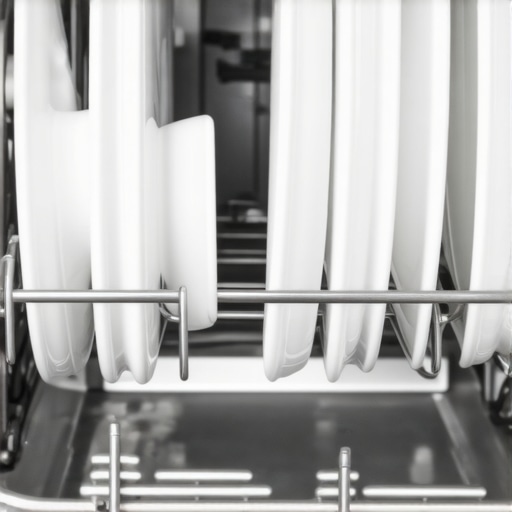
Your bottom rack is for the ‘battleship’ items—plates, large bowls, and sturdy pots. The key here isn’t just fitting them in; it’s ensuring they don’t shield each other. Always load plates with the dirty side facing the center spray. If you have deep pasta bowls, don’t stack them like a deck of cards. Lean them so the water can actually enter the bowl and drain back out. If you find that even with good spacing your dishes aren’t coming clean, you might want to see if your dishwasher needs professional diagnostics to check the pump pressure.
Stop Spoons from Snuggling
The cutlery basket is where most cleaning failures happen because of ‘nesting.’ This is when two spoons tuck into each other, effectively protecting the grime from the water. To prevent this, I mix my silverware. Put some handles up and some handles down, or better yet, use the individual slots if your basket has them. It takes an extra thirty seconds, but it beats scrubbing dried peanut butter off a ‘clean’ spoon later. Also, keep an eye on your detergent choice here. I’ve noticed that the residue from certain tablets versus powder can actually make nesting issues worse by creating a sticky film that traps debris between spoons.
Warm Up Your Water for a Faster Clean
One trick that changed my life is the ‘Hot Start.’ Most dishwashers are connected to the same hot water line as your kitchen sink. If you start your machine while the water in the pipes is still cold, the first ten minutes of the cycle are spent washing with lukewarm water. I always run my kitchen faucet until the water is hot to the touch before I hit ‘Start’ on the machine. This ensures the detergent dissolves instantly and the thermal action starts working on grease immediately. Understanding why running the kitchen sink hot prevents cold starts is the easiest way to shave time off your cycle and improve results without spending a dime.
Protect Your Top Rack Fragiles
The top rack is a lower-pressure zone, making it the safest spot for glasses and plastics. However, even here, a ‘cramming’ mindset leads to disaster. Make sure your glasses are placed between the tines, not over them, to avoid those annoying water spots or breakage. If you notice your upper items are still coming out gritty, it’s worth taking a moment to learn the proper way to clean spray arm nozzles. A single grain of rice stuck in a nozzle can kill the water pressure for half the rack. If things still feel off, you can even test your float switch with a simple pencil to ensure the water level is high enough to reach the top arm in the first place.
Don’t Trust the Error Codes Blindly
Beyond the physical layout, there’s a technical layer to your machine that most homeowners—and even some amateur repair techs—completely overlook. I used to assume that if my control panel wasn’t flashing a red light, the internal ‘brain’ was happy. That’s a massive misconception. Modern machines are surprisingly stoic; they will often limp along with failing sensors for months without throwing an error code. This is where top signs your dishwasher needs professional diagnostics becomes your early warning system. According to data from the Association of Home Appliance Manufacturers (AHAM), many ‘poor cleaning’ complaints actually stem from minor sensor drifts that haven’t yet reached the threshold of a full system failure. If you suspect something is off, you can sometimes access the secret diagnostic mode hidden on your touch control panel to see what the machine is really thinking before you call in a pro.

Your Garbage Disposal Might Be Killing Your Warranty
Here is the ‘oops’ factor that catches almost everyone off guard: your plumbing is a legal loophole. I’ve seen countless neighbors get their claims rejected because they didn’t realize that why your warranty claim got denied because of your garbage disposal is a standard industry practice. If your disposal is clogged or incorrectly installed, it forces dirty water back into the dishwasher. The manufacturer won’t pay for a repair caused by external plumbing issues. Furthermore, you need to realize why your appliance warranty covers parts but not labor costs. You might get a free ten-dollar sensor, but the technician’s visit will still cost you two hundred. It’s a bitter pill to swallow when you realize the real difference between service plans and manufacturer warranties often boils down to who pays for the van in your driveway.
Why does the last minute of the cycle last for twenty?
We’ve all stood in the kitchen, staring at that ‘0:01’ on the display while the machine hums indefinitely. It’s not a glitch; it’s the machine trying to compensate for an issue. Usually, it’s because the water isn’t reaching the right temperature or the turbidity sensor thinks the water is still dirty. Digging into why your new machine stays on one minute for ten minutes can save you from unnecessary panic. If this happens consistently, it’s a signal that your heater might be struggling or your water hardness is throwing off the sensors. For those in high-mineral areas, the impact of hard water on eco-friendly detergent performance can create a feedback loop that tricks the machine into extending the cycle. Have you ever been blindsided by a repair bill for a ‘covered’ appliance or a cycle that wouldn’t end? Let me know in the comments—I’ve heard some horror stories about labor costs that would make your head spin.
Ultimately, understanding appliance diagnostics and improving your warranty claims is about documentation. If you hear a strange sound, record it. If the dishes are wet, take a photo. When you can prove an intermittent fault, you’re much more likely to get a successful outcome when to trust a warranty for dishwasher repairs. Don’t let the ‘smart’ machine outsmart your wallet.
Transitioning from fighting with the warranty department to actual physical maintenance was the turning point for my kitchen sanity. Once you realize that most appliance failures are predictable, you stop being a victim of your kitchen and start being its manager. I’ve found that the difference between a machine that lasts five years and one that lasts fifteen usually comes down to two things: a basic multimeter and a willingness to get a little dirty. If you really want to take control, you need to stop relying on ‘common sense’ and start troubleshooting dishwasher problems with expert diagnostics. I remember the first time I pulled the kickplate off and realized my machine wasn’t broken; it just had a tiny piece of plastic film stuck in the drain pump.
Stop Guessing and Start Measuring with Real Tools
I cannot stress this enough: buy a digital multimeter. For about twenty dollars, you can stop wondering if a part is bad and actually know for sure. I used mine last month to learn how to test a dishwasher solenoid with a multimeter, and it saved me from buying a whole new control board I didn’t need. According to the AHAM DW-1-2020 technical standard, modern solenoids should typically show a resistance between 500 and 1500 ohms; if yours is open or shorted, no amount of ‘resetting’ the power will fix it. Another tool I swear by is a standard shop-vac. When your machine won’t drain, don’t just bail it out with a cup. Learn how to clear a blocked impeller with a shop vacuum by creating a seal over the drain port. The suction power of a vacuum can often dislodge seeds or glass shards that your fingers can’t even feel.

How do I maintain my dishwasher’s performance over several years?
Maintenance isn’t a one-time event; it’s a rhythm. Every six months, I perform a deep-system calibration. If you live in an area with shifting mineral levels in the water, you must know how to calibrate your dishwasher for soft water. Excessive soft water can actually lead to ‘etching,’ where the glass is permanently scratched because the detergent has no minerals to react with. Conversely, failing to account for mineral buildup will kill your heating element. I’ve noticed the impact of hard water on eco-friendly detergent performance is particularly brutal, often requiring you to run a citric acid cycle once a month to keep the sensors clear. If you start to hear a change in the machine’s song, you need to be able to identify a dying circulation motor by its pitch before it completely seizes and leaves you with a kitchen full of suds.
Why Predictive Maintenance is the Next Big Thing
Looking ahead, I predict we are moving toward a ‘Pre-Failure’ era. Within the next few years, I expect smart dishwashers to use vibration analysis to tell you exactly when a bearing is starting to wear out, weeks before it fails. Currently, we deal with the frustration of why your smart dishwasher notifications are always delayed, but as firmware improves, these machines will become more transparent. The goal is to move away from reactive repairs. If you can document intermittent noises for a repair claim now, you are already ahead of the curve. My advice? Go grab a multimeter this weekend and test your thermal fuse for continuity—it is the ultimate way to demystify the ‘magic’ inside your appliance and save hundreds on service calls.
Lessons My Dishwasher Taught Me the Hard Way
After years of trial and error, I’ve realized that most ‘broken’ appliances are actually just misunderstood. One of the biggest shifts in my perspective came when I stopped blaming the machine and started looking at the ecosystem around it; for instance, understanding why your warranty claim got denied because of your garbage disposal taught me that external plumbing is often the silent killer of dishwasher performance. I also had to accept that my choice of cleaning agents wasn’t just about sparkle—it was about chemistry. Diving into the truth about tablet vs powder detergent residue helped me realize that internal buildup was choking my circulation pump long before the parts actually wore out. Finally, I learned that the best defense is a good paper trail; knowing how to document intermittent noises for a repair claim is what finally got my manufacturer to listen when a subtle bearing hum turned into a major failure.
The Essential Kit for DIY Troubleshooting
To move from a passive owner to a confident manager of your kitchen, you need more than just a screwdriver. My personal toolkit always includes a digital multimeter—it is the only way to be 100% sure when testing a dishwasher solenoid or heating element. I also swear by a standard shop-vac; it is the fastest, cleanest method for clearing a blocked impeller without bailing out dirty water by hand. For routine maintenance, I’ve moved away from expensive store-bought cleaners and started focusing on targeted solutions, like removing cloudiness from glasses using citric acid, which effectively descales the entire interior while it works. These tools don’t just fix problems; they provide the peace of mind that comes with knowing exactly how your machine is breathing.
Becoming the Master of Your Machine
Your dishwasher should be a tool that saves you time, not a source of constant frustration. By understanding appliance diagnostics and improving your warranty claims, you take the power back from the manufacturer and ensure your investment lasts for its full intended lifespan. Don’t be afraid to pull off that kickplate and look for the hidden truths your machine is trying to tell you. With the right loading strategy and a proactive diagnostic mindset, you can turn a temperamental appliance into a high-performance cleaning beast. If you find yourself facing a code you can’t crack or a leak you can’t find, you can always contact us for professional guidance. Have you ever discovered a simple DIY fix that saved you from a massive repair bill? I’d love to hear your stories in the comments below!