

I stood there, staring at my “clean” dinner plates, and honestly, I wanted to cry. I had just spent a small fortune on those fancy, biodegradable, scent-free pods because I wanted to do right by the environment. But instead of sparkling porcelain, I got a gritty, white film that made everything look like it had survived a sandstorm. I actually thought my machine was dying and started looking up expert diagnostics and repair tips before I realized the culprit wasn’t a broken part; it was the liquid rock flowing through my pipes. Hard water is the silent killer of the eco-friendly lifestyle, and if you don’t adjust your strategy, you’re just throwing money down the drain. Today, I am going to show you exactly how to get that spot-free shine using green cleaners, even if your water is as hard as a brick.
Stop Blaming Your Machine and Start Looking at Your Pipes
We often think that if the dishes are dirty, the dishwasher is broken. I made that exact mistake early on, nearly risking a service fee because I didn’t realize why your warranty claim was denied due to lack of maintenance. The truth is, eco-friendly detergents are missing the aggressive chemicals—like phosphates—that used to muscle through calcium and magnesium. When you mix hard water with these “gentle” cleaners, they basically cancel each other out. You end up with a gritty film on your glasses and a whole lot of frustration. This build-up isn’t just ugly; it can lead to rust forming on your dishwasher racks and calcium deposits clogging the hidden spray arm nozzles. Over time, this mineral interference can even make the impact of detergent overdose worse, as you keep adding more soap trying to find a solution that chemistry simply won’t allow.
Are These Green Detergents Just a Total Waste of Money?
I get it. You want to save the planet, but you also want to eat off a plate that doesn’t feel like sandpaper. You might be tempted to go back to the harsh stuff, but hold on. The real issue is that your low-water dishwasher requires special rinsing habits when the mineral count is high. According to the Water Quality Association, hard water can reduce the effectiveness of detergents by up to 50% because the minerals “tie up” the active cleaning agents before they can even touch the food on your plates. Have you ever felt like your eco-soap was actually making your dishes dirtier than when they went in? Let me know in the comments, because I spent weeks thinking I had a lemon for an appliance! We are going to look at how to remove cloudiness from glasses using citric acid and why you must understand the truth about salt reservoirs to save your machine.
Make the Most of Your Built-In Water Softener
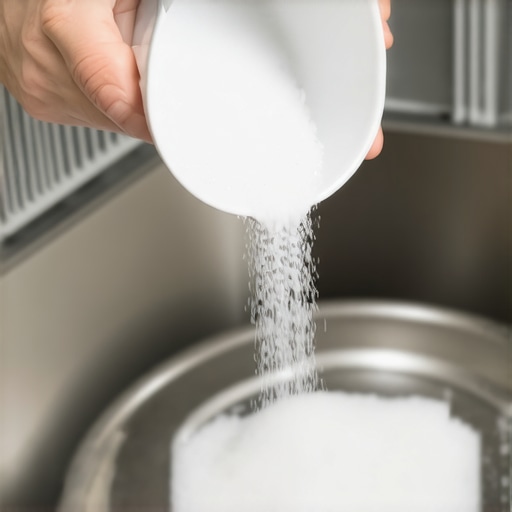
If you have a modern European-style or high-end American machine, you likely have a secret weapon: a dedicated salt compartment. I once ignored my ‘Salt’ light for three months, thinking it was just a marketing gimmick to sell more supplies. My glasses eventually looked like they had been etched with acid. The truth about salt reservoirs in modern high-end dishwashers is that they are the only thing standing between your eco-detergent and total failure. This specialized salt doesn’t actually touch your dishes; it regenerates the ion-exchange resin that strips minerals from the water before it ever enters the tub. When I finally filled it, the transformation was overnight—my grit disappeared, and the ‘clean’ light finally felt honest again.
Why Citric Acid Beats Every Green Booster on the Shelf
If you don’t have a salt reservoir, you need a chemical bypass that doesn’t rely on harsh phosphates. Citric acid is a natural chelator, which is just a fancy way of saying it grabs onto minerals and drags them out of the water. I started adding a tablespoon to the bottom of the tub before every cycle, and the result was better than the $20 ‘booster’ bottles sold at the grocery store. Learning how to remove cloudiness from glasses using citric acid is the most cost-effective way to salvage a ‘clean’ lifestyle in a hard-water home. It dissolves the calcium bonds that keep the film stuck to your porcelain and prevents the white haze from forming during the drying stage.
Quit the Pre-Rinse Habit for Better Enzyme Performance
It sounds counterintuitive, but your dishes actually come out cleaner if they are a little dirty. Eco-friendly detergents rely on enzymes that are designed to latch onto food particles. If you pre-rinse everything until it’s spotless, those enzymes have nothing to do, so they spend the cycle attacking your glassware or just washing down the drain. This is why why pre-rinsing dishes actually makes your machine less efficient and can lead to more etching. I used to spend ten minutes at the sink scrubbing every plate, but once I switched to just scraping off the big chunks, my ‘eco-mode’ finally started producing the results I expected. Let the chemistry do the heavy lifting for you.
Clear the Path for High-Pressure Water Flow
Even the best detergent fails if the water can’t reach the dishes. Hard water minerals love to settle in the tiny holes of your spray arms, forming a crust that restricts water pressure. This is why you should learn how to clean the hidden spray arm nozzles with a toothpick. I found that a quarterly deep clean of these components ensures the water reaches the top rack with enough force to rinse away the loosened minerals. You can also use the best way to clean your spray arms using only lemon juice to dissolve build-up without using industrial chemicals that might damage the internal seals over time.
I used to think that when my machine started beeping and flashing lights, it was a death sentence for my wallet. The common wisdom in most DIY forums is to start ripping out the pump or the heater as soon as you see an error. But here is the contrarian truth: in modern smart appliances, the hardware is usually fine—it’s the sensors that are having a nervous breakdown. Before you call a tech, you need to access the secret diagnostic mode hidden on your touch control panel. This isn’t just for pros; it’s the only way to see what the machine thinks is wrong versus what is actually happening.
The Vinegar Myth That Could Cost You a New Gasket
One of the biggest traps I see people fall into is the ‘Vinegar Everything’ trend. We’re told it’s the ultimate eco-friendly descaler, right? Well, if you use it every week, you’re playing a dangerous game. Acetic acid is a solvent, and while it eats calcium, it also eats the rubber in your gaskets. I’ve seen perfectly good machines develop leaks because the owner thought they were being ‘green,’ only to find out why using distilled vinegar every week may damage your seals. It’s a classic example of a good intention leading to a $200 repair bill for a frayed door seal.
Why Does Your Machine Stay Stuck on the Last Minute?
This is the question I get asked the most. You see the timer hit ‘0:01’ and it just sits there for ten minutes. Most people assume the control board is fried, but the reality is often related to the water temperature or a slow drain. According to the Association of Home Appliance Manufacturers (AHAM), modern high-efficiency machines will extend the cycle if they detect that the water hasn’t reached the optimal temperature for enzyme activation. If your new machine stays on one minute for ten minutes, it’s actually trying to save the cycle from failing, not dying on you.
Protect Your Warranty from Environmental Clauses
The ‘Oops’ factor that gets everyone is the warranty claim. If you have hard water and you haven’t been maintaining your machine, the manufacturer has a ‘get out of jail free’ card. I’ve seen so many people get their claims rejected because they didn’t realize the clause in your service plan that voids coverage for hard water damage. They view mineral buildup as ‘environmental’ rather than a ‘manufacturing defect.’ This is why understanding appliance diagnostics is so vital; you need to prove that the failure wasn’t caused by your pipes before the technician even arrives. 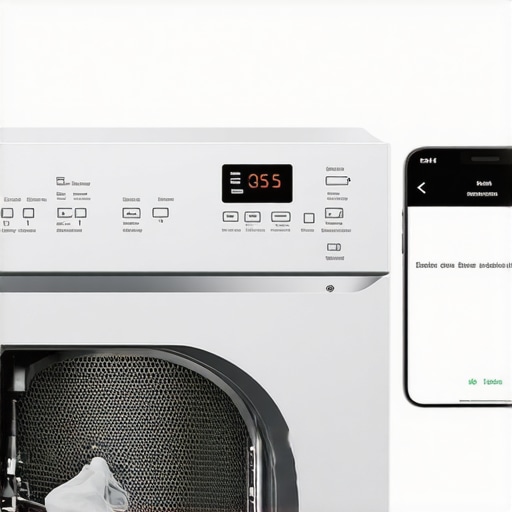
Check the Drain Hose Before Calling a Pro
Another nuance people miss is the ‘High Loop’ on the drain hose. If your dishwasher smells like a swamp, don’t buy a cleaner yet. Check under the sink. If the hose isn’t looped higher than the entry point to the drain, dirty sink water is siphoning back into your clean machine. This is why your service tech always checks the drain hose high loop first. It’s a five-minute fix that solves 90% of odor problems and prevents you from needing professional diagnostics. Have you ever spent hours troubleshooting a part only to find out it was something silly like a clogged air gap or a software glitch? Let me know in the comments—I need to know I’m not the only one who has been outsmarted by a dishwasher! If you’re really stuck, you can always try expert diagnostics and repair tips to see if it’s a simple DIY fix like unclogging a dishwasher air gap with a straw before you spend money on a service call.
Stop Guessing and Start Measuring Your Hardware
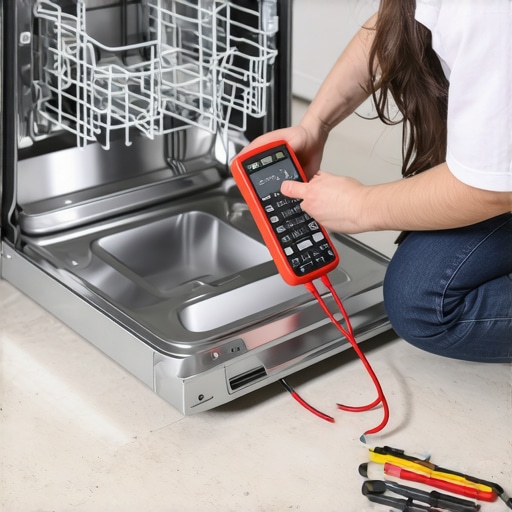
I used to be the person who would stare at a dead control board and just pray it would reset if I flipped the breaker enough times. Then I bought a $20 digital multimeter, and my entire relationship with my kitchen changed. If you really want to stop being at the mercy of a service schedule, you have to embrace basic electrical testing. You don’t need an engineering degree to perform testing your heating element for ground faults with a meter; you just need to know how to read continuity. Most of the time, the ‘broken’ part is just a circuit that can’t complete its loop. Even something as simple as how to test your dishwashers float switch with a pencil can save you a $150 diagnostic fee. It turns out that a lot of what we call ‘broken’ is just a stuck mechanical component or a sensor covered in hard-water scale.
How can I make my dishwasher last for a decade?
The secret to a ten-year lifespan isn’t buying the most expensive brand; it’s about preventing the slow creep of mineral sludge. I make it a habit to perform a ‘deep dive’ every six months. This goes beyond just rinsing the mesh screen under the tap. You need to learn how to deep clean a dishwasher sump without pulling the machine. This is where the bits of broken glass, plastic labels, and popcorn kernels go to die, eventually choking your drain pump. According to detailed service documentation from RepairClinic experts, nearly 30% of dishwasher failures are actually just sensor calibration issues or debris blocks that can be cleared without buying a single new part. By keeping the sump clear and the water path unobstructed, you’re significantly reducing the load on the circulation motor, which is usually the most expensive part to replace.
Your Phone is Actually a Repair Tool Now
We live in a weird age where your dishwasher might have more computing power than the Apollo 11 lander. While it can be annoying when why your smart dishwasher keeps dropping its wi-fi connection, that connectivity is actually your best friend for long-term health. I’ve started using manufacturer apps to monitor cycle efficiency because they often catch errors before the machine even throws a code. We are seeing a massive shift in the industry where how smart diagnostic apps are changing home appliance repair, allowing us to see real-time data on water temperature and motor torque. If you aren’t doing it already, check for updates; why firmware updates are essential for new smart dishwashers is the same reason they are essential for your phone—they fix bugs that cause premature wear on the hardware. Even a simple software cache clear can sometimes fix a machine that keeps stopping mid-wash.
The Future of Kitchen Diagnostics
Looking ahead, I suspect we are only a few years away from ‘predictive vibration analysis’ becoming standard in every home. Instead of waiting for a leak, your machine will use internal sensors to detect the specific harmonic frequency of a bearing that is starting to fail, sending a notification to your phone to ‘Replace Drain Pump’ before your kitchen floors get wet. Until that AI future arrives, we have to be the brains of the operation. By staying on top of the small stuff, you are essentially understanding appliance diagnostics and saving your warranty benefits by proving you’ve followed the maintenance fine print. My challenge for you this week: Don’t wait for a breakdown. Go find your model number and look up the secret tech menu that calibrates your water sensors tonight just to see what information is hidden behind that touch panel.
The Hardest Lesson I Learned About the ‘Green’ Dishwasher Trap
If there is one thing I’ve realized after years of trial and error, it’s that eco-friendly living requires more brainpower, not just better soap. The biggest myth is that modern machines are ‘disposable.’ They aren’t; they are just more sensitive. I spent way too much time guessing before I learned how to use troubleshooting dishwasher problems and expert diagnostics to my advantage. Realizing that a ‘broken’ machine is often just a sensor confused by mineral build-up changed everything for me. It’s also why I now keep a close eye on the red flags your service tech looks for in the plumbing.
#IMAGE_PLACEHOLDER_E#
My Essential Survival Kit for Modern Appliances
You don’t need a garage full of tools to keep your kitchen running. My ‘go-to’ list includes a simple box of food-grade citric acid, a multimeter for testing your heating element, and a reliable diagnostic guide. I also recommend bookmarking the official service manual for your specific model—not the ‘user guide’ that tells you how to load a plate, but the technical one that explains the secret tech menu that calibrates your water sensors. Trusting these data-driven tools is how appliance diagnostics can save your warranty benefits when the manufacturer tries to blame your hard water for a motor failure.
You Are More Capable Than the Repair Hotline
Don’t let a blinking ‘Error’ code intimidate you into a $500 replacement. Most of the time, the fix is as simple as testing your float switch with a pencil or listening for the specific trick to identifying a failing drain pump by sound. You have the power to extend the life of your appliance and keep it out of the landfill. Take a breath, grab a flashlight, and start investigating—you’ll be surprised at how much you can fix with just a little curiosity and the right information. Have you ever successfully solved a ‘mysterious’ dishwasher problem by accessing a hidden menu or using a simple household tool? Let me know your best DIY wins in the comments below!