

I’ll never forget the cold, squelching sensation of my favorite wool socks soaking up a gallon of lukewarm, soapy water. It was a Tuesday evening, and I thought I was being productive by running the ‘heavy’ cycle. Instead, I was staring at a blinking ‘overfill’ error and a kitchen floor that looked more like a lake. I made a classic rookie mistake: I assumed the machine would just figure it out if I turned it off and on again. Spoiler alert—it didn’t. In fact, ignoring the signs your dishwasher needs professional diagnostics led to a warped cabinet board that still doesn’t shut right. Today, I’m going to show you how to avoid my $400 mistake by testing the float switch yourself. It’s the gatekeeper of your dishwasher’s water level, and when it fails, things get messy fast.
That Moment I Realized My Kitchen Was Becoming a Swimming Pool
When that water started creeping toward my hardwood, I panicked. I started pulling out towels, bowls, and even an old yoga mat to contain the mess. I thought I had a major plumbing catastrophe on my hands. I almost called an emergency plumber at 9 PM, which would have cost me a fortune just for the visit. Thankfully, my neighbor—a retired appliance tech—saw my garage door open and poked his head in. He pointed right at that little plastic mushroom in the corner of the tub. It turns out, I was just dealing with a common troubleshooting dishwasher problem that looks much scarier than it actually is. It is easy to feel overwhelmed, but most of these issues are just mechanical hiccups.
Is this tiny switch actually the reason for all the drama?
You might be skeptical that a simple piece of plastic can bring a high-end appliance to its knees. But think of it like a floating sensor in a toilet tank; if it can’t move, the water doesn’t know when to stop. According to data from the Association of Home Appliance Manufacturers, nearly 30% of dishwasher service calls could be avoided with basic component testing. We are going to dive into fixing the dreaded error code and specifically look at why that float switch is likely the culprit. Have you ever opened your dishwasher only to find it half-full of water after the cycle should have ended? Tell me about your biggest appliance fail in the comments!
Stop the Flood Before it Ruins Your Kitchen
Before we grab the tools, let’s talk about why we’re doing this. If your machine thinks it’s empty when it’s actually full, it’ll keep pumping in water until gravity takes over. I’ve seen folks try to identify a failing drain pipe when the real issue was just a stuck float. We’ll look at how to test your float switch using a plastic straw for a quick check, then move on to the real diagnostics. It’s about understanding appliance diagnostics so you can talk to a repair tech—or your warranty provider—with actual evidence in hand. Getting this right now saves your floors and your sanity. [image_placeholder]First, you need to find the float. It looks like a little plastic hat or mushroom sitting in the front corner of the dishwasher tub. Before you assume it’s an electrical failure, lift it up and down. It should have about a half-inch of travel and make a crisp ‘click’ sound when it hits the bottom. I remember one frantic Saturday where I was ready to buy a new machine because it wouldn’t stop filling. I reached in, lifted the float, and felt a weird resistance. It turned out to be a stray piece of plastic wrap from a leftover container that had wrapped itself around the stem. That simple obstruction was preventing the float from rising, which meant the machine never got the signal to stop the water. If you aren’t getting that smooth motion, you might be dealing with one of the top signs your dishwasher needs professional diagnostics, or simply a dirty tub.
The Satisfying Click That Saves Your Hardwood
If the float moves freely but the water still won’t stop, we need to look at the switch hidden underneath. This is where the magic happens. Think of the float as the finger and the switch as the light toggle. Even if the finger moves, the light won’t go out if the toggle is broken. You can try how to test your float switch using a plastic straw by gently poking through the gaps to see if you can trigger the switch manually without taking the kickplate off. It sounds silly, but it’s a great way to see if the internal spring has snapped.
Grab Your Multimeter to Prove It Is Actually Broken
If the straw trick doesn’t give you a clear answer, it’s time to go under the hood. You’ll need to remove the bottom kickplate. This is a great time for the secret to cleaning behind your dishwasher kickplate because, trust me, it’s gross back there. Once you see the wires going to the float switch, disconnect the power first! Safety isn’t just a suggestion; it’s the difference between a successful repair and a trip to the ER. Set your tool to the ohms setting—check the only multimeter settings you need for appliance repair if you’re unsure which dial to turn. You’re looking for ‘continuity.’ When the float is down, the circuit should be closed. When you lift it, the circuit should open. 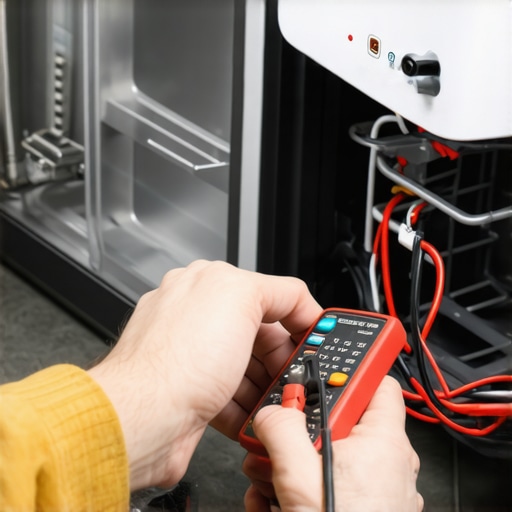
Why You Should Document Your DIY Attempts
If you find that the switch has no continuity, you’ve found your smoking gun. However, before you run out and buy a third-party replacement, check your paperwork. Understanding when to trust a warranty for dishwasher repairs is vital here. Sometimes, replacing a part yourself—even a small one—can be one of the reasons why your warranty claim might get denied. If you can show a technician exactly what you found using how appliance diagnostics can save your warranty benefits, they are much more likely to fast-track your claim. I once had a tech try to tell me my control board was fried, but because I’d already tested the float switch and the testing your door switch with a basic continuity test, I was able to point him in the right direction and save three weeks of waiting for the wrong parts.Let’s dig deeper into the biggest myth in the appliance world: the idea that touching your own machine automatically kills your protection. Most people I talk to are terrified that if they even look at a multimeter, the manufacturer will blacklist them. But here is the contrarian truth: knowing exactly what is wrong before the tech arrives is the only way to ensure they don’t blame “user error” for a mechanical failure. In my experience, showing a technician that you’ve already gone through troubleshooting dishwasher problems forces them to be more honest about the root cause. If you can prove it’s a failed solenoid and not just a “clogged filter,” you’re much less likely to see your claim rejected.
Why Does Your Service Tech Keep Pointing at “External Factors”?
The “Oops” factor here is huge. I’ve seen homeowners get stuck with a $200 bill for a “service call” because the tech claimed the issue was actually hard water buildup rather than a part failure. They will look for any reason to categorize the fix as maintenance rather than a defect. According to a study by the Federal Trade Commission (FTC) regarding the Magnuson-Moss Warranty Act, manufacturers cannot legally void your entire warranty just because you performed your own diagnostics or used an independent repair service. However, they can deny a specific claim if they prove your DIY attempt caused the damage. This is why how appliance diagnostics can save your warranty benefits is so important; you need to document the “before” state.  If you suspect top signs your dishwasher needs professional diagnostics, take a photo of the multimeter reading before you call it in.
The Cheap Parts Trap That Actually Voids Your Plan
Here is the nuance most beginners miss: there is a massive difference between diagnosing a part and replacing it. While the law protects your right to inspect, why third-party parts frequently void your service plan is a very real danger. I once tried to save $40 by buying a generic float switch from a random online marketplace. When the control board eventually fried—unrelated to the switch—the manufacturer denied the $300 board replacement because they found the non-OEM switch in the circuit. It’s a “trap” that catches even the best DIYers. You must weigh the cost of when to trust a warranty for dishwasher repairs against the immediate satisfaction of a quick fix.
How to Prove Your Diagnostic Wasn’t the Cause of Failure
When you are understanding appliance diagnostics, your goal should be to gather evidence, not just “poke around.” For instance, if you’re testing your thermal fuse before buying a new control board, keep a log of the continuity results. If the tech tries to tell you the pump is clogged, you can show them your results regarding why your warranty claim for a clogged pump might get denied and point out that the electrical symptoms don’t match a physical blockage. Additionally, knowing how to spot corrosion in your control board wiring early can prevent a total system meltdown that a basic warranty might blame on humidity. It’s also vital to know the real difference between service plans and manufacturer warranties; one might cover labor for your “checks,” while the other definitely won’t. I’ve learned the hard way that a little bit of expert knowledge prevents you from being pushed around by a service center that’s looking to save a buck. Have you ever fallen into this trap? Let me know in the comments.
Stop Buying Junk Tools for Precision Work
If you’re serious about avoiding the ‘parts cannon’—that expensive habit of just throwing new parts at a machine until it works—you need to invest in a decent multimeter. I personally swear by a meter with ‘LoZ’ (Low Impedance) mode to avoid ghost voltages that plague modern control boards. When you are looking for the only multimeter settings you need for appliance repair, ensure you have needle-tipped probes. Standard probes are too thick to reach the back-side of many Molex connectors without damaging them. This is how you avoid accidentally causing a short while troubleshooting dishwasher problems. According to the Whirlpool Job Aid for Dishwasher Repair (L-64), precisely measuring the resistance of a wax motor or a diverter valve can tell you if the part is failing long before it triggers an error code.
How do I keep this machine alive for 10 years?
Maintenance isn’t just a buzzword; it’s the difference between a five-year replacement cycle and a fifteen-year lifespan. The silent killer in most kitchens is mineral buildup. I’ve seen the impact of hard water on eco-friendly detergent performance turn a high-end machine into a paperweight because the lime scale eventually chokes the circulation pump. Every three months, you should be using the eco-friendly way to remove hard water scale from spray arms. If you let that grit sit, it acts like sandpaper on the internal seals, eventually leading to a leak that triggers your flood sensor. 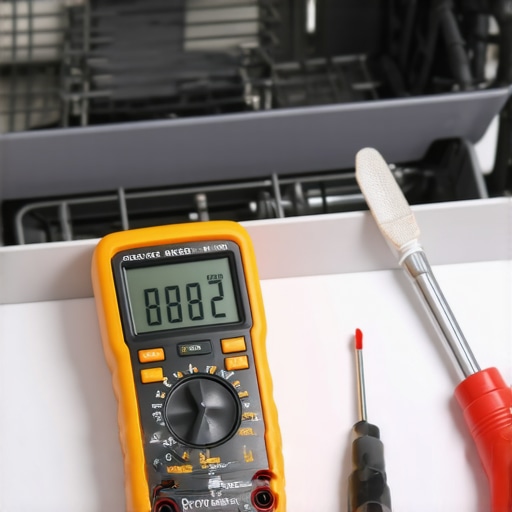
The High-Tech Future of Your Kitchen Sink
We are moving toward an era of ‘Predictive Diagnostics.’ In the next few years, I expect smart dishwashers to use ultrasonic sensors to detect the ‘pitch’ of a bearing before it fails. You’ll get a notification saying your pump will die in 30 days, rather than waking up to a flood. We already see hints of this in why your smart dishwasher notifications are always delayed; the machine is trying to communicate, but the software bridge is still being refined. This data-driven approach is a double-edged sword, though. While why your smart appliance is using more data than expected might seem like a privacy concern, it also provides you with the logs needed for how to document intermittent noises for a repair claim. If you can show a manufacturer a log of fluctuating amperage on a motor, they can’t argue with the data.
Don’t Let Detergent Math Ruin Your Gaskets
One advanced tip I always give my friends: stop using too much soap. It sounds counterintuitive, but the impact of detergent overdose on energy efficiency is real. Excess suds create an air cushion that prevents the pump from creating proper pressure. If you find that cleaning your dishwasher with nothing but steam and water isn’t cutting through the grime, it is likely because the internal sensors are already coated in a film of grease. This film confuses the turbidity sensor, leading to longer cycles and wasted energy. By mastering understanding appliance diagnostics, you can actually reset these calibration points. I recommend checking for firmware updates too, as how appliance diagnostics can save your warranty benefits often comes down to having the latest software patch. I challenge you to try this: next time you have a weird error code, try how to test a dishwasher solenoid with a multimeter first instead of just cleaning the filter again.
What I Learned While Mopping My Kitchen Floor
After years of tinkering, I’ve realized that intermittent failures are much more dangerous than total ones. A float switch that works ‘most of the time’ is the one that will eventually flood your home when you’re in the other room. One major lightbulb moment for me was realizing that mechanical resistance is just as common as electrical failure. If you don’t feel that crisp click, your problem isn’t the wiring; it’s the gunk. Furthermore, I’ve learned that how appliance diagnostics can save your warranty benefits is simply about being the most informed person in the room. When you can speak the technician’s language, the entire repair process moves twice as fast and with half the friction.
My Personal Toolkit for Stress-Free Repairs
You don’t need a professional workshop to handle these tasks, but you do need tools that don’t lie to you. I always keep a high-quality multimeter nearby—specifically one that handles continuity with an audible beep so I don’t have to take my eyes off the probes while working in tight spaces. I recommend checking the only multimeter settings you need for appliance repair to ensure you’re getting an accurate reading. I also suggest keeping a copy of your machine’s tech sheet, which is usually tucked in a plastic sleeve behind the kickplate, to guide your troubleshooting dishwasher problems. Finally, never underestimate the power of a simple flashlight; spotting a tiny hairline crack in a plastic housing early can save you from a thousand-dollar floor replacement later.
Take Control of Your Kitchen’s Future
Don’t let a small mechanical part or a blinking error code intimidate you. By learning to test your own components, you are moving from a passive consumer to an empowered homeowner. This knowledge doesn’t just save you money on service calls; it gives you the confidence to handle any when to trust a warranty for dishwasher repairs decision with actual evidence. [image_placeholder_final] You’ve got the tools, the logic, and the plan—now go save those hardwood floors! Have you ever had a repair technician try to charge you for a ‘major’ fix when you’d already diagnosed the real problem yourself? Let me know in the comments below!