

I stood in my kitchen, hands covered in suds, staring at a dead dishwasher that refused to even acknowledge my existence. It’s a gut-punch feeling. You’ve got a sink full of lasagna pans, a deadline at work, and a machine that has decided to take an unscheduled vacation. My first instinct back then was to call a pro and prepare to hand over a couple hundred bucks. But then I realized something—most appliance issues aren’t catastrophic engine failures; they are simple communication breakdowns. [image]
The Silent Saboteur Hiding in Your Door Latch
That little click you hear when you close the door? That’s not just for show. It’s a safety handshake. If that switch doesn’t tell the ‘brain’ of the machine that the door is sealed, nothing happens. I spent hours troubleshooting dishwasher problems by checking water valves and drain lines, only to find out the culprit was a tiny piece of plastic worth less than a latte. I actually made the rookie mistake of ordering a whole new control board once—talk about an expensive lesson in humility—when the real fix was just a ten-dollar part.
Is a DIY electrical test actually safe for a beginner?
I get it. Playing with wires feels like a recipe for a bad hair day, or worse. But testing for continuity is about as dangerous as checking the batteries in your remote, provided you’ve pulled the plug first. You aren’t ‘running’ power through the machine; you’re just checking if a path exists for electricity to flow. According to the repair data experts at Consumer Reports, faulty door latches are among the top five reasons for appliance start-up failures, often misdiagnosed as motherboard deaths. We are going to use the only multimeter settings you need to prove whether that switch is dead or alive. If you’ve ever wondered if testing a door latch using a screwdriver handle was enough to diagnose a ghost in the machine, let me tell you: the multimeter doesn’t lie. Have you ever had your dishwasher just sit there blinking at you while you contemplated buying a whole new kitchen? I’d love to hear about your most frustrating ‘why won’t you just work?’ moment. Before you even think about trusting a warranty for dishwasher repairs, let’s look at how to verify the problem ourselves.
Kill the Power Before You Touch a Wire
First things first: you have to cut the juice. I once forgot this while poking around a heating element and got a zap that felt like a localized lightning strike. It was a jarring reminder that water and electricity are a volatile cocktail. Before you even think about unscrewing the door panel, flip the breaker in your service panel or pull the plug from the wall. If you are unsure if the power is truly off, using a voltmeter to check your power cord connection safely is the only way to be 100% certain. Safety isn’t just a suggestion here; it is the prerequisite for not turning a simple repair into a trip to the emergency room.
Get Inside the Control Panel Without Breaking the Plastic
Most door latches are tucked behind the inner door panel. You will usually need a Torx screwdriver—usually a T15—to get through the perimeter screws. I remember helping a neighbor who tried prying his Bosch open with a butter knife because he didn’t have the right bit; he ended up needing a new $200 plastic fascia along with his $10 latch. Don’t be that guy. Once those screws are out, the panel will drop slightly. Be careful not to yank it, as those thin ribbon cables connecting the buttons to the ‘brain’ are incredibly fragile.
Use Your Multimeter to Solve the Mystery
Now for the actual detective work. Set your digital tool to the continuity setting—this is the one that looks like a little sound wave icon. When you touch the two probes together, the device should beep. This beep is the sound of success; it means electricity has a clear path. To test the switch, press the probes against the metal terminals of the latch while manually clicking the latch closed. If the meter stays silent, you’ve found your culprit. This is far more reliable than testing a door latch using a screwdriver handle, which only tells you if the mechanical parts move, not if the electrical signal is actually firing.
Look for the Tiny Bodyguard Called the Thermal Fuse
If the latch tests fine, your next stop is the thermal fuse. Think of this as a tiny bodyguard for your control board. If the dishwasher gets too hot or suffers a power spike, this fuse ‘dies’ to prevent the expensive motherboard from melting down. You can check this exactly like the door latch. I once spent three hours diagnosing a ‘dead’ machine only to find a blown fuse that cost less than a bag of chips. You should prioritize testing your thermal fuse before buying a new control board every single time. It is the most common reason a machine suddenly loses all signs of life.
Decipher the Secret Language of Blinking Lights
Sometimes the machine isn’t dead; it is just trying to tell you it’s hurting in a language you don’t speak yet. If you see flashes or a random ‘E’ followed by a number, the machine is throwing a code. Instead of guessing, you need to understand why your dishwasher screen shows a numeric error code. These codes are like a GPS for your repair; they might point you toward a clogged drain or a faulty sensor rather than a total hardware failure. If you are still under a service plan, having this specific code ready can actually speed up your process. In fact, understanding appliance diagnostics improving your warranty claims is the best way to ensure the technician doesn’t give you the runaround when they finally show up. Knowing the ‘why’ before they arrive puts the power back in your hands.Most people think that as long as they have a piece of paper saying ‘Warranty,’ they are golden. That is a dangerous assumption that often leads to a lighter wallet. Everyone says a warranty is a safety net, but in my experience, it is more like a hurdle course. Manufacturers aren’t exactly eager to hand out free repairs, and they look for any excuse to categorize a mechanical failure as ‘environmental’ or ‘user-related.’ One of the biggest shocks for homeowners is discovering why your appliance warranty covers parts but not labor costs. You might get a $50 motor for free, but you will still pay $200 for the technician to drive to your house and turn a screwdriver.
The Ugly Truth About Those ‘Full’ Warranties
According to industry data from Warranty Week, companies are increasingly scrutinizing claims to keep overhead low. If you haven’t been keeping up with maintenance, you might be in for a surprise. For instance, I’ve seen service calls rejected because of mineral buildup. You need to be aware of the clause in your service plan that voids coverage for hard water damage. If a technician pulls out a heating element and sees it coated in white crust, they will mark it as a lack of maintenance and walk away, leaving you with the diagnostic fee. This is why learning how appliance diagnostics can save your warranty benefits is so vital; you need to prove the part failed, not that your water killed it.
Your Garbage Disposal Is Secretly Sabotaging Your Claim
Here is the ‘Oops’ factor that catches almost everyone: the kitchen sink connection. If you recently installed a new garbage disposal and your dishwasher suddenly stops draining, do not call the manufacturer yet. There is a plastic knock-out plug inside the disposal’s drain inlet. If you didn’t remove it, the dishwasher can’t pump water out. This is a classic installation error, and I have watched homeowners lose their minds when they find out why your warranty claim got denied because of your garbage disposal. It is a $150 mistake for a five-second fix. Always double-check your plumbing connections before assuming the machine’s pump has died. 
Is your ‘broken’ pump actually just a software bug?
We are living in an era where dishwashers are essentially waterproof computers. Sometimes the hardware is perfectly fine, but the logic is scrambled. This is a nuance most beginners miss. If your machine is acting erratic, why your smart appliance app keeps crashing during firmware updates might be a more relevant question than which motor to buy. A software glitch can mimic a burnt-out motor or a faulty sensor. Before you start ripping out parts, try a hard reset—kill the power for ten minutes to let the capacitors drain. Have you ever fallen into this trap where a ‘free’ repair ended up costing you hundreds because of a technicality? Let me know in the comments. By shifting your mindset from ‘something is broken’ to ‘something is being blocked,’ you can navigate these repairs like a seasoned pro.I’ve learned the hard way that the difference between a ten-year appliance and a three-year paperweight usually comes down to three specific tools and a bit of foresight. If you’re serious about avoiding those $200 service calls, you need to stop thinking like a consumer and start thinking like a technician. For me, the holy trinity of repair involves a digital multimeter, a set of Torx drivers, and a simple inspection mirror. I personally swear by a multimeter with an audible continuity setting because, when you’re crammed under a sink in the dark, you need to hear the ‘truth’ rather than squinting at a screen to see if a part is dead. This is exactly why I recommend mastering the only multimeter settings you need for appliance repair before you even pull the machine out from the cabinet.
Why a cheap multimeter is a dangerous trap
I used to use those five-dollar bargain bin meters until I realized they often provide ‘ghost’ readings that suggest a part is fine when it’s actually failing under load. According to technical documentation from the Association of Home Appliance Manufacturers (AHAM), even a slight resistance variance in a heating element can trigger a control board error while still showing ‘continuity’ on a low-quality tester. Investing in a tool that can accurately measure ohms is the only way to be sure. I’ve used this precision to save my own skin by testing your thermal fuse before buying a new control board, which turned a potential $180 mistake into a $12 win.
How do I keep my dishwasher running like new for a decade?
It isn’t about deep-cleaning every week; it is about managing the chemistry inside the tub. I’ve found that the debate between pods and powder isn’t just about price—it’s about residue. I personally switched back to high-quality powder because I noticed a significant decrease in the ‘white film’ on my spray arms. If you’re curious about the science, check out the truth about tablet vs powder detergent residue build-up to see how it affects your pump’s lifespan. Beyond soap, you have to look at the physical seals. I make it a habit to wipe down the lower gasket every few months; it’s a prime spot for mold and grit that eventually eats through the rubber. If you catch it early, you can learn how to replace a frayed door seal for under twenty dollars before it turns into a kitchen flood. 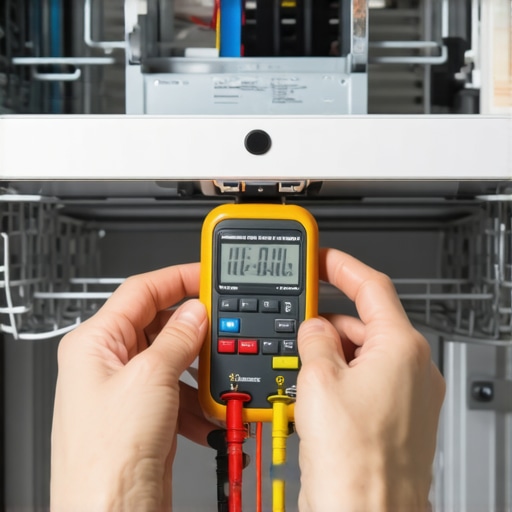
Smart diagnostics are the future of home repair
We are rapidly moving toward an era where your dishwasher won’t just break; it will tell you exactly which sensor is failing via a push notification. I predict that within five years, DIY repair will shift from ‘guessing’ to ‘validating’ what the AI tells us. We are already seeing this with modern units where why your smart dishwasher needs a firmware update to save water is a legitimate fix for a performance issue. However, don’t let the tech distract you from the basics. No app can tell you if a bone fragment is jammed in your impeller. You still need to be comfortable troubleshooting dishwasher problems by hand. My best advice? Tonight, pull off your kickplate and use a flashlight to check the floor. If you see even a single drop of water, you need to start identifying a failing sump gasket before the floor warps. Catching that one leak early is the ultimate ‘pro move’ that separates the masters from the amateurs.
The Hard Truths About Living With a High-Tech Dishwasher
After years of tinkering, I’ve realized that 90% of the battle is psychological. When the machine stops, our brain goes to the worst-case scenario. Here is the reality check I wish I had a decade ago. First, most failures are cumulative. A tiny bit of grit in a filter eventually kills a pump. Second, the warranty department is not your friend; they are a gatekeeper. Learning how appliance diagnostics can save your warranty benefits is the only way to get what you paid for. Finally, trust the data over your gut. If the meter says the switch has continuity, it’s fine—don’t replace it just because you ‘feel’ like it’s old.
The Three Tools That Pay for Themselves
You don’t need a van full of gear to be effective. I rely on three things. First is a reliable multimeter; knowing the only multimeter settings you need for appliance repair simplifies everything. Second, get a set of magnetized Torx bits so you don’t drop screws into the bottom of the tub. Third, learn to interpret the machine’s internal logs. By reading the hidden blinking lights on your dishwasher brain, you skip the guesswork entirely. I also recommend bookmarking the official parts diagram for your specific model number before you start turning screws.
Stop Fearing the Flashing Lights
There is a profound sense of satisfaction that comes from hearing your dishwasher hum back to life after you’ve personally diagnosed and fixed it. You aren’t just saving a few hundred dollars; you’re reclaiming control over your home. Whether you are dealing with a faulty latch or a mystery leak, the process is the same: observe, test, and verify. If you hit a wall, you can always research how to claim a repair refund from your appliance manufacturer if the part was fundamentally defective. Keep practicing your troubleshooting dishwasher problems skills, and soon you’ll be the one the neighbors call for help. Have you ever had a warranty claim denied for a ridiculous reason? Let me know in the comments below.