

I remember standing in my kitchen two years ago, staring at a plate that looked like it had been frosted with a layer of white chalk. My old 1990s-era dishwasher had finally kicked the bucket, and I’d replaced it with a sleek, quiet ‘smart’ model. Naturally, I did what I’d always done: I filled the detergent cup to the absolute brim with powder. I thought more soap meant more clean. I was dead wrong. Instead of sparkling plates, I got a ‘suds lock’ error and a kitchen floor that looked like a foam party. That was the day I realized my new machine wasn’t just quieter; it was playing by a completely different set of rules. We’re going to dive into why your high-tech appliance is actually begging you to be stingy with the soap and how you can stop wasting money on wasted suds.
Your Old Cleaning Habits are Killing Your New Machine
If you grew up in a house with a dishwasher that sounded like a jet engine taking off, you probably learned that heavy-duty cleaning required heavy-duty chemicals. Back then, machines used 10 to 15 gallons of water per cycle. They literally blasted the grease away with sheer volume. Today’s smart units are different. They are designed to be incredibly efficient, often using less than 4 gallons of water for a full load. When you dump a massive amount of soap into that tiny amount of water, it can’t dissolve properly. You end up with the impact of detergent overdose on energy efficiency being much worse than you’d think, as the pump has to work twice as hard to push through the thick, frothy mess. I learned the hard way that a smart machine is basically a precision instrument. It uses turbidity sensors to ‘see’ how dirty your water is. If you’re still rinsing every plate before it goes in, you’re actually confusing the brain of your machine. I used to be a serial pre-rinser until I realized why pre-washing dishes is a waste of time and money; without any food particles to latch onto, the detergent just spends its time attacking your glassware and internal seals. Have you noticed a weird, cloudy film on your favorite wine glasses lately? You might be a victim of ‘over-cleaning’ too.
Is “Less Soap” Just a Marketing Trick?
It’s natural to be skeptical. We’ve been conditioned to think bubbles equal cleanliness. But in the world of modern appliances, excessive foam is actually the enemy of a deep clean. According to the Association of Home Appliance Manufacturers (AHAM), modern dishwashers use about 3 to 5 gallons of water per cycle, compared to the massive amounts used by machines built decades ago. Because there is so little water, the concentration of detergent becomes much higher much faster. I made the mistake of using those ‘mega-sized’ pods in a small, efficient load, and the residue was so thick I had to run two extra rinse cycles just to clear the air. You really have to look at the truth about tablet vs powder detergent residue build-up to see how much gunk is left behind in your filters. Sometimes, your machine might even struggle because of its software; believe it or not, why your smart dishwasher needs a firmware update to save water is a real conversation I had with a technician once. The hardware and the software work together to measure exactly how much soap is needed, and usually, it’s about half of what you’re currently using.
Clean Out the Gritty Residue First
The very first thing I do when a friend complains that their expensive new dishwasher is leaving white spots is check the detergent reservoir. Nine times out of ten, it’s caked in a chalky, sandy film that feels like 100-grit sandpaper. This isn’t just an eyesore; it’s a mechanical hazard. This grit creates friction that prevents the dispenser door from sliding or popping open at the exact millisecond the control board demands. You really need to master the secret to clearing a gritty soap reservoir without scratches because using a metal scrubby will only create tiny grooves where even more soap can hide later. I once spent an hour with a damp microfiber cloth and some warm water just to get my own reservoir back to its factory-smooth finish, and the difference in the door-pop sound was immediately noticeable.
Keep the Detergent Door From Sticking
If you find a half-dissolved tablet sitting in the bottom of your machine after a three-hour cycle, don’t assume the machine is broken. Often, the gasket around the soap cup has become sticky or warped from high-heat cycles and detergent chemicals. This is a classic case where knowing how to fix a soap dispenser door that stays shut saves you a massive headache. I’ve seen people replace their entire front panel for $200 when all they needed was to wipe a bit of old residue off a rubber seal. If the door doesn’t flip open freely when you trigger it manually, your soap is never hitting the water during the main wash phase, leaving your dishes to basically just take a very long, very hot bath in plain water.
Test Your Components with a Multimeter
There was a Tuesday night last November when my dishwasher filled with water but then just… sat there. No spraying, no humming, just silence. My first instinct was to call a repairman and kiss $300 goodbye. Instead, I pulled the kickplate off and grabbed my digital tester. If you can use a screwdriver, you can learn the only multimeter settings you need for appliance repair. I tested the water inlet valve and found it was completely dead. Checking the multimeter test that pinpoints a dead water valve allowed me to identify the problem in five minutes. I ordered the $25 part and fixed it myself, all because I didn’t let the ‘electronics’ intimidate me. 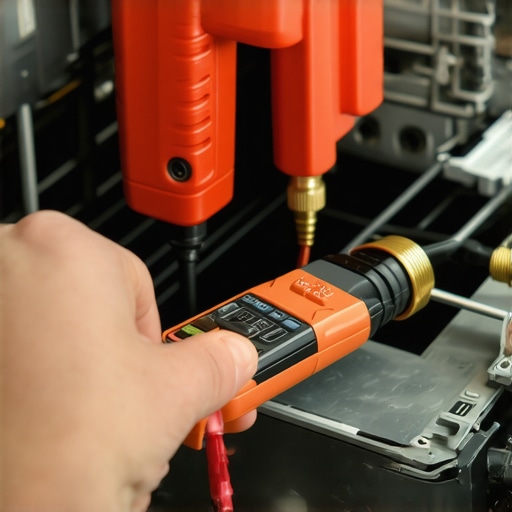
Stop the Cold Start Failures
Another common culprit for poor cleaning is the temperature of the incoming water. Modern machines are efficient, but they aren’t magic. If the water entering the machine is ice-cold because it’s been sitting in your pipes, the detergent won’t activate properly. I always run my kitchen sink until the water is steaming hot before I press ‘Start.’ This ensures the first gallon that enters the tub is actually hot enough to melt the soap. If you’re still getting spots despite hot water, it might be your local water chemistry. You should learn how to calibrate your dishwasher for soft water if you live in an area with a softener, as ‘over-cleaning’ with too much soap in soft water can actually etch your glasses permanently. Finally, always check your sink’s plumbing; sometimes the easiest way to unclog your kitchen sink air gap is the only thing standing between you and a dry, clean load of dishes. If these steps don’t solve the mystery, it’s time to look for the top signs your dishwasher needs professional diagnostics before something more expensive fails.Wait, before you start tearing apart the main control board, there’s a nuance most people miss. Everyone tells you that DIY repair is the ultimate money-saver, but in my experience, jumping the gun on a repair can actually cost you thousands in the long run. The biggest myth in the appliance world is that a warranty is a safety net for all failures. It’s not. If your machine stops draining because a cherry pit is stuck in the impeller, that’s considered user error, and you’ll likely find out why your warranty claim for a clogged pump might get denied the hard way. I’ve seen homeowners get hit with a $150 service fee just for a technician to tell them they didn’t clean their filter.
Stop Trusting Your Warranty Blindly
Most people don’t realize that understanding appliance diagnostics improving your warranty claims is the difference between a free repair and a denied one. If you can’t prove the failure was a manufacturing defect, you’re on the hook for labor costs. Consumer Reports has frequently pointed out that while modern appliances are more feature-rich, their complexity leads to higher repair rates within the first five years of ownership. This complexity means that troubleshooting isn’t just looking for a broken wire anymore; it’s about troubleshooting dishwasher problems expert diagnostics repair tips that account for sensor calibration and software glitches.
Will a Simple DIY Fix Trash Your Service Plan?
Here is the oops factor that kills most budgets: the unauthorized repair. I once tried to save a few bucks by swapping a thermal fuse myself. I figured testing your thermal fuse before buying a new control board was the smart move. And it was, until the main motor died three months later. Because I had opened the sealed control housing and used a non-OEM part, the manufacturer voided the remaining two years of my protection plan. You have to be incredibly careful because why third-party parts frequently void your service plan is a clause hidden in the fine print of almost every major brand. 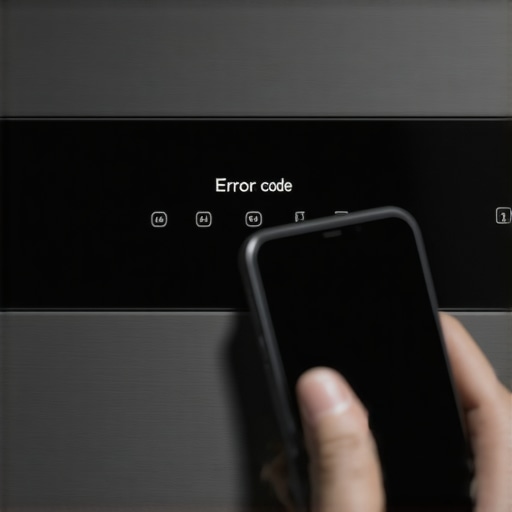
Master the Diagnostic Mode Before You Call for Help
Modern smart dishwashers have a secret handshake—a sequence of button presses that puts the machine into a diagnostic state. This is where the machine tells you exactly what hurts via blinking lights or numeric codes. Before you start buying parts, you need to learn reading the hidden blinking lights on your dishwasher brain. This isn’t just for pros; it’s the only way to ensure you aren’t replacing a perfectly good pump when the real issue is just a faulty sensor or a software hang. If the code looks serious, that’s when you look for the top signs your dishwasher needs professional diagnostics. Have you ever tried to fix something yourself only to realize you accidentally voided your warranty or made the problem worse? Let me know in the comments below; I’d love to hear your horror stories—or your wins!Beyond just knowing the codes, you have to realize that the ‘brain’ of the machine is only as good as the feedback it gets from the sensors. If you want to scale your DIY skills from ‘clueless’ to ‘competent,’ you need to stop guessing. I spent years thinking a ‘drain error’ meant I needed a new pump, until I realized the hidden drain screen that most homeowners never clean was the real culprit 90% of the time. This isn’t the mesh filter you see in the bottom of the tub; it’s a secondary, finer screen tucked away near the impeller that catches the tiny fibers and eggshell fragments that bypass the main basket.
Clean the Filter Most People Forget
Every six months, I pull my machine out and check the internal plumbing for calcification. If you ignore this, the pressure builds up and starts to eat away at your seals. I highly recommend learning troubleshooting dishwasher problems expert diagnostics repair tips because it teaches you that physical maintenance and digital diagnostics are two sides of the same coin. According to the Appliance Service Technician’s Handbook, debris accumulation is the leading cause of premature motor failure in high-efficiency units. If you keep the pathways clear, the motor runs cooler and lasts significantly longer. 
One Tool That Actually Saves Your Weekend
If I could only keep one tool in my kitchen drawer for appliance repair, it would be my digital multimeter. Most people think it’s just for electricians, but it is the only way to know for sure if a part is ‘dead’ or just not receiving power. For instance, testing the float switch to fix an overfill error is a two-minute job with a meter, but a guessing game without one. I’ve seen people throw away a perfectly good machine because they thought the control board was fried, when in reality, they just needed to know how to prove your appliance failure was caused by a power surge to get their insurance or warranty to cover it.
How do I keep this thing running forever?
Maintenance isn’t just about cleaning; it’s about understanding the real difference between service plans and manufacturer warranties so you know when to DIY and when to trust a warranty for dishwasher repairs. I predict that in the next few years, we’ll see ‘self-healing’ appliances that can run their own descaling cycles using internal reservoirs, but until then, the burden is on us. You should definitely try a basic continuity test on your heating element or door latch tonight—it’s the single best way to demystify the electronics and gain the confidence to handle any repair that comes your way.
Hard Lessons from My Most Expensive Repair Failures
Looking back at my foam-covered kitchen floor, I realize my biggest mistake wasn’t just using too much soap; it was thinking I knew better than the engineers. One major lightbulb moment occurred when I realized that how appliance diagnostics can save your warranty benefits is actually about having documented proof. If you can show a technician the specific error code you found during your own check, they are far less likely to brush you off with a “user error” label. I also learned that the secret to getting grease out of your filter mesh isn’t a chemical solution—it’s just consistent, manual scrubbing. Finally, never underestimate the power of a simple reset; sometimes knowing how to reset a frozen control panel is all you need to clear a software glitch that looks like a hardware death. It’s about being smarter than the machine.
Gear That Actually Belongs in Your Junk Drawer
You don’t need a professional workshop to maintain a modern dishwasher, but you do need three specific items that have saved my weekend more than once. First, a digital multimeter is non-negotiable. I use mine for testing your thermal fuse for continuity without a pro whenever the machine won’t power on. Second, keep a simple paperclip or toothpick handy; the proper way to clean spray arm nozzles using a paperclip is far more effective and precise than any expensive “cleaning tablet” you can buy at the store. Lastly, I always keep a spare dishwasher door seal kit on hand because heat-warped rubber is the primary cause of those mystery puddles that ruin hardwood floors.
You’re Just One Repair Away from Total Confidence
Repairing your own dishwasher isn’t just about saving a few hundred dollars—it’s about the mental shift from being a frustrated consumer to becoming a capable maintainer. When you finally hear that motor hum back to life because of a part you swapped yourself, the fear of high-tech appliances completely disappears. Take it one screw at a time, trust your diagnostic meter, and remember that even the most complex machine is just a series of parts you can master. #IMAGE_PLACEHOLDER_E# Have you ever attempted a DIY repair only to find a much simpler solution halfway through? Let me know in the comments below!