

I stood in my kitchen last Tuesday, staring at a puddle that was slowly migrating toward my hardwood floors, and I felt that familiar pit in my stomach. My dishwasher was overflowing, humming a low, mournful tune that screamed ‘expensive repair bill.’ My first instinct was to panic and search for a local technician, but then I remembered a hard lesson I learned years ago: never pay for a service call until you’ve checked the water inlet valve. I once spent nearly three hundred dollars just to have a guy come out, turn off my water, and spend ten minutes replacing a part that costs less than a fancy steak dinner. Never again. Today, I am going to show you exactly how I handle this swap in about 15 minutes, saving you time, money, and the headache of waiting for a repairman who might not show up until next Thursday.
Stop Calling the Repairman for This Simple Valve Swap
If your machine is humming but no water is actually entering the tub, or if you’ve noticed your water inlet housing is cracked, you are likely looking at a faulty valve. It is the gatekeeper of your dishwasher, and when it fails, everything grinds to a halt. I used to think anything involving water lines and wiring required a specialized license, but the truth is, most of us can handle this ourselves with just a screwdriver and a pair of pliers. According to data from HomeAdvisor, the average cost for an appliance repair service call is between $100 and $400, yet the replacement valve itself is surprisingly affordable. Why give away your hard-earned cash for a task that is essentially ‘unplug, unscrew, and replace’? We are going to dive into the nitty-gritty of getting this done fast, because I know you have better things to do than mop your kitchen floor all afternoon.
Is This Small Part Actually Worth the Effort?
You might be skeptical, thinking that a small plastic valve couldn’t possibly be the root of all your dishwasher woes. I made that exact mistake early on; I assumed my control board was fried and almost junked a perfectly good two-year-old machine. I didn’t realize that mineral buildup from hard water can jam these valves or that a simple electrical surge can fry the solenoid. Before you decide to trust a dishwasher warranty for a fix that might take weeks to schedule, try this diagnostic first. Have you ever felt that moment of dread when your appliance starts making a sound it definitely shouldn’t? Tell me about your worst appliance fail in the comments!
How Speed and Strategy Save Your Kitchen Floors
You do not have all day to mess around with a leaky machine. That is why I am a huge fan of replacing your water inlet valve without pulling the machine out from the cabinetry. It is a total game-changer. Most ‘pro’ guides tell you to disconnect everything and drag the whole unit into the middle of the room, but for 90% of modern models, you can access the valve right behind the lower kickplate. We will use some expert dishwasher diagnostics to confirm the valve is the culprit before we even touch a tool. I once skipped this step and replaced a valve when the real issue was a clogged water inlet filter screen. Lesson learned: always check for debris first. By following a streamlined process, we can ensure you aren’t just throwing parts at a ghost problem, but actually fixing the leak at its source.
Cut the Power and Water Before You Start
Safety isn’t just a buzzword; it’s the difference between a successful DIY and a trip to the emergency room. Before you even think about grabbing a wrench, you must disconnect the power. I usually flip the breaker in the basement because I don’t trust the appliance plug to stay dry if things get messy. Once the power is dead, you can use a voltmeter to check your power cord connection safely and ensure there is zero juice flowing to the unit. Next, shut off the water supply line, typically found under the kitchen sink. I remember the first time I tried this on an old Whirlpool; I was so confident I forgot to shut off that dedicated valve. The second I loosened the brass nut, a jet of cold water hit me square in the chest. I was soaked, the cat was terrified, and I spent twenty minutes chasing a shut-off valve behind a stack of old cleaning supplies. Don’t be like me—double-check that the line is dry.
Peel Back the Kickplate to Find the Valve
You don’t need to pull the dishwasher out and risk scratching your laminate or hardwood. Most modern machines house the water inlet valve right at the front, tucked behind that thin metal or plastic panel at the very bottom. Grab a nut driver or a Phillips head screwdriver and remove the two to four screws holding that plate in place. While you have it off, it is a great time to learn the secret to cleaning behind your dishwasher kickplate, because you would be shocked at the amount of pet hair and dust bunnies that migrate there. With the panel gone, you’ll see the valve—a small plastic component with a brass fitting for the water line and two wire leads. 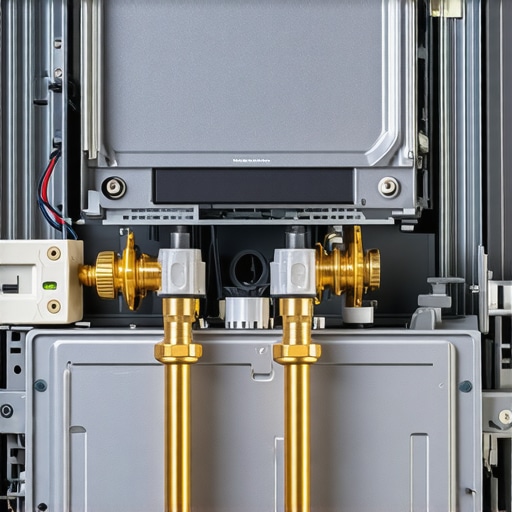
Run These Quick Tests to Save Money
Before you rip the old valve out, make sure it’s actually the part that died. Sometimes the float switch—that little plastic mushroom in the corner of your tub—is stuck in the ‘up’ position, telling the machine it’s full when it’s actually empty. You can learn how to test your dishwasher’s float switch with a pencil in about thirty seconds. If the float is fine, the next suspect is the solenoid on the valve itself. Think of the solenoid as the bouncer at a club; it only lets the water in when the control board gives the signal. If you have a multimeter, you can check for continuity. This is similar to testing your thermal fuse for continuity without a pro kit; you are just looking for a complete electrical path. If the reading is ‘infinite’ or ‘OL,’ the solenoid is fried and the valve is officially trash.
Perform the 15-Minute Valve Swap
Now for the main event. Place a shallow towel under the valve to catch the small amount of water remaining in the line. Use an adjustable wrench to unscrew the brass water supply line. If you’ve been hearing a ‘bang’ when the machine stops filling, this is the perfect time to look into stopping the thumping noise in your water supply line by installing a small hammer arrestor. Next, disconnect the two wire terminals—they usually just pull right off, but you might need needle-nose pliers if they are stubborn. Remove the screws holding the valve bracket to the frame, slide the old unit out, and swap the rubber hose clamp to the new valve. Slide the new valve in, reconnect the wires, and tighten the brass fitting. Be careful not to cross-thread that brass nut; it should go on smoothly by hand before you give it a final snug with the wrench. While you are down there, take a quick peek at the surrounding area to ensure you aren’t identifying a failing sump gasket before the floor warps elsewhere.It feels amazing to hear that dishwasher hum back to life after a DIY fix, but there is a sophisticated trap waiting for you if you aren’t careful. While I am a huge advocate for fixing your own gear, I have seen far too many people lose their safety net because they didn’t respect the hierarchy of coverage. You need to grasp the real difference between service plans and manufacturer warranties before you even pick up a screwdriver. A manufacturer warranty usually only covers factory defects for the first year, while an extended service plan is basically an insurance policy you bought later. If you swap that inlet valve with a cheap knock-off you found on a random auction site, you are flirting with disaster. I’ve learned the hard way that why third-party parts frequently void your service plan is because the provider wants an ‘out’ to avoid paying for future repairs. If a tech comes out later for a motor issue and sees a non-OEM valve, they can deny the entire claim on the spot.
Is Your Machine Protected Against Your Own Plumbing?
This is the ‘oops’ factor most homeowners never see coming. You might think the dishwasher is the problem, but the technician might blame your sink. It is a shocking reality, but why your warranty claim got denied because of your garbage disposal is often due to improper installation or a knock-out plug that was never removed. According to a study by Consumer Reports, nearly 25% of all dishwashers will experience a breakage within the first five years, but those stats don’t account for how many claims are rejected for ‘user-induced’ errors. If your disposal causes a backup into the machine, the manufacturer will consider it a plumbing issue, not a machine defect. 
The Sneaky Clause That Voids Coverage for Hard Water
Here is a nuance that even the pro-DIYers miss: the chemistry of your water. Many people ignore the clause in your service plan that voids coverage for hard water damage. If mineral buildup from your well water or city supply seizes that new inlet valve, the warranty company might call it ‘lack of maintenance’ rather than a mechanical failure. It is frustrating, but they expect you to use softeners or descalers. This is also why your appliance warranty covers parts but not labor costs in many mid-tier plans—they know the labor to scrub out lime scale is where the real expense lies. Before you commit to a major repair, spend ten minutes troubleshooting dishwasher problems expert diagnostics repair tips to see if the issue is environmental rather than mechanical. I once spent three weeks fighting a claim because I hadn’t documented my maintenance history. They wanted proof I was cleaning the filters! Have you ever fallen into this trap? Let me know in the comments so we can warn others before they lose their coverage. Always keep your receipts, use OEM parts for the ‘visible’ repairs, and never let a service tech see a messy disposal connection.I am obsessed with keeping my kitchen running smoothly because I’ve seen what a five-thousand-dollar floor restoration looks like after a slow leak. Beyond the simple valve swap, you need a proactive strategy to ensure your appliance doesn’t fail you when you have a house full of guests. Every three months, I get on my hands and knees to focus on cleaning your sump filter with a soft brush to stop foul odors before they permeate the plastic tub. If you aren’t doing this, you’re essentially forcing your drain pump to work twice as hard, which leads to early motor burnout.
The Tools That Turned Me Into a Kitchen Hero
I don’t believe in buying every gadget at the hardware store, but a few pieces of gear are non-negotiable for a serious DIYer. First, a shop-vac is my secret weapon for any water-based repair. You can learn how to clear a blocked impeller with a shop-vacuum and save yourself an hour of manual bailing and soaking up greywater with towels. Second, invest in a decent digital multimeter. According to the Whirlpool Technical Service Manual (Part No. W11174788), an inlet valve solenoid should register between 500 and 1,500 ohms of resistance. If you see ‘OL’ or an open loop on your screen, that part is dead. No guessing, just data. 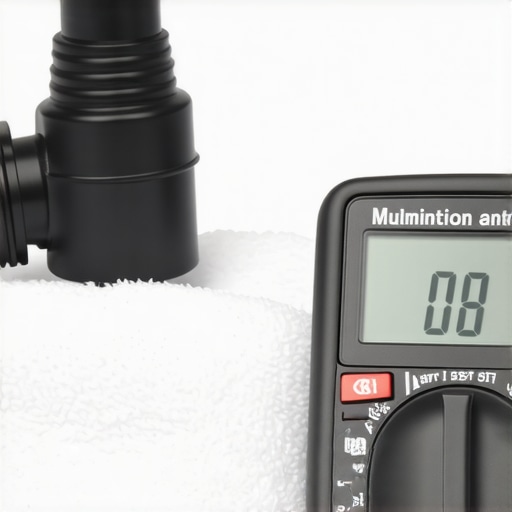
How do I maintain my dishwasher’s performance over several years?
It is all about the spray and the drainage path. Over time, calcium and food particles build up inside the plastic arms. I’ve found that how to clean the hidden spray arm nozzles with a toothpick is a meditative Sunday task that prevents my glasses from looking cloudy or etched. Also, check your physical plumbing layout at least once a year. I always make sure why your service tech always checks the drain hose high loop is physically implemented under the sink. Without that loop, dirty sink water and food waste can siphon right back into your clean machine, causing smells and bacteria growth.
Software is the New Wrench in Modern Kitchens
The future of appliance repair isn’t just about better pumps and thicker gaskets; it is about software and sensor calibration. We are already seeing a massive shift where understanding why your smart dishwasher needs a firmware update to save water becomes as common as updating your smartphone. I predict that in five years, the traditional ‘repairman’ will often be a remote diagnostic technician who pushes a code patch to fix a sensor calibration issue before you even notice a leak. Take a look at your drain hose under the sink right now—if it isn’t looped higher than the drain entry, fix it today to prevent backflow and keep your machine sanitary.
The Hard-Earned Wisdom of a Recovering Panic-Fixer
Looking back on that flooded kitchen floor, I realize my biggest mistake wasn’t the leak itself, but the lack of preparation. I’ve learned that a successful repair is 20% turning a wrench and 80% knowing the rules of the game. First, never throw away the old part until the new one has completed three full cycles; if that replacement is a ‘lemon,’ you’ll need the original for comparison. Second, I cannot stress enough that you must understand the real difference between service plans and manufacturer warranties before you start unscrewing panels. Manufacturers are looking for any reason to deny a claim, and a poorly documented DIY fix is their favorite excuse. Finally, I discovered that why your warranty claim was denied due to lack of maintenance is the most common rejection letter sent out by insurance providers. Keeping a simple log of when you clean your filters can save you thousands in the long run.
The Minimalist Toolbag for Appliance Success
You don’t need a professional-grade garage to handle these tasks. My ‘go-to’ list includes a digital multimeter for checking solenoids, a set of nut drivers, and a simple shop-vacuum. In fact, knowing how to clear a blocked impeller with a shop-vacuum has saved me more money than almost any other trick in my arsenal. I also highly recommend bookmarking the troubleshooting dishwasher problems expert diagnostics repair tips guide, as it provides a structured way to think about mechanical failures. These resources are my ‘secret weapons’ because they move you away from guesswork and toward data-driven repairs. I trust these methods because they have survived my own trial-and-error sessions in the trenches of home ownership.
Build the Confidence to Fix it Yourself
There is a specific kind of pride that comes from hearing your dishwasher hum after you’ve fixed it with your own two hands. You aren’t just saving a service fee; you are taking control of your home’s ecosystem. Don’t let the technical manuals or the fear of a warranty denial stop you from learning. When you use proper top signs your dishwasher needs professional diagnostics to guide your decisions, you mitigate the risks. Take it one screw at a time, keep your work area dry, and remember that every expert was once a beginner with a wet floor and a screwdriver. You’ve got this. Have you ever felt that moment of dread when a DIY repair didn’t go as planned, or did you nail it on the first try? Let me know in the comments below!