

I was staring at my dishwasher, my hands covered in grease, and the damn thing was humming but bone dry inside. It was a Tuesday night. I had three kids, a mountain of lasagna-crusted plates, and a machine that refused to drink. I thought the pump was dead. I even started looking into replacing your water inlet valve without pulling the machine out because I was convinced the hardware had finally quit on me. It turns out, I was looking at the problem from the wrong end of the hose. I spent twenty minutes sweating over a screwdriver when the culprit was a piece of debris smaller than a grain of rice. Today, I’m going to save you that sweat and probably a hundred dollars in service fees by showing you the gatekeeper of your appliance’s water supply.
Stop Overlooking the Tiny Screen at the Door
Most homeowners assume that if water isn’t flowing, the computer board is fried or the motor is toast. I’ve spent years understanding appliance diagnostics to help my neighbors realize the solution is often much simpler. I made a massive mistake early on in my DIY journey: I actually called a professional and paid a hefty service fee just for him to pull a tiny bit of calcium out of the inlet with needle-nose pliers. I felt like an absolute novice. That’s why you need to check this before you go searching for the top signs your dishwasher needs professional diagnostics. The water inlet filter screen is a tiny mesh sentinel. It protects your expensive internal components from sediment, but it’s designed to clog so your machine doesn’t die. Have you ever noticed your dishwasher cycle taking ages only for the dishes to come out dry?
Is cleaning a tiny mesh really going to save my dishwasher?
You might be skeptical. It’s easy to think your issue is more dramatic, like a failing circulation motor. But consider the facts: the Water Quality Association reports that hard water can reduce the efficiency of water-using appliances by as much as 48%. That mineral scale doesn’t just disappear; it migrates. It builds up right on that filter screen until the water flow is restricted to a pathetic trickle. By the time we’re done here, you’ll know exactly how to pop that screen out and clear it without damaging the delicate mesh. It’s the easiest win you’ll have in your kitchen all week, and it keeps your warranty benefits intact because you aren’t actually ‘modifying’ the machine—you’re just performing basic maintenance.
Kill the Power and Cut the Flow First
Before you even touch a tool, you have to disconnect the lifelines. Working on a dishwasher without cutting the power is like trying to fix a lawnmower while the blades are spinning. Find your circuit breaker and flip it. Then, reach under the sink and kill the water supply valve. I once skipped the water shut-off because I thought I could be ‘fast’—I ended up with a pressurized geyser soaking my laminate flooring. Trust me, you don’t want to be documenting a flood while trying to figure out how to prove your appliance failure was caused by a power surge if things go south with the electrical side. Once the lines are dead, remove the bottom kickplate. This is usually held in by two screws at the very base. Slide it out, and you’ll see the internal guts of the machine.
Find the Valve Behind the Kickplate
Look for the brass or plastic fitting where your main water line connects to the machine. That’s your water inlet valve. It’s the gatekeeper. If this part is physically damaged, you aren’t just cleaning a screen; you’re replacing a cracked water inlet valve before your kitchen floods. But if it looks solid, the problem is likely internal. Use a wrench to carefully disconnect the water supply line from the valve. Keep a shallow pan and a towel handy. Even with the water off, there’s always a lingering ‘burp’ of water trapped in the hose that wants to ruin your floor. This is a critical moment to check your connections; sometimes you’ll find the difference between a clogged hose and a dead drain pump is just a matter of where the pressure is failing.
Extract the Tiny Mesh Screen Gently
Inside the mouth of the valve, where the hose was just attached, you’ll see a tiny, circular mesh screen. It’s often white or blue. This is the ‘holy grail’ of simple fixes. 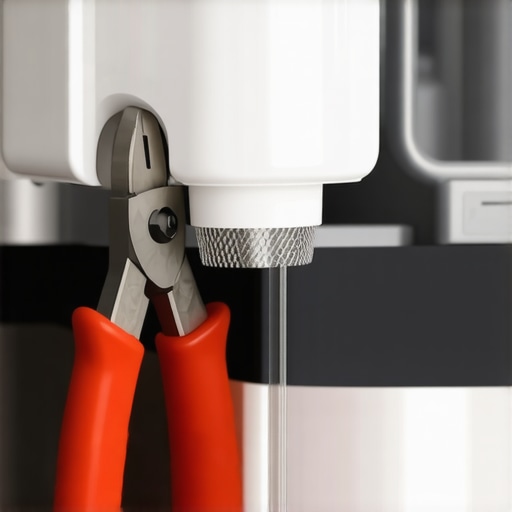 I remember the first time I did this; I used a flathead screwdriver and pushed too hard, tearing the mesh. That was a fifty-dollar mistake. Use needle-nose pliers to gently wiggle it out. If it’s covered in brown gunk or white crusty scales, you’ve found your culprit. This buildup is the primary reason why your warranty claim was denied due to lack of maintenance. Take the screen to the sink and run it under warm water. If the scale is stubborn, you can use the secret to de-scaling your machine using lemon juice to dissolve those minerals without using harsh chemicals that degrade the plastic.
Why Scrubbing Too Hard Is a Rookie Move
The mesh is delicate. If you scrub it with a wire brush, you’ll create gaps large enough for sand to pass through, which will eventually destroy the valve’s internal seal. Use an old toothbrush and be patient. Once you can see through the screen clearly, pop it back into the valve. Reattach your water line, making sure not to cross-thread the fitting—plastic threads are unforgiving. Turn the water back on slowly and check for leaks. If everything stays dry, flip the power back on. When you start the next cycle, listen closely. You should hear a robust ‘whoosh’ of water. If the sound is still weak or off-beat, you might need the trick to identifying a failing drain pump by sound to ensure the rest of the system is actually keeping up with the new flow.
While clearing that tiny screen is a massive win, I see homeowners fall into a dangerous trap immediately after. They get the ‘maintenance bug’ and decide to deep clean everything with the strongest chemicals they can find. Here is where I’m going to go against the grain: stop pouring a gallon of vinegar into your machine every week. Everyone tells you it’s a miracle cleaner, but in my experience, why using distilled vinegar every week may damage your seals is a conversation we aren’t having enough. The high acidity can eventually eat away at the rubber components, leading to leaks that are far more expensive than a simple clog. You think you’re being proactive, but you’re actually fast-tracking a service call.

The Vinegar Myth Might Be Rotting Your Seals
Instead of relying on harsh acids, focus on the mechanics. I’ve seen countless DIYers try to solve a ‘low water’ issue by over-tightening the supply line with a massive pipe wrench. Plastic threads on modern valves are incredibly unforgiving. If you feel resistance, stop. I’ve had neighbors call me in tears because they cracked the housing of a brand-new valve, turning a five-minute screen cleaning into a full-blown plumbing emergency. If you aren’t careful, you’ll end up replacing a cracked water inlet valve before your kitchen floods. Precision beats force every single time when you are troubleshooting dishwasher problems.
Will my choice of detergent actually void my factory warranty?
It’s a more sophisticated question than you might think. While a manufacturer usually can’t void a warranty just because you used a different brand of soap, the *consequences* of that soap can. The Association of Home Appliance Manufacturers (AHAM) notes that using non-HE detergents or excessive amounts of pods in modern machines can cause suds-lock or sensor errors. This is a common reason why your warranty claim was denied due to lack of maintenance. If the technician finds a mountain of sticky residue in the sump, they’ll label it ‘user error’ rather than a mechanical defect. This is why understanding appliance diagnostics is so vital; it’s about knowing how the machine ‘thinks.’
Stop Pre-Rinsing Every Single Plate
Another nuance people miss is the ‘soil sensor’ logic. If you scrub your plates until they are sparkling before putting them in the dishwasher, the machine’s internal sensors think the water is clean and will shorten the cycle or lower the temperature. This actually leaves your machine more prone to grease buildup in the long run. I always tell people that why pre-rinsing dishes actually makes your machine less efficient is because the detergent needs something to latch onto. Without food particles, the enzymes just attack your glassware and the machine’s own plastic parts. If your machine is acting up, sometimes the best fix is to access the secret tech menu that calibrates your water sensors to reset its baseline. Have you ever fallen into this trap of over-cleaning and ended up making the problem worse? Let me know in the comments so we can swap horror stories.
The soil sensor is just the starting point for a machine that actually works for you instead of against you. To really move from a frustrated homeowner to a confident DIYer, you need to look at your tool bag. I don’t mean a massive chest of specialty wrenches; I mean three specific items that have saved me from calling a pro more times than I can count. First, if you don’t own a shop vacuum, get one. When your machine refuses to drain, you can’t always reach the debris by hand. I’ve found that how to clear a blocked impeller with a shop vacuum is the single most effective way to remove broken glass or cherry pits that are jamming the pump. It creates a suction force that no pair of tweezers can match.
Forget the Plunger and Grab a Shop-Vac
I remember a Sunday morning when my dishwasher was half-full of stagnant, gray water. Most people reach for a plunger, which is a terrible idea—it just shoves the clog deeper into the delicate internal check valves. I used my shop-vac to suck the water out through the drain hose, and the culprit—a tiny plastic bread tie—popped right out. This kind of proactive mechanical clearing is what keeps your pump from burning out prematurely. If you aren’t clearing these physical blocks, you’re eventually going to be identifying a failing circulation motor by its pitch because it’s working way too hard to move water.
Why a Multimeter Saves More Than Just Time
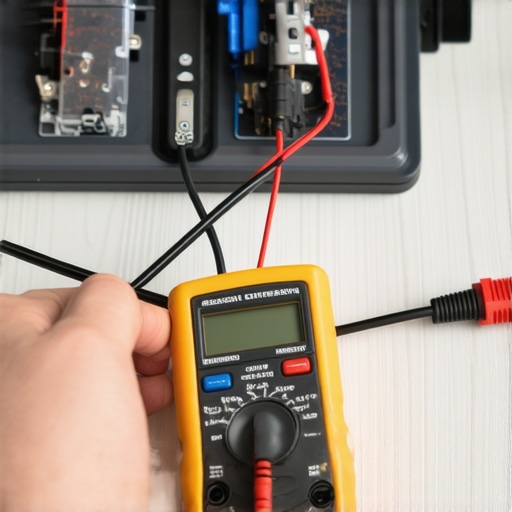
The second tool I swear by is a basic digital multimeter. When the machine just won’t start, or the heat isn’t kicking in, 90% of people assume the control board is dead. Usually, it’s just a five-dollar fuse that’s blown. I’ve spent a lot of time testing a thermal fuse for continuity without a pro kit, and it’s a simple pass/fail test. If the meter doesn’t beep, the fuse is dead. Replacing it takes five minutes. If you call a tech for that, you’re paying for an hour of labor and a massive markup. This is also how you build a paper trail for your records; if you can prove you tested the components correctly, you’ll have a much easier time if you ever need to appeal a rejected extended warranty claim.
How do I keep my dishwasher’s performance from tanking after three years?
The secret isn’t just cleaning the filters; it’s about managing the environment inside the tub. Over time, the rubber seals and the spray arm bearings degrade due to heat and chemical exposure. According to the Whirlpool Global Service Support technical manuals, one of the most common causes of ‘lazy’ spray arms is actually mineral buildup inside the rotation hub, not a pump failure. I make it a habit to check the spray arms for cracks twice a year. If you see water leaking from the seams of the arm, you aren’t getting the pressure you need. You can often fix this by cleaning spray arm nozzles using a paperclip to ensure every jet is firing at 100% capacity.
Look Out for the Software Revolution in Your Kitchen
Looking ahead, I see a massive shift in how we maintain these machines. We are moving away from purely mechanical fixes and into the world of digital health. Most high-end machines now have Wi-Fi connectivity for a reason. Manufacturers can push ‘over-the-air’ updates that change how long the pump runs or how hot the water gets based on fleet-wide data. This is why why firmware updates are essential for new smart dishwashers. If your machine is acting ‘glitchy’ or stopping mid-cycle, check the app before you grab the screwdriver. A simple software patch might be the ‘repair’ you were looking for. I challenge you to go into your dishwasher’s settings tonight and check for an update; you might find your machine runs better tomorrow morning just because of a few lines of code.
What These Years Under the Sink Taught Me About Machine Logic
I’ve crawled under more countertops than I care to admit, and if there is one thing I’ve learned, it’s that machines don’t actually ‘hate’ us—they just get clogged. My biggest lightbulb moment came when I realized that dishwasher performance isn’t about the motor’s power; it’s about the path of least resistance. When you clear that tiny screen, you aren’t just cleaning a part; you are restoring the hydraulic balance the engineers intended. I also learned the hard way that patience saves parts. Rushing to pry out a screen with the wrong tool is how a free maintenance task turns into a $200 repair. Finally, always document your findings. If you see recurring sediment, it’s a sign your whole home needs a water softener, not just a one-time troubleshooting dishwasher problems session.
The Gear That Keeps My Kitchen Flood-Free
You don’t need a rolling tool chest to be effective, but these three items are my non-negotiables for any appliance owner. First, get a decent digital multimeter; it’s the only way to stop guessing and start knowing if a part is actually dead. I use mine specifically for testing a thermal fuse for continuity without a pro kit, which has saved me from replacing three perfectly good control boards. Second, keep a bag of citric acid on hand. It’s significantly safer for your components than vinegar and is the best way for how to remove cloudiness from glasses using citric acid without eating your seals. Lastly, a small LED headlamp is a lifesaver. You can’t fix what you can’t see, especially when you’re looking for micro-cracks in your spray arm in the dark corner behind the sump.
Take Back Control of Your Kitchen Chores
Repairing your own appliances can feel intimidating when you first see the wires and hoses, but remember: these machines were built by humans, and they can be maintained by you. Don’t let a small clog turn into a reason to buy a new machine. By mastering these small steps—like clearing filters and checking the screen—you are effectively understanding appliance diagnostics better than the average homeowner. This knowledge is your best defense against expensive service calls and helps you maintain your troubleshooting dishwasher problems skills for years to come. You’ve got the tools and the plan—now go get that water flowing again. Have you ever found something bizarre stuck in your inlet screen that completely stopped your machine? Let me know in the comments below!