

It was 8:00 PM on a Tuesday, and I was staring at a puddle that was slowly creeping toward my expensive cherry-wood cabinets. The sound was unmistakable—the high-pitched hiss of a failing water inlet valve. My first instinct? Panic. I looked at the tight fit of my dishwasher, wedged under the granite countertop and over the hardwood floor, and I felt sick. I knew that if I tried to drag that beast out, I’d either crack the stone or gouge the wood. But here’s the secret I learned after years of tinkering: you don’t actually have to move the machine. Today, I’m going to show you how to swap that valve from the front, saving your floors and your sanity. [image]
Stop Stressing Over Your Hardwood Floors
Believe me, I’ve been where you are. Early in my DIY journey, I made the classic rookie mistake of thinking brute force was the only way. I once tried to ‘manhandle’ an old Kenmore out of its nook without checking the clearance, and I ended up with a six-inch tear in the vinyl flooring that I had to hide with a rug for three years. It was embarrassing, frustrating, and totally avoidable. Most people assume that because the dishwasher is ‘built-in,’ it must be ‘pulled out’ for every little repair. That’s just not true. Before you even touch a wrench, you need to recognize the top signs your dishwasher needs professional diagnostics or if it’s a simple mechanical failure you can handle yourself. According to the Insurance Institute for Business & Home Safety, water damage is a leading cause of home insurance claims, and many of these stem from small appliance leaks that go unnoticed. By replacing a cracked water inlet valve before your kitchen floods, you’re playing defense against a massive renovation bill. I’ve found that the peace of mind you get from a twenty-dollar part is worth far more than the headache of a flooded basement.
Wait, is there actually enough room down there?
It looks impossible, doesn’t it? You’re staring at a four-inch gap behind a kickplate and wondering how your hands—let alone a tool—will fit. I felt the same way. I remember kneeling on the cold tile, shining a flashlight into the dark void under the tub, thinking my fingers were just too thick for this job. But most modern machines are designed with a huge amount of ‘dead space’ right behind that bottom panel. Once you get the kickplate off, the valve is usually staring right back at you, held in by just a couple of screws. You just have to know the right way to tighten a leaking water line once the new part is in. It’s tight, yes, and you might lose a little skin on your knuckles, but it beats the alternative of disconnecting every hose and wire just to slide the unit out. Have you ever felt like your kitchen was holding your dishwasher hostage? Drop a comment below if you’ve been terrified of pulling your machine out. We’re going to get through this troubleshooting dishwasher problems journey together, one bolt at a time. It’s about working smarter, not harder.
Kill the power and water before you touch anything
First things first: safety isn’t just a suggestion here; it’s the difference between a successful DIY and a trip to the ER. I remember the time I thought I could ‘quick-swap’ a simple wire without hitting the breaker. I touched a live terminal and felt a zap that made my arm tingle for two hours. It was a stupid risk. Before you grab a single tool, flip the circuit breaker and turn off the water supply valve under the sink. Think of the water inlet valve as the gatekeeper of your kitchen; if that gate is even slightly ajar when you disconnect the line, you’re going to have a bad time. While you’re under there, it’s a great time to check if you should be trusting a warranty for dishwasher repairs rather than going solo, especially if your machine is less than a year old.
Strip away the kickplate to reveal the culprit
Most people look at the bottom of their dishwasher and see a solid wall. In reality, that plastic or metal panel—the kickplate—is usually held on by just two screws. Once those are out, the entire ‘basement’ of your machine is exposed. I once spent twenty minutes struggling with a stuck kickplate only to realize I was pulling against a decorative piece of trim my contractor had installed too low. Always check for those hidden obstacles. Once that panel is off, you’ll likely see the water inlet valve on the left or right side. While you have this rare access, it’s the perfect opportunity for deep cleaning a dishwasher sump without pulling the machine, which can prevent odors and drainage issues down the road.
Maneuvering your tools in the dead zone
This is where the ‘meat’ of the job happens. You’ll see a brass fitting connecting the hot water line to the valve. Use a small adjustable wrench or a pair of channel locks. Space is tight, so think of it like a game of Operation—slow and steady wins. When I did this last summer, I dropped my wrench into the dark abyss under the tub three times before I realized I should have laid down a bright towel to catch anything that fell. That towel also soaks up the small amount of water that will inevitably leak out of the line. If you’re already troubleshooting, you might also want to know how to test your dishwashers float switch with a pencil, as these two parts often fail together. Using a small mirror can help you see the wires connected to the solenoid; they usually just pull right off with a firm tug.
Connecting the new valve without the leaks
Once the old, crusty valve is out, the new one should slide right into the same mounting bracket. The real trick is the ‘re-entry.’ When you reattach the water line, you have to be incredibly careful not to cross-thread the brass fitting. If it doesn’t spin on easily with your fingers first, stop. Force is your enemy here. I’ve seen DIYers ruin a brand-new twenty-dollar valve by trying to wrench-tighten a crooked connection. Once it’s snug, use the right way to tighten a leaking water line to ensure you don’t over-torque it. After the wires are back on, turn the water back on *before* you put the kickplate back. Watch it like a hawk for five minutes. If there’s even a single drip, you’ll want to know now, not after the wood cabinets start swelling again. If everything looks dry, you’ve just saved yourself a $200 service call and kept your floors pristine.Now that you’ve seen how accessible that valve is, let’s talk about why so many people get stuck before they even start. I’ve noticed a major misconception in the DIY community: the idea that more ‘effort’ equals a better repair. In reality, modern machines are highly calibrated systems that don’t always appreciate our ‘help.’ For instance, why pre-rinsing dishes actually makes your machine less efficient is one of those truths that shocks most homeowners. By scrubbing every crumb off, you’re essentially tricking the turbidity sensors into thinking the water is clean, which leads to shorter cycles and poor results. It’s a classic case of doing too much.
Your dishwasher is smarter (and more sensitive) than you think
When I first started digging into appliance repair, I didn’t realize that my machine was basically a computer that happened to spray water. Most high-end units have a the secret diagnostic mode hidden on your touch control panel. This isn’t just a gimmick; it’s the exact same tool professional techs use to identify a failing solenoid or a faulty thermistor. Instead of guessing, you can force the machine to tell you exactly what’s wrong. Learning how appliance diagnostics can save your warranty benefits is the difference between an informed conversation with a service rep and getting a generic ‘user error’ rejection. 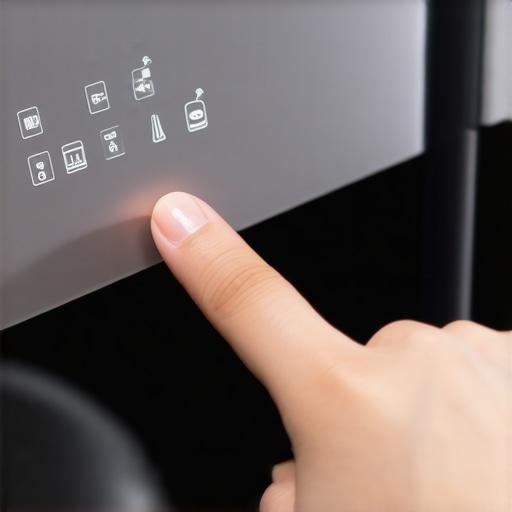
Does using ‘off-brand’ parts actually void the manufacturer warranty?
This is the big question I get every time I suggest a $15 third-party valve over a $60 OEM part. People are terrified of the ‘warranty void if removed’ stickers. However, you should know the truth about non-manufacturer repair parts and your warranty. According to the Federal Trade Commission (FTC) under the Magnuson-Moss Warranty Act, it is generally illegal for manufacturers to deny warranty coverage simply because you used an aftermarket part or did the work yourself, unless they can prove your repair actually caused the damage. It’s an empowering bit of legislation that keeps the big guys from monopolizing the repair market.
The fine print that could cost you hundreds
Here is the ‘trap’ I promised to warn you about. While the law protects your right to use third-party parts, many warranties contain a sneaky ‘relocation clause.’ I’ve seen homeowners lose their coverage because of the clause that voids your coverage if you move the appliance. The manufacturers argue that once you slide that unit out of its original installation spot, any future leaks could be blamed on your ‘improper’ re-installation. This is exactly why my method of replacing the water inlet valve from the front is such a game-changer. You’re fixing the problem without technically ‘moving’ the unit, which keeps you in the clear. Have you ever fallen into this trap or had a claim denied for something small? Let me know in the comments. We’re all learning these nuances together, and sharing those ‘oops’ moments is the best way to prevent someone else from making the same expensive mistake.Once you’ve mastered the front-access repair, you need to think about the long game. Maintenance isn’t just about avoiding a puddle; it’s about protecting your investment from internal decay. I use a digital multimeter for almost every troubleshooting session now. Last winter, I suspected my dishes weren’t getting clean because of water temperature, and by testing your heating element for ground faults with a meter, I found a hairline crack in the coil that would have eventually fried the expensive main control board. I also swear by a budget thermal camera. It sounds like overkill for a kitchen, but using a thermal camera to find heat leaks in your dishwasher door lets you see exactly where steam is escaping before it warps your expensive cherry-wood cabinets or breeds mold in the drywall.
How do I make this machine last a decade?
The secret isn’t some expensive chemical; it’s consistency and knowing your water chemistry. I’ve seen so many people lose their machines early because of simple scale buildup that chokes the motor. You need to calculate the real cost of skipping your monthly descaling cycle in terms of pump longevity. If you live in a hard-water area, those minerals act like sandpaper on your internal seals, eventually leading to the very leaks we worked so hard to avoid. In fact, manufacturers are getting much stricter about maintenance logs; I’ve heard horror stories about why your warranty claim was denied due to lack of maintenance. The Association of Home Appliance Manufacturers (AHAM) specifically notes in their technical guides that user-preventable clogs and mineral scale are the top reasons service contracts are voided prematurely. I predict that in the next five years, we won’t even be looking for leaks ourselves. Appliances are moving toward predictive failure models where the machine monitors its own power draw. We’re already seeing how smart diagnostic apps are changing home appliance repair by alerting you to a failing drain pump days before it actually dies. But even with all that tech, you still need to be the expert on understanding appliance diagnostics improving your warranty claims so you don’t get charged for a service visit that should be covered. If you have a smart unit, remember that why your smart appliance needs regular software cache clears is the modern version of unclogging the filter. Before you call it a day, I want you to try one thing tonight. Grab a high-lumen LED light and use the flashlight trick for finding micro-cracks in your spray arm. It takes two minutes and could save you from a ghost leak that quietly ruins your kitchen subfloor.
Hard Truths I Learned After Fixing My Own Mistakes
After years of tinkering, I’ve realized that the physical repair is only half the battle. The real trick to long-term success is respecting the machine’s limits. I used to think I could outsmart the system by skipping small steps, but I quickly learned that the real cost of skipping your monthly descaling cycle isn’t just a dirty filter; it’s a shortened lifespan for every internal seal. Another ‘lightbulb moment’ came when I dealt with a service center that tried to bully me out of a claim. You must be prepared for why your warranty claim was denied due to lack of maintenance by keeping a simple log of when you clean your sump and clear your lines. Lastly, always remember that while a part might fit, its quality dictates its future; stay informed on the truth about non-manufacturer repair parts and your warranty before you commit to the cheapest option on the shelf. These nuances are what separate a ‘temporary fix’ from a machine that lasts fifteen years.
My Favorite Gear for Staying Under the Sink
You don’t need a professional workshop to handle these repairs, but a few specific items will save you from a massive headache. First, a high-quality digital multimeter is non-negotiable. I use mine for testing your heating element for ground faults with a meter whenever the dishwasher isn’t drying properly. Second, never underestimate a good light source. I swear by the flashlight trick for finding micro-cracks in your spray arm to catch leaks before they reach the floorboards. Finally, keep a small mirror in your toolkit; it allows you to see the back of the water inlet valve without having to contort your neck into impossible angles. Having these tools ready makes the process feel like a controlled project rather than a desperate scramble.
Stop Being Afraid of Your Own Kitchen Appliances
Taking the leap into DIY appliance repair can feel intimidating, especially when water and electricity are involved. But remember, the engineers who built these machines designed them to be serviced. By following the front-access method for your water inlet valve, you aren’t just saving money—you’re proving that you are the master of your home’s maintenance. Your confidence will grow with every bolt you turn and every successful diagnostic cycle you run. By understanding appliance diagnostics improving your warranty claims, you are no longer at the mercy of a service schedule. You’ve got the skills, the knowledge, and the right plan. Now, get under there and fix it! Have you ever hesitated to start a repair because you were worried about your warranty coverage? Let me know in the comments below!