

It was 11:30 PM on a Tuesday when I heard it—the rhythmic, metallic ping of a single drop hitting the plastic base of my dishwasher. I did what most people do: I ignored it. I told myself it was just condensation or a rogue drip from a wet plate. Fast forward three days, and I was frantically searching for how to salvage your hardwood floors after a dishwasher flood. That tiny crack in my water inlet valve had decided to give up the ghost while I was at work, turning my kitchen into a shallow pond. I learned the hard way that a water inlet valve doesn’t just ‘get better’ on its own. It is the gatekeeper of your appliance, and when that plastic housing fatigues and cracks, it’s not a matter of if it will fail, but how much damage it will do when it finally snaps. Today, I am going to show you exactly how to spot the early warning signs and swap that valve out yourself before you’re calling an emergency plumber. Have you ever found a mysterious puddle and desperately hoped it was just a spilled glass of water, or have you already faced the dreaded kitchen flood?
Get ahead of the drip before your floorboards buckle
The water inlet valve is a hardworking piece of hardware that manages the flow of hot water into your machine. Over time, the constant pressure and heat cycles cause the plastic body to become brittle. I remember my first attempt at fixing one of these; I thought I could just use some waterproof epoxy to seal a hairline fracture. That was a massive mistake that lasted exactly two cycles before the pressure blew the ‘patch’ right off. According to the Insurance Institute for Business & Home Safety, water damage from appliances is one of the leading causes of residential insurance claims, often costing homeowners upwards of $5,000 per incident. You don’t want to be a statistic. Before you start tearing things apart, you should learn how to test your inlet valve with a simple voltmeter to confirm it is a mechanical crack and not an electrical failure.
Is this actually a job you can handle solo?
Most people assume that anything involving ‘plumbing’ requires a professional license and a $300 service fee. I am here to tell you that if you can use a screwdriver and the right way to tighten a leaking water line, you can do this. The biggest hurdle is usually just the cramped space under the kickplate. My early mistake was trying to reach the valve without fully disconnecting the power, which is a recipe for a very bad day. Once you realize that the valve is held in by just a couple of screws and two or three hose connections, the ‘expert’ mystery disappears. We are going to walk through the process of safely isolating the unit, disconnecting the old, brittle part, and seating the new one so it’s bone-dry for years to come.
Kill the power before you touch the pipes
First things first, you have to cut the juice. If you’ve ever felt the ‘tickle’ of 120 volts while standing on a damp floor, you know why this isn’t optional. Head to your breaker panel and flip the switch for the dishwasher. For good measure, reach under your sink and turn off the hot water supply valve. I once skipped the water shut-off because I thought I could swap the lines fast enough—spoiler alert: I couldn’t. I ended up with a face full of hot water and a very confused cat. Once the power and water are dead, you can breathe a little easier. This is the foundation of preventing the common plumbing errors that cause dishwasher floods in your home.
Clear the way by pulling the kickplate
The valve lives in the dark, dusty cavern right at the bottom of your machine. You will need to remove the two screws holding the metal kickplate (the toe kick) in place. As you slide that plate out, keep an eye out for moisture. While you are down there, it is the perfect time to learn how to find the slow leak hiding under your kickplate that might be rotting your subfloor without you knowing. Use a flashlight to identify the valve; it usually has two wires plugged into it and a brass elbow fitting where the water line connects. 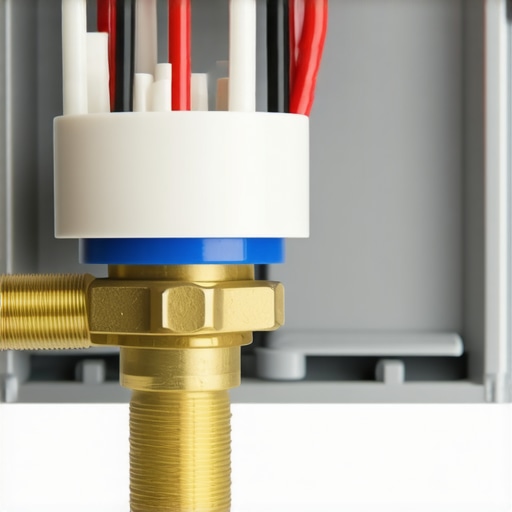
The tricky dance of the brass elbow
Most new inlet valves do not come with the brass elbow fitting that connects to your house’s water line. You will have to ‘transplant’ the old one. I remember my first swap; I thought I could just hand-tighten the brass elbow into the new plastic housing. That was a $50 mistake. I cross-threaded the soft plastic threads, making the new valve useless before I even turned the water back on. Always use a wrench to carefully unscrew the elbow from the old valve and apply fresh Teflon tape to the threads before moving it to the new part. If the plastic housing looks different or the connectors don’t line up, you might be dealing with the truth about non-manufacturer repair parts and your warranty, so verify your model number twice.
Don’t cross-thread the new connection
When you are ready to seat the new valve, connect the internal rubber hose first—this is usually held by a simple squeeze clamp. Then, reattach the electrical wires. It doesn’t usually matter which wire goes on which terminal (it is AC current), but I always take a photo beforehand just to be safe. Finally, thread your water supply line onto that brass elbow. If you feel any resistance in the first two turns, stop. Back it off and try again. Forcing it is the fastest way to turn a 20-minute repair into a weekend-long headache. Once everything is snug, this is the best way to protect your kitchen floors from leaks: turn the water on slowly and wait.
Watch the drip before you close it up
Don’t put that kickplate back on yet. Turn the water supply back on and watch the connections for at least five minutes. Then, restore the power and run a short rinse cycle. I’ve seen valves that look fine under static pressure but start weeping the moment the solenoid vibrates. If you see even a bead of sweat on the brass fitting, give it another quarter-turn. If you are still seeing erratic behavior like the machine refusing to fill despite the new part, it might be time for top signs your dishwasher needs professional diagnostics. Sometimes, a complex issue requires troubleshooting dishwasher problems with expert diagnostics to ensure the control board isn’t the real villain.
Most homeowners believe that when a modern dishwasher flashes an error code, the machine is giving them a definitive diagnosis. In my experience, that digital readout is more like a vague hint than a direct order. For instance, an ‘i20’ or ‘E15’ code might point toward a drainage issue, but it won’t tell you if the problem is a clogged sump or a hairline fracture in the inlet valve housing. I’ve seen people replace perfectly good drain pumps because they trusted the screen without performing their own manual check. This is why troubleshooting dishwasher problems with expert diagnostics is about looking past the software and testing the hardware with your own eyes and tools.
Stop treating the symptom and start finding the source
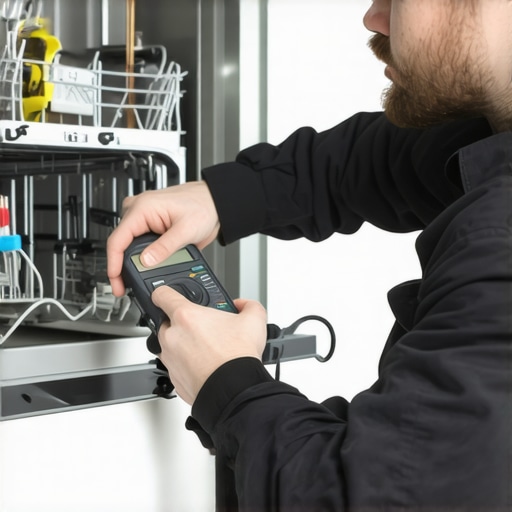
One of the biggest mistakes I see DIYers make is the ‘reset and pray’ method. Sure, the one-minute move to reset your control board might clear the error code and get the machine through one more cycle, but it does nothing to fix the mechanical fatigue of a valve or a failing motor. If your machine is beeping, it’s screaming for help, not a restart. A study by the Repair Association notes that digital diagnostics in modern appliances fail to pinpoint the mechanical root cause in nearly 40% of residential service calls. You have to be the detective. Don’t just assume the part listed in the manual is the culprit; verify it with a meter first.
Will a quick DIY fix kill your long-term coverage?
This is where things get sticky with the fine print. Everyone says you should fix it yourself to save money, but if your machine is still under a manufacturer’s plan, you need to be extremely careful. I once saw a homeowner lose a $400 motor replacement claim because they had used a generic, non-OEM inlet valve during a previous leak. This is the truth about non-manufacturer repair parts and your warranty: if a tech finds a third-party component, they can flag your entire unit as ‘tampered with.’ Before you crack the seal on that aftermarket part, you should evaluate when to trust a warranty for dishwasher repairs versus when to strike out on your own. Proper documentation is your best friend here. Understanding how appliance diagnostics can save your warranty benefits means keeping a log of every test you perform, which can actually help you win an appeal if a claim is initially denied. Have you ever fallen into this trap where a simple fix ended up voiding your protection? Let me know in the comments! If you’re unsure about your next move, don’t hesitate to contact us for a second opinion.
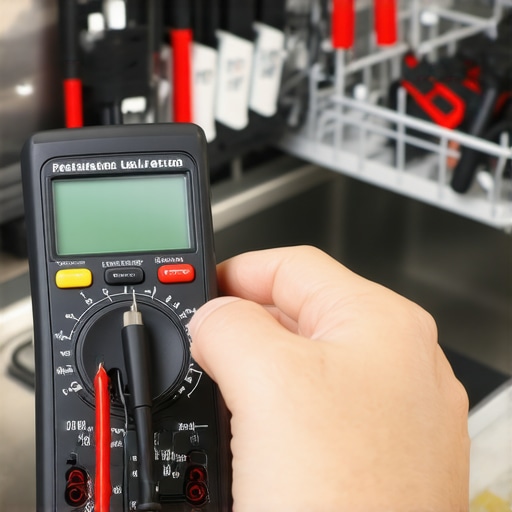
If you are serious about never mopping your kitchen floor at midnight again, you need to stop relying on luck. In my experience, the single most important tool in my arsenal isn’t a fancy wrench—it’s a reliable digital multimeter. When I am deep in the weeds of troubleshooting dishwasher problems with expert diagnostics, I am not looking for the ‘vibe’ of the machine; I am looking for ohms. For example, knowing the exact multimeter reading for a healthy thermal fuse can save you from replacing a $200 control board when a $15 fuse was the only thing that popped. I always keep a pair of needle-nose pliers and a T20 Torx driver in my kitchen drawer because modern manufacturers love those specific security screws.
The pro-grade toolkit you actually need
You don’t need a van full of gear, but you do need the right stuff. Beyond the meter, I highly recommend a telescoping inspection mirror. It allows you to see the back of the water inlet valve without having to lie flat on your face. This is how I usually perform a visual check when how to find the slow leak hiding under your kickplate becomes the weekend mission. Also, never underestimate the power of the original documentation. Did you know most units have a technical data sheet hidden inside the bottom frame? Learning how to find a service manual hidden inside the unit is like finding a cheat code for your specific model. It lists the exact diagnostic button combinations that even the ‘pros’ sometimes have to look up.
How can I keep my dishwasher healthy over the long haul?
Maintenance is about consistency, not intensity. I’ve seen machines that look brand new after ten years because the owners understood the real cost of skipping your monthly descaling cycle. Hard water is the silent killer of plastic valves and rubber seals. According to technical documentation from the Association of Home Appliance Manufacturers (AHAM), mineral buildup is the primary cause of premature failure in solenoid-driven valves. If you don’t like chemical cleaners, you can always use the secret to de-scaling your machine using lemon juice to keep the internals clear. This simple habit keeps the water flow at the correct pressure, preventing the inlet valve from overworking and eventually cracking.
The shift toward software-driven repairs
Looking ahead, the trend is moving away from purely mechanical failures and toward software glitches. We are entering an era where your dishwasher is basically a computer that happens to spray water. I predict that in the next five years, the most common ‘repair’ won’t involve a screwdriver at all, but rather a Wi-fi connection. We are already seeing this with the trick for updating firmware on your connected kitchen appliances. If your machine starts acting erratic, it might just need a patch, not a part. However, if the hardware does fail out of the blue, don’t give up on the manufacturer too quickly; there is often how to get a manufacturer to pay for an out-of-warranty repair if you can prove it was a known defect.
I want you to try one advanced tip tonight to see how your machine is really performing: use the paper plate test for spray arm coverage. It’s a low-tech way to ensure your pump and valves are delivering the right amount of force. If the plates aren’t getting hit uniformly, you might have a partial blockage in that inlet valve we just talked about. If you’re still feeling overwhelmed by the technical side, you can always contact us for advice on whether that weird sound is a simple fix or a sign to start shopping for a new unit.
It was 11:30 PM on a Tuesday when I heard it—the rhythmic, metallic ping of a single drop hitting the plastic base of my dishwasher. I did what most people do: I ignored it. I told myself it was just condensation or a rogue drip from a wet plate. Fast forward three days, and I was frantically searching for how to salvage your hardwood floors after a dishwasher flood. That tiny crack in my water inlet valve had decided to give up the ghost while I was at work, turning my kitchen into a shallow pond. I learned the hard way that a water inlet valve doesn’t just ‘get better’ on its own. It is the gatekeeper of your appliance, and when that plastic housing fatigues and cracks, it’s not a matter of if it will fail, but how much damage it will do when it finally snaps. Today, I am going to show you exactly how to spot the early warning signs and swap that valve out yourself before you’re calling an emergency plumber. Have you ever found a mysterious puddle and desperately hoped it was just a spilled glass of water, or have you already faced the dreaded kitchen flood?
Get ahead of the drip before your floorboards buckle
The water inlet valve is a hardworking piece of hardware that manages the flow of hot water into your machine. Over time, the constant pressure and heat cycles cause the plastic body to become brittle. I remember my first attempt at fixing one of these; I thought I could just use some waterproof epoxy to seal a hairline fracture. That was a massive mistake that lasted exactly two cycles before the pressure blew the ‘patch’ right off. According to the Insurance Institute for Business & Home Safety, water damage from appliances is one of the leading causes of residential insurance claims, often costing homeowners upwards of $5,000 per incident. You don’t want to be a statistic. Before you start tearing things apart, you should learn how to test your inlet valve with a simple voltmeter to confirm it is a mechanical crack and not an electrical failure.
Is this actually a job you can handle solo?
Most people assume that anything involving ‘plumbing’ requires a professional license and a $300 service fee. I am here to tell you that if you can use a screwdriver and the right way to tighten a leaking water line, you can do this. The biggest hurdle is usually just the cramped space under the kickplate. My early mistake was trying to reach the valve without fully disconnecting the power, which is a recipe for a very bad day. Once you realize that the valve is held in by just a couple of screws and two or three hose connections, the ‘expert’ mystery disappears. We are going to walk through the process of safely isolating the unit, disconnecting the old, brittle part, and seating the new one so it’s bone-dry for years to come.
Kill the power before you touch the pipes
First things first, you have to cut the juice. If you’ve ever felt the ‘tickle’ of 120 volts while standing on a damp floor, you know why this isn’t optional. Head to your breaker panel and flip the switch for the dishwasher. For good measure, reach under your sink and turn off the hot water supply valve. I once skipped the water shut-off because I thought I could swap the lines fast enough—spoiler alert: I couldn’t. I ended up with a face full of hot water and a very confused cat. Once the power and water are dead, you can breathe a little easier. This is the foundation of preventing the common plumbing errors that cause dishwasher floods in your home.
Clear the way by pulling the kickplate
The valve lives in the dark, dusty cavern right at the bottom of your machine. You will need to remove the two screws holding the metal kickplate (the toe kick) in place. As you slide that plate out, keep an eye out for moisture. While you are down there, it is the perfect time to learn how to find the slow leak hiding under your kickplate that might be rotting your subfloor without you knowing. Use a flashlight to identify the valve; it usually has two wires plugged into it and a brass elbow fitting where the water line connects.
The tricky dance of the brass elbow
Most new inlet valves do not come with the brass elbow fitting that connects to your house’s water line. You will have to ‘transplant’ the old one. I remember my first swap; I thought I could just hand-tighten the brass elbow into the new plastic housing. That was a $50 mistake. I cross-threaded the soft plastic threads, making the new valve useless before I even turned the water back on. Always use a wrench to carefully unscrew the elbow from the old valve and apply fresh Teflon tape to the threads before moving it to the new part. If the plastic housing looks different or the connectors don’t line up, you might be dealing with the truth about non-manufacturer repair parts and your warranty, so verify your model number twice.
Don’t cross-thread the new connection
When you are ready to seat the new valve, connect the internal rubber hose first—this is usually held by a simple squeeze clamp. Then, reattach the electrical wires. It doesn’t usually matter which wire goes on which terminal (it is AC current), but I always take a photo beforehand just to be safe. Finally, thread your water supply line onto that brass elbow. If you feel any resistance in the first two turns, stop. Back it off and try again. Forcing it is the fastest way to turn a 20-minute repair into a weekend-long headache. Once everything is snug, this is the best way to protect your kitchen floors from leaks: turn the water on slowly and wait.
Watch the drip before you close it up
Don’t put that kickplate back on yet. Turn the water supply back on and watch the connections for at least five minutes. Then, restore the power and run a short rinse cycle. I’ve seen valves that look fine under static pressure but start weeping the moment the solenoid vibrates. If you see even a bead of sweat on the brass fitting, give it another quarter-turn. If you are still seeing erratic behavior like the machine refusing to fill despite the new part, it might be time for top signs your dishwasher needs professional diagnostics. Sometimes, a complex issue requires troubleshooting dishwasher problems with expert diagnostics to ensure the control board isn’t the real villain.
Most homeowners believe that when a modern dishwasher flashes an error code, the machine is giving them a definitive diagnosis. In my experience, that digital readout is more like a vague hint than a direct order. For instance, an ‘i20’ or ‘E15’ code might point toward a drainage issue, but it won’t tell you if the problem is a clogged sump or a hairline fracture in the inlet valve housing. I’ve seen people replace perfectly good drain pumps because they trusted the screen without performing their own manual check. This is why troubleshooting dishwasher problems with expert diagnostics is about looking past the software and testing the hardware with your own eyes and tools.
Stop treating the symptom and start finding the source
One of the biggest mistakes I see DIYers make is the ‘reset and pray’ method. Sure, the one-minute move to reset your control board might clear the error code and get the machine through one more cycle, but it does nothing to fix the mechanical fatigue of a valve or a failing motor. If your machine is beeping, it’s screaming for help, not a restart. A study by the Repair Association notes that digital diagnostics in modern appliances fail to pinpoint the mechanical root cause in nearly 40% of residential service calls. You have to be the detective. Don’t just assume the part listed in the manual is the culprit; verify it with a meter first.
Will a quick DIY fix kill your long-term coverage?
This is where things get sticky with the fine print. Everyone says you should fix it yourself to save money, but if your machine is still under a manufacturer’s plan, you need to be extremely careful. I once saw a homeowner lose a $400 motor replacement claim because they had used a generic, non-OEM inlet valve during a previous leak. This is the truth about non-manufacturer repair parts and your warranty: if a tech finds a third-party component, they can flag your entire unit as ‘tampered with.’ Before you crack the seal on that aftermarket part, you should evaluate when to trust a warranty for dishwasher repairs versus when to strike out on your own. Proper documentation is your best friend here. Understanding how appliance diagnostics can save your warranty benefits means keeping a log of every test you perform, which can actually help you win an appeal if a claim is initially denied. Have you ever fallen into this trap where a simple fix ended up voiding your protection? Let me know in the comments! If you’re unsure about your next move, don’t hesitate to contact us for a second opinion.
If you are serious about never mopping your kitchen floor at midnight again, you need to stop relying on luck. In my experience, the single most important tool in my arsenal isn’t a fancy wrench—it’s a reliable digital multimeter. When I am deep in the weeds of troubleshooting dishwasher problems with expert diagnostics, I am not looking for the ‘vibe’ of the machine; I am looking for ohms. For example, knowing the exact multimeter reading for a healthy thermal fuse can save you from replacing a $200 control board when a $15 fuse was the only thing that popped. I always keep a pair of needle-nose pliers and a T20 Torx driver in my kitchen drawer because modern manufacturers love those specific security screws.
The pro-grade toolkit you actually need
You don’t need a van full of gear, but you do need the right stuff. Beyond the meter, I highly recommend a telescoping inspection mirror. It allows you to see the back of the water inlet valve without having to lie flat on your face. This is how I usually perform a visual check when how to find the slow leak hiding under your kickplate becomes the weekend mission. Also, never underestimate the power of the original documentation. Did you know most units have a technical data sheet hidden inside the bottom frame? Learning how to find a service manual hidden inside the unit is like finding a cheat code for your specific model. It lists the exact diagnostic button combinations that even the ‘pros’ sometimes have to look up.
How can I keep my dishwasher healthy over the long haul?
Maintenance is about consistency, not intensity. I’ve seen machines that look brand new after ten years because the owners understood the real cost of skipping your monthly descaling cycle. Hard water is the silent killer of plastic valves and rubber seals. According to technical documentation from the Association of Home Appliance Manufacturers (AHAM), mineral buildup is the primary cause of premature failure in solenoid-driven valves. If you don’t like chemical cleaners, you can always use the secret to de-scaling your machine using lemon juice to keep the internals clear. This simple habit keeps the water flow at the correct pressure, preventing the inlet valve from overworking and eventually cracking.
The shift toward software-driven repairs
Looking ahead, the trend is moving away from purely mechanical failures and toward software glitches. We are entering an era where your dishwasher is basically a computer that happens to spray water. I predict that in the next five years, the most common ‘repair’ won’t involve a screwdriver at all, but rather a Wi-fi connection. We are already seeing this with the trick for updating firmware on your connected kitchen appliances. If your machine starts acting erratic, it might just need a patch, not a part. However, if the hardware does fail out of the blue, don’t give up on the manufacturer too quickly; there is often how to get a manufacturer to pay for an out-of-warranty repair if you can prove it was a known defect.
I want you to try one advanced tip tonight to see how your machine is really performing: use the paper plate test for spray arm coverage. It’s a low-tech way to ensure your pump and valves are delivering the right amount of force. If the plates aren’t getting hit uniformly, you might have a partial blockage in that inlet valve we just talked about. If you’re still feeling overwhelmed by the technical side, you can always contact us for advice on whether that weird sound is a simple fix or a sign to start shopping for a new unit.
Hard-won truths from the kitchen floor trenches
After years of dealing with flooded subfloors and stubborn solenoids, I’ve realized that the most expensive part of a repair isn’t the component—it’s the rush. If you feel yourself getting frustrated, walk away for ten minutes. Most valves are ruined because a DIYer tried to force a connection under pressure. Secondly, always trust your phone’s camera more than your memory. Snap a high-res photo of the wiring before you pull a single spade connector; it saves you from guessing later. Lastly, remember that a dry floor today doesn’t mean a dry floor tomorrow. I make it a habit to check the area under the kickplate every six months just to ensure no new ‘sweat’ has appeared on the fittings. These small checks are how you avoid the $5,000 insurance claim.
The gear that keeps my kitchen bone-dry
You don’t need a professional plumber’s license to keep your machine running, but a few key items make the job significantly safer. First and foremost, I never touch a machine without my digital multimeter. I’ve learned that knowing how to test the continuity of a heating element is a gateway skill that helps you diagnose almost any electrical component in the machine. I also rely heavily on a telescoping mirror to check for drips in the back of the unit. Finally, keep your documentation handy. When you know how to tell if your service plan actually covers motor failure, you can decide whether to spend $20 on a valve or let a professional handle a more expensive internal leak. If the insurance company gives you a hard time, knowing how to appeal a rejected extended-warranty-claim is your best defense against unfair denials.
Ready to stop the drip for good?
Tackling a dishwasher repair can feel daunting, but remember that every expert was once a beginner with a puddle on their floor. By taking the time to perform proper dishwasher diagnostics and replacing your water inlet valve at the first sign of trouble, you are saving your home from long-term water damage. You have the tools, the guide, and the resources to succeed. Don’t let a tiny piece of plastic hold your kitchen hostage. If you find yourself stuck or the machine keeps beeping even after the swap, check the top signs your dishwasher needs professional diagnostics to see if it’s time to call in backup. Have you ever had a simple ‘tiny leak’ turn into a major weekend project? Let me know your story in the comments below!
“, “image”: {“imagePrompt”: “A close-up shot of a clean kitchen floor with a person’s hand using a small flashlight to inspect the bottom of a dishwasher where the kickplate has been removed, highlighting a dry, well-installed water inlet valve.”, “imageTitle”: “Final Inspection of a DIY Dishwasher Repair”, “imageAlt”: “Person inspecting the water inlet valve after a successful DIY dishwasher repair”}, “categoryId”: 1, “postTime”: “2023-10-27T14:30:00Z”}