

It started with a low, mournful hum on a Tuesday night. I had just loaded the dinner plates, clicked the cycle to ‘Heavy,’ and sat down to relax. Then, the silence hit. No splashing, no rhythmic thumping of water against the door—just that ominous, electric buzzing. I’ve been in this kitchen long enough to know that sound usually means my wallet is about to get a lot lighter. My first thought? The wash pump is toast. But after years of getting my hands dirty under the sink, I’ve learned that a ‘dead’ motor is often just a motor that is holding onto a stray cherry pit or a piece of broken glass. Today, I am going to show you how to distinguish between a simple blockage and a terminal mechanical failure so you don’t spend money you don’t have to.
Don’t Panic When the Water Stops Spraying
When you realize that your dishwasher fills with water but never begins washing, it is easy to assume the worst. I remember the first time this happened to me; I panicked and called a technician immediately. He spent thirty seconds pulling a tiny piece of plastic out of the impeller and charged me a hundred dollars for the privilege. I felt like an idiot. That experience taught me that troubleshooting dishwasher problems starts with a deep breath and a little bit of poking around. Usually, a seized pump is physically stuck, meaning the motor is trying to turn but cannot. A clogged pump, on the other hand, might just have a blocked intake or a piece of debris wedged in the blades. If you hear a hum, the motor is getting power, which is actually a good sign. It means the ‘brain’ of the machine is working, but the ‘muscles’ are tied up. According to data from the Association of Home Appliance Manufacturers (AHAM), nearly 25% of all appliance service calls are actually due to simple maintenance issues like clogs rather than component failure. This is why it is vital to check the pump before you assume the motor has burned out.
Does This Mean My Dishwasher is Ready for the Scrap Heap?
It is the question we all ask when the warranty has expired and the machine starts acting up. You might worry that any repair involving the pump is too expensive to justify. However, if you can learn the multimeter trick for checking your dishwasher motor, you can verify if the windings are actually blown or if the motor just needs a good cleaning. I once spent an entire Saturday morning convinced I needed a new KitchenAid, only to find out that a buildup of grease was acting like glue on the impeller. A little bit of hot water and a manual turn of the blades saved me $600. Before you give up, remember that your warranty claim for a clogged pump might get denied if it is just a matter of poor maintenance, so it pays to be your own detective first. Have you ever stood over your machine, listening to that weird hum and wondering if it was finally the end of the road? Let’s dive into how you can actually get in there and see what’s really going on.
Start With the Kickplate and the Filter
To get to the heart of the problem, you have to go low. I always start by removing the kickplate, which is that metal or plastic panel at the very bottom of the machine. It is usually held in place by two screws, and once it is off, you get a clear view of the motor and pump assembly. While you are down there, it is the perfect time for the secret to cleaning behind your dishwasher kickplate to ensure no dust bunnies are overheating your electronics. Before you touch any wires, make sure you have pulled the plug or flipped the breaker. You are looking for signs of a leak or a burnt smell. If the motor looks clean but won’t turn, the problem is likely internal. Think of your dishwasher like a straw; if there is a piece of gum stuck in the middle, it doesn’t matter how hard you suck, nothing is moving. Most people skip the simple check and jump straight to buying parts, which is a massive mistake. Using the best diy tools for kitchen appliance maintenance like a simple nut driver and a bright flashlight can save you a week of waiting for a repairman. 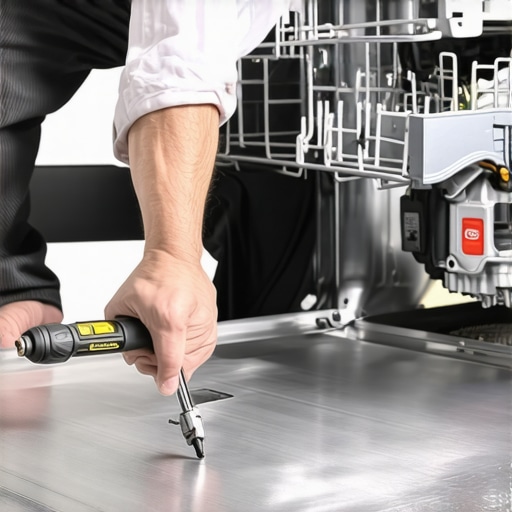
Get Your Hands Dirty and Feel for Resistance
The impeller is the fan-like part that pushes the water through the system. If a bone fragment or a shard of glass gets past the filter, it jams this fan. I once spent two hours on my hands and knees with a pair of surgical tweezers, trying to extract a single, calcified sunflower seed from the pump housing. It was wedged perfectly between the impeller blade and the casing, preventing the motor from starting. Once that tiny seed was out, the motor spun freely. You should be able to flick the impeller with a screwdriver; it should move with a little resistance from the motor’s magnets but shouldn’t feel like it is stuck in concrete. If it won’t budge, you have found your culprit. While you have the internal components exposed, take a second for cleaning the spray arm nozzles with a simple toothpick to ensure that once the pump is fixed, the water actually reaches your plates.
Verify Electrical Life with a Simple Continuity Test
If the impeller spins freely but the motor still just hums, it is time to check the electrical integrity. This is where the only multimeter settings you need for appliance repair come into play. You are looking for ‘continuity’—a continuous loop of electricity through the motor’s copper windings. If the circuit is broken, the motor is physically dead and must be replaced. I remember a neighbor who was about to toss a three-year-old Bosch because it wouldn’t start. We pulled the leads, checked the motor, and it had perfect continuity. The real issue? A blown thermal fuse. We followed the steps for testing your thermal fuse before buying a new control board and fixed the whole thing for less than twenty dollars.
Protect Your Wallet and Your Warranty
Before you start unscrewing the motor itself, check your paperwork. If your machine is still under a service plan, performing a deep tear-down might be risky. Knowing how appliance diagnostics can save your warranty benefits is crucial because if you can prove to the technician that the failure is mechanical and not due to a clog you caused, they are much more likely to cover the labor. However, be careful with the parts you choose if a replacement is necessary. I’ve seen homeowners lose their entire coverage because they used a cheap knock-off pump; why third-party parts might kill your service contract is a lesson you don’t want to learn the hard way. Always look for top signs your dishwasher needs professional diagnostics if the multimeter readings are inconsistent, as an intermittent electrical short can be a fire hazard.Everyone tells you to trust the machine’s internal computer, but I am here to tell you that the ‘brain’ can be a massive liar. Most DIYers see a specific error code and immediately order the part the screen points to. That is a massive mistake that I have seen cost homeowners hundreds of dollars in unnecessary parts. In my experience, why your dishwasher screen shows a numeric error code is often just a report of a symptom, not the root cause. For example, a ‘drain error’ code might lead you to buy a new pump, when the real issue is actually a drainage mistake that ruins kitchen remodeling, like a kinked hose hidden behind the cabinetry. The hidden nuance is that modern machines are essentially computers that happen to spray water. Often, fixing the dreaded error code that stops everything does not involve a wrench at all, but rather a hard reset or a firmware check.
Why Your Smart Appliance Might Be Lying to You
I have fallen into the ‘software trap’ more than once. I once spent two hours testing a heating element, only to find out the machine just needed a reboot because the sensor was stuck in a loop. Before you start tearing things apart, try how to reset a frozen control panel to see if the error clears. Another major ‘oops’ factor is ignoring how to spot corrosion in your control board wiring early. Moisture can create phantom signals that make the machine think a motor has failed when the motor is perfectly healthy. Always check the harness connectors for that tell-tale green crust before you reach for your credit card. According to a study by the Association of Home Appliance Manufacturers (AHAM), electronic failures are increasing as a percentage of total repairs, yet many are solved by simply cleaning contacts rather than replacing boards. 
Why does my high-efficiency machine take three hours to finish?
This is the most common question I get from people who just upgraded from a 15-year-old machine. It is not broken; it is designed that way. Energy Star standards require machines to use less water and lower temperatures, which necessitates longer ‘soak’ times to get the same level of clean. However, if your cycle is creeping toward the four-hour mark, you should be testing your heating element. If the water cannot reach the right temperature, the timer will stall as it waits for a heat-up that never comes. This is a classic example of why understanding appliance diagnostics is vital; you need to know what ‘normal’ looks like before you can spot a failure.
Protect Your Warranty Before You Poke Around
One final warning: be incredibly careful with how you document your findings. If you are still under a service plan, the fine print that voids your appliance service plan can be brutal. Many manufacturers will deny a claim if they see evidence of ‘unauthorized’ troubleshooting. This is why I always recommend how to document intermittent noises for a repair claim using your phone’s video camera. Showing a technician the exact sound and the resulting error code can prevent them from dismissing the issue as ‘no fault found’—which is the most frustrating outcome of any service call. Have you ever been told your machine was ‘fine’ only for it to break the next day? Let me know in the comments. Also, remember that why third-party parts frequently void your service plan is a reality you must face if you choose to DIY during the first year of ownership.I’ve spent a lot of time talking about the ‘what’ and ‘why,’ but let’s talk about the ‘how’—specifically the gear that lives in my junk drawer for these exact moments. You do not need a five-hundred dollar scanner. I personally swear by a digital multimeter with a ‘min/max’ capture feature. Why? Because sometimes the voltage drop that kills your cycle only happens for a split second, and if you are not watching the screen, you will miss the diagnostic window entirely. Beyond that, I keep a simple flexible grabber tool for those times when a bone fragment falls into the pump housing. According to the International Plumbing Code (IPC) Section 807.3, a proper ‘high loop’ or air gap is non-negotiable for safety, and I have seen more ‘broken’ pumps caused by poor drainage geometry than by actual mechanical failure. If you have not checked your hose lately, learning how to replace a snapped drain hose clamp yourself might be the most valuable fifteen minutes you spend on your kitchen this year. Using the best diy tools for kitchen appliance maintenance ensures you are not just guessing, but actually measuring the health of your machine.
What is the secret to a twenty-year dishwasher lifespan?
It is not about buying the most expensive brand on the showroom floor; it is about managing the ‘hidden’ friction that kills motors. Every six months, I perform a deep clean that goes beyond the standard rinse cycle. I am talking about the secret to getting grease out of your filter mesh using an old toothbrush and a concentrated degreaser. If that mesh is even partially clogged, the pump has to work twice as hard to move water, which shortens its life exponentially. I also suggest testing your heating element with a 9-volt battery if you notice your dishes are no longer coming out bone-dry. A weak element forces the machine to run much longer cycles, wearing out the seals and the circulation pump in the process. 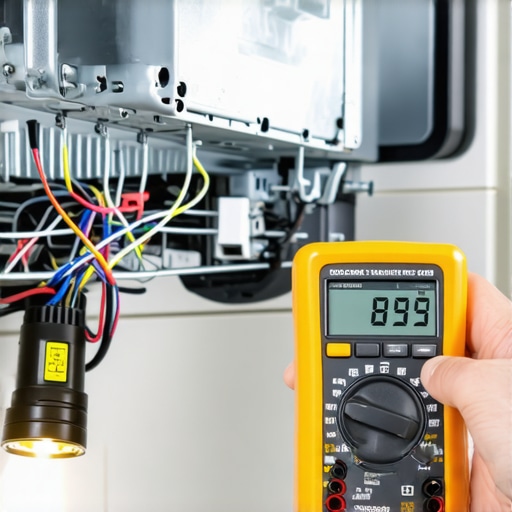 Looking ahead, I suspect we are moving toward a world where your machine will ‘self-heal’ by adjusting its own pump speed based on real-time sensor feedback. We are already seeing the beginnings of this trend with why your smart dishwasher needs a firmware update to save water. The tech is getting more complex, but the basic physics of a clogged drain or a calcified heating element will never change. My best advice? Go grab your multimeter and check the continuity on your door latch today. It takes five minutes and could save you from a mid-cycle flood tomorrow. If you find yourself staring at a pile of wires and feeling stuck, don’t hesitate to contact us for a bit of professional guidance before you start pulling things apart further. Knowing understanding appliance diagnostics is your best defense against predatory repair quotes.
The Expensive Lessons Only a Flooded Floor Can Teach
In my decades of tinkering with appliances, I have realized that the most valuable tool isn’t a wrench, but a healthy dose of skepticism. First, never take a digital readout at face value. I have seen homeowners replace perfectly good control boards simply because they didn’t know why your dishwasher screen shows a numeric error code that actually pointed to a simple blockage. Second, the ‘patience tax’ is real. Most people rush the process and end up with a drainage mistake that ruins kitchen remodeling projects by forcing a fit that wasn’t there. Lastly, always keep your paperwork organized. Knowing when to trust a warranty for dishwasher repairs versus when to dive in yourself is the difference between a free fix and a five-hundred-dollar mistake. My biggest lightbulb moment? Realizing that why dishwasher pods might be clogging your drain lines is often due to the temperature of the water, not the machine’s mechanical health. If you can master the ‘why’ before the ‘how,’ you are already ahead of 90% of the DIY crowd.
A Skeptic’s Toolkit for Reliable Repairs
You do not need a garage full of gear to keep your machine running for twenty years. I trust three things above all else. A reliable digital multimeter is non-negotiable; I use mine for testing your thermal fuse before buying a new control board every single time. Next is a simple flexible grabber tool, which is the simple tool for removing hair from a drain pump or glass shards that your fingers can’t reach. Finally, your smartphone is your best diagnostic ally. Use it for how to document intermittent noises for a repair claim so you have proof for the manufacturer. I also recommend checking the best diy tools for kitchen appliance maintenance to see which specific nut drivers fit your brand’s unique fasteners. These aren’t just gadgets; they are the barrier between you and an unnecessary service call.
Reclaim Your Kitchen Without Breaking the Bank
It is easy to feel defeated when you are staring at a pile of dirty plates and a silent machine, but remember that most dishwasher problems are just puzzles waiting for a solution. You have the ability to handle troubleshooting dishwasher problems with the same precision as a professional. By taking the time for understanding appliance diagnostics, you aren’t just fixing a machine; you are building the confidence to maintain your entire home. Don’t be afraid to get your hands a little dirty—the satisfaction of hearing that pump kick back to life is worth every minute of effort. If you ever feel in over your head, you can always contact us for a second opinion. You’ve got this. Have you ever discovered a strange object in your pump that completely stopped your machine? Let me know in the comments below!