

It was 11:30 PM on a Tuesday, and I was just about to crawl into bed when I heard it: that rhythmic, sickening drip-drip-drip coming from the kitchen. I opened the cabinet door under the sink, and my flashlight beam hit a shimmering pool of greywater. The drain hose had finally kicked the bucket—well, specifically, the metal clamp holding it to the sink tailpiece had snapped clean in two. I’ll be honest, my first instinct was to wrap the whole thing in half a roll of duct tape and hope for the best. That was a massive mistake. Duct tape doesn’t stand a chance against the heat and pressure of a dishwasher’s drain cycle, and I ended up spending the next hour mopping.
Stop the Leak Before Your Flooring Quits on You
A snapped drain hose clamp might seem like a minor annoyance, but it’s the fast track to a warped subfloor and a very expensive call to a restoration company. Most people see a leak and immediately think they need a new machine, but more often than not, it’s just a failure of a fifty-cent piece of hardware. If you’ve spent any time troubleshooting dishwasher problems, you know that the drainage system is usually the first place to look. Today, I’m going to show you exactly how to swap out that broken clamp yourself, saving you a $150 service fee and a whole lot of headache. We’re going to get into the nitty-gritty of selecting the right clamp—because yes, there is a difference—and how to seat it so it never pops off again. We will also touch on why your service tech always checks the drain hose high loop while they are under there.
Is a DIY clamp replacement actually going to hold up?
I get the skepticism. You’re worried that if you do it yourself, you’ll wake up to a flooded kitchen. I felt the same way until I realized that the pros are often just using the same stainless steel worm-gear clamps you can find at any hardware store. The trick is all in the tension. Early on, I made the mistake of over-tightening a clamp until it sliced right through the rubber of the hose. Talk about a self-inflicted wound! You want it snug, but you should not strangle the rubber. The stakes are higher than you might think. According to the Insurance Institute for Business & Home Safety, water damage is one of the leading causes of property loss, and even small, slow drips can lead to mold growth in as little as 24 to 48 hours. Replacing this clamp isn’t just about finishing the dishes; it’s about protecting your home’s foundation. Have you ever been blindsided by a leak just as you were finishing a long day? Let me know if you’ve ever tried a quick fix that backfired as badly as my duct tape incident. Before we grab the pliers, we need to make sure we aren’t accidentally voiding any protections. It’s always smart to check when to trust a warranty for dishwasher repairs versus when to grab your own toolbox. If you are clear to proceed, let’s look at the tools you actually need.
Get the Power and Water Out of the Way
Before you start twisting metal, you need to neutralize the environment. I once forgot to unplug the unit while reaching for a wet hose, and let’s just say the resulting zap was more effective than my morning coffee. Pull the plug or flip the breaker. Even if you are just working under the sink, water and electricity are a bad mix. If your leak was bad enough to soak the floor, you should definitely check the top signs your dishwasher needs professional diagnostics before you assume the clamp was the only casualty. Once the power is dead, shut off the water supply valve usually located under the sink. It’s better to be safe than to have a high-pressure geyser soaking your cabinetry while you have the drain line detached.
Ditch the Weak Factory Spring Clamps
Most manufacturers ship dishwashers with those flimsy, tension-based spring clamps. They look like a thick wire loop with two tabs you squeeze together. In theory, they provide constant tension; in reality, they lose their ‘spring’ over time or snap due to corrosion. I remember trying to wrestle one off with a pair of dull slip-joint pliers—the clamp slipped, flew across the kitchen, and I ended up with a bruised knuckle and a very loud vocabulary. Swap that junk for a stainless steel worm-gear clamp. These are the ones with a screw that you tighten to shrink the band. They are vastly superior because you control the exact amount of pressure applied to the hose. 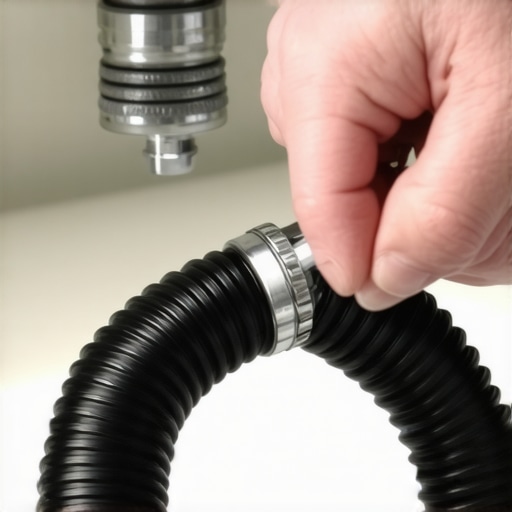
How to Seat the Hose Like a Professional
First, slide your new worm-gear clamp onto the drain hose *before* you push the hose onto the sink tailpiece or garbage disposal nipple. This sounds obvious, but you’d be surprised how many times I’ve gotten the hose perfectly seated only to realize the clamp is sitting three feet away on the floor. While the hose is off, take a second to look inside the connector. If you see a buildup of slime or food particles, you’re looking at a future blockage. This is often why your warranty claim was denied due to lack of maintenance, as ignored clogs put immense strain on the pump. Push the hose all the way onto the nipple until it seats firmly against the stop.
The Secret to the Perfect Tightness
Here is where most DIYers fail. You want the clamp positioned about a quarter-inch from the end of the hose. Using a nut driver or a flat-head screwdriver, tighten the screw until the rubber of the hose just begins to bulge slightly around the edges of the metal band. This is the ‘firm handshake’ rule. If you tighten it until the metal starts cutting into the rubber, you’ve gone too far and created a new leak point. If it’s too loose, the vibration of the machine will eventually shimmy it off. If you’re worried about the pump itself, you can learn the trick to identifying a failing drain pump by sound to ensure the struggle to drain isn’t what caused the clamp to fail in the first place. Once tightened, give the hose a firm tug. It shouldn’t budge. If you find the hose itself is cracked further down, you might need to learn how to spot a failing drain pipe before it floods your kitchen to decide if a full replacement is necessary. Check your work by running a short rinse cycle and keeping a dry paper towel under the connection—any moisture will show up instantly on the paper.Most homeowners believe that the moment they pick up a screwdriver, they have signed away their right to a factory-backed repair. I used to think the same, but here is the contrarian truth: neglecting a visible, minor issue like a loose clamp is often cited by manufacturers as owner negligence. In many cases, how appliance diagnostics can save your warranty benefits is by identifying these external failures before they lead to internal motor damage. If you ignore a slow drip and it eventually shorts out the main board, you will find out the hard way why your warranty claim was denied due to lack of maintenance. The American Society of Home Inspectors (ASHI) notes that water damage from appliance failure is frequently the result of deferred maintenance on simple connections. By proactively tightening that clamp, you are actually preserving your coverage for the big-ticket items like the pump or the control panel.
Why Your Warranty Might Actually Demand a DIY Fix
People often over-complicate the relationship between home repairs and service plans. There is a huge difference between tearing apart a sealed motor and tightening an external hose. In fact, understanding appliance diagnostics improving your warranty claims means knowing that keeping your drainage system clear is a prerequisite for most service contracts. If a technician arrives and finds that your ‘broken’ machine is actually just leaking because of a fifty-cent rusted clamp, you might be on the hook for the full service call fee regardless of your coverage status. This is exactly when to trust a warranty for dishwasher repairs for internal failures, while handling the ‘plumbing’ interface yourself. 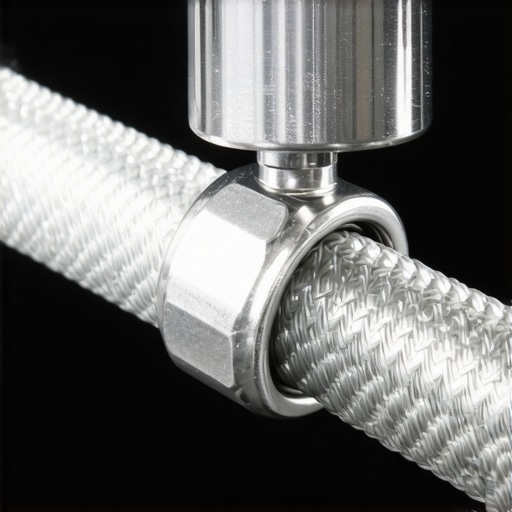
The Disposal Trap That Fools Seasoned Homeowners
Here is an ‘oops’ factor that I have seen trip up even the handiest DIYers. If you are replacing a drain hose or a clamp because of a new garbage disposal installation, you must ensure the knockout plug inside the disposal’s drain nipple has been removed. I’ve seen people replace the clamp, the hose, and eventually the entire pump, only to realize the water wasn’t moving because of a plastic disc blocking the path. This is a primary reason why your warranty claim got denied because of your garbage disposal; it is an installation error, not a machine defect. Always use a screwdriver and a hammer to tap out that plug before you seat your new hose and clamp.
Can a simple clamp really save your insurance claim?
You bet it can. Beyond just the manufacturer’s warranty, your homeowner’s insurance looks for ‘sudden and accidental’ discharge of water. If they find a clamp that was clearly corroded and leaking for months, they may argue the damage was preventable. When you are troubleshooting dishwasher problems, look for the ‘white crust’ of dried detergent around the hose ends—that is your early warning sign. Tightening or replacing that clamp today prevents the slow rot that insurance adjusters love to use as a reason for denial. Have you ever fallen into this trap where a tiny part caused a massive headache? Let me know in the comments.
Why a 5/16 Nut Driver Beats a Screwdriver Every Time
I used to struggle with flat-head screwdrivers while leaning at awkward angles under the sink, but then I invested in a dedicated 5/16-inch nut driver. It was a game-changer. Unlike a screwdriver that slips and rounds out the head of your worm-gear clamp, a nut driver provides a solid, six-point grip that lets you feel the exact moment the metal meets the rubber. If you are serious about troubleshooting dishwasher problems, this is the one tool you cannot skip. It allows for precision torque that prevents the accidental slicing of the drain hose I mentioned earlier. Beyond the physical tools, I always keep a digital multimeter in my kit. Even if you aren’t an electrician, knowing how to perform testing your thermal fuse for continuity without a pro can save you from an unnecessary $400 control board replacement. 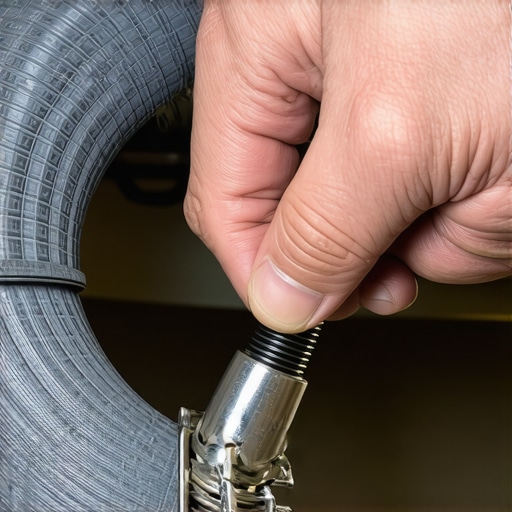
How do I maintain my dishwasher’s health over the long haul?
Keeping your machine running for a decade isn’t about luck; it’s about managing the ‘invisible’ threats like grease and scale. The Association of Home Appliance Manufacturers (AHAM) explicitly states in their performance guidelines that sediment accumulation is the primary driver of premature pump failure. To combat this, I recommend a monthly deep dive where you focus on how to clean out grease build-up in a drain-impeller. When grease hardens, it acts like glue, forcing the motor to draw more current and eventually burning out the windings. This is often the trick to identifying a failing drain pump by sound—if you hear a low-frequency hum instead of a crisp whir, the motor is struggling against debris.
Flush Out the Sludge to Protect Your Pump
You might be tempted to use harsh chemicals, but I prefer a mechanical approach followed by a gentle rinse. Start by cleaning your sump filter with a soft brush to stop foul odors and ensure that no large particles are putting back-pressure on your newly installed drain hose clamp. I predict that within the next five years, we won’t even be looking for drips ourselves; ultrasonic sensors will become standard in mid-range units, alerting your phone the second a clamp loses its ‘torque signature.’ Until then, your best defense is a manual check.
Keep Your Paperwork as Sharp as Your Tools
One thing I’ve learned from years of DIY is that documentation is just as important as the repair itself. If you ever have to figure out how to appeal a rejected extended warranty claim, having a log of when you cleaned the filters and replaced the external clamps is your ‘get out of jail free’ card. It proves the failure wasn’t due to owner neglect. While you are under there, it doesn’t hurt to explore the secret tech menu that calibrates your water sensors to ensure your machine isn’t overworking itself on every cycle. My advanced tip for you today: grab a soft-bristled toothbrush and clean the tiny weep holes in the upper spray arm. It takes five minutes and restores the pressure balance to the entire drainage system, preventing the surges that stress your hose connections. Try it tonight and see if your glasses don’t come out looking noticeably clearer.
Completing a repair like this is more than just stopping a drip; it is about taking ownership of your home’s most hard-working systems. I have spent years crawling under cabinetry, and if there is one thing I have learned, it is that the smallest components often hold the most power over your peace of mind. By swapping out that flimsy factory clip for a robust worm-gear clamp, you have effectively upgraded your machine beyond its original retail specifications.
What I Finally Realized After Three Flooded Kitchens
One of the hardest lessons I had to learn was that factory-standard parts are often chosen for assembly-line speed rather than decades of durability. Those spring-tension clamps are great for a robot to install in five seconds, but they are prone to fatigue. I also discovered that why your warranty claim was denied due to lack of maintenance often boils down to these tiny oversights. If you see even a hint of rust, don’t wait for it to fail. Another lightbulb moment for me was realizing that understanding appliance diagnostics improving your warranty claims starts with the external connections. If the plumbing side is secure, you have a much stronger case when calling for a pro to handle internal motor issues later on. Finally, never underestimate the power of a dry cabinet. Use a moisture-sensing alarm near your drain line for an extra layer of protection.
The Gear That Lives in My Under-Sink Maintenance Kit
If you want to move from ‘fixing things when they break’ to true preventative maintenance, I recommend keeping a small dedicated kit nearby. My essential toolkit includes a 5/16-inch nut driver, which provides a much more secure grip than a standard screwdriver. I also keep a few spare stainless steel clamps in sizes SAE 4 and SAE 6. For the deeper issues, I rely on a shop vacuum—knowing how to clear a blocked impeller with a shop vacuum can prevent the back-pressure that causes clamps to pop off in the first place. Lastly, every DIYer should have a basic multimeter; testing your thermal fuse for continuity without a pro is the natural next step once you have mastered the plumbing side of your machine.
#IMAGE_PLACEHOLDER_E#
You Are Ready to Push That Start Button Now
You have done the work, checked the tension, and verified the seal. There is a specific kind of satisfaction that comes from hearing the first drain cycle of a repaired machine and knowing that every drop of water is going exactly where it belongs. Don’t be afraid to keep exploring your machine’s potential. Whether you are troubleshooting dishwasher problems or just performing a monthly filter rinse, your proactive approach is what extends the life of your appliance. Your kitchen is now safer and your wallet is a little heavier. Did you find a rusted factory clamp under your sink, or did your original one snap completely? Let me know in the comments below!