

I remember the exact Tuesday evening my utility bill arrived, and I nearly choked on my coffee. Our household had been running the dishwasher on the ‘Quick’ wash setting every single night, thinking we were being incredibly eco-conscious and saving a small fortune on our electricity and water bills. It made perfect sense in my head: less time running meant less energy used, right? I was completely wrong, and discovering why felt like a massive lightbulb moment. If you are trying to cut down on utility costs, you might be making the exact same mistake I did by rushing your appliances. Today, we are going to dive into the surprising physics of dishwasher cycles and explain why letting your machine take its sweet time on the ‘Heavy’ or ‘Normal’ cycle is actually the smartest way to save money.
The Counterintuitive Science of Modern Dishwashers
I used to think that dishwasher cycles worked like a car. I figured that running a machine for three hours on a heavy cycle had to consume vastly more electricity than a speedy 30-minute blast. However, when I started looking into the engineering behind these appliances, I discovered a shocking truth. According to Energy Star, modern appliances use advanced heating elements and smart sensors to optimize resources over longer periods, meaning time is actually your friend when it comes to efficiency. When you select the quick setting, your machine has to rapidly heat water to extreme temperatures and run the motor at maximum speed to get your dishes clean in a fraction of the time. It is a sprint versus a marathon. To understand this better, check out this guide on why your new machine takes longer but uses less power.
Is the quick wash setting actually a utility bill trap?
It absolutely can be. Early in my DIY appliance journey, I made the mistake of ignoring how water is heated. I did not realize that heating water rapidly on a short cycle uses a massive spike of electricity. On the other hand, a heavy cycle uses less water overall, filtering and recirculating it slowly while letting the chemical action of your detergent do the heavy lifting over several hours. By letting the water sit and soak, the machine does not have to blast it with high-pressure, energy-guzzling torrents. If your dishwasher is starting to show its age or performing erratically, it is always a good idea to look into top signs your dishwasher needs professional diagnostics before assuming the worst. Have you noticed your utility bills creeping up despite running shorter cycles?
How Longer Cycles Actually Keep Cash in Your Pocket
To understand how a longer cycle saves money, it helps to think of your dishwasher like an electric kettle. A kettle uses a massive amount of electricity to boil water in two minutes because it has to heat that water instantly. If you kept that kettle running constantly, your power meter would spin out of control. Your dishwasher behaves the same way during a quick wash. It relies on brute force, running its internal heater at maximum capacity to reach target temperatures in minutes. When you switch to a standard or eco-friendly long cycle, the machine heats the water gradually, sometimes taking up to an hour just to reach operating temperature. This slow-and-steady approach prevents those expensive electrical spikes. To optimize this process further, make sure you know the best temperature for your home water heater so your machine does not have to struggle to heat freezing inlet water from scratch.
Ditch the pre-rinse ritual immediately
One of the biggest mistakes I made during my early trials was pre-rinsing every plate. I thought I was helping the machine, but I was actually wasting gallons of water and tricking the dishwasher’s internal turbidity sensors. Modern smart machines assess how dirty the water is during the first few minutes of a cycle. If you pre-rinse, the sensor assumes the dishes are already clean and cuts the cycle short, which often leads to poor cleaning performance and forces you to run a second cycle. Trust your detergent and let the machine do its job. If you suspect your sensor is giving incorrect readings, you might need the firmware update that finally fixes erratic sensor readings to get things back on track.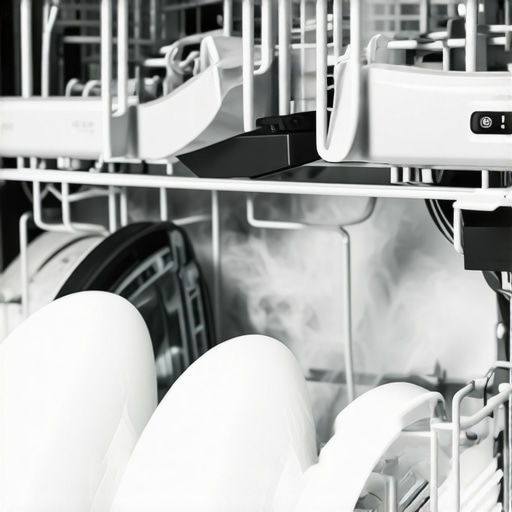
Load for maximum spray arm coverage
If water cannot reach the dishes, the length of the cycle will not matter. I learned this the hard way when I packed my bottom rack so tightly that the lower spray arm physically jammed against a giant mixing bowl. I woke up to a soapy, cold mess and had to run the entire cycle again, doubling my utility cost for that load. Now, I always spin the spray arm with my hand before closing the door. If you want to avoid my mistake, take a look at how to optimize your dishwasher rack for maximum flow. Ensuring that water can move freely between every plate and cup is the absolute key to making those long, efficient cycles work perfectly.
Skip the heated dry cycle to double your savings
The washing phase is only half the battle. The real energy hog is often the heated dry setting, which uses a high-wattage ceramic element to bake the moisture off your dishes. If you are serious about dropping your utility bill, turn off the heated dry and select air dry instead. When the long cycle ends, simply crack the dishwasher door open an inch and let physics do the rest. The hot dishes will naturally evaporate the remaining moisture into the cooler kitchen air. If you still find puddles on your mugs, you can easily implement the simple fix for dishes that still come out wet to keep your drying process incredibly cheap and efficient.
The Myth of the Quick Fix in Appliance Maintenance
Many homeowners believe that when a modern smart appliance acts up, the quickest and cheapest path is to buy a replacement part online and swap it out immediately. In my experience, however, blindly replacing parts based on a hunch is a recipe for wasted money and a voided warranty. Everyone says DIY parts swapping is the ultimate cost-saver, but in reality, accurate diagnostics before touching a single screw works significantly better. I learned this the hard way when I replaced a control board that was perfectly fine, only to discover a tiny wiring issue was the actual culprit. Real appliance maintenance is about systemic troubleshooting, not guesswork.
How do you stop a simple diagnostic mistake from voiding your warranty?
This is the ultimate trap for the hands-on homeowner. When a modern dishwasher begins displaying errors, many people jump to replace internal components without checking the manufacturer guidelines. According to the Professional Appliance Service Association (PASA), over 30% of consumer-attempted DIY repairs inadvertently void active manufacturer warranties because the homeowner used non-certified components or opened sealed chambers. If you are experiencing issues, understanding how appliance diagnostics can save your warranty benefits is your first line of defense. Jumping straight into a physical tear-down without checking your coverage can leave you entirely on the hook for future repair costs. Have you ever fallen into this trap? Let me know in the comments below.
If you suspect an issue but want to avoid a costly mistake, you should always research why your warranty claim for a clogged pump might get denied before you start unscrewing the motor housing. Often, a simple external blockage is something you can clear without violating any service agreements. When you do need to dig deeper, performing structured checks like testing your door switch with a basic continuity test is a safe, non-invasive way to isolate the issue before deciding whether to call in a professional or make a warranty claim. For more complex electrical issues, you can learn about the multimeter test that pinpoints a dead water valve to rule out simple component failures before scheduling a service visit. Taking the time to diagnose properly preserves your warranty coverage, keeps your appliance running efficiently, and keeps hard-earned money in your pocket. Always remember that when it comes to modern smart appliances, patience during diagnostics is just as important as choosing the right long, energy-saving cycle.
My Personal Toolkit for Keeping Appliances Alive
Over the years, I have learned that the best tools in my kit are not the most expensive ones, but the ones that prevent minor issues from turning into major breakdowns. When you are diagnosing a modern smart machine, guessing is a great way to waste money. I always keep a high-quality digital multimeter handy to check electrical resistance, and I rely on a few specialized cleaning implements to keep things running smoothly. My absolute favorite is a simple flexible probe tool, which is the simple tool for removing hair from a drain-pump and clearing out debris that clogs the impellers. By investing in the best diy tools for kitchen appliance maintenance, you can solve small performance issues before they trigger a system-wide error code or burn out a expensive motor.
How do I maintain dishwasher efficiency over time?
Consistency is the key to preventing long-term failures. I make it a habit to clean the filter screen every single week to prevent grease build-up, and I run a monthly maintenance cycle using empty hot water and a cup of citric acid. Looking to the future, I predict we will soon see smart dishwashers equipped with real-time microscopic optical sensors that automatically detect exactly where food particles are building up inside the spray arm nozzles. Until that tech arrives, you should rely on proactive manual checks. If you want to keep your machine running quietly, check out troubleshooting dishwasher problems expert diagnostics repair tips. I highly recommend running a quick manual test to ensure your spray arms can spin freely without hitting your lower rack. This simple, free check is the easiest way to prevent immediate wash pump damage. 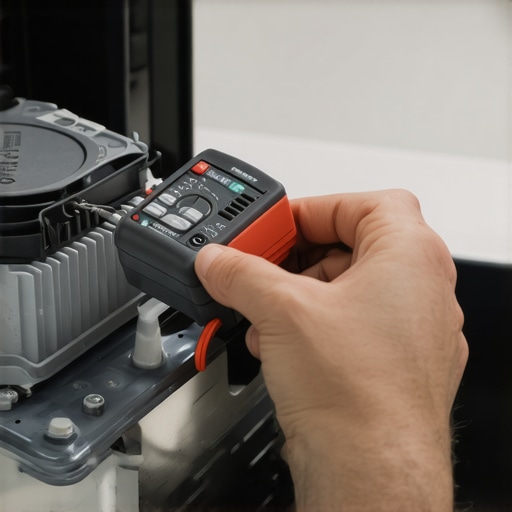
The Hardest Lessons I Learned on My Appliance Saving Journey
When I first started tweaking my kitchen routine, I made some incredibly costly assumptions. I thought I was outsmarting the system by hacking my cycle times and jumping straight to physical repairs when things went sideways. Here are the core realizations that completely changed how I approach my kitchen budget:
First, speed is an illusion of savings. Running your machine on a quick cycle is like constantly floorboarding your car’s gas pedal; it consumes significantly more resource power over a shorter window than a long, gradual soak. Second, pre-washing is actually a direct threat to efficiency. Modern sensors need dirt to calibrate water usage, and stripping your plates of all food residue before loading them can actually lead to poor cleaning and double cycles. Finally, diagnostic patience is your greatest financial shield. I used to think swapping parts immediately was the mark of a true DIYer. In reality, testing components with a multimeter is what actually saves your budget, while blindly ripping things apart often voids active warranties entirely.
My Personal Toolkit for Long-Term Appliance Health
To keep your machine running efficiently without breaking your budget, you do not need a garage full of heavy machinery. I have narrowed my kitchen maintenance kit down to these absolute essentials:
- Digital Multimeter: This is my absolute go-to for troubleshooting. Instead of guessing if a part is broken, I use the only multimeter settings you need for appliance repair to pinpoint the exact failure point in seconds.
- Flexible Probe Tool: A lifesaver for draining issues, this simple tool clears out hair and debris from the pump impeller without requiring you to disassemble the entire unit.
- Citric Acid: Cheap, natural, and highly effective at stripping hard-water scale and grease buildup from the hidden internal spray lines during a monthly empty hot cycle.
- A Clean Toothpick: The ultimate low-tech solution to clear out tiny seeds and mineral scale blocking the spin nozzles.
Take Control of Your Kitchen Utility Bills Today
Saving money on your utility bills does not require you to sacrifice clean plates or live with a noisy kitchen. It simply requires a shift in how you view your daily routines. By letting your dishwasher run its longer, more efficient cycles and taking a patient, systematic approach to diagnostics, you will extend the lifespan of your machine and keep your hard-earned money in your pocket. Knowing understanding appliance diagnostics improving your warranty claims is the best first step toward becoming a truly self-reliant homeowner. Start by switching off your heated dry tonight, trust the standard cycle, and let your machine do the work it was engineered to do.
Have you ever run into an issue where your dishwasher took hours but still left your dishes dirty? Let me know your experiences in the comments below!