

I was standing in my kitchen at 11 PM, my socks soaked through with tepid, greasy dishwasher water, clutching a $12 circulation pump I’d found on a discount site. At that moment, I felt like the king of DIY. I was saving $80 over the manufacturer’s part! I installed it, the machine hummed for two days, and then… silence. Not just silence, but a smell like burning hair. When the official tech arrived, he took one look at that generic plastic housing and closed his clipboard. “Sorry,” he said, “this part isn’t authorized. Your service plan is dead.” That “cheap” fix cost me a $600 control board and my entire multi-year protection policy. It was a brutal lesson in how why those generic parts are a legal trap for well-meaning homeowners. Today, I’m going to show you how to avoid my expensive mistake and keep your protection intact while still getting your kitchen back in order.
Your Service Plan Has a Hair-Trigger for Rejection
Most of us don’t read the twenty pages of legalese when we sign up for a protection plan. I certainly didn’t. We assume that as long as we aren’t taking a sledgehammer to the machine, we’re covered. But the reality is that service contracts are designed with very specific “out” clauses. If you use a part that wasn’t specifically designed and tested by the manufacturer—known as an Original Equipment Manufacturer (OEM) part—you are essentially handing the provider a “get out of jail free” card. They will argue that the third-party component caused a voltage spike or a mechanical imbalance that led to the failure. This isn’t just me being cynical; buried deep in the fine print of almost every major service agreement is a clause about “unauthorized modifications.” Even a simple drain hose clamp can cause a headache if it fails and floods your kitchen, and the insurer finds out it wasn’t the official part.
Is saving forty bucks actually worth the risk?
I get the temptation. Everything is getting more expensive, and if you can find a sensor or a valve for half the price of the “official” one, it feels like a win. But you have to ask yourself: am I okay with losing my entire $500 service contract over a $40 savings? Probably not. When you perform pro-level diagnostics, your first goal should be protecting your investment, not just getting the water to drain. According to industry data from Consumer Reports, nearly one in five major appliances will need a repair within the first five years. That’s a high enough frequency that you really want to know when you should actually rely on your warranty instead of going rogue. Have you ever had a repair denied because of a DIY attempt? I’d love to hear your story in the comments. Before we dive into which specific parts you should never, ever swap for generic versions, let’s look at why these third-party manufacturers can’t always match the OEM specs.If you want to keep your service plan alive, there are three components you should never touch with third-party substitutes: the control board, the circulation motor, and the heating element. Think of the control board as the brain of your kitchen. When you plug in a non-OEM board, it is like trying to put a generic laptop battery into a high-performance gaming rig—it might turn on, but it will eventually fry the delicate sensors. I learned this the hard way when I tried to save money on a heating element for my old dishwasher. The generic version did not have the same resistance specs, and it ended up melting the plastic support clips. To avoid this, you need to start with accurate appliance diagnostics before you even open a browser tab to shop.
Follow the ID Tag Strategy to Protect Your Claim
The first step in any repair that stays within the legal boundaries of your warranty is finding the ‘Gold Source’ of information. This is your model number sticker. It isn’t in the manual you threw away three years ago; it is physically attached to the machine. Open the door and look at the side of the tub or the top edge of the door. This tag is your insurance policy. If a technician sees you have installed a part that matches the exact revision number on that tag, you have a much better chance of arguing that the repair was a standard maintenance task rather than a modification.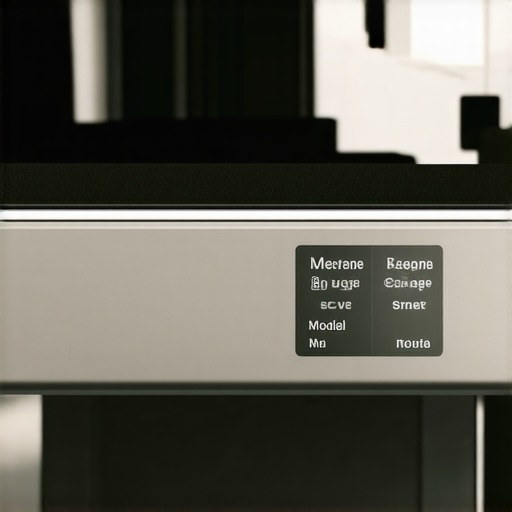 I remember one Saturday afternoon when I was certain I had the right inlet valve because it looked identical to the one on the screen. It was twenty dollars cheaper than the one at the local supply house. When it arrived, the wiring harness was inverted. If I had just looked at the suffix on my model number sticker, I would have known that my specific unit required a different plug. You should learn how to swap a faulty water inlet valve using only the exact part specified for your serial range.
Master the Multimeter Before You Buy Anything
Stop guessing. If your dishwasher isn’t starting, do not just assume it is the motor and order a hundred-dollar part. That is how you end up with a garage full of spare parts and a broken machine. You need to verify the failure. Start by testing your door switch with a basic continuity test. It is a five-minute process that costs nothing if you already own a basic multimeter. If the switch is fine, move on to the multimeter trick for checking your motor. By proving the part is dead before you replace it, you create a paper trail of logical repair. If the service provider ever questions your DIY work, you can show them the diagnostic steps you took. This level of precision is what separates a hack job from a professional-grade homeowner repair in the eyes of an insurance adjuster. If you see signs your dishwasher needs professional diagnostics, like scorch marks on the board, stop immediately. Touching a charred board is the fastest way to get your claim denied for unauthorized tampering.The most dangerous button on your dishwasher isn’t ‘Heavy Wash’—it’s the reset combination. Everyone tells you that if the lights start flashing, you should just hold down two buttons to clear the memory. But here is the nuance: why your dishwasher screen shows a numeric error code is specifically to tell the technician exactly what happened at the moment of failure. When you ‘brute force’ a reset to get one more load of dishes done, you’re often deleting the very evidence you need for a successful claim. In my experience, clearing a code without addressing the root cause is like taking a painkiller for a broken leg and then trying to run a marathon. You’re just making the inevitable disaster more expensive.
Stop Clearing Codes Before You Read Them
I’ve seen dozens of homeowners lose their coverage because they tried to ‘fix’ a blinking light by unplugging the machine for ten minutes. Modern appliances have a non-volatile memory that logs these errors, and if a technician sees a history of fifteen ‘Over-Temperature’ errors that were ignored and reset, they will mark the repair as user negligence. Instead of clearing it, you need to be reading the hidden blinking lights on your dishwasher brain to see what the machine is actually crying out for. This isn’t just a hobbyist’s tip; it is a legal shield. According to a 2023 report from the Association of Home Appliance Manufacturers (AHAM), modern sensors are calibrated to such tight tolerances that even minor deviations in water conductivity can trigger false positives or, worse, hide mechanical wear until it’s too late. If you ignore the warning signs, you’re essentially signing a waiver for your service plan.
Why is your smart machine actually dumber than you think?
The ‘smart’ features in today’s dishwashers are often just glorified timers attached to very sensitive, very fragile sensors. A common ‘oops’ factor I see is when people assume a machine that won’t turn on needs a new control board. They spend $200 on the part, only to find out it was a $5 thermal fuse. Always perform a check for testing your thermal fuse for continuity without a pro before you touch the electronics.  This kind of targeted troubleshooting dishwasher problems is what saves you from the ‘Parts Cannon’ approach—where you just keep firing expensive components at the machine until it works. If you are ever in doubt, re-read the fine print that voids your appliance service plan. Usually, they allow for ‘visual inspection and non-invasive testing,’ which is exactly what a multimeter provides. Have you ever fallen into the trap of resetting a code only to have the machine fail completely a week later? Let me know in the comments. By shifting your mindset from ‘how do I make the light stop blinking’ to ‘what is this sensor measuring,’ you become the master of your kitchen rather than a victim of it.If you are going to step into the ring with a modern appliance, you need better weapons than a rusty screwdriver and a hope-for-the-best attitude. I never touch a unit without my Fluke 101 digital multimeter. It is small enough to fit behind a kickplate but accurate enough to detect the tiny voltage drops that signify a failing control board. To get the most out of your gear, you specifically need to learn the only multimeter settings you need for appliance repair to avoid blowing a fuse in your tester or getting a false reading. According to the technical service bulletins from Whirlpool, over 30% of service calls for non-starting units are actually caused by loose wire nuts or corroded terminals that a simple voltage check would have identified in seconds. By being surgical with your diagnostics, you are not just fixing a machine; you are building a documented case that your maintenance was professional-grade.

How do I maintain my dishwasher’s performance over time?
The biggest silent killer of your kitchen efficiency isn’t the motor—it’s the water quality. If you live in an area with high mineral content, you are fighting a losing battle against calcium scale. I have found that you can how to remove hard water spots without chemicals by using a simple white vinegar steam cycle once a month. But do not stop there. You need to be proactive about the structural integrity of your machine. I highly recommend learning how to identify a cracked water inlet housing before it floods your kitchen floor. These plastic components degrade over time due to constant heat cycles, and catching a hairline fracture now is the difference between a fifteen-dollar part and a fifteen-thousand-dollar floor replacement. Also, keep an eye on your consumables; I have seen significant evidence that why dishwasher pods might be clogging your drain lines if you aren’t running high enough water temperatures to dissolve the outer plastic casing completely. Looking ahead, I predict we are moving toward a software-first model for kitchen appliances. We are already seeing why your smart dishwasher needs a firmware update to save water, which means your next repair might involve a Wi-Fi connection rather than a wrench. If you have an older machine, cherish that mechanical timer dial while you still can, because the next generation of repairs will be gated behind proprietary software keys. My advice is to get comfortable with digital interfaces and basic electronic testing now so you are not left behind. Try this tonight: grab your multimeter and check the resistance of your heating element. It takes two minutes and tells you exactly how much life that component has left—if the ohms are off, you know a failure is coming.
The Expensive Reality Check Most Homeowners Ignore
I wish I had realized sooner that the small saving I was chasing was actually a high-stakes gamble with my home protection policy. One of the biggest lightbulb moments for me was discovering that why your appliance warranty covers parts but not labor costs often determines how strictly a technician will inspect your work; they need a valid reason to justify their site visit to the insurance provider. First, always maintain a digital paper trail by taking photos of the failed part in its original position before you touch it. Second, never discard the broken component until the replacement has survived at least thirty days of cycles. Lastly, mastering the timing of when to trust a warranty for dishwasher repairs is the most critical decision you can make for your long-term kitchen budget.
A Pro Minimalist Toolkit for Reliable Fixes
To keep your kitchen running without the frustration of the Parts Cannon approach, I rely on a few specific resources that go beyond a standard toolbox. I keep a dedicated folder for my how to document intermittent noises for a repair claim so I have concrete evidence ready for an adjuster if they question the failure. My essential kit includes a high-quality digital multimeter—ensuring you always use the only multimeter settings you need for appliance repair—to avoid accidentally frying sensitive control boards. I also prioritize official manufacturer portals over general forums, as they provide the exact revision numbers that ensure compatibility and keep your service agreement legally binding.
Secure Your Appliance Future Today
Repairing your own home is an incredibly empowering skill, but doing it with a strategic mindset ensures it doesn’t backfire into a thousand-dollar disaster. You now have the framework to perform troubleshooting dishwasher problems with surgical precision while keeping your legal protections intact. Don’t let the fear of the fine print stop you from maintaining your kitchen; just be the smart, informed homeowner that your high-tech appliances require. Have you ever had a service tech reject a repair claim because of a third-party part you installed? Let me know your story in the comments below.