

I stood there in my kitchen, staring at a stack of plates that felt more like grease-slicked frisbees than clean dinnerware. I had just run a full heavy-duty cycle, but when I cracked that door open, there was no steam. No warmth. Just a sad, lukewarm puddle at the bottom of the tub and a rack of dishes that looked like they’d just been licked clean by a very tired dog. It was the moment I realized my dishwasher’s heating element had finally kicked the bucket. I almost picked up the phone to call a pro, but then I remembered my first big appliance mistake: years ago, I replaced an entire control board only to find out it was a loose wire. I wasn’t going to let that happen again. Today, I am going to show you exactly how to take matters into your own hands and swap that burnt-out element without losing your sanity or your savings.
Stop Paying a Pro for a Job You Can Handle in an Hour
If you are currently drying your dishes with a towel because your machine is acting like a cold-water-only zone, you’re likely dealing with a dead loop of metal. This isn’t just about the convenience of dry plates; it’s about hygiene. Did you know that the NSF/ANSI Standard 184 requires residential dishwashers to reach at least 150°F during the final rinse to properly sanitize? If your water stays cool, you’re basically just bathing your forks in a lukewarm bacteria soup. Before you panic and think your whole machine is toast, you should realize that testing your heating element is actually surprisingly simple. I used to be terrified of touching anything electrical under the sink, but once you understand how the circuit works, the fear vanishes. Whether you’ve noticed that your machine stays cold during the pre-wash or you’re seeing white spots that won’t go away, the element is usually the culprit. Have you ever opened your dishwasher only to find a cloud of cold, damp air instead of the usual steam? Drop a comment and tell me if you’re currently in the middle of this kitchen nightmare.
Is a $200 repair bill actually necessary for a $30 part?
Let’s be real: appliance repair companies have to charge for their time, travel, and expertise. But when you realize the heating element itself is often less than forty bucks, paying five times that amount feels like a gut punch. I learned this the hard way after my first house purchase when I paid a technician to basically turn a wrench twice. Now, I always check the basics first. You need to verify your heating element isn’t touching the plastic tub or getting coated in hard water scale, which can cause premature burnout. It’s also worth a quick look to see when to trust a warranty versus doing it yourself, because if you’re still covered, let the manufacturer pay for it! If you’re out of luck on the warranty front, don’t worry—I’ve got your back. If things get too hairy, you can always contact us for advice, but for now, let’s get your tools ready.
Safety First Means Pulling the Plug
Before you even think about touching a wrench, you have to cut the power. I’m not just talking about turning the knob to ‘off.’ You need to flip the breaker or pull the plug. Water and electricity are the ultimate ‘frenemies’—they love to hang out, but they’ll ruin your day if they meet in your hands. I once skipped this step while working on a garbage disposal and got a zap that felt like a localized lightning strike. Lesson learned: always verify power is dead. Once that’s done, you’ll likely need to pull the dishwasher out from the cabinet. This usually involves unscrewing the mounting brackets and carefully sliding the unit forward. While you’re down there, it’s the perfect time for the secret to cleaning behind your dishwasher kickplate, as years of pet hair and dust bunnies love to hide in that dark cavern.
How to Tell if Your Element is Actually Dead
You don’t want to buy a new part only to find out the old one was fine. Think of the heating element like a lightbulb filament; if there’s a break in the circuit, it won’t shine—or in this case, it won’t get hot. To be 100% sure, you need to perform troubleshooting dishwasher problems with expert diagnostics. The best way to do this is by checking for continuity. If you’ve never used one before, don’t worry—you only need to know the only multimeter settings you need for appliance repair. Essentially, you’re looking for resistance. If the meter shows ‘OL’ or infinite resistance, that metal loop is officially a paperweight. I remember the first time I did this; I was so nervous I’d blow up the meter, but it’s actually as simple as touching two wires to two metal posts. 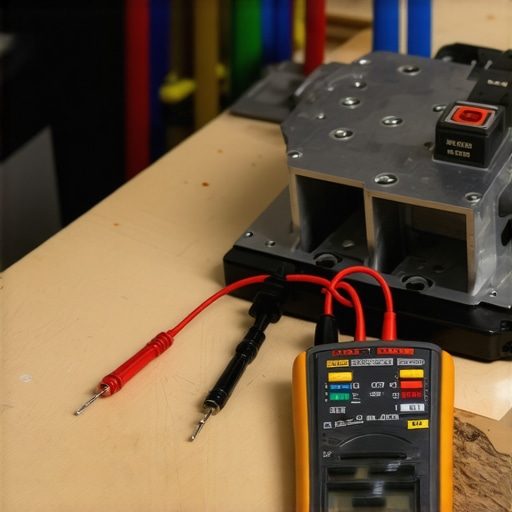
Unthreading the Old and Sliding in the New
The element is held in by two plastic nuts on the underside of the tub. You’ll need to access the bottom of the machine, which usually means removing the access panel or tipping the machine (carefully!) on its back. When you loosen those nuts, be gentle. If you over-torque them, you risk cracking the tub, and then you aren’t just replacing a part—you’re buying a whole new machine. This is why it is vital to verify your heating element isn’t touching plastic tubs during the install. One of my buddies once rushed this part and ended up with a melted hole in his dishwasher floor because the element was sitting too low. It’s also a good idea to check if your failure was part of a bigger issue; sometimes clogged pumps can lead to overheating scenarios that fry the element prematurely. Once the old element is out, slide the new one in, hand-tighten the nuts, and then give them just a quarter-turn more with a wrench to ensure a watertight seal. If you’re unsure about the electrical connections, the multimeter test that pinpoints a dead water valve uses similar logic for checking terminals, so keep that tool handy!”, “image”: {“imagePrompt”: “A close-up, high-quality photo of a digital multimeter testing the terminals of a circular dishwasher heating element on a wooden workbench, showing a clear resistance reading.”, “imageTitle”: “Testing Dishwasher Continuity with a Multimeter”, “imageAlt”: “A multimeter being used to test a dishwasher heating element for continuity.”}, “categoryId”: 0, “postTime”: “”}The most common mistake I see isn’t the repair itself—it’s what I call firing the parts cannon. Most homeowners search for a symptom, buy the first part they see, and hope for the best. This is a gamble, not a strategy. True expertise comes from troubleshooting dishwasher problems with expert diagnostics before you spend a dime. I once saw a neighbor replace three parts—the element, the thermostat, and the control board—only to realize his dishwasher was fine, but his home water heater was set too low. Have you ever fallen into this trap? Let me know in the comments.
Does Your Service Plan Actually Cover This Fix?
Here’s the nuance that many DIY enthusiasts miss: the invisible line between a manufacturer warranty and an extended service plan. It’s crucial to understand the real difference between service plans and manufacturer warranties before you open the chassis. If you’re under a standard manufacturer’s warranty, even opening the access panel can sometimes lead to a denied claim if you aren’t careful. Furthermore, why third-party parts frequently void your service plan is a lesson you don’t want to learn at the checkout counter. Official technicians can spot a non-OEM part from a mile away. If you’re going to DIY, understanding appliance diagnostics can improve your warranty claims by allowing you to speak the technician’s language if a pro does need to step in.
Stop Firing the Parts Cannon
A major trap is failing to account for external factors like electrical spikes. You need to know how to prove your appliance failure was caused by a power surge because your warranty might actually cover the replacement if you can link it to an environmental event rather than mechanical wear and tear. According to data from the Association of Home Appliance Manufacturers (AHAM), a significant percentage of service calls result in no-fault found, which often stems from user error or external issues like power fluctuations. 
Why Your Screen is Screaming in Code
If your machine has a digital interface, it’s literally trying to talk to you. Instead of guessing, look at why your dishwasher screen shows a numeric error code or learn the art of reading the hidden blinking lights on your dishwasher brain. These sequences are diagnostic gold. However, if the machine is dead silent or the errors make no sense, those are the top signs your dishwasher needs professional diagnostics. Knowing how appliance diagnostics can save your warranty benefits is the difference between a successful Saturday project and a five-hundred-dollar headache.But even the best diagnostics won’t save a machine that is drowning in its own grime. To keep your new heating element from burning out again, you have to look at the environment it lives in.
Invest in tools that don’t lie to you
When I first started doing my own repairs, I bought a cheap five-dollar analog meter. Big mistake. It was barely accurate enough to tell if a battery was dead, let alone diagnose a sensitive control board. Now, I never go under the sink without a digital multimeter that has an audible continuity mode. If you are serious about this, mastering the only multimeter settings you need for appliance repair will save you more money than any coupon ever could. You also need to keep a few niche items in your kit, like a simple paperclip. It sounds low-tech, but the proper way to clean spray arm nozzles using a paperclip is a secret tech-trick that prevents the pressure imbalances that stress your motor.
How do I keep my dishwasher running like new for a decade?
The secret isn’t a magic chemical; it is consistency. I set a reminder on my phone every three months to pull the filter. If you have never done it, prepare yourself—it is usually a swamp of old labels and mystery slime. Learning the secret to getting grease out of your filter mesh is the single best thing you can do for your machine’s longevity. Once that’s clear, I use a cup of white vinegar on a hot cycle. This is the eco-friendly way to remove hard water scale from spray arms without using harsh acids that can degrade your gaskets over time. According to Whirlpool Service Manual W10535209A, mineral buildup is the leading cause of ghost heating failures where the element is fine, but the thermostat is insulated by a layer of lime.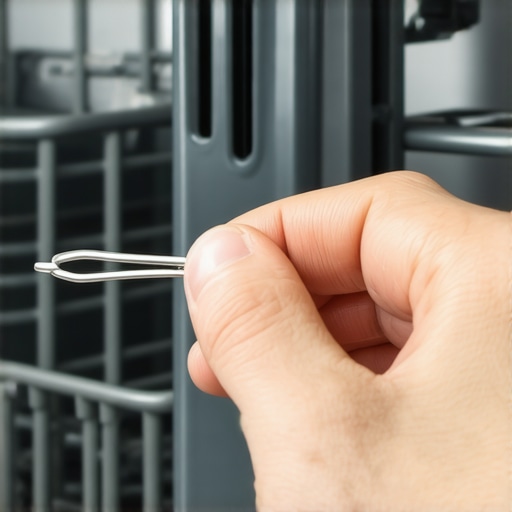
The future of kitchen chores is surprisingly data-heavy
We are moving toward an era where your dishwasher won’t just break; it will tell you it is going to break three weeks in advance. I am already seeing this with high-end units that track vibration patterns in the circulation pump. This is why why your smart dishwasher needs a firmware update to save water and performance is becoming a standard maintenance step. If your machine starts acting strangely, do not ignore the digital signs. Recognizing the top signs your dishwasher needs professional diagnostics early can mean the difference between a forty dollar part and a flooded kitchen. My challenge to you: tonight, before you load the dinner plates, take thirty seconds to check your spray arms for clogs. If they are blocked, clear them out. Your heating element and your wallet will thank you.I stood there in my kitchen, staring at a stack of plates that felt more like grease-slicked frisbees than clean dinnerware. I had just run a full heavy-duty cycle, but when I cracked that door open, there was no steam. No warmth. Just a sad, lukewarm puddle at the bottom of the tub and a rack of dishes that looked like they’d just been licked clean by a very tired dog. It was the moment I realized my dishwasher’s heating element had finally kicked the bucket. I almost picked up the phone to call a pro, but then I remembered my first big appliance mistake: years ago, I replaced an entire control board only to find out it was a loose wire. I wasn’t going to let that happen again. Today, I am going to show you exactly how to take matters into your own hands and swap that burnt-out element without losing your sanity or your savings.
Stop Paying a Pro for a Job You Can Handle in an Hour
If you are currently drying your dishes with a towel because your machine is acting like a cold-water-only zone, you’re likely dealing with a dead loop of metal. This isn’t just about the convenience of dry plates; it’s about hygiene. Did you know that the NSF/ANSI Standard 184 requires residential dishwashers to reach at least 150°F during the final rinse to properly sanitize? If your water stays cool, you’re basically just bathing your forks in a lukewarm bacteria soup. Before you panic and think your whole machine is toast, you should realize that testing your heating element is actually surprisingly simple. I used to be terrified of touching anything electrical under the sink, but once you understand how the circuit works, the fear vanishes. Whether you’ve noticed that your machine stays cold during the pre-wash or you’re seeing white spots that won’t go away, the element is usually the culprit. Have you ever opened your dishwasher only to find a cloud of cold, damp air instead of the usual steam? Drop a comment and tell me if you’re currently in the middle of this kitchen nightmare.
Is a $200 repair bill actually necessary for a $30 part?
Let’s be real: appliance repair companies have to charge for their time, travel, and expertise. But when you realize the heating element itself is often less than forty bucks, paying five times that amount feels like a gut punch. I learned this the hard way after my first house purchase when I paid a technician to basically turn a wrench twice. Now, I always check the basics first. You need to verify your heating element isn’t touching the plastic tub or getting coated in hard water scale, which can cause premature burnout. It’s also worth a quick look to see when to trust a warranty versus doing it yourself, because if you’re still covered, let the manufacturer pay for it! If you’re out of luck on the warranty front, don’t worry—I’ve got your back. If things get too hairy, you can always contact us for advice, but for now, let’s get your tools ready.
Safety First Means Pulling the Plug
Before you even think about touching a wrench, you have to cut the power. I’m not just talking about turning the knob to ‘off.’ You need to flip the breaker or pull the plug. Water and electricity are the ultimate ‘frenemies’—they love to hang out, but they’ll ruin your day if they meet in your hands. I once skipped this step while working on a garbage disposal and got a zap that felt like a localized lightning strike. Lesson learned: always verify power is dead. Once that’s done, you’ll likely need to pull the dishwasher out from the cabinet. This usually involves unscrewing the mounting brackets and carefully sliding the unit forward. While you’re down there, it’s the perfect time for the secret to cleaning behind your dishwasher kickplate, as years of pet hair and dust bunnies love to hide in that dark cavern.
How to Tell if Your Element is Actually Dead
You don’t want to buy a new part only to find out the old one was fine. Think of the heating element like a lightbulb filament; if there’s a break in the circuit, it won’t shine—or in this case, it won’t get hot. To be 100% sure, you need to perform troubleshooting dishwasher problems with expert diagnostics. The best way to do this is by checking for continuity. If you’ve never used one before, don’t worry—you only need to know the only multimeter settings you need for appliance repair. Essentially, you’re looking for resistance. If the meter shows ‘OL’ or infinite resistance, that metal loop is officially a paperweight. I remember the first time I did this; I was so nervous I’d blow up the meter, but it’s actually as simple as touching two wires to two metal posts.
Unthreading the Old and Sliding in the New
The element is held in by two plastic nuts on the underside of the tub. You’ll need to access the bottom of the machine, which usually means removing the access panel or tipping the machine (carefully!) on its back. When you loosen those nuts, be gentle. If you over-torque them, you risk cracking the tub, and then you aren’t just replacing a part—you’re buying a whole new machine. This is why it is vital to verify your heating element isn’t touching plastic tubs during the install. One of my buddies once rushed this part and ended up with a melted hole in his dishwasher floor because the element was sitting too low. It’s also a good idea to check if your failure was part of a bigger issue; sometimes clogged pumps can lead to overheating scenarios that fry the element prematurely. Once the old element is out, slide the new one in, hand-tighten the nuts, and then give them just a quarter-turn more with a wrench to ensure a watertight seal. If you’re unsure about the electrical connections, the multimeter test that pinpoints a dead water valve uses similar logic for checking terminals, so keep that tool handy!The most common mistake I see isn’t the repair itself—it’s what I call firing the parts cannon. Most homeowners search for a symptom, buy the first part they see, and hope for the best. This is a gamble, not a strategy. True expertise comes from troubleshooting dishwasher problems with expert diagnostics before you spend a dime. I once saw a neighbor replace three parts—the element, the thermostat, and the control board—only to realize his dishwasher was fine, but his home water heater was set too low. Have you ever fallen into this trap? Let me know in the comments.
Does Your Service Plan Actually Cover This Fix?
Here’s the nuance that many DIY enthusiasts miss: the invisible line between a manufacturer warranty and an extended service plan. It’s crucial to understand the real difference between service plans and manufacturer warranties before you open the chassis. If you’re under a standard manufacturer’s warranty, even opening the access panel can sometimes lead to a denied claim if you aren’t careful. Furthermore, why third-party parts frequently void your service plan is a lesson you don’t want to learn at the checkout counter. Official technicians can spot a non-OEM part from a mile away. If you’re going to DIY, understanding appliance diagnostics can improve your warranty claims by allowing you to speak the technician’s language if a pro does need to step in.
Stop Firing the Parts Cannon
A major trap is failing to account for external factors like electrical spikes. You need to know how to prove your appliance failure was caused by a power surge because your warranty might actually cover the replacement if you can link it to an environmental event rather than mechanical wear and tear. According to data from the Association of Home Appliance Manufacturers (AHAM), a significant percentage of service calls result in no-fault found, which often stems from user error or external issues like power fluctuations.
Why Your Screen is Screaming in Code
If your machine has a digital interface, it’s literally trying to talk to you. Instead of guessing, look at why your dishwasher screen shows a numeric error code or learn the art of reading the hidden blinking lights on your dishwasher brain. These sequences are diagnostic gold. However, if the machine is dead silent or the errors make no sense, those are the top signs your dishwasher needs professional diagnostics. Knowing how appliance diagnostics can save your warranty benefits is the difference between a successful Saturday project and a five-hundred-dollar headache.But even the best diagnostics won’t save a machine that is drowning in its own grime. To keep your new heating element from burning out again, you have to look at the environment it lives in.
Invest in tools that don’t lie to you
When I first started doing my own repairs, I bought a cheap five-dollar analog meter. Big mistake. It was barely accurate enough to tell if a battery was dead, let alone diagnose a sensitive control board. Now, I never go under the sink without a digital multimeter that has an audible continuity mode. If you are serious about this, mastering the only multimeter settings you need for appliance repair will save you more money than any coupon ever could. You also need to keep a few niche items in your kit, like a simple paperclip. It sounds low-tech, but the proper way to clean spray arm nozzles using a paperclip is a secret tech-trick that prevents the pressure imbalances that stress your motor.
How do I keep my dishwasher running like new for a decade?
The secret isn’t a magic chemical; it is consistency. I set a reminder on my phone every three months to pull the filter. If you have never done it, prepare yourself—it is usually a swamp of old labels and mystery slime. Learning the secret to getting grease out of your filter mesh is the single best thing you can do for your machine’s longevity. Once that’s clear, I use a cup of white vinegar on a hot cycle. This is the eco-friendly way to remove hard water scale from spray arms without using harsh acids that can degrade your gaskets over time. According to Whirlpool Service Manual W10535209A, mineral buildup is the leading cause of ghost heating failures where the element is fine, but the thermostat is insulated by a layer of lime.
The future of kitchen chores is surprisingly data-heavy
We are moving toward an era where your dishwasher won’t just break; it will tell you it is going to break three weeks in advance. I am already seeing this with high-end units that track vibration patterns in the circulation pump. This is why why your smart dishwasher needs a firmware update to save water and performance is becoming a standard maintenance step. If your machine starts acting strangely, do not ignore the digital signs. Recognizing the top signs your dishwasher needs professional diagnostics early can mean the difference between a forty dollar part and a flooded kitchen. My challenge to you: tonight, before you load the dinner plates, take thirty seconds to check your spray arms for clogs. If they are blocked, clear them out. Your heating element and your wallet will thank you.
What the Repair Manuals Never Mention About Metal Loops
The biggest takeaway from my years under the sink is that a fixed machine isn’t really fixed until it passes a full cycle without a leak. Many people celebrate the moment the heating element turns red, but they forget to level the dishwasher to stop mystery leaks that can occur once the unit is moved. I’ve also learned that if your new element burns out within a month, you likely have a failing thermostat or a control board issue. Always check for testing your thermal fuse for continuity without a pro because it’s the primary safety gate for your heater. Finally, remember that pre-washing dishes is a waste of time and money and actually deprives the detergent of the enzymes it needs to keep your heating element free of calcified food particles.
My Go-To Kit for Kitchen Resurrection
You don’t need a truck full of tools, but you do need the right ones. First, a digital multimeter is non-negotiable. I use mine for everything from testing your door switch with a basic continuity test to verifying the heater’s resistance. Second, keep a simple paperclip in your drawer for the proper way to clean spray arm nozzles. Lastly, a basic 9-volt battery is my favorite cheat code for testing your heating element quickly before committing to a teardown. These three items have saved me thousands in unnecessary service fees over the years.#IMAGE_PLACEHOLDER_E#
Take Control of Your Kitchen’s Reliability
Repairing your own appliances is about more than just saving forty bucks on a part; it’s about the confidence of knowing how your home actually works. When you take the time for understanding appliance diagnostics, you aren’t just a homeowner—you’re the chief engineer of your domain. Don’t let a few blinking lights or a lukewarm rinse cycle intimidate you. You have the tools, the knowledge, and the steps to get that machine back to its sanitizing glory. Your dishwasher is a workhorse, and with a little bit of maintenance, it will serve you for another decade. Have you ever tried a DIY repair only to find a completely different problem once you opened the machine? Let me know your stories in the comments below!