

I was standing in my kitchen, staring at a ‘clean’ plate that looked like it had been dusted with fine sand. It was the third time this week. My expensive dishwasher, the one I spent weeks researching, was failing me. I’ve been there—frustrated, holding a damp sponge, and wondering if I needed to call a pro and pray my warranty covered the visit. But before you start troubleshooting dishwasher problems with expensive tools, I want to share a secret. It turns out, the culprit wasn’t a fried circuit board or a dead motor. It was just a handful of tiny, clogged holes and my own stubbornness. [image1]
The Day My Dishwasher Stopped Doing Its Only Job
I used to think that if the machine was running and making noise, it was doing its job. I even went through a phase where I was certain it was a software issue, which led me down a rabbit hole of appliance diagnostics that were way over my head. One afternoon, I pulled out the bottom rack and really looked at the spray arms. They were caked with a white, chalky residue. According to the Department of Energy, even slight blockages in your appliance’s water flow can significantly drop its efficiency and cleaning power. I realized that the water wasn’t even reaching the corners of the machine. I made a huge mistake early on by trying to use a metal needle to clear them, which actually widened the holes and ruined the spray pressure. Trust me, you don’t want to make that mistake. Have you ever noticed that your glasses come out cloudy while the bottom plates are perfectly fine?
Is a tiny toothpick really enough to fix a whole appliance?
It sounds like one of those ‘hacks’ that’s too good to be true, doesn’t it? I was skeptical too. I thought I’d need to learn multimeter settings or buy a whole new assembly. But a simple wooden toothpick is soft enough to clear the debris without damaging the plastic nozzles. It’s about precision, not power. We aren’t just poking at random; we are clearing the calcified minerals so you can optimize your dishwasher rack for maximum flow again. If you’ve ever felt like your dishwasher is more of a glorified drying rack than a cleaning machine, this simple fix is going to change your morning routine. Does your machine sound like it’s struggling to push water through the arms lately?
Remove the Spray Arms Without Breaking the Plastic
Before you can get into the nitty-gritty of cleaning, you have to get the arms out. Most bottom arms just pop off with a firm tug, but some have a plastic nut that turns clockwise—remember, these are often reverse-threaded so you don’t accidentally unscrew them during a cycle. I once spent twenty minutes twisting the wrong way on a Bosch model, nearly snapping the mount, only to realize I was tightening it. If you aren’t sure if the arm is even the problem, the simple way to check if your sprayer is spinning involves a piece of tape and a quick test cycle. If it hasn’t moved an inch, you’ve found your bottleneck.
Use a Paperclip for the Stubborn Bits
Once the arm is out, take it to the sink. You’ll likely see bits of plastic, seeds, or even tiny shards of glass wedged in the holes. This is where the proper way to clean spray arm nozzles using a paperclip becomes your best friend. A toothpick works for soft debris, but for calcified minerals, a paperclip has the rigidity to break the seal without widening the hole. I remember a Saturday morning spent digging out a single popcorn kernel that had essentially fused with the plastic nozzle; it was the difference between a clean load and a wasted hour. 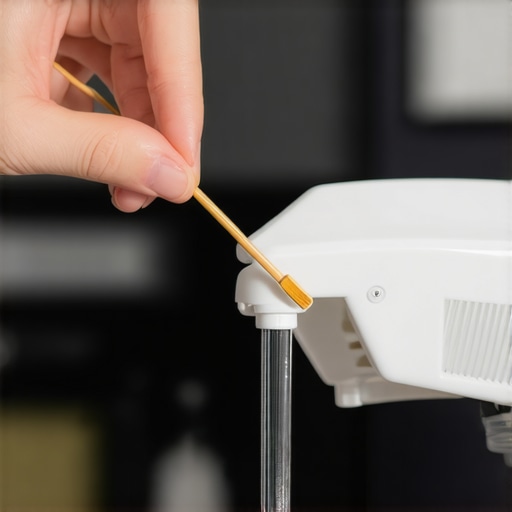
Get Rid of Scale Without Harsh Chemicals
If your nozzles look white and crusty, that’s hard water talking. Instead of reaching for a bottle of industrial de-scaler, you can use the eco-friendly way to remove hard water scale from spray arms by soaking them in warm vinegar for thirty minutes. This softens the calcium so it can be rinsed away through the large center hole of the arm. It’s also worth considering the impact of powder vs pods on your machines lifespan; some pods contain fillers that don’t fully dissolve in cooler water, leading to the very grit you’re currently fishing out with a toothpick.
Flush the System for a Clean Start
After the arms are clear, don’t just put them back and hit start. Run the hot water in your kitchen sink until it’s steaming before you start the machine. This ensures the first bit of water entering the dishwasher is hot enough to dissolve any remaining detergent residue. This is why why running the kitchen sink hot prevents cold starts and helps maintain that high water pressure you just restored. If the water pressure still feels weak, it might not be the arms at all. You should look into the secret to unclogging a water inlet filter screen. This tiny mesh sits right where the water hose connects to the machine, and if it’s full of sediment from your pipes, no amount of toothpick poking will help.
Check the Drainage Path Before You Close Up
Finally, ensure the water has somewhere to go. A clogged spray arm often goes hand-in-hand with a sluggish drain. If you notice a pool of water at the bottom after a cycle, you might need the simple plumbing fix for a dishwasher that wont drain to clear out the sump area. It’s a holistic system; if the exit is blocked, the pump can’t build the pressure needed to spin the spray arms properly. When I finally cleared my own machine and heard that rhythmic thwack-thwack-thwack of water hitting the door again, I knew I’d saved myself a three-hundred-dollar repair bill.
Most people think they are being helpful by scrubbing their plates before loading them, but they are actually sabotaging the machine’s internal logic. Modern dishwashers use turbidity sensors to ‘see’ how dirty the water is. If you pre-wash, the sensor thinks the load is already clean and prematurely cuts the cycle short, often leaving a soapy film on your glasses because the detergent didn’t have enough grime to latch onto. This is exactly why pre-washing dishes is a waste of time and money. I have seen countless homeowners replace perfectly good pumps when the real issue was just a confused sensor and a lack of soil for the enzymes to work with. But the real expertise comes in knowing when to stop poking at the spray arms and start looking at your paperwork. There is a massive difference between what you think is covered and what is actually protected by your contract. Most homeowners do not realize the real difference between service plans and manufacturer warranties until they are staring at a three-figure labor bill. Manufacturers love to brag about a ’10-year motor warranty,’ but they often hide the fact that the labor to install that motor costs more than a brand-new machine. Worse, many plans include the clause in your service plan that voids coverage for hard water damage. If a technician finds lime scale in your inlet valves, they can deny the whole claim on the spot. Have you ever fallen into this ‘fine print’ trap? Let me know in the comments. 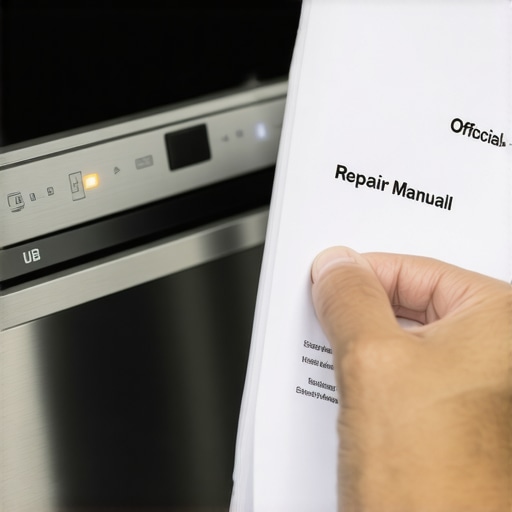
Can a simple error code reset save me from a total system failure?
Sometimes, the hardware isn’t broken; the software is just stuck in an infinite loop. I have had clients ready to scrap a two-year-old machine because it wouldn’t start, only to find out it just needed a sequence-based ‘brain’ reset. By reading the hidden blinking lights on your dishwasher brain, you can often identify if the issue is a genuine part failure or just a tripped safety sensor caused by a momentary power flicker. According to the Association of Home Appliance Manufacturers (AHAM), a significant percentage of service calls could be avoided through better consumer understanding of onboard diagnostics. The biggest ‘oops’ factor I see with advanced DIYers is the temptation of cheap, unbranded components. I get it—a fifteen-dollar heating element on a discount site is tempting compared to the eighty-dollar OEM part. However, why third-party parts frequently void your service plan is a lesson you do not want to learn the hard way. These parts often have slightly different electrical resistance levels that can overheat a control board over time. If you want to keep your protection intact, understanding appliance diagnostics improving your warranty claims is about documenting that you used the right parts and followed the manual. Don’t let a small savings on a part cost you your entire five-hundred-dollar warranty benefit.
When I am deep into a repair, I do not just look at what is currently broken; I look for what is about to break. I always tell my friends that the most expensive repair is the one you did not see coming. For instance, I have seen people replace entire pumps when they just needed to know how to replace a frayed door seal for under twenty dollars. It sounds small, but that tiny leak can eventually travel down and short out the motor or the main board. This is where learning how to spot corrosion in your control board wiring early becomes a literal lifesaver for your wallet. If you can catch the green oxidation on the wires before they fry the board, you are winning the game against planned obsolescence.
Don’t ignore the grime hiding under your machine
Most homeowners wait until the machine is dead to act, but I take a proactive approach that saves hundreds in labor. I use a routine check-up once a year that involves the secret to cleaning behind your dishwasher kickplate. You would be shocked at the amount of pet hair, dust, and kitchen debris that gets sucked into the fan area of your motor. According to technical data from Consumer Reports, modern dishwashers have a median lifespan of about 10 years, but that assumes the mechanical components are not being forced to overheat due to restricted airflow caused by household dust. 
The five-cent tool that beats a professional technician
Consistency in maintenance does not require an expensive toolbox. I personally keep a simple plastic straw in my junk drawer specifically for how to test your float switch using a plastic straw. If that switch gets gunked up with old soap or a stray bit of plastic, your machine might flood or refuse to fill, and most pros will charge you a hefty service fee just to tell you it was stuck. If you are feeling more adventurous, mastering the multimeter trick for checking your dishwasher motor can save you from being talked into a new unit when you really just have a loose connection or a blown thermal fuse.
How do I keep my dishwasher running for a decade?
The secret is in the data. Looking ahead, I see a future where machines will tell us exactly what is wrong via AI-driven remote diagnostics before the cycle even fails. We are already seeing the beginnings of this shift with how appliance diagnostics can save your warranty benefits, where your smartphone can transmit specific error codes directly to the manufacturer. This means that knowing when to trust a warranty for dishwasher repairs will be less about guessing and more about having the digital proof in your hand. My challenge to you this weekend is simple: do not just run another load. Open that bottom panel, grab a flashlight, and look for those early signs of trouble like moisture or frayed wires. It is the difference between a five-minute tweak and a thousand-dollar replacement.
Lessons I Learned the Hard Way Under My Sink
After years of tinkering, I’ve realized that the biggest mistake isn’t a wrong turn of a wrench; it’s ignoring what the machine is trying to tell you. One of my biggest lightbulb moments was realizing that knowing how to document intermittent noises for a repair claim is just as important as the repair itself. If you can’t prove the sound exists to a technician, they can’t fix it under warranty. I also learned that why your dishwasher screen shows a numeric error code is often a cry for help regarding a tiny sensor blockage, not a total system failure. Don’t let the blinking lights intimidate you; they are your roadmap to a cheaper weekend. Most importantly, I’ve found that the best time to fix a problem is when it’s still just a ‘weird sound,’ not a puddle on the floor.
Tools That Saved My Wallet This Year
You don’t need a professional-grade van to keep your kitchen running. My personal kit is surprisingly lean. First, I never start a job without a basic tester—learning the only multimeter settings you need for appliance repair was the single best 15-minute investment I ever made. Second, keep a set of dental picks or even high-quality toothpicks for those spray arm nozzles we discussed. Finally, I always suggest keeping a digital copy of your specific model’s service manual on your phone. These documents often contain ‘Easter egg’ diagnostic modes that aren’t in the standard user guide but are essential for deep troubleshooting dishwasher problems. I trust these resources because they rely on technical data rather than anecdotal guesswork.
Take Back Control of Your Kitchen
There is a unique kind of satisfaction that comes from hearing your dishwasher hum perfectly after you thought it was destined for the scrap heap. It’s not just about the money you saved—though that’s a nice bonus—it’s about the confidence you gain. Every time you tackle a repair, you are learning the language of your home. So, next time your machine acts up, don’t reach for the phone first; reach for your flashlight and your curiosity. You’ve got this. Have you ever managed to fix an appliance with nothing but a common household item? Let me know your best ‘MacGyver’ story in the comments below!