

I’ll never forget the Tuesday my kitchen stayed eerily quiet. Usually, there’s that satisfying gush of water, but that night? Nothing. Just a faint, pathetic hum. I stood there over a mountain of dirty plates, feeling that familiar dread of a $300 repair bill. In my early days, I would have panicked and replaced the expensive control board immediately, thinking the brain was fried. It was an expensive mistake I still regret. As it turns out, the brain was fine; the muscle—the solenoid—was the real problem. Today, I’m going to show you how to skip the panic and use a simple tool to find the truth about your machine.
Don’t Let a Silent Dishwasher Ruin Your Weekend
We’ve all been there. You hit ‘Start,’ walk away, and come back to a soap-covered mess that never got wet. Most people assume they need professional diagnostics for these issues, but if you have a multimeter and twenty minutes, you can be your own hero. The solenoid is essentially an electronic gatekeeper. If it’s dead, the water stays out. If you troubleshoot your dishwasher problems with a bit of logic, you can save a fortune.
Is a $15 Multimeter Really Reliable Enough?
You might be wondering if a cheap tool from the hardware store can actually tell you more than a seasoned technician. The answer is a resounding yes. A multimeter doesn’t guess; it measures resistance. According to the home repair experts at The Spruce, testing for continuity is the only definitive way to know if your inlet valve’s solenoid has electrically failed. It’s the same way pros test a thermal fuse for continuity before suggesting a total replacement. Have you ever felt intimidated by those red and black probes, or maybe you’re worried about how diagnostics impact your warranty? Trust me, once you see the ‘infinite’ reading on that screen, the fear disappears and is replaced by the sweet satisfaction of knowing exactly what’s wrong. Before we dive into the guts of the machine, ask yourself: have you ever replaced a part only to realize it wasn’t the problem? It’s a rite of passage for DIYers, but today, we’re ending that cycle. We’re going to swap that water inlet valve only if we’re 100% sure it’s the culprit.
Kill the Power Before You Crack the Case
The absolute first rule of DIY repair is that you can’t fix a machine that is trying to bite you. Before you even think about grabbing a screwdriver, head to your circuit breaker and flip the switch. I learned this the hard way years ago when I tried to nudge a wire back into place on a dryer while it was still plugged in; the resulting spark was a terrifying reminder that electricity doesn’t care about your weekend plans. Once the power is dead, you should also shut off the water supply under the sink. If you are unsure if the juice is truly gone, using a voltmeter to check your power cord connection safely is the only way to be 100% certain. Safety isn’t just about avoiding a shock; it is about protecting the machine’s sensitive electronics from accidental shorts while you’re poking around inside.
Find the Water Valve Behind the Kickplate
Now that the environment is safe, you need to get to the guts. Most modern dishwashers hide their vital organs behind a thin metal or plastic panel at the very bottom, known as the kickplate. You’ll usually find two screws holding it in place. While you have this off, it is the perfect time to look for the secret to cleaning behind your dishwasher kickplate because the amount of pet hair and dust bunnies that migrate under there is honestly staggering. Once the panel is gone, look for the water inlet valve. It is easy to spot because it’s the only part where your main water line connects directly to a plastic housing with two wires attached to it. Before you start pulling wires, take a quick look for any drips or lime scale, as you might actually need to identify a cracked water inlet housing before it floods your kitchen floor.
Probe the Terminals for the Truth
This is where the magic happens. To get an accurate reading, you must disconnect the two wires leading to the solenoid. Do not just pull on the wires; use a pair of needle-nose pliers to grab the metal connectors. If you leave the wires attached, you might get a ‘false positive’ reading through the rest of the wiring harness. Set your multimeter to the lowest setting for Ohms (resistance). Think of the solenoid as a narrow hallway; if the hallway is blocked (a broken wire inside the coil), the multimeter can’t send its signal through. 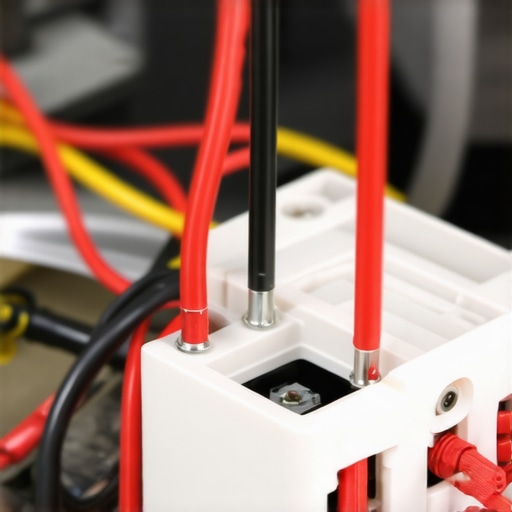 Touch one probe to each of the two metal terminals on the valve. I remember a specific Tuesday afternoon where I was convinced my valve was dead. I got a ‘0’ reading and almost threw the part in the trash, only to realize I hadn’t pushed the probes firmly against the metal. A little bit of oxidation can act like an insulator, so give those terminals a tiny scratch with the probe to ensure good contact. This technique is remarkably similar to testing a thermal fuse for continuity without a pro kit, and it’s the most reliable way to perform troubleshooting dishwasher problems.
What Does the Number on the Screen Actually Mean?
If your multimeter shows a reading between 500 and 1,500 ohms, your solenoid is electrically healthy. It’s the gatekeeper telling the water it’s okay to enter. However, if the screen shows ‘OL’ (Open Loop) or an ‘infinite’ symbol, the internal coil is snapped. It’s like a bridge that has collapsed; no matter how much electricity the dishwasher sends, the gate will never open. If that’s the case, you don’t need a technician to tell you what to do next. You can simply swap a faulty water inlet valve in 15 minutes and get back to your life. If the reading is good but you still have no water, your problem might be mechanical—like a clogged screen—or it could be that your float switch is stuck in the ‘full’ position, tricking the machine into thinking it’s already flooded.Many DIYers assume that the moment they touch a multimeter to a terminal, they’ve legally forfeited their right to future service. This is a massive misconception. In reality, understanding appliance diagnostics actually strengthens your position. If you can prove a part failed through objective testing, you’re less likely to be bullied by a service center claiming ‘user error.’ However, the nuance most people miss is how you document that failure. If you don’t claim a repair refund correctly, or if you fail to take a photo of the multimeter reading, it’s your word against theirs. Have you ever fallen into this trap? Let me know in the comments.
Stop Fearing the Warranty Police
The Magnuson-Moss Warranty Act exists to protect you from being forced into using only ‘authorized’ repairmen for basic checks. But there’s a trap: the ‘improper installation’ clause. Manufacturers love this loophole. If you use appliance diagnostics to save your warranty benefits, you have to be meticulous. I’ve seen homeowners swap a valve, forget to tighten a compression fitting, and then get denied coverage for a completely unrelated control board failure because of ‘evidence of moisture intrusion.’ It’s the butterfly effect of appliance repair.
The Part-Only Warranty Trap
Here is a contrarian take: your ‘extended parts warranty’ is often a liability, not an asset. Manufacturers love offering these because they know the labor is where the real cost lies. According to the repair experts at Consumer Reports, the 50% rule usually dictates when to scrap a machine, but labor costs can inflate a simple valve swap to $200. If you do it yourself, you save that labor, but beware—why third-party parts frequently void your service plan is a lesson learned the hard way. A non-OEM valve might work for six months, but if the machine detects an off-spec electrical draw, it might trigger a software lockout. 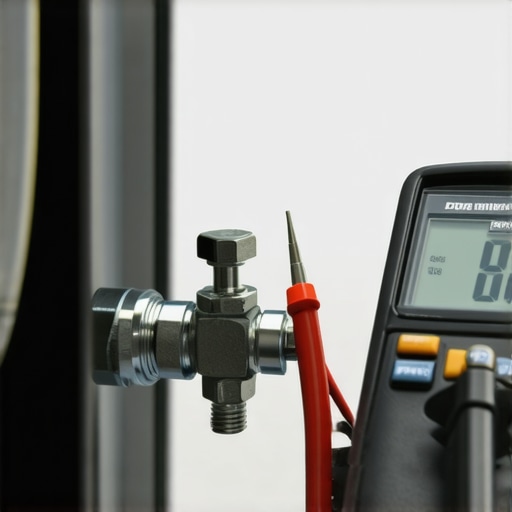
Does Your Machine Really Need a Brand-Name Valve?
This is where the ‘experts’ and the realists clash. While a generic solenoid might have the same 1,000-ohm resistance, the housing might not handle the thermal expansion of a high-temp cycle as well as the original. This is why troubleshooting dishwasher problems requires looking at more than just a screen. You also need to look at the environment. For instance, why your warranty claim got denied because of your garbage disposal often boils down to improper drainage causing back-pressure on that new valve you just installed. If the pressure is too high, even a perfect solenoid will fail prematurely. You can even prove your appliance failure was caused by a power surge if you see charred marks on the solenoid’s plastic casing—info that is vital when you trust a warranty for dishwasher repairs.
Force Your Machine to Tell You What’s Wrong
While the multimeter is my favorite tool for checking hardware, modern dishwashers have a digital soul that you can talk to. I spent years guessing at problems before I discovered that most brands have a ‘backdoor’ to their logic. By pressing a specific sequence of buttons, you can enter the secret diagnostic mode hidden on your touch control panel. This mode allows the dishwasher to run self-tests on the heater, the pump, and even that solenoid we just tested. According to the official technical service manual for Whirlpool’s Global Wash System (W10842261), many components that appear ‘dead’ are actually just software-locked due to a previous sensor error. If you don’t know how to reset a frozen control panel, you might end up replacing a perfectly good water inlet valve simply because the ‘brain’ refused to send it power.
Keep Your Spray Arms from Choking on Grime
Even with a new valve, your dishes won’t get clean if the water can’t actually reach them. I make it a habit every six months to pull out the racks and check the physical path of the water. You would be shocked at how a single popcorn kernel can kill your cleaning power. I use the proper way to clean spray arm nozzles using a paperclip to ensure every jet is clear. It’s a tedious ten-minute task, but it prevents the back-pressure that often leads to why your third rack sprayer isn’t getting enough water pressure. If you notice a clicking sound during the cycle, it’s time for fixing the rattle why your spray arm hits the bottom rack before it chips your favorite plates. 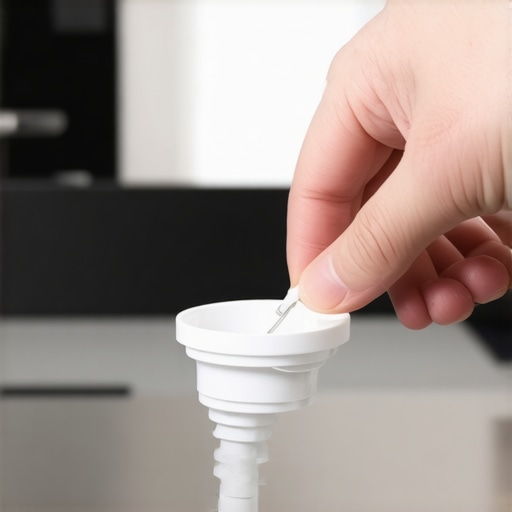
How do I maintain my dishwasher over the long haul?
Maintenance isn’t just about fixing what’s broken; it’s about preventing the slow creep of inefficiency. The biggest silent killer I see is grease buildup in the filtration system. You need to master the secret to getting grease out of your filter mesh using a soft toothbrush and degreasing soap. Additionally, the temperature of the incoming water matters more than most people realize. I always suggest why running the kitchen sink hot prevents cold starts; it ensures the first splash of water is at the optimal temperature to dissolve detergent. Looking ahead, I suspect we are moving toward a ‘Software-as-a-Service’ model for appliances where why your smart dishwasher needs a firmware update to save water will be a monthly occurrence. We are already seeing why your smart appliance app keeps crashing during firmware updates, which suggests that the future of understanding appliance diagnostics will involve as much coding knowledge as it does mechanical skill. Before you call a pro, I challenge you to try accessing your machine’s diagnostic mode tonight—it’s the ultimate way to truly own the tech in your kitchen.
Avoid the Trap of Solving Problems with Your Wallet
After years of tinkering with appliances, I’ve realized that the most expensive tool in your kit isn’t a high-end screwdriver; it’s the urge to buy parts before you’ve run a test. One of the biggest lessons I learned was that a ‘dead’ dishwasher often just has a minor electrical hiccup or a clogged sensor. For instance, many people rush to buy a new pump when they really just need to learn the secret diagnostic mode hidden on your touch control panel to clear a stuck error code. Another lightbulb moment came when I realized how much money I was losing by ignoring the fine print; specifically, why your appliance warranty covers parts but not labor costs. If you can identify a failure yourself, you bypass the massive hourly rates that professional techs charge just to ring your doorbell. Finally, remember that data is power. If you test your dishwashers float switch with a pencil or a multimeter, you aren’t just a homeowner with a broken machine—you’re a technician with a plan.
The Essential Kit for Every Kitchen Hero
You don’t need a truck full of specialized gear to master troubleshooting dishwasher problems. I personally swear by a few humble items that have saved me more times than I can count. First is a basic digital multimeter; it’s the only way to truly verify if a part is dead or alive. Second is a simple office supply—I’ve found the proper way to clean spray arm nozzles using a paperclip is more effective than any high-priced cleaning chemical. Third, I highly recommend keeping a smartphone nearby to document every wire connection before you unplug it. If things get messy, a shop vacuum is the fastest way to clear a blocked impeller without making a puddle on your linoleum. These tools aren’t just about the fix; they are about giving you the confidence to start.
Become the Expert Your Dishwasher Needs
Taking the leap into DIY repair can feel intimidating, but remember that every pro started exactly where you are right now: standing in a quiet kitchen with a handful of tools and a lot of questions. By learning the nuances of understanding appliance diagnostics, you are protecting one of your home’s most important investments. You have the ability to solve troubleshooting dishwasher problems on your own terms and your own schedule. Don’t let a silent machine or a confusing multimeter reading stop you. You’ve got the knowledge, the tools, and the logic to get that water flowing again. Have you ever discovered a strange object like a cherry pit or a piece of glass causing a blockage in your pump? Let me know about your craziest DIY discovery in the comments below!