

I stood there, barefoot in a growing puddle of lukewarm dishwater, wondering if my machine had finally given up the ghost. It was 9 PM on a Sunday, the absolute worst time for a mechanical heart attack. I’d already started mentally calculating the cost of a service call or, worse, a full replacement. I had been through this before, thinking my dishwasher was terminal, only to realize I was missing the basics of appliance diagnostics that could have saved me hours of stress. The culprit? Not a fried motor or a cracked housing, but a stubborn, disgusting nest of hair and soap scum wrapped tightly around the pump impeller. Today, I’m going to show you how to bypass the expensive repair bill using the most unlikely tool in your junk drawer. We are going to tackle that drainage failure once and for all without you having to wait three days for a technician to show up. Have you ever felt that sinking feeling when your dishwasher hums but refuses to drain?
The Night My Kitchen Floor Almost Became a Lake
I’ll be the first to admit that I haven’t always been the ‘handy’ neighbor. In my early DIY days, I once jammed a metal screwdriver into the pump housing trying to pry out a blockage. All I did was chip the plastic impeller, turning a $0 fix into a $200 part replacement that I had to explain to my wife. It was a classic case of not knowing the difference between a simple clog and a dead drain pump. But that failure taught me something valuable: the most delicate parts of your machine require the simplest, softest tools. When hair gets into that pump, it acts like a garrote, slowly strangling the motor until it overheats.
Does a cheap plastic tie really work better than a plumber?
It sounds like a gimmick, doesn’t it? You might be skeptical that a piece of plastic meant for bundling cables can outperform professional tools. However, the flexibility of a standard heavy-duty zip tie allows it to navigate the tight curves of a pump housing where a rigid brush or a metal hook would cause permanent damage. According to data from Consumer Reports, nearly 30% of appliance ‘breakdowns’ reported by homeowners are actually just simple maintenance issues or clogs that don’t require any replacement parts at all. By learning how to clean out grease and hair build-up yourself, you are effectively putting money back into your pocket.
Stop paying for repairs that take five minutes
Before you even think about whether you should trust a warranty for these repairs, you need to check the pump manually. If you call a pro and they pull out a wad of hair, you’re likely on the hook for the service fee because ‘user maintenance’ or ‘foreign objects’ are rarely covered under standard plans. I learned this the hard way when a tech charged me $125 just to pull a stray toothpick out of my drain line. The tool we’re using today is safe, non-conductive, and thin enough to reach the deep crevices of the pump assembly. I’m going to walk you through exactly how to notch this tool to create a ‘hair snake’ that grabs onto debris without scratching your machine’s internals. Ready to get your hands a little dirty to save a lot of cash?
Get Down to the Sump Level Without Tools
First, you need to clear the stage. Remove the bottom rack and set it aside. You’ll see the filter assembly at the bottom of the tub—this is usually the first stop for troubleshooting dishwasher problems. Give that filter a quarter-turn and pull it out. If it looks like a science experiment, you’ve found part of your problem. This is where you find the secret to getting grease out of your filter mesh: hot water and a soft toothbrush. But we’re going deeper. Underneath that filter is the pump housing, often covered by a small plastic tab or cover held in by a single screw. Once that’s off, you are looking at the impeller—the tiny fan that pushes water out of your machine.
Modify Your Zip Tie for Maximum Grip
Now, grab that heavy-duty zip tie. Using a pair of scissors or a utility knife, cut small notches into the sides of the zip tie at a 45-degree angle, pointing back toward the head. You’re essentially creating a flexible, plastic harpoon. I remember the first time I tried this; I was working on an old Kenmore that sounded like it was grinding gravel. I slid my notched zip tie into the narrow gap around the impeller and felt something snag. When I pulled it back, out came a massive, slimy ‘rat’ of tangled hair and a rubber band. It was disgusting, but the moment I cleared it, the impeller spun freely with a flick of my finger.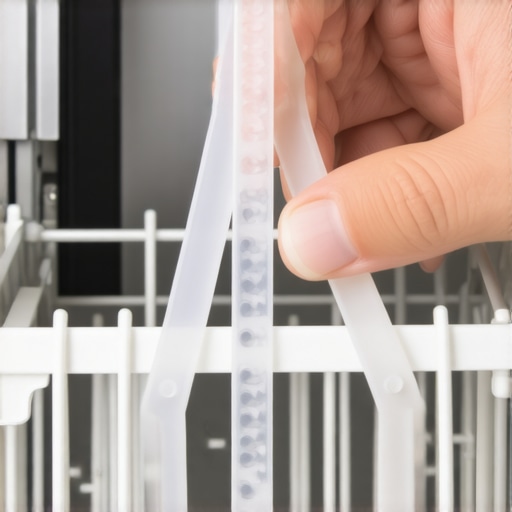
Fish for the Clog Like a Pro
Slide your modified tool into the drainage port. Move it gently in a circular motion, feeling for any resistance. If you hit a hard stop, don’t force it—it might be the impeller blade itself. You’re fishing for ‘soft’ resistance. This is much safer than testing your dishwashers float switch with a pencil or using metal tools that can gouge the plastic. Often, why dishwasher pods might be clogging your drain lines becomes clear here as you find undissolved casing bits mixed with hair. The flexibility of the zip tie allows it to bend around the impeller housing, reaching the debris that a vacuum or a brush simply cannot touch.
Listen for the Right Sounds Before Reassembling
Before you put everything back together, perform a manual rotation test. Use the tip of the zip tie (the non-notched end) to nudge the impeller blades. They should move easily. If they feel stiff or ‘chunky,’ you might be dealing with a internal motor failure rather than a simple clog. This is the moment to learn how to identify a dying circulation motor by its pitch. If it spins freely, you’ve likely just saved yourself a $200 repair bill. Reinstall the pump cover, lock the filter back in place, and run a quick rinse cycle to see if that puddle finally disappears. Checking the impeller this way is a primary step in understanding appliance diagnostics because it rules out mechanical failure before you start replacing expensive electronics.
But checking the hardware is only half the battle. Many DIYers assume that if they can’t fix a drainage issue themselves, their warranty will automatically catch the fall. This is where most people get it wrong. Let’s dig deeper into the ‘wear and tear’ loophole that keeps manufacturers from paying out. People often assume that as long as their machine is under a ‘warranty,’ they are bulletproof, but a manufacturer’s warranty is vastly different from an extended service plan. Most homeowners don’t realize the real difference between service plans and manufacturer warranties until they get hit with a $150 bill for a ‘non-covered’ diagnostic fee. I’ve seen countless cases where a tech finds a buildup of calcium or a foreign object—like a toothpick or a cherry pit—and immediately classifies it as user neglect rather than a mechanical defect.
Why did your dishwasher claim get rejected because of the sink?
One of the most common diagnostic traps involves your kitchen plumbing, not the appliance itself. If you recently installed a new garbage disposal and forgot to knock out the plastic drain plug, your dishwasher will fail to drain every single time. In the eyes of the manufacturer, that is an installation error, not a product failure. This is exactly why your warranty claim got denied because of your garbage disposal. According to a study on appliance service reliability by Consumer Reports, nearly 25% of all dishwasher service calls for drainage issues are eventually attributed to improper installation or external plumbing blockages. If a technician pulls out a wad of hair and grease that you could have cleared with a zip tie, you are on the hook for the full labor rate.
Don’t Let Hard Water Voids Your Coverage
Another nuance that experts know—and beginners miss—is the impact of your local water quality. If you live in an area with high mineral content, you need to be aware of the clause in your service plan that voids coverage for hard water damage. If scale builds up inside the pump housing and causes it to seize, many service plans will reject the claim because you didn’t use a water softener or professional descaler. This is why mastering how appliance diagnostics can save your warranty benefits is so vital; you need to prove the failure was electrical or mechanical before the technician finds a reason to blame your pipes.
The Hidden Risk of Amazon Spare Parts
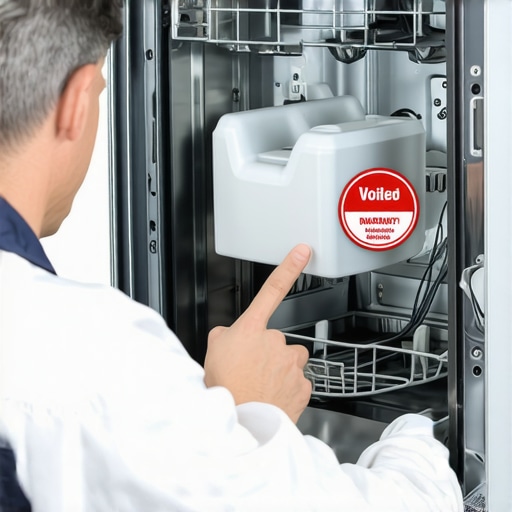
If you think you’re being smart by swapping out a sensor yourself with a $10 ‘compatible’ part from a random online marketplace, you might be nuking your entire coverage. I’ve heard horror stories of homeowners losing a three-year service contract because they installed a non-OEM (Original Equipment Manufacturer) drain pump. This is why third-party parts frequently void your service plan. When a certified tech sees a part without the factory stamp, they often close their toolkit and walk out. Instead of replacing parts blindly, focus on gathering evidence. If you can show how to document intermittent noises for a repair claim using your phone, you have a much higher chance of getting a legitimate motor replacement covered by the pros. Always document the ‘crime scene’ with photos and video of the error codes before you touch a single screw. Have you ever fallen into this trap of paying for a repair that should have been covered? Let me know in the comments.
Stop Guessing and Start Measuring with a Voltmeter
If you want to move beyond the zip-tie tricks and actually own your kitchen’s destiny, you need to graduate to electrical testing. I personally never open a machine without my digital multimeter. Why? Because looking at a wire doesn’t tell you if it’s carrying current. I’ve seen dozens of cases where a perfectly good drain pump was thrown in the trash because the owner didn’t know using a voltmeter to check your power cord connection safely is the first step in diagnosing a ‘dead’ unit. When you test for continuity, you are checking if the electrical path is unbroken. If your thermal fuse has blown, the machine won’t even start, and you can verify this in ten seconds with a probe rather than spending $500 on a new control board you don’t need. According to technical standards from the Association of Home Appliance Manufacturers (AHAM), electrical component failure accounts for nearly 40% of mid-life appliance breakdowns, yet many of these are simple ‘open-loop’ circuit issues that require a $15 part, not a $1,000 replacement.
How do I keep my dishwasher from dying early?
Maintaining your machine over time isn’t just about cleaning the filter; it’s about managing the chemistry inside the tub. I’ve made the switch back to high-quality powder detergent because the enzymes are often more effective at breaking down proteins during the pre-wash cycle compared to some compressed tablets. You really need to weigh the impact of powder vs pods on your machines lifespan because pods can sometimes cause excessive sudsing that wears out the shaft seals on your circulation pump. Once those seals go, water leaks into the motor bearings, leading to that high-pitched screeching sound. I also recommend a monthly ‘deep purge’ using a citric acid cleaner. This prevents the scale buildup that eventually leads to why your dishwasher detergent door is stuck open or why your spray arms stop spinning.

The Pro Level Move: Thermal Imaging
One tool I’ve started using more frequently is a compact thermal camera that plugs into my smartphone. It sounds like overkill until you realize it can show you exactly where heat is escaping or where a motor is overheating before it actually fails. I use it for using a thermal camera to find heat leaks in your dishwasher door, which is often the first sign that your gasket is losing its compression. This kind of data is exactly what you need when you are understanding appliance diagnostics to win a fight with a warranty company. If you can show them a heat map of a failing component, they are much less likely to give you the runaround.
The Future of Home Repairs Is Predictive
I predict that within the next five years, we will see a massive shift away from reactive repairs toward predictive AI diagnostics. Some newer high-end models already track pump torque and cycle times to warn you weeks before a failure occurs. This is why your smart dishwasher needs a firmware update to save water and monitor its own health. We are moving toward a world where your phone will tell you to ‘Clear the drain pump now’ before your kitchen floor ever sees a drop of water. But until that tech is in every home, you need to know the top signs your dishwasher needs professional diagnostics versus what you can handle with a screwdriver and some patience. I challenge you to try this today: access the secret diagnostic mode hidden on your touch control panel and see if your machine has any stored error codes you didn’t know about. It’s the best way to get a ‘health report’ on your appliance without spending a dime.
I didn’t become a DIY enthusiast by choice; I became one out of pure frustration with $150 service fees for five-minute fixes. If my kitchen floor could talk, it would tell you about the times I over-tightened a valve or ignored a simple error code until the motor burned out. But those mistakes were the price of admission for learning how these machines actually tick.
Lessons from the Drainage Trenches
Looking back on my worst repair disasters, I’ve realized that the most expensive repairs are almost always the ones you ignore for too long. If you notice why your dishwasher smells like a damp basement, don’t wait for the puddle to appear. That smell is often the first sign of a stagnant water buildup in the sump that will eventually choke your pump. Another huge takeaway is that your phone is your best diagnostic tool; I now know how to document intermittent noises for a repair claim so that when a tech does arrive, I have proof of the failure. Most importantly, I’ve learned that the ‘user error’ label is a warranty company’s best friend. They will look for any excuse—from a stray cherry pit to a kinked hose—to deny a claim, so you must be your own first line of defense.
Tools That Keep My Repair Bill at Zero
You don’t need a professional workshop to maintain a modern dishwasher, but you do need more than just a screwdriver. My ‘holy trinity’ of tools includes a high-quality digital multimeter, which is essential for testing your thermal fuse before buying a new control board. Second, never underestimate the power of a shop vacuum; learning how to clear a blocked impeller with a shop vacuum from the exterior drain line can save you from having to disassemble the entire machine. Finally, I keep a bag of food-grade citric acid on hand. It’s far more effective than vinegar for how to remove cloudiness from glasses and keeping the internal spray arms from clogging with scale.
#IMAGE_PLACEHOLDER_A#
Stop Fearing Your Dishwasher and Start Owning It
The biggest hurdle to DIY repair isn’t a lack of skill; it’s the fear of breaking something expensive. But here’s the secret: the machine is already broken. You have nothing to lose by opening that kickplate and taking a look. By understanding appliance diagnostics, you aren’t just fixing a machine; you are protecting your household budget and gaining the confidence to tackle any appliance failure. You have the tools, you have the data, and now you have the experience to keep your kitchen running smoothly without the professional price tag. Have you ever successfully fixed a major appliance with a simple household item? Let me know your best ‘junk drawer’ repair story in the comments below!