

I remember standing in my kitchen at six in the morning, coffee mug in hand, when I felt that dreaded cold squish. My socks were instantly soaked. I looked down to see a thin, shimmering trail of water snaking its way from under the dishwasher toward my hardwood. My heart sank. I immediately assumed the worst: a cracked tub, a blown pump, or maybe I needed to be replacing the water inlet valve before the whole kitchen turned into a lake. I spent three hours on my hands and knees with a flashlight, but there was no obvious hole. It was a mystery leak that seemed to appear out of thin air. It turns out, I wasn’t dealing with a broken part; I was dealing with gravity. My dishwasher was leaning just enough to let water slosh over the tub edge during the heavy wash cycle.
Stop the Squish Before Your Subfloor Rots
Most people jump straight to expensive repairs when they see water on the floor, but after years of tinkering, I’ve realized that a simple bubble level is often more important than a wrench. If your machine isn’t perfectly plumb, the door won’t seal right, and the water won’t drain toward the sump like it should. This is one of those top signs your dishwasher needs diagnostics that you can actually handle yourself. I’ll be honest, I learned this the hard way. Early in my DIY journey, I spent sixty bucks replacing a frayed door seal that was actually in perfect condition. I was so convinced the rubber was the problem that I ignored the fact that my unit was visibly tilted forward. It’s a classic rookie mistake that can lead to warranty claims being denied because, technically, improper installation falls on the homeowner, not the manufacturer.
Does a tiny slant really cause a massive puddle?
You might think a quarter-inch tilt is no big deal, but physics disagrees. According to the International Association of Certified Home Inspectors (InterNACHI), even a slight pitch can cause water to bypass the primary gaskets or pool in areas where it eventually corrodes the wire harnesses. When the machine is off-kilter, the spray arms might even hit the racks, creating a rhythmic splashing that forces water through the air vents. By taking the time to troubleshoot these dishwasher problems through proper leveling, you aren’t just stopping a leak; you are protecting your subfloor from mold and your warranty benefits from being voided by negligence. Have you ever spent a whole weekend chasing a leak only to find out your floor was the real culprit? I’d love to hear your horror stories in the comments. Today, we are going to walk through exactly how to adjust those stubborn legs so you never have to deal with the 6 AM wet-sock surprise again.
Get the Kickplate Out of the Way
Before you can fix the lean, you have to find the feet. Most dishwashers have a thin metal or plastic panel at the bottom—the kickplate. I usually find two Phillips-head screws holding it in place near the floor. Once those are out, you’ll see the leveling legs. Think of these like the foundation of a house; if they’re wonky, everything ‘upstairs’ in the tub is going to crack or leak. I once spent an hour testing a float switch with a pencil because I was sure it was faulty, only to realize the machine was tilted so far forward that the float couldn’t even rise. Removing that plate gives you a clear view of the battlefield.
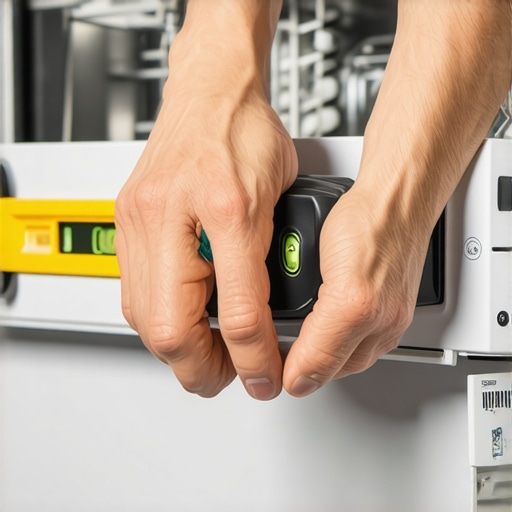
Adjust the Front Feet with a Wrench
Now, grab a bubble level and place it across the top of the open dishwasher door frame. If the bubble isn’t dead center, your machine is doing a literal dance, which is why your dishwasher shakes during the high-speed drain. I learned the hard way that shims are a bad idea. I once tried to level a unit by wedging a folded piece of cardboard under the left leg. It worked for a week until the cardboard got wet and compressed, leading me right back to troubleshooting dishwasher problems while mopping up a gallon of soapy water. Use a wrench or pliers to turn the metal or plastic feet. Turning them clockwise usually raises that corner. You want it level side-to-side, and perfectly plumb or slightly tilted toward the back to encourage drainage.
Tweak the Rear Leveler From the Front
Most modern machines are designed with a clever convenience: a rear-adjustment screw located right in the middle of the front base. Turning this screw moves the back leg up or down via a long rod or cable system. This is a huge win because replacing your water inlet valve without pulling the machine out is hard enough; you don’t want to have to disconnect every hose just to reach the back corners. If you notice your door rubbing against the cabinet on one side, it usually means the back of the machine is lower than the front on that specific side. Small turns make a big difference here, so adjust in small increments and re-check your level.
The Door Latch Never Lies
The final verification isn’t actually the level; it’s the door itself. If the tub is ‘racked’—meaning it’s twisted diagonally—the door won’t close smoothly or seat properly against the gasket. You can test a door latch using a screwdriver handle to simulate a closure and see how the latch enters the strike. If the latch hits the strike plate off-center, you need to tweak the legs until it clicks perfectly. If you’ve moved the unit significantly during this process, the sensors might get confused. In that case, check the secret diagnostic mode hidden on your touch control panel to make sure the machine recognizes it’s properly closed and ready to run without triggering a false leak error.
Once the door clicks shut and the latch aligns, you might think the mission is accomplished. I used to think that too, until I realized I was overlooking the chemistry and hidden plumbing physics of the wash cycle itself. I need to debunk a massive DIY myth that’s been circulating for years: the ‘vinegar cure-all.’ Social media is full of influencers telling you to run a cup of vinegar through every cycle to keep things fresh. While it’s great for removing hard water spots, I’ve seen countless units where the rubber door gaskets have turned to mush because of the constant acidity. In fact, why using distilled vinegar every week may damage your seals is one of the most overlooked causes of slow-drip leaks. You think you’re maintaining the machine, but you’re actually dissolving the very parts that keep the water inside. If you must use an acid, stick to citric acid or manufacturer-approved cleaners that won’t compromise the integrity of the EPDM rubber seals.
Stop Over-tightening Your Leveling Legs
Then there is the ‘Oops’ factor when it comes to the actual leveling hardware. I’ve seen well-meaning DIYers use impact drivers to adjust the leveling legs when the machine is under a heavy granite countertop. Please, for the sake of your kitchen floor, put the power tools away. These components are often threaded into plastic housings or thin-gauge metal. One over-zealous turn and you’ve stripped the frame, leading to a permanent tilt that no amount of shimming can fix. I always recommend a manual crescent wrench. It gives you the ‘feel’ of the resistance, so you know if you’re about to cross-thread the leveler or snap a plastic foot.
Can high-pressure wash cycles actually bypass a perfect seal?
The answer is a frustrating ‘yes.’ Even if your machine is perfectly level, a ‘detergent overdose’ creates a wall of foam that acts like a solid mass. The spray arm hits this foam and deflects water at sharp angles, hitting the top of the door or the corners where the gasket is naturally weakest. According to the Association of Home Appliance Manufacturers (AHAM), using the wrong type or amount of detergent—like the truth about tablet vs powder detergent residue build up suggests—is a leading cause of ‘ghost leaks’ that technicians can never replicate on-site. If you see suds during the cycle, you are using too much, and no amount of leveling will stop that water from escaping.
The Drain Hose High Loop is Your Real Problem
You also have to look beyond the machine at the plumbing. Many people level the machine but ignore the ‘high loop’ in the cabinet next door. This is why your service tech always checks the drain hose high loop before even looking at the dishwasher itself. If your hose isn’t looped higher than the sink’s drain point, dirty water from your sink siphons back into your machine. You’ll spend hours leveling a machine that is actually just being flooded by your own kitchen sink. It’s a classic case of misdiagnosis that leads to soggy subfloors and expensive repairs that have nothing to do with the machine’s actual hardware.
Avoid the Manufacturer Warranty Trap
Finally, let’s talk about the warranty trap. Most people don’t realize the real difference between service plans and manufacturer warranties until they get a bill for a ‘non-covered’ visit. A manufacturer might cover a motor failure, but if the technician finds your drain hose is clogged with food because of a faulty connection to your sink, you’re paying for the labor out of pocket. I’ve even seen cases where a warranty claim was denied because of your garbage disposal being improperly installed, which caused back-pressure in the dishwasher line. Understanding appliance diagnostics and improving your warranty claims is about seeing the whole system, not just the four legs of the dishwasher. It’s the nuance that saves you $300 on a service call. Have you ever fallen into this trap and spent a weekend fixing something that wasn’t actually broken? Let me know in the comments.
Stop the Guesswork with a Multimeter
If you’re serious about taking control of your kitchen repairs, you need to graduate from the expensive ‘replace and pray’ method. My most-used tool isn’t a wrench or a screwdriver—it’s a digital multimeter. When my machine refuses to start, I’m not just staring at the wire harness; I’m testing your thermal fuse for continuity without a pro to see if the electrical path is actually broken. According to Whirlpool’s official Job Aid for Dishwasher Service (Manual #W10705530), resistance testing is the only definitive method to verify component health before replacing expensive parts. By using a voltmeter to check your power cord connection safely, you can rule out house-side circuit issues before you even waste time pulling the unit out from under the counter. This kind of precision is exactly how appliance diagnostics can save your warranty benefits because it provides the technical proof needed to show you aren’t just swapping parts at random.
How can I keep my machine running like new for years?
Maintaining peak performance is a marathon, not a sprint, and it requires looking at the small details. Every six months, I take the time to follow the proper way to clean spray arm nozzles using a paperclip. It sounds incredibly tedious, but a single tiny popcorn kernel or a shard of plastic stuck in a nozzle can drop your cleaning efficiency by 30%, leaving you with half-dirty dishes. If your favorite wine glasses are starting to look hazy or white, you can remove cloudiness from glasses using citric acid, which is significantly safer for your machine’s internal rubber gaskets than the high acidity of distilled vinegar. I predict that within the next five years, most high-end machines will feature AI-driven self-cleaning sensors, but until that technology is in every home, the manual ‘paperclip and soft brush’ method remains your best defense against ‘gritty’ glassware.
Access the Hidden Tech Menus
Modern dishwashers are essentially waterproof computers, and like any computer, they have backdoors for technicians. Did you know there is a secret tech menu that calibrates your water sensors and displays error codes? Accessing this usually involves a specific, non-obvious sequence of button presses on the door interface. It allows you to see real-time data on water temperature and turbidity. If you find your cycles are running too long, it might just need a sensor recalibration rather than a new circulation pump. Being able to document intermittent noises for a repair claim using these specific diagnostic codes makes you an absolute hero when the warranty service tech finally arrives. They simply cannot argue with recorded error codes stored in the machine’s non-volatile memory.
Hunt Down Heat Leaks with a Thermal Camera
One tool I’ve started using lately—and I think will become standard for every serious DIYer—is a compact thermal camera that plugs into a smartphone. It is a complete game-changer for using a thermal camera to find heat leaks in your dishwasher door. If the internal insulation has slipped or the tub gasket is failing in a microscopic spot you simply can’t see with the naked eye, the camera will show a bright yellow ‘hot spot’ on the outer cabinet or the floor. This diagnostic data prevents you from wasting money on soaring energy bills and protects your expensive custom cabinetry from long-term steam damage. This level of technical detail is the future of appliance longevity. I want you to try one specific advanced tip today: Grab a high-powered flashlight and a paperclip to inspect every single hole in your spray arms—you’ll be shocked at the calcified gunk and plastic debris that has been hiding in there and sabotaging your wash cycles.
The Hard-Won Secrets from My Kitchen Floor
After years of mopping up “mystery puddles,” I’ve learned that the most expensive repairs are almost always the ones you could have prevented with ten minutes of focused attention. One thing that always sticks with me is that a dishwasher is a delicate system, not just a metal box. When you are troubleshooting dishwasher problems, always look for the simplest explanation first—it is usually gravity, a loose connection, or a bit of debris. I’ve also realized that being your own advocate is vital; knowing when to trust a warranty for dishwasher repairs versus when to pick up a wrench yourself saves thousands of dollars over a lifetime. Lastly, remember that even the best coverage has its limits, and understanding why your appliance warranty covers parts but not labor costs is a lesson best learned before the technician arrives at your door.
The Diagnostic Gear I Can’t Live Without
If you want to stop guessing and start fixing like a professional, you need to build a small but mighty toolkit. First, a reliable digital multimeter is non-negotiable for testing a thermal fuse for continuity without a pro kit. It turns an invisible electrical mystery into a simple “yes or no” answer. Second, I always keep a high-quality 6-inch bubble level in my kitchen drawer specifically for checking the machine’s plumb every few months as floors settle. Finally, for those who want to be truly thorough, using a thermal camera to find heat leaks in your dishwasher door is the ultimate way to spot failing gaskets before they warp your expensive custom cabinets. These tools pay for themselves the very first time they prevent an unnecessary and expensive service call.
Take Back Control of Your Kitchen
You don’t need to be a certified plumber or a master electrician to keep your kitchen dry and your dishes sparkling. By paying close attention to the tilt of your machine and the physical health of your seals, you are doing more for your home’s longevity than any service contract ever could. Understanding appliance diagnostics and improving your warranty claims is about moving from a passive owner to an active caretaker of your technology. So, grab that wrench, check your levels, and stop that 6 AM squish for good. Your hardwood floors—and your wallet—will thank you for the effort. Have you ever spent a whole weekend chasing a leak only to find out your machine was just leaning the wrong way? Let me know your dishwasher horror stories in the comments below!