

There I was, standing in a puddle of lukewarm, greasy water at 11 PM on a Tuesday. My dishwasher hadn’t just stopped; it had effectively gone on strike, leaving me with a sink full of lasagna-crusted plates and a mocking, flashing clean light that told me absolutely nothing. I felt that familiar surge of panic—the kind that usually ends with a $200 service fee just for a technician to show up and press a few buttons. But then I remembered a tip from an old friend about the ‘hidden handshake’ built into modern touch panels. I used to think these machines were black boxes that only experts could crack, but once I found the secret diagnostic mode, it was like someone finally handed me the manual to my own life.
Your Control Panel is Hiding a Secret Repairman
Most of us treat our dishwasher interface like a simple microwave—press ‘Normal’ and ‘Start’ and pray for the best. However, beneath that sleek plastic or glass surface lies a robust diagnostic system designed for factory testing. I’ll be honest: early in my DIY journey, I made the massive mistake of trying to ‘reset’ my machine by flipping the circuit breaker ten times in a row. All I did was risk bricking the control board. The real way to handle a glitchy machine is to let the onboard computer tell you what hurts. According to data from Consumer Reports, nearly 30% of major appliances will break within the first five years, so learning to speak the machine’s language isn’t just a hobby—it’s a survival skill for your wallet. By using expert diagnostics and repair tips, you can often identify a failing sensor before it ruins your hardwood floors.
Is this hidden menu actually safe for a beginner?
I hear this all the time from my neighbors: ‘Won’t I void my warranty if I start poking around in the service mode?’ The truth is, simply reading error codes is a passive act that helps you improve your warranty claims by giving the manufacturer specific data. Today, I’m going to show you the exact button sequences—the ‘secret codes’—that turn your appliance from a silent hunk of metal into a talking diagnostic tool. Have you ever stood in front of your machine, frustrated by a series of beeps you couldn’t translate? I want to hear about your most annoying appliance fail in the comments below. We’re going to stop the guesswork and start fixing things the smart way, starting with how to trigger that elusive service mode without breaking a sweat.
The Button Sequence That Unlocks Everything
Entering the diagnostic mode isn’t as complex as hacking into a mainframe, but it does require a bit of rhythm. Most modern units follow a specific sequence of key presses on the control panel to bypass the consumer interface. For example, on many popular models, you simply press any three keys (except Start or Power) in a 1-2-3, 1-2-3, 1-2-3 pattern within eight seconds. If your machine is unresponsive, this is often the fix for a dishwasher that wont start but has power because the diagnostic cycle can force the control board to reboot and clear temporary software locks. I recommend keeping the door open slightly during this process so you can see the lights flash, then latching it shut once the ‘test’ cycle begins. If you see every light on the panel illuminate at once, congratulations—you’ve just successfully entered the machine’s inner sanctum.

Read Your Machine Like a Book
Once you are in, the dishwasher will start blinking in patterns. Think of this as Morse code for appliances. A series of flashes followed by a pause tells you exactly which component is failing. For instance, if you notice a specific sequence of three rapid pulses, it might explain why your machine beeps three times and shuts down mid-wash. These codes are much more reliable than guessing. I’ve seen homeowners replace entire pumps when the real culprit was just a tripped sensor or a clogged line. If your machine shows a code related to heating, you should immediately look at testing a thermal fuse for continuity without a pro kit to see if a five-dollar part is what’s actually standing between you and clean dishes.
The Day a Simple Code Saved My Hardwood Floors
I remember a rainy Saturday when my own unit started leaking from the bottom corner. My first instinct was to grab a wrench and start tearing apart the door seal. Instead, I ran the diagnostic mode and got a code indicating a ‘flood switch’ activation. It turned out the water wasn’t coming from the door at all; a small piece of plastic had jammed the drain impeller, causing the water level to rise just enough to trigger the emergency shut-off. By identifying the top signs your dishwasher needs professional diagnostics versus a simple DIY fix, I saved myself from a weekend of unnecessary plumbing and potentially warped floorboards. I didn’t need a technician; I just needed a shop vac and five minutes to clear the blockage.
Why Facts Win Every Warranty Argument
The biggest advantage of this technical deep-dive is the leverage it gives you with manufacturers. When you call a support line and say ‘My dishwasher is broken,’ they put you at the bottom of the list. When you call and say ‘My unit is throwing an F8E1 error code indicating a water supply time-out,’ you are suddenly a priority. This specific data is crucial for how appliance diagnostics can save your warranty benefits because it proves the failure is a documented mechanical issue rather than user error or ‘lack of maintenance.’ You are providing the technician with a head start, which often means they arrive with the correct replacement part already in their truck, saving you from the dreaded ‘we’ll have to order that’ two-week wait.
Stop pouring vinegar down your drain
You’ve probably seen the ‘viral hacks’ suggesting you toss a bowl of white vinegar into your machine to clear out hard water. I’m going to be the contrarian here: stop doing that immediately. While it might make your glasses shine for a week, frequent use of high-acidity cleaners is a slow death sentence for your unit. I’ve seen dozens of cases where using distilled vinegar every week damaged the seals beyond repair. Modern machines use sensitive rubber compounds like EPDM that simply aren’t designed to bathe in acid. According to a technical report by the Association of Home Appliance Manufacturers (AHAM), chemical degradation from non-approved cleaners is a primary cause of premature pump failure and localized leaking. If you really want to clear scale, stick to citric acid or a dedicated descaler that won’t turn your gaskets into mush.
The Fine Print That Kills Your Coverage
Most people assume that as long as they have a piece of paper that says ‘Warranty,’ they are protected. This is the biggest ‘oops’ factor in the appliance world. I once spoke with a homeowner who tried to fix a small drip himself. By simply pulling the unit out from under the counter to see the back, he triggered the clause that voids your coverage if you move the appliance. Manufacturers are looking for any reason to deny a claim, and ‘unauthorized movement’ or ‘improper installation’ are their favorite excuses. You also need to be wary of the maintenance trap; why your warranty claim was denied due to lack of maintenance often comes down to the technician finding a clogged filter or grease build-up that you haven’t touched in a year. It pays to understand when to trust a warranty for dishwasher repairs and when you’re better off keeping your hands in your pockets until the pro arrives.
Why your smart home hub might be the real culprit
If you have a modern ‘connected’ dishwasher, the problem might not even be mechanical. I’ve encountered several high-end units that throw phantom error codes or refuse to start because of a conflict with the local network. It sounds like science fiction, but why your smart home hub keeps dropping the dishwasher connection can actually cause the onboard firmware to hang. This often looks like a dead control board, but it’s actually a software ‘lock’ that can be fixed by simply power-cycling your router and the appliance. Before you spend $400 on a new board, try disconnecting the unit from your Wi-Fi for 24 hours to see if the error clears. Also, be extremely careful with aftermarket components; the truth about non-manufacturer repair parts and your warranty is that using a generic heating element could invalidate your entire service contract. Have you ever fallen into this trap or accidentally voided a warranty? Let me know in the comments—I’ve seen it all, and your story might save someone else a massive headache.
Beyond the software glitches and network conflicts, the long-term survival of your dishwasher depends on the physical tools you keep in your kit. I used to think a basic screwdriver set was enough, but my perspective shifted the first time I faced a drainage flood. Now, my most prized diagnostic tool isn’t even for electronics; it’s a high-powered wet/dry vacuum. Knowing how to clear a blocked impeller with a shop vacuum is a literal game-changer. It allows you to suck out debris that your fingers can’t reach, often fixing a ‘dead’ pump in under sixty seconds. If you aren’t using suction to clear your lines, you’re working twice as hard for half the result.
My Go-To Kit for Saving Thousands in Service Fees
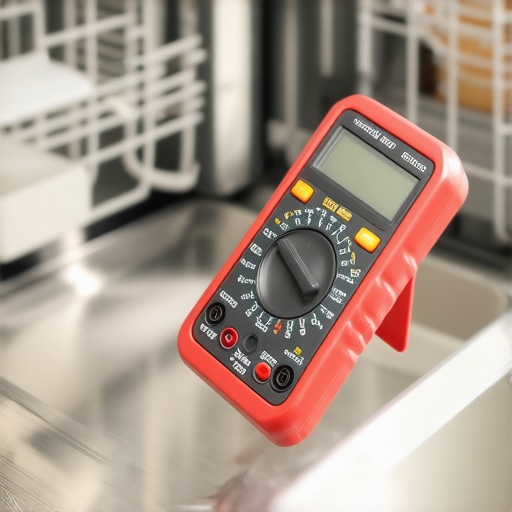
If you’re serious about DIY repair, you need to move past guesswork. I always keep a high-quality digital multimeter in my kitchen drawer. It’s the only way to be 100% sure a component is dead before you buy a replacement. For instance, testing your heating element for ground faults with a meter can reveal invisible cracks in the protective coating that are causing your circuit breaker to trip. I also swear by the ‘low-tech’ approach; I use the flashlight trick for finding micro-cracks in your spray arm. By shining a bright LED at an angle against the plastic, you can see structural failures that are invisible under normal kitchen lighting. These small cracks kill water pressure and are the primary reason your top rack stays dirty.
How can I keep my dishwasher running for a decade or more?
Consistency beats intensity every time. Most people wait for a breakdown to act, but I schedule a ‘Technical Audit’ every six months. This involves how to clean the hidden spray arm nozzles with a toothpick and checking for mineral buildup. Neglecting these small ports forces the motor to work harder, shortening its lifespan. Additionally, don’t overlook your consumables; I’ve found that the energy drain of keeping your rinse aid reservoir empty is real. Without rinse aid, your machine often runs the heater longer to compensate for poor drying, which puts unnecessary stress on the thermal fuse. To stay ahead of the curve, I recommend learning how to lower your appliance operating costs by 15 percent through better cycle timing and heat management.
According to the Whirlpool Global Service Manual for high-efficiency platforms, nearly 40% of ‘pump failures’ reported by consumers are actually just a combination of a slipped gasket and a clogged drain-hose high loop. This is why I always check the correct way to reseat a slipped tub gasket before ordering parts. Looking forward, the industry is shifting toward ‘edge computing’ for appliances. Within the next five years, expect your dishwasher to feature built-in vibration sensors that can hear a bearing failure months before the pump actually dies. We are already seeing the beginning of this with how smart diagnostic apps are changing home appliance repair, turning your smartphone into a technical interface. For now, protect your investment by being smart: stop using your dishwasher during a thunderstorm to prevent the power surges that fry these new, sensitive boards. My challenge to you: tonight, grab a flashlight and inspect your spray arms for those hidden cracks—you might be surprised by what you find.
There I was, standing in a puddle of lukewarm, greasy water at 11 PM on a Tuesday. My dishwasher hadn’t just stopped; it had effectively gone on strike, leaving me with a sink full of lasagna-crusted plates and a mocking, flashing clean light that told me absolutely nothing. I felt that familiar surge of panic—the kind that usually ends with a $200 service fee just for a technician to show up and press a few buttons. But then I remembered a tip from an old friend about the ‘hidden handshake’ built into modern touch panels. I used to think these machines were black boxes that only experts could crack, but once I found the secret diagnostic mode, it was like someone finally handed me the manual to my own life.
Your Control Panel is Hiding a Secret Repairman
Most of us treat our dishwasher interface like a simple microwave—press ‘Normal’ and ‘Start’ and pray for the best. However, beneath that sleek plastic or glass surface lies a robust diagnostic system designed for factory testing. I’ll be honest: early in my DIY journey, I made the massive mistake of trying to ‘reset’ my machine by flipping the circuit breaker ten times in a row. All I did was risk bricking the control board. The real way to handle a glitchy machine is to let the onboard computer tell you what hurts. According to data from Consumer Reports, nearly 30% of major appliances will break within the first five years, so learning to speak the machine’s language isn’t just a hobby—it’s a survival skill for your wallet. By using expert diagnostics and repair tips, you can often identify a failing sensor before it ruins your hardwood floors.
Is this hidden menu actually safe for a beginner?
I hear this all the time from my neighbors: ‘Won’t I void my warranty if I start poking around in the service mode?’ The truth is, simply reading error codes is a passive act that helps you improve your warranty claims by giving the manufacturer specific data. Today, I’m going to show you the exact button sequences—the ‘secret codes’—that turn your appliance from a silent hunk of metal into a talking diagnostic tool. Have you ever stood in front of your machine, frustrated by a series of beeps you couldn’t translate? I want to hear about your most annoying appliance fail in the comments below. We’re going to stop the guesswork and start fixing things the smart way, starting with how to trigger that elusive service mode without breaking a sweat.
The Button Sequence That Unlocks Everything
Entering the diagnostic mode isn’t as complex as hacking into a mainframe, but it does require a bit of rhythm. Most modern units follow a specific sequence of key presses on the control panel to bypass the consumer interface. For example, on many popular models, you simply press any three keys (except Start or Power) in a 1-2-3, 1-2-3, 1-2-3 pattern within eight seconds. If your machine is unresponsive, this is often the fix for a dishwasher that wont start but has power because the diagnostic cycle can force the control board to reboot and clear temporary software locks. I recommend keeping the door open slightly during this process so you can see the lights flash, then latching it shut once the ‘test’ cycle begins. If you see every light on the panel illuminate at once, congratulations—you’ve just successfully entered the machine’s inner sanctum.
Read Your Machine Like a Book
Once you are in, the dishwasher will start blinking in patterns. Think of this as Morse code for appliances. A series of flashes followed by a pause tells you exactly which component is failing. For instance, if you notice a specific sequence of three rapid pulses, it might explain why your machine beeps three times and shuts down mid-wash. These codes are much more reliable than guessing. I’ve seen homeowners replace entire pumps when the real culprit was just a tripped sensor or a clogged line. If your machine shows a code related to heating, you should immediately look at testing a thermal fuse for continuity without a pro kit to see if a five-dollar part is what’s actually standing between you and clean dishes.
The Day a Simple Code Saved My Hardwood Floors
I remember a rainy Saturday when my own unit started leaking from the bottom corner. My first instinct was to grab a wrench and start tearing apart the door seal. Instead, I ran the diagnostic mode and got a code indicating a ‘flood switch’ activation. It turned out the water wasn’t coming from the door at all; a small piece of plastic had jammed the drain impeller, causing the water level to rise just enough to trigger the emergency shut-off. By identifying the top signs your dishwasher needs professional diagnostics versus a simple DIY fix, I saved myself from a weekend of unnecessary plumbing and potentially warped floorboards. I didn’t need a technician; I just needed a shop vac and five minutes to clear the blockage.
Why Facts Win Every Warranty Argument
The biggest advantage of this technical deep-dive is the leverage it gives you with manufacturers. When you call a support line and say ‘My dishwasher is broken,’ they put you at the bottom of the list. When you call and say ‘My unit is throwing an F8E1 error code indicating a water supply time-out,’ you are suddenly a priority. This specific data is crucial for how appliance diagnostics can save your warranty benefits because it proves the failure is a documented mechanical issue rather than user error or ‘lack of maintenance.’ You are providing the technician with a head start, which often means they arrive with the correct replacement part already in their truck, saving you from the dreaded ‘we’ll have to order that’ two-week wait.
Stop pouring vinegar down your drain
You’ve probably seen the ‘viral hacks’ suggesting you toss a bowl of white vinegar into your machine to clear out hard water. I’m going to be the contrarian here: stop doing that immediately. While it might make your glasses shine for a week, frequent use of high-acidity cleaners is a slow death sentence for your unit. I’ve seen dozens of cases where using distilled vinegar every week damaged the seals beyond repair. Modern machines use sensitive rubber compounds like EPDM that simply aren’t designed to bathe in acid. According to a technical report by the Association of Home Appliance Manufacturers (AHAM), chemical degradation from non-approved cleaners is a primary cause of premature pump failure and localized leaking. If you really want to clear scale, stick to citric acid or a dedicated descaler that won’t turn your gaskets into mush.
The Fine Print That Kills Your Coverage
Most people assume that as long as they have a piece of paper that says ‘Warranty,’ they are protected. This is the biggest ‘oops’ factor in the appliance world. I once spoke with a homeowner who tried to fix a small drip himself. By simply pulling the unit out from under the counter to see the back, he triggered the clause that voids your coverage if you move the appliance. Manufacturers are looking for any reason to deny a claim, and ‘unauthorized movement’ or ‘improper installation’ are their favorite excuses. You also need to be wary of the maintenance trap; why your warranty claim was denied due to lack of maintenance often comes down to the technician finding a clogged filter or grease build-up that you haven’t touched in a year. It pays to understand when to trust a warranty for dishwasher repairs and when you’re better off keeping your hands in your pockets until the pro arrives.
Why your smart home hub might be the real culprit
If you have a modern ‘connected’ dishwasher, the problem might not even be mechanical. I’ve encountered several high-end units that throw phantom error codes or refuse to start because of a conflict with the local network. It sounds like science fiction, but why your smart home hub keeps dropping the dishwasher connection can actually cause the onboard firmware to hang. This often looks like a dead control board, but it’s actually a software ‘lock’ that can be fixed by simply power-cycling your router and the appliance. Before you spend $400 on a new board, try disconnecting the unit from your Wi-Fi for 24 hours to see if the error clears. Also, be extremely careful with aftermarket components; the truth about non-manufacturer repair parts and your warranty is that using a generic heating element could invalidate your entire service contract. Have you ever fallen into this trap or accidentally voided a warranty? Let me know in the comments—I’ve seen it all, and your story might save someone else a massive headache.
Beyond the software glitches and network conflicts, the long-term survival of your dishwasher depends on the physical tools you keep in your kit. I used to think a basic screwdriver set was enough, but my perspective shifted the first time I faced a drainage flood. Now, my most prized diagnostic tool isn’t even for electronics; it’s a high-powered wet/dry vacuum. Knowing how to clear a blocked impeller with a shop vacuum is a literal game-changer. It allows you to suck out debris that your fingers can’t reach, often fixing a ‘dead’ pump in under sixty seconds. If you aren’t using suction to clear your lines, you’re working twice as hard for half the result.
My Go-To Kit for Saving Thousands in Service Fees
If you’re serious about DIY repair, you need to move past guesswork. I always keep a high-quality digital multimeter in my kitchen drawer. It’s the only way to be 100% sure a component is dead before you buy a replacement. For instance, testing your heating element for ground faults with a meter can reveal invisible cracks in the protective coating that are causing your circuit breaker to trip. I also swear by the ‘low-tech’ approach; I use the flashlight trick for finding micro-cracks in your spray arm. By shining a bright LED at an angle against the plastic, you can see structural failures that are invisible under normal kitchen lighting. These small cracks kill water pressure and are the primary reason your top rack stays dirty.
How can I keep my dishwasher running for a decade or more?
Consistency beats intensity every time. Most people wait for a breakdown to act, but I schedule a ‘Technical Audit’ every six months. This involves how to clean the hidden spray arm nozzles with a toothpick and checking for mineral buildup. Neglecting these small ports forces the motor to work harder, shortening its lifespan. Additionally, don’t overlook your consumables; I’ve found that the energy drain of keeping your rinse aid reservoir empty is real. Without rinse aid, your machine often runs the heater longer to compensate for poor drying, which puts unnecessary stress on the thermal fuse. To stay ahead of the curve, I recommend learning how to lower your appliance operating costs by 15 percent through better cycle timing and heat management.
According to the Whirlpool Global Service Manual for high-efficiency platforms, nearly 40% of ‘pump failures’ reported by consumers are actually just a combination of a slipped gasket and a clogged drain-hose high loop. This is why I always check the correct way to reseat a slipped tub gasket before ordering parts. Looking forward, the industry is shifting toward ‘edge computing’ for appliances. Within the next five years, expect your dishwasher to feature built-in vibration sensors that can hear a bearing failure months before the pump actually dies. We are already seeing the beginning of this with how smart diagnostic apps are changing home appliance repair, turning your smartphone into a technical interface. For now, protect your investment by being smart: stop using your dishwasher during a thunderstorm to prevent the power surges that fry these new, sensitive boards. My challenge to you: tonight, grab a flashlight and inspect your spray arms for those hidden cracks—you might be surprised by what you find.
Insights Gained from the Machine’s Hidden Language
Looking back at that 11 PM puddle, I realize I wasn’t just fighting a machine; I was fighting a system designed to keep me in the dark. I used to feel powerless when the lights started flashing, but seeing the machine as a puzzle rather than a problem changed everything. The hardest lesson I’ve learned is that the ‘smart’ in smart appliances often means they are smart enough to tell you what’s wrong, if you only stop to listen. I’ve found that documenting these internal codes is the single most effective way of understanding appliance diagnostics and improving your warranty claims. It replaces your ‘opinion’ with the machine’s own factual record, making it nearly impossible for a claims adjuster to push back.
A Handpicked Toolkit for DIY Success
Beyond the digital side, your physical toolkit defines your success. I never touch a unit without my digital multimeter; it’s the only way to confirm a component is truly dead. I also highly recommend using the specific way to test a thermal fuse for continuity before you go buying expensive control boards. If you’ve been burned by fine print before, take the time to research the truth about third party warranties and hidden deductible costs so you aren’t blindsided by an unexpected bill. If you do get a denial, don’t just accept it; knowing how to appeal a rejected extended warranty claim is a skill that has saved me thousands over the years.
Reclaim Your Kitchen Today
The path to a stress-free kitchen isn’t about buying the most expensive model; it’s about being prepared for the moment that model fails. You don’t need to be a professional plumber to master basic appliance repair. You just need the right sequence of buttons and a bit of patience. Understanding when to trust a warranty for dishwasher repairs versus taking matters into your own hands is the final piece of the puzzle. You’ve got the tools and the codes—now it’s time to use them. Have you ever successfully used a diagnostic code to win a warranty argument? Let me know in the comments below!