

It was the night after my daughter’s graduation party, and my dishwasher was packed with the greasy remains of a three-course dinner. I pressed the power button, expecting that familiar hum, but I got nothing but a cold, hard silence. My heart sank because I knew exactly what that meant: a potential $200 service call just for a technician to walk through my door. I’ve been there before, and frankly, I’m tired of the ‘appliance tax’ we pay for simple fixes. You see, when a machine goes completely dark, it’s often just a tiny safety guard—the thermal fuse—doing its job. Today, I’m going to show you how to identify this culprit without needing a fancy ‘Pro Kit’ or a degree in electrical engineering. We are going to reclaim your kitchen and save your weekend budget. [image_placeholder]
Stop Calling the Repairman Before You Try This
In the past, I’ve spent way too much time troubleshooting dishwasher problems without a clear plan. One time, I actually replaced a perfectly good control board because I assumed the worst, only to realize later it was just the fuse. Talk about an expensive lesson in appliance diagnostics! It’s easy to panic when the lights won’t come on, but most of the time, the fix is simpler than the manual makes it look. If you can handle a screwdriver, you can handle this. Many people don’t realize that the specific way to test a thermal fuse for continuity usually involves a multimeter, but what if you don’t have one? I’ve been caught without my tools at my sister’s house and had to improvise using nothing but a battery and a small lightbulb. It sounds like MacGyver stuff, but it works perfectly.
Is DIY Testing Actually Safe for Your Machine?
I get it. Playing around with wires feels like a recipe for a house fire. But here is the secret: testing for continuity is just about checking if an electrical path is open or closed—it’s not rocket science. According to the National Electrical Manufacturers Association, thermal fuses are specifically designed as one-time sacrificial devices to prevent overheating, which means they are meant to be handled and replaced by design. If your appliance overheated without tripping a fuse at the main breaker, this little component is your primary suspect. It’s a safety hero that died so your house wouldn’t burn down. Have you ever stared at a dead dishwasher and felt that immediate sense of dread about the repair bill? Before you reach for your wallet, let’s look at how we can prove that fuse is dead using common household items. We’ll jump into the physical steps next, but first, make sure you’ve disconnected the power—safety isn’t just a suggestion; it’s the rule.
Find the Fuse Without Stripping the Whole Machine
To get started, you need to access the guts of the door. Most people start ripping out the bottom kickplate, but the thermal fuse is almost always located behind the inner door panel, tucked right next to the control board. Grab your screwdriver—usually a Torx T15 or a Phillips head—and remove the screws holding the inner panel to the outer shell. Hold the door as you take out the last few screws so it doesn’t just flop down and strain the hinges. Once you pull that panel back, you’ll see a bundle of wires leading to a small, plastic-encased component. That’s your target. If you’ve ever wondered about troubleshooting dishwasher problems, this is the most common ‘gatekeeper’ part that stops power dead in its tracks. 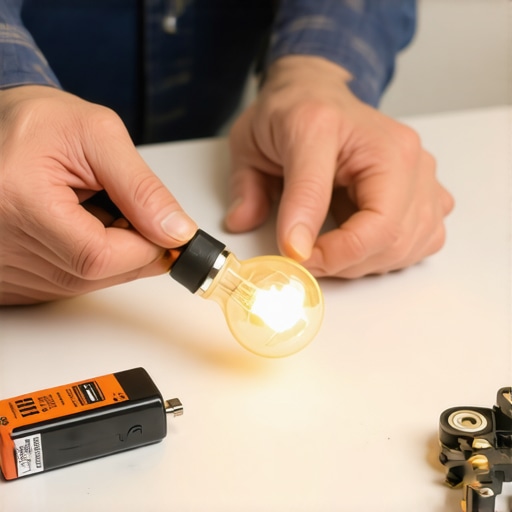
The MacGyver Way to Test for Continuity
If you don’t have a multimeter, don’t panic. I remember being at my sister’s house during a massive family reunion when her dishwasher quit. I didn’t have my tool bag, but I did have a 9-volt battery and a small LED bulb from a broken toy. I disconnected the fuse from its wire harness and touched one terminal to the battery’s positive post. I then used a scrap piece of wire to connect the other fuse terminal to the bulb, and touched the bulb’s base to the battery’s negative post. If that fuse is alive, the bulb will light up because the circuit is complete. In my sister’s case, the bulb stayed dark. That tiny piece of metal inside the fuse had melted, acting like a gate that refused to let electricity pass. It’s a low-tech version of the specific way to test a thermal fuse for continuity that works every single time. It’s a similar logic to how to test your dishwashers float switch with a pencil—you are looking for physical or electrical movement.
Check for Melted Plastic and Burnt Terminals
While the battery test tells you if the fuse is blown, your eyes can tell you why it blew. Look closely at the plastic housing around the fuse and the wire connectors. If the plastic looks warped or discolored, you’ve had a loose connection that caused localized heat. This is a classic reason why your appliance overheated without tripping a fuse at the main breaker box. If the wires look crispy, you can’t just replace the fuse; you’ll need to snip those wire ends and crimp on new connectors, or the new fuse will blow within a week. This is where understanding appliance diagnostics becomes a real money-saver, because it prevents you from making the same mistake twice.
What to Do if the Fuse Actually Works
If your battery-and-bulb test proves the fuse is healthy, you need to look elsewhere. Before you start worrying about how to tell if your service plan actually covers motor failure, check the door latch. I once spent two hours testing every component only to realize the door wasn’t clicking shut properly. You can also take a quick peek at the control board itself. Sometimes you can spot a failing control board capacitor by sight—it will look swollen or have a burnt smell. But if the fuse is dead, you’ve found your ‘smoking gun’ and you’re just a $15 part away from a working machine. This is the fix for a dishwasher that wont start but has power going to the wall but nothing on the display.Now, here is where most people get it wrong. We have been conditioned to think that if an appliance is under a service plan, we should never touch it. But the truth about third-party warranties and hidden deductible costs is that they often charge more for the service visit deductible than the actual part costs online. Everyone says to let the pros handle it to stay safe, but in my experience, waiting three weeks for a technician to swap a fifteen-dollar fuse is a waste of your time and money.
The Warranty Trap That Actually Costs You Money
If you have an extended plan, you might feel protected. However, many homeowners find out the hard way why your warranty claim was denied due to lack of maintenance when a technician blames a blown fuse on a clogged filter you forgot to clean. According to data from the Association of Home Appliance Manufacturers (AHAM), a significant percentage of service calls are for issues that are technically preventable through routine consumer care. If the repairman determines the overheat was caused by your own neglect, they will bill you for the full ‘professional’ rate regardless of your contract.
Can You Really Lose Your Coverage by Opening the Panel?
This is the big scary question that keeps people from DIY fixes. Under the Magnuson-Moss Warranty Act, manufacturers generally cannot void your entire warranty just because you opened a panel to inspect a component. However, you must be careful about the clause that voids your coverage if you move the appliance or perform ‘unauthorized modifications’ like cutting the factory wiring. Checking for continuity is a passive test; it is not a modification. Understanding how appliance diagnostics can save your warranty benefits means knowing that presenting a tech with a clear, diagnosed issue can sometimes force them to cover a part they would otherwise try to skip. 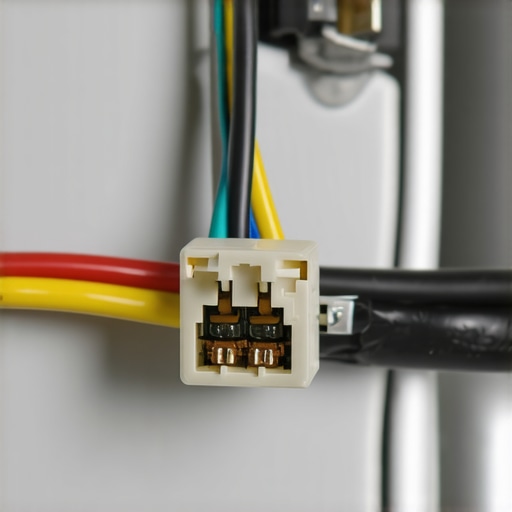
Why Your New Fuse Might Die in Two Days
Here is the ‘oops’ factor most DIYers miss: the fuse is almost always a symptom, not the underlying disease. If you replace the fuse but do not check the wiring harness, you are just putting a band-aid on a broken leg. I have seen people buy three fuses in a single month because they did not realize that a slightly loose female spade connector was creating localized resistance heat. That heat travels right into the fuse, blowing it even if the dishwasher’s internal temperature is perfectly fine. Always give those wire connectors a firm ‘tug test’ to ensure they are snug. Have you ever fallen into this trap and replaced the same part twice? Let me know in the comments. Knowing when to trust a warranty for dishwasher repairs versus when to grab your own toolkit is the ultimate secret to keeping your kitchen running without breaking the bank.
Equip Your Toolkit Like a Professional Diagnostician
I’ve learned the hard way that a standard screwdriver and a ‘can-do’ attitude aren’t always enough to prevent a kitchen flood. If you want to stop guessing and start fixing, you need a few specialized items in your bag. I personally never open a dishwasher door without a set of Torx security bits—specifically the T15 and T20 sizes—because modern manufacturers love using these to discourage casual tinkering. Beyond that, a digital multimeter is non-negotiable. While the battery-and-bulb trick is great for an emergency, testing your heating element for ground faults with a meter gives you numerical proof that a component is failing before it completely dies. This precision is what separates a weekend warrior from someone who truly understands appliance diagnostics. I recommend the Klein or Fluke brands; they are rugged enough to survive being dropped on a tile floor and accurate enough to detect micro-fluctuations in resistance that cheaper models miss.
How do I maintain my dishwasher’s performance over the long haul?
Maintenance isn’t a one-time event; it’s a monthly rhythm. Most people think they are ‘cleaning’ the machine every time they run a cycle with soap, but that is a myth. You need to be proactive about cleaning your sump filter with a soft brush to stop foul odors and removing the gunk that builds up in the crevices of the spray arms. According to technical bulletins from the Association of Home Appliance Manufacturers (AHAM), mineral deposits from hard water can reduce your pump’s efficiency by up to 30% over three years if left untreated. I make it a point to perform how to deep clean a dishwasher sump without pulling the machine once every season. If you skip this, you’ll eventually see the real cost of skipping your monthly descaling cycle, which usually manifests as a burnt-out motor or a recurring clog that no amount of vinegar can fix. 
The Shift Toward Remote Diagnostics and Digital Fixes
We are entering an era where your dishwasher might know it’s broken before you do. I’ve started seeing more units that utilize ‘optical sensors’ to check water clarity, and when these fail, the whole machine stalls. Knowing how to calibrate your dishwasher turbidity sensor with plain water is becoming a vital skill for the modern homeowner. I predict that within the next five years, manual continuity testing will be secondary to how smart diagnostic apps are changing home appliance repair. We’re moving toward a ‘software first’ approach where you’ll plug your phone into the service port to see exactly which relay on the board failed. However, until that’s universal, your best defense is still a solid physical inspection. If you’re ever in doubt, don’t just keep pressing ‘start’; look for top signs your dishwasher needs professional diagnostics like a clicking drain pump or a flashing ‘clean’ light. My best advice? Take five minutes today to find the hidden filter most owners never clean in their machine and give it a quick scrub—it’s the single easiest way to prevent a $500 repair bill next year.
Hard Lessons from My Most Expensive Repair Blunders
In my years of tinkering, I’ve learned that a dead machine is usually an opportunity to learn, not a reason to panic. First, always remember that a blown fuse is often a messenger. If you don’t investigate why it blew, you’re just waiting for the next failure. I’ve found that the truth about third-party warranties and hidden deductible costs is that they rely on you being too intimidated to look inside. Also, keep in mind that the specific way to test a thermal fuse for continuity isn’t just about confirming it is broken, but verifying the circuit’s reliability. Finally, never underestimate the power of a simple visual check; half my successful repairs involve just tightening a loose spade connector or cleaning a terminal. These small wins are what build the confidence to tackle bigger household issues down the road.
[image_placeholder]
Gear That Actually Makes the Job Easier
You don’t need a warehouse of tools, but a few choice items change the game. I swear by a set of magnetic Torx drivers because those tiny screws love to hide in your floor cracks. A digital multimeter is your best friend—it turns guesswork into hard data. For ongoing maintenance, I use citric acid regularly to prevent mineral buildup. Failing to do this leads to the real cost of skipping your monthly descaling cycle, which is usually an expensive pump replacement. If you want to keep your glasses sparkling without the cloudy film, knowing how to remove cloudiness from glasses using citric acid is a pro tip every homeowner should have in their back pocket.
Take Back Control of Your Kitchen Budget
Repairing your own appliances is about more than just saving a few hundred bucks—it’s about the confidence that comes with knowing how your home works. When you master appliance diagnostics, you stop being at the mercy of service schedules and surprise fees. Whether you’re dealing with the fix for a dishwasher that wont start but has power or a minor leak, the first step is always the most important. Don’t let the fear of a warranty claim keep you from doing basic checks. Armed with the right knowledge, you can ensure that how appliance diagnostics can save your warranty benefits becomes a reality for your household. Have you ever found a blown fuse only to realize it was caused by something as simple as a loose wire? Let me know your DIY success stories below!