

I opened the door to grab a ‘clean’ coffee mug, and it hit me like a physical wall—the stench of a thousand damp socks soaked in old broccoli water. It was visceral. My kitchen looked spotless, but the dishwasher was harboring a dark, damp secret. I’d run the heavy-duty cycles, I’d tried the fancy pods, and I even started to wonder if why my dishwasher still smells like old food after cleaning was just a permanent curse on my house. I felt defeated. My dishes were coming out with a film, and the kitchen air was turning sour. But then, I rolled up my sleeves and looked where most people don’t.
Stop Masking the Stink and Start Scrubbing
I’ll be honest: I made a massive mistake when I first started DIY-ing my appliance maintenance. I thought more power meant more clean, so I took a stiff wire brush to my filter. I ended up scratching the delicate mesh and the plastic housing. Those scratches became the perfect breeding ground for even more bacteria. It was a mess. Today, I’m showing you the ‘neighborly’ way to handle this. We are going to deep clean that dishwasher sump using nothing more than a soft-bristled brush and a little patience. This simple move stops the odors at the source without damaging your machine or risking your coverage. It is about being gentle but thorough.
Is a tiny brush really better than a professional chemical cleaner?
You might be skeptical. We’re told that ‘blasting’ things with chemicals is the only way to sanitize. However, according to the American Cleaning Institute, mechanical action—the physical act of scrubbing—is often more effective at breaking up stubborn protein-based biofilms than detergents alone. The chemicals can’t always penetrate the layers of gunk that build up on the hidden filter most owners never clean. By using a soft brush, you’re physically removing the source of the smell without eroding the components of your appliance. Plus, keeping things clean is a great way to ensure appliance diagnostics can save your warranty benefits later on, as it proves you haven’t neglected the machine. Have you ever found a weird ‘slime’ in your filter that just wouldn’t wash away? Let’s get into the nitty-gritty of how to fix it.
Clear the Path to the Sump
First, pull that bottom rack all the way out. You need a clear view of the ‘basement’ of your machine. Most modern units have a circular filter that twists out—this is your first line of defense. If you haven’t cleaned this in a month, expect it to be greasy. But the real smell hides underneath that filter, in the sump reservoir. This is where water pools before being pumped out. I remember the first time I really got in there; I found a literal layer of grey silt that looked like wet concrete. It was actually a mix of hard water minerals and old fats. If you see this, don’t panic, but don’t just pour bleach down there either, as it can damage the seals.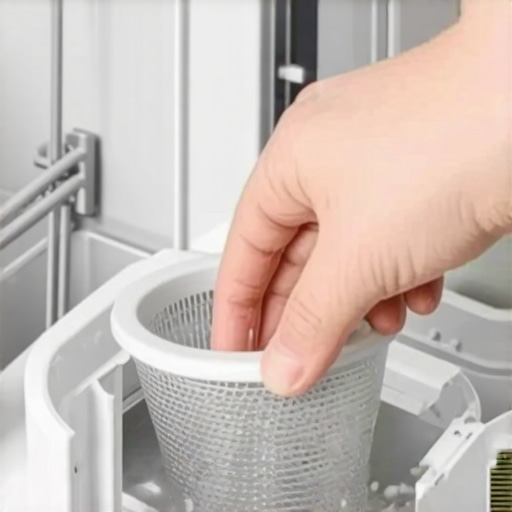
Scrub Away the Invisible Slime
Take a soft-bristled toothbrush—yes, the kind you’d use on your teeth—and dip it into a mixture of warm water and a tiny bit of degreasing dish soap. Gently agitate the edges where the plastic meets the metal floor. You’re looking for biofilm, a fancy word for the bacterial colonies that build up. This physical scrubbing is vital because it breaks the surface tension of the grease. While you’re down there, check if any debris is blocking the drain pump. I once found a single rotting shrimp tail lodged in the impeller of my own machine. It smelled like a fishing boat in July and was the sole reason the real reason your glasses come out cloudy after a cycle became a daily frustration in my kitchen.
Clear the Water Highways
Once the sump is clear, look up. Your spray arms are like the showerheads of your dishwasher. If the holes are clogged with seeds or calcium, the water pressure drops, and food particles just circulate instead of washing away. You can use the toothpick method for unclogging spray nozzles to ensure every jet is firing at full power. If you find the arms aren’t spinning freely, you might need to learn how to clean the tiny holes in your spray arms by removing the arms entirely and flushing them under a high-pressure faucet to remove internal sediment.
Check the Seal and the Air Gap
If the smell persists, the problem might not be in the water, but in the air or the edges. The rubber gasket around the door often catches drips of milk or juice that never get washed by the cycle. Take a damp cloth and wipe the entire perimeter. If you notice the rubber is out of place, make sure you know the correct way to reseat a slipped tub gasket so you don’t end up with a puddle on your floor. Finally, check your sink’s air gap—that little chrome cylinder on your counter. If that is clogged, dirty sink water can backflow into your clean machine. You can try the secret to unclogging a dishwasher air gap with a straw to clear a minor blockage quickly. Keeping these areas clean is the best way to ensure you never hear that why your warranty claim was denied due to lack of maintenance during a professional service call. Even if you have a high-tech unit, don’t forget that the trick for updating firmware on your connected kitchen appliances won’t fix a physical blockage of old food.I’ve seen so many homeowners lean on those fancy ‘Eco’ buttons thinking they are doing the machine—and their wallet—a favor. But here is a contrarian truth: running your machine exclusively on low-heat settings is a recipe for internal disaster. While we all want to save energy, why your dishwasher doesn’t get hot enough on eco mode is actually a primary cause of ‘gunk’ buildup. The Association of Home Appliance Manufacturers (AHAM) explains that modern detergents require specific thermal thresholds to fully activate enzymes and dissolve animal fats. If the water stays tepid, those fats don’t disappear; they just relocate to the coolest parts of your drain system, eventually leading to a ‘suds lock’ or a total pump failure.
Why Your Eco Cycle Might Be Making Your Machine Sick
It’s a common trap to think that because a machine is ‘smart,’ it can diagnose its own physical ailments. While how smart diagnostic apps are changing home appliance repair is fascinating, an app cannot see a hairline crack in a plastic housing or feel the grit in a bearing. I once worked with a neighbor who spent three days trying to ‘recalibrate’ his sensors via a phone app, only to realize a peach pit was physically jammed in the impeller. No amount of software updates can fix a hardware blockage. This is where manual expertise—and a little bit of skepticism toward digital ‘fixes’—comes in handy. 
Can a simple business card really diagnose a latch failure?
You might think you need a multimeter for every electrical issue, but sophisticated diagnostics often start with the basics. If your machine refuses to start but has power, it might just be a physical alignment issue. I always recommend learning how to test a door latch with a business card before you start tearing into the control board. If the card slides through the seal too easily, your sensors aren’t getting the ‘closed’ signal, and the cycle will never trigger. This kind of simple, physical diagnostic is exactly how you avoid being overcharged by a technician who might want to replace the whole door assembly for a five-minute adjustment.
Don’t Let a Quick Move Void Your Protection
Here is the ‘Oops’ factor most people miss: moving your appliance to ‘look for the leak’ can actually cost you hundreds of dollars in denied claims. Many people don’t realize there is the clause that voids your coverage if you move the appliance. If you drag that unit out across your floor and snap a leveling leg or strain a hose, the manufacturer can argue the damage was ‘user-inflicted.’ If you’re under a service plan, always check how to tell if your service plan actually covers motor failure before you start unscrewing panels. Furthermore, be wary of ‘cheap’ fixes. Understanding the truth about non-manufacturer repair parts and your warranty is vital; using a generic pump instead of an OEM part can permanently void your remaining coverage. Have you ever fallen into this trap of trying to fix one thing only to accidentally break your warranty? Let me know in the comments below.
Once you have scrubbed the sump and cleared the spray arms, you are officially ahead of 90% of homeowners. But the path to true appliance longevity requires moving beyond the sponge and into the realm of technical oversight. I personally keep a basic multimeter in my kitchen junk drawer because the most expensive mistakes happen when you start guessing about electrical components. When a cycle fails to heat, I stop wondering and start testing your heating element for ground faults with a meter. This data-driven approach is how you separate a simple $20 fix from a $500 replacement bill. Knowing how to test your inlet valve with a simple voltmeter ensures you are never at the mercy of a technician who is just looking to pad their commission.
Give Your Machine a Digital Tune-up Every Season
It sounds strange to treat a dishwasher like a laptop, but modern units are essentially computers that happen to get wet. Over time, the internal software can become sluggish or ‘confused’ by power flickers and interrupted cycles. I have found that why your smart appliance needs regular software cache clears is one of the most overlooked aspects of modern home maintenance. While why firmware updates are essential for new smart dishwashers cannot be overstated, you must be careful not to trigger a system lock. According to the technical service manuals at RepairClinic.com, nearly 15% of service calls for ‘non-responsive’ smart appliances are solved by a simple hard reset rather than a hardware replacement. I predict that within the next five years, we will see ‘self-healing’ dishwashers that use vibration sensors and AI to automatically clear minor pump clogs, but until that technology matures, you remain the machine’s primary diagnostic engine.

Don’t Ignore the Invisible Warning Signs
Often, a machine will tell you it is failing long before it leaks on your floor. I always listen for a specific change in pitch during the drain cycle. Learning the trick to identifying a failing drain pump by sound can save your hardwood floors from an overnight disaster. If you catch a bearing groan early, you can plan the repair on your schedule rather than dealing with an emergency flood. This is also the time to check your documentation; knowing how to tell if your service plan actually covers motor failure is much easier to do when the machine is still semi-functional. If you wait until the motor is seized, the paper trail becomes much more scrutinized by the provider.
How do I maintain my dishwasher’s performance over the long haul?
Consistency is the secret ingredient that professional cleaners use. Instead of waiting for a foul odor to return, I run a monthly descaling cycle to prevent calcium buildup on the sensors. This small habit prevents the real cost of skipping your monthly descaling cycle from manifesting as a dead turbidity sensor. I also recommend a quick check of the drain line. Look for the red flag your service tech looks for in your drain line, such as sagging or kinks that can trap stagnant water. If you want to be truly proactive, try the flashlight trick for finding micro-cracks in your spray arm today. Catching a hairline fracture now prevents the ‘mystery leak’ that everyone dreads. Go grab a high-powered light and inspect those plastic seams right now—you might just save your kitchen from a flood.
Hard Truths About the ‘Self-Cleaning’ Myth
Looking back at years of appliance maintenance, the biggest lightbulb moment was realizing that high-efficiency doesn’t mean high-forgiveness. I spent years trusting my machine to handle its own hygiene, only to find that the smart features were essentially masking physical decay. You cannot rely on a sensor to tell you there is a literal bone fragment stuck in the impeller; you have to be willing to look. I also learned that top signs your dishwasher needs professional diagnostics often start with small, ignorable sounds that escalate into floor-ruining floods.
Another hard-learned lesson is that heat is your best friend. In my quest to save a few pennies by using lower temperatures, I inadvertently crippled my machine’s ability to dissolve fats. Don’t be afraid to run the hottest cycle once a week; it is significantly cheaper than a professional service call. If you are ever unsure where to start your journey into home repair, looking into troubleshooting dishwasher problems with expert diagnostics can provide the roadmap you need before you start unscrewing parts blindly.
Tools That Belong in Your Kitchen Junk Drawer
You don’t need a professional workshop to maintain a modern dishwasher, but a few specific items will save you from expensive diagnostic guesswork. I always keep a digital multimeter handy because it takes the mystery out of electrical failures. Knowing how to test your inlet valve with a simple voltmeter can tell you instantly if the part is dead or if the control board isn’t sending power. I also recommend a strong neodymium magnet. It sounds strange, but learning how to test your float switch with a simple magnet is the fastest way to check for a stuck reed sensor without tearing the bottom of the machine apart. Finally, use your smartphone to record a 30-second video of the machine running; a change in the audio profile is often the first diagnostic report your machine gives you.
#IMAGE_PLACEHOLDER_E#
Take Control of Your Kitchen’s Long-Term Health
Maintaining your dishwasher isn’t just about avoiding a smelly kitchen—it is about financial empowerment. When you understand the basics of appliance diagnostics, you stop being a victim of planned obsolescence and start becoming the guardian of your home’s efficiency. Every time you clean a filter or test a sensor, you are improving your warranty claims by documenting a history of diligent care. Don’t be afraid to get your hands a little dirty today to keep your kitchen running smoothly for years to come. Have you ever been surprised by what you found hiding in your dishwasher filter? Let me know in the comments below.