

It was a Tuesday night, and my kitchen floor looked more like a shallow pond than a cooking area. I stood there with a soggy towel, staring at my dishwasher, wondering how several hundred dollars of modern engineering could fail so spectacularly. When the tech finally arrived, he didn’t even open the dishwasher door first. He went straight for the cabinet under my sink, peered inside with a flashlight, and gave a knowing nod. That’s when I realized I’d made a rookie mistake that almost cost me a brand-new appliance. I had tucked the drain hose away “neatly,” but in the world of appliance repair, “neat” usually means “not working.” I had accidentally created a siphon that was pulling dirty sink water back into my clean dishes every time the sink ran.
The Telltale Sign Hiding Under Your Kitchen Sink
Most of us think the dishwasher is the star of the show, but your service technician knows the real drama happens in the shadows of your cabinetry. When they look at your drain line, they aren’t just checking for leaks; they are looking for the “High Loop.” Early in my DIY journey, I didn’t realize that the common plumbing errors that cause dishwasher floods often start with a sagging hose. If that line doesn’t arch above the level of the sink drain, you’re essentially inviting old food particles to move back into your machine. This leads to that dreaded moment when your dishwasher smells like a wet dog because of stagnant, recycled waste water. According to the Uniform Plumbing Code (UPC), a physical air gap or a high-loop installation is a non-negotiable requirement for a reason—it prevents cross-contamination and backflow. If you aren’t sure where to start, looking at the top signs your dishwasher needs professional diagnostics can help you decide if the problem is just a hose or something deeper in the pump.
Is a fancy air gap actually worth the extra counter space?
I used to think that little chrome cylinder on the back of the sink was just a decorative eyesore. I even considered removing mine to make room for a soap dispenser. That would have been a massive blunder. You see, the secret to unclogging a dishwasher air gap with a straw is a trick every homeowner should know before they call a pro. That air gap is your first line of defense. Without it, or a proper high loop, your dishwasher has to work twice as hard to push out effluent. I’ve learned the hard way that the quick drain pipe fix that stops your dishwasher from backing up is often just a matter of repositioning a plastic bracket. Understanding how appliance diagnostics can save your warranty benefits is also key, because improper installation—like that sagging drain hose I mentioned—is often used as a reason for manufacturers to deny a repair claim. Have you ever opened your machine after a cycle and found a layer of murky water at the bottom? Sometimes you might not need a Vancouver plumber for your kitchen sink backup if you know how to read the signs your drain line is giving you. Today, we’re going to look at exactly what your tech sees when they open that cabinet door and how you can spot the red flags before your kitchen becomes a flood zone.
Master the High Loop to Prevent Backflow
To get your machine draining like it did on day one, you need to address the geometry of the drain hose. Think of your drain line like a mountain pass; if the path slumps into a valley before reaching the summit, the ‘traffic’ of dirty water simply settles and rots. You want the hose to travel from the dishwasher, arch up as high as possible under the countertop, and then drop down into the sink drain or disposal. This simple arch uses gravity as a natural check valve. I remember a time when I used a simple plastic zip-tie to secure my sagging hose to the back of the cabinet frame. Within two cycles, that swampy odor disappeared entirely. This is often the quick drain pipe fix that stops your dishwasher from backing up that professionals charge a hundred dollars to perform. 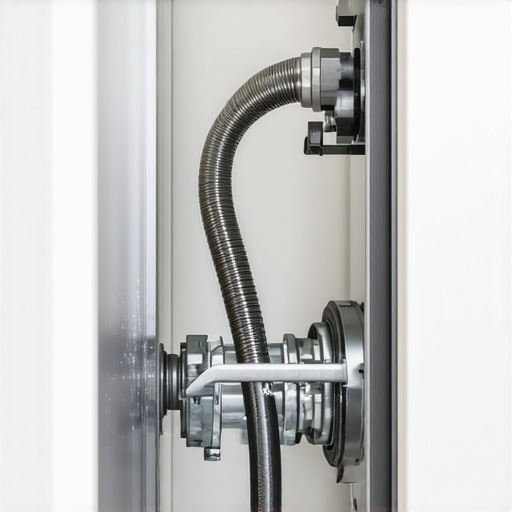
Clear the Air Gap Without Tools
If you have that little chrome cylinder on your sink, it can get clogged with grease and food debris. Instead of taking it apart, try the secret to unclogging a dishwasher air gap with a straw. You simply place a large-diameter straw over the small hole inside the air gap and blow hard. It sounds ridiculous, but it clears the blockage instantly.
Identify Pump Failures by Sound and Sight
Sometimes the plumbing is perfect, but the hardware is struggling. You can often skip the expensive service call by learning the trick to identifying a failing drain pump by sound. A healthy pump has a steady, rhythmic hum. If you hear a sharp clicking or a rhythmic thumping, there is likely a foreign object caught in the impeller. I once spent an hour panicking because my machine wouldn’t drain, only to find a single popcorn kernel wedged in the pump. Before you tear the machine apart, try the ice cube move for unjamming a stuck impeller. Dropping a few cubes into the sump can sometimes provide enough friction to dislodge small debris without damaging the plastic blades.
Handle Triple Beep Errors Immediately
If your unit stops mid-cycle and starts screaming at you, pay attention to the pattern. Learning what to do when your machine beeps three times and stops is vital because that specific code often points to a leak detected in the base pan. This is your machine’s way of preventing a disaster. If you ignore it, you risk a catastrophic overflow. You should immediately learn how to find the slow leak hiding under your kickplate. Catching a drip early is the best way to protect your kitchen floors from leaks and can be the difference between a five-minute fix and needing to how to salvage your hardwood floors after a dishwasher flood.
Protect Your Warranty Benefits During Repairs
When you start tinkering, you must be careful not to void your protection. Manufacturers are notoriously picky about who touches the internal components. Knowing how appliance diagnostics can save your warranty benefits is essential because it allows you to provide a service tech with specific data, proving the fault isn’t due to your ‘DIY’ attempts. Always keep a log of what you find. If you have to replace a component, be wary of cheap online knockoffs. The truth about non-manufacturer repair parts and your warranty is that using an uncertified pump can give the company a legal loophole to deny future claims on the entire unit.
We often think that as long as we have a warranty sticker on the side of the machine, we are shielded from any major financial hits. But here is the contrarian truth: simply having coverage doesn’t mean you’re protected. In my years of troubleshooting, I’ve found that homeowners often mistake ‘parts coverage’ for ‘full protection.’ If you don’t understand how appliance diagnostics can save your warranty benefits, you might find yourself paying hundreds of dollars out of pocket for a ‘covered’ repair just because the technician’s paperwork didn’t use the specific manufacturer-approved terminology.
Stop assuming the diagnostic fee is a waste of money
The biggest mistake I see is people trying to save sixty bucks by skipping professional diagnostics and guessing which part is broken. They buy a pump online, install it, and then realize the issue was a faulty control board capacitor. Not only are they out the cost of the pump, but they have also potentially voided their entire service contract. Using troubleshooting dishwasher problems expert diagnostics repair tips is about more than fixing a leak; it is about creating a paper trail that the manufacturer cannot argue with. According to experts at the Association of Home Appliance Manufacturers (AHAM), modern sensors are so finely tuned that even a slight drift in calibration can cause system-wide errors that a DIYer simply cannot see without the right tools. For instance, you might need to know how to calibrate your dishwasher turbidity sensor with plain water to prove the sensor isn’t actually broken, saving you from an unnecessary and costly replacement.
Why did my warranty claim get rejected even though I followed the manual?
This is the question that haunts every homeowner after a flood. The ‘trap’ usually lies in the fine print regarding ‘installation errors.’ If your drain hose isn’t high-looped or if you used the wrong detergent, the company has a legal out. I have seen claims denied because the owner didn’t know the truth about non-manufacturer repair parts and your warranty. Even a simple third-party gasket can be flagged as the ’cause’ of a larger failure. If you are dealing with a complex issue, it is vital to recognize the top signs your dishwasher needs professional diagnostics before you start unscrewing panels. Sometimes, the one-minute move to reset your control board is all it takes, but if that doesn’t work, stop. Forcing a machine to run when it is giving you error codes is a surefire way to be told your ‘negligence’ caused the motor to burn out.

Beyond the hardware, you need to be wary of the truth about third-party warranties and hidden deductible costs. Many people assume their extended service plan covers everything, only to find out there is a per-visit fee that costs more than the part itself. This is why your service plan might be a waste of money if you aren’t strategic about when to call for help. Understanding the nuances of understanding appliance diagnostics improving your warranty claims allows you to speak the technician’s language. Have you ever fallen into this trap where a ‘covered’ repair ended up costing you a fortune in labor or hidden fees? Let me know in the comments. Before you give up on your machine, check when to trust a warranty for dishwasher repairs to see if you can still get the manufacturer to foot the bill.
One thing I’ve learned after years of scraping gunk off my kitchen floors is that most people own the wrong tools for the job. You don’t need a giant chest of wrenches; you need a few precision items that tell you why the machine is failing before you ever touch a screw. My absolute must-have is a digital multimeter. I used to guess if my water wasn’t getting hot enough, but now I know how to test the continuity of a heating element to be certain. As noted in the Bosch Service Manual for SHX series machines, the resistance of the heating element should consistently measure between 11 and 18 ohms; anything outside this range indicates a failure that no amount of ‘resetting’ will fix. If your unit is dead to the world, knowing the exact multimeter reading for a healthy thermal fuse can save you a $300 service call for what is essentially a $15 part.
Forget the heavy toolkit and grab a multimeter instead
Beyond the electrical tests, I always keep a simple business card in my kitchen drawer. It’s not for networking—it’s for how to test a door latch with a business card. If the card slides too easily between the latch and the strike, your machine might think the door is open, even when it’s latched shut. This is a common culprit when you are trying to figure out the fix for a dishwasher that wont start but has power. For those with newer, high-tech models, the tools are becoming digital. I’m fascinated by how smart diagnostic apps are changing home appliance repair, allowing us to beam error codes directly to a manufacturer’s server for a precise breakdown of the fault. 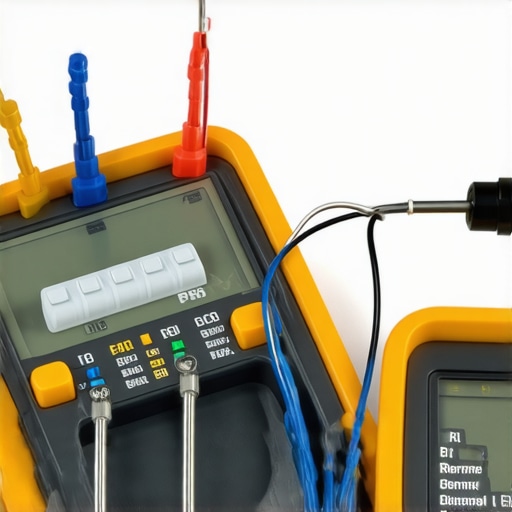
Your software might be the reason it won’t start
We are entering an era where your dishwasher is basically a computer that happens to spray water. This means you have to think like an IT professional. I’ve seen perfectly good machines get scrapped because why your appliance firmware update just bricked the control board. You need to be proactive about the trick for updating firmware on your connected kitchen appliances to ensure the sensors stay calibrated. In the next five years, I predict we’ll see ‘predictive maintenance’ become standard, where your machine orders its own replacement drain pump before the old one even starts clicking. For now, you have to be the brain. If your buttons aren’t responding, check why your dishwasher buttons are unresponsive after cleaning—it’s often just moisture trapped in the touchpad ribbon cable.
How do I keep my machine running like new for a decade?
The secret isn’t a magic chemical; it’s consistency. I set a recurring alert on my phone for a monthly deep clean. Most people ignore the sump, but learning how to deep clean a dishwasher sump without pulling the machine prevents the buildup that eventually kills the motor. You should also consider the real cost of skipping your monthly descaling cycle; hard water is a slow killer for internal seals. Before you call for professional help, I challenge you to try the one-minute move to reset your control board. It’s the simplest way to clear ghost errors and is often the first thing a tech does while they’re charging you for the visit. If that doesn’t work, then it’s time to look at troubleshooting dishwasher problems expert diagnostics repair tips to narrow down the hardware culprit.
The expensive lesson I learned about trusting a sticker is that a warranty is only as good as your documentation. Simply having a service plan doesn’t guarantee the company will cover the bill, especially if they can claim an ‘installation error.’ I discovered that understanding appliance diagnostics improving your warranty claims is essentially a superpower for homeowners. It allows you to speak the same technical language as the manufacturer’s gatekeepers, making it much harder for them to brush you off. I have even successfully used the hidden loophole that gets your denied claim reversed by showing that the fault was a known design flaw rather than simple user neglect.
My Go-To Kit for a Stress-Free Kitchen
For anyone serious about maintaining their appliances without calling a pro every month, I suggest three specific things. First, hunt down your technical data sheet; most people don’t know how to find a service manual hidden inside the unit, but it is usually right there behind the bottom kickplate in a small plastic sleeve. Second, get a basic digital multimeter—it is the only way to stop guessing and start knowing which component failed. Finally, keep a direct line to the manufacturer’s corporate resolution team. If your machine is slightly older, you might still be able to learn how to get a manufacturer to pay for an out-of-warranty repair by being persistent and providing your own diagnostic data. #IMAGE_PLACEHOLDER_E#
Take Control of Your Kitchen’s Lifeline
Your dishwasher shouldn’t be a source of anxiety or a potential flood zone. By taking these small proactive steps, you are doing more than just fixing a drain; you are mastering the systems that keep your household running smoothly. Don’t be afraid to pull off that kickplate and see what is going on—your wallet and your hardwood floors will thank you. Have you ever had a warranty claim denied for a reason that felt like a total technicality? Let me know in the comments below.