

I will never forget the sickening sensation of my socks soaking up cold, greasy water in the middle of the night. I had tiptoed into the kitchen for a quick glass of water, only to find that my expensive oak planks were already starting to warp and “cup” beneath my feet. It was a total nightmare. My dishwasher, the very appliance I trusted to make my life easier, had been weeping silently for weeks behind its plastic kickplate. I learned the hard way that by the time you actually see a visible puddle on your floor, the structural damage is usually already done. Today, I am going to share the hard-won secrets of keeping your kitchen dry so you never have to deal with the panic of how to salvage your hardwood floors after a dishwasher flood like I did.
The Night My Kitchen Became a Pond
It wasn’t a massive explosion of water or a burst pipe; it was a slow, rhythmic drip-drip-drip that I chose to ignore because I thought I was too busy to investigate. I remember seeing a tiny bit of moisture and thinking, “I’ll get to that next weekend.” That was a massive mistake. That delay allowed water to seep into the subfloor, creating a moldy headache that no warranty for dishwasher repairs was ever going to cover. I had to learn the hard way that a little bit of proactive maintenance is the only thing standing between you and a five-figure renovation bill.
Is Professional Floor Protection Actually Worth the Hassle?
You might be thinking that a plastic tray or an electronic moisture sensor is overkill for a standard kitchen. I used to be a skeptic too. However, when you consider that the Insurance Institute for Business & Home Safety notes that water damage is one of the leading causes of residential insurance claims—with appliances being a primary culprit—the “hassle” of a $20 leak pan seems like a bargain. I failed to realize early on that finding the slow leak hiding under your kickplate is the only real way to stay ahead of the rot. Have you ever noticed a mysterious damp spot near your cabinets and just hoped it was a spilled drink? I’d love to hear I’m not the only one who has played that dangerous game!
Stop the Slow Drip Before It Destroys Your Subfloor
The real trick to protecting your home isn’t just about mopping up spills; it is about early detection and physical barriers. One of my biggest early blunders was not knowing the importance of identifying the leak that only appears during the final rinse. I would run a cycle, check the floor mid-way through, see it was dry, and walk away satisfied. Little did I know, the pressure change during the final five minutes of the cycle was when the disaster actually happened. If I had been more observant, I could have spotted why the dishwasher was leaking from the bottom corners before the wood started to turn black. By setting up the right defenses now, you can keep your kitchen beautiful and your stress levels low.
How to Find the Source Without Tearing Out Cabinets
To stop a flood, you have to think like water. Water is lazy; it follows the path of least resistance, which usually leads straight to your subfloor. When I was frantically trying to figure out what to do when your kitchen floor is suddenly damp and you can’t find the leak, I realized my visual inspections were not enough. I needed a more scientific approach. Think of your dishwasher as a pressurized box; if one seal or valve is compromised, that pressure will force water out of the smallest gap. I once spent three days staring at my machine, only to realize the water was traveling along a support rail and dripping three feet away from the actual hole. To save your floors, you must be methodical.
The Paper Towel Test Provides Visual Proof
The most effective tool in my arsenal is not a high-tech sensor, but a roll of bounty. By performing the simple paper towel test for checking leak locations, you can see moisture before it pools. Lay dry sheets under the kickplate and around the corners of the door before you start a cycle. Check them every ten minutes. If a sheet shows a damp spot, you have found your culprit. This is exactly how I discovered how to find the slow leak hiding under your kickplate that had been slowly rotting my oak planks for months.
Stop Drips at the Source by Checking Your Door Gasket
Your door seal is like the weatherstripping on your front door; it keeps the elements (in this case, hot soapy water) where they belong. Over time, heat and detergent residue cause the rubber to become brittle and crack. I learned that replacing a brittle door seal before it floods your floor is a ten-minute job that saves thousands in repairs. If you notice a drip coming from the bottom of the door, it is often a sign of a deformed gasket. This is one of the primary reasons why your dishwasher is leaking from the bottom corners during the heavy wash phase.
Balance Your Machine to Prevent Overflow
If your dishwasher is not level, the water inside will not sit correctly in the tub, often overwhelming the side gaskets or the front lip. I once struggled with a mysterious overflow until I tried the simple trick to leveling a dishwasher on an uneven floor. It turned out my machine was leaning slightly forward, causing water to slosh over the front dam during the high-pressure spray. Adjusting the front legs took sixty seconds and ended a month of floor-mopping stress.
Verify Your Inlet Valve Integrity
Sometimes the leak happens when the machine isn’t even running. If you find a puddle in the morning, your water inlet valve might be failing to close completely. You can learn how to test your inlet valve with a simple voltmeter to see if the solenoid is getting stuck. A slow-leaking valve acts like a dripping faucet, eventually filling the tub until it overspills onto your beautiful flooring.
It is easy to assume that a dishwasher is a simple machine, but modern high-efficiency units are actually complex computers managing water pressure and heat. One of the most common myths I hear is that the "Eco" or "Normal" cycle is the gold standard for daily use. I actually disagree. In my experience, relying solely on these low-temp settings is a recipe for internal grease clogs that lead to leaks. I have found that why the heavy cycle is actually better for your machines health often comes down to the higher water temperatures necessary to fully liquefy fats and detergents. If you only run cool cycles, that grease solidifies in your drain hose, eventually causing a backup that mimics a broken pump.
The Critical Installation Error That Voids Your Protection
One "oops" factor that catches even the handiest homeowners is the use of thread sealant. It sounds counterintuitive, but why you should never use plumbing tape on a water inlet valve is because most modern valves are made of plastic. The added thickness of the tape can actually crack the housing, leading to a slow drip that you won’t notice until the floorboards start to buckle. According to data from the Association of Home Appliance Manufacturers (AHAM), improper installation remains a leading cause of non-warrantied leaks. I have seen countless claims denied because a technician spotted white PTFE tape on a plastic thread, immediately classifying the failure as "unauthorized modification."
Why did your warranty claim get rejected when the evidence seemed clear?
If you think a proof of purchase is enough to get a free repair, you might be in for a rude awakening. I’ve discovered that why service techs deny warranty claims for soap choice is a very real hurdle. If a technician finds evidence of non-HE detergent or excessive "sudsing," they will document it as user error. To protect yourself, you need to understand the photo evidence you need for every warranty claim. Taking a picture of your detergent box next to the clean, dry unit before the tech arrives can actually save your claim. It is all about understanding appliance diagnostics improving your warranty claims so you are prepared for the scrutiny of the manufacturer.
Mastering the Hidden Interface for Faster Fixes
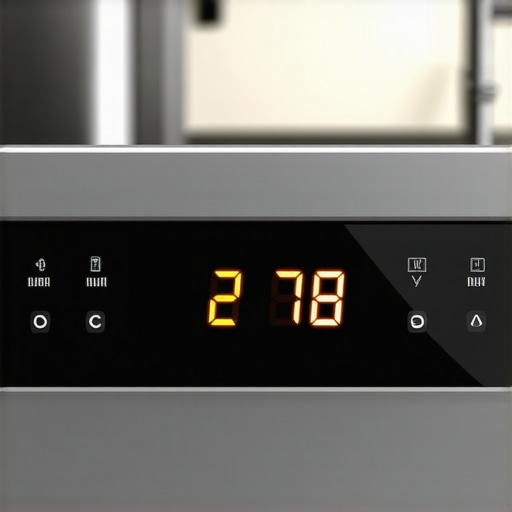
Before you call a professional, you should learn how to get professional-grade diagnostic codes from your interface. Most machines have a "secret" button sequence that forces the unit to display its last five error codes. This is significantly more accurate than guessing based on a sound. For example, the sound of a failing check valve and how to fix it is often mistaken for a motor issue, but the diagnostic code will tell you exactly which solenoid is stuck. By being proactive and analytical, you can avoid the "guess and check" method that leads to buying parts you don’t actually need. Have you ever fallen into this trap where a simple fix turned into a warranty nightmare? Let me know in the comments!
Stop Guessing and Start Measuring with a Multimeter
I used to think a multimeter was just for electricians or people who liked to tinker with ham radios. I was wrong. If you really want to graduate from an amateur with a mop to a homeowner with a plan, you need to learn how to use a multimeter to find a shorted wire. Testing for electrical continuity is the only way to know for certain if a part has failed or if your control board is simply having a bad day. For instance, testing a solenoid valve for continuity in 3 steps can confirm a leak source in minutes, whereas visual inspection might take hours of watching water drip. I personally keep a Klein Tools MM400 in my kitchen drawer specifically for these moments because it gives me the data I need to argue with a manufacturer when they try to claim my issue is just ‘routine wear.’
How do I maintain my dishwasher performance over time?
The secret to a decade of service isn’t a magic detergent; it is clear paths for water and air. Every six months, I use how a toothpick can save your spray arm from clogs to ensure every jet is firing at full pressure. When these tiny holes get blocked by seeds or mineral scale, the internal pressure shifts, often forcing water out of the seals in ways the machine wasn’t designed to handle. I also recommend the right way to de-scale your machine without chemicals using citric acid or white vinegar to keep the heating element from burning out. Experts at Master Samurai Tech, a leading appliance repair academy, often note that ‘restricted water flow is the silent killer of circulation pumps,’ which is exactly why how to clean the tiny holes in your spray arms should be on your seasonal chore list.
Don’t Fly Blind Without the Service Manual
Did you know there is a secret map hidden inside your kitchen? Most people don’t realize that how to find a service manual hidden inside the unit usually involves reaching into the plastic envelope tucked behind the kickplate or inside the door panel. This sheet contains the wiring diagrams and specific resistance values for your exact model. When you are testing the continuity of a heating element, having that manual tells you exactly what ‘normal’ looks like so you don’t replace a perfectly good part. It is the ultimate tool for troubleshooting dishwasher problems with expert diagnostics without paying $150 for a service call just to hear a technician read that same sheet to you.
Predicting the Future of Self-Repairing Kitchens
I predict that in the next five years, the ‘secret diagnostic codes’ I mentioned earlier will be replaced by full AI-driven remote monitoring. We are already seeing this with high-end models where why your smart app says the filter is dirty when it is not is becoming a common frustration for users. However, as the sensors improve, your dishwasher will likely shut its own water valve off the moment it detects a 1% change in pump pressure. For now, we still have to be the brains of the operation. My challenge to you: tonight, go find that hidden service manual behind your kickplate. Knowing it’s there is the first step toward never being afraid of a puddle again.
The Expensive Lessons I Learned While Mopping My Subfloor
Reflecting on my own flooded kitchen, the biggest ‘lightbulb moment’ was realizing that observation is not the same as diagnosis. I used to think seeing water meant I knew the problem, but I quickly learned that how appliance diagnostics can save your warranty benefits is about providing hard data to the manufacturer, not just a wet floor. Another hard-won truth is that small mechanical failures often masquerade as big electrical ones; for instance, knowing the secret reason your dishwasher detergent door stays shut can actually prevent the pressure imbalances that cause corner leaks. Finally, I’ve realized that being able to identify a faulty control board without a technician is the ultimate power move for any homeowner, saving you from the ‘replace-it-all’ mentality that sales reps love to push.
Build a Disaster-Proof Toolkit Without Spending a Fortune
I don’t believe you need a garage full of specialized gear, but there are a few non-negotiables I keep in my kitchen drawer. First, a basic multimeter is essential because top signs your dishwasher needs professional diagnostics usually involve electrical values you simply cannot see with the naked eye. Second, I always keep a small bag of citric acid on hand; using the natural way to strip hard water buildup from the tub is my primary defense against the mineral scale that eats through pump seals. Lastly, that ‘secret’ service manual hidden behind your kickplate is your most valuable resource—it is the roadmap that makes sense of every beep and flash your machine throws at you.
Stop Living in Fear of the Next Puddle
You don’t have to be a master plumber to keep your kitchen dry and your hardwood floors pristine. By shifting your mindset from reactive mopping to proactive diagnostics, you are taking control of your home’s most temperamental appliance. If you find yourself facing a machine that won’t stop running, take a breath and remember how to fix a dishwasher that keeps filling with water when off before you reach for the phone to call a pro. You have the tools, the data, and the knowledge to handle this. Have you ever found a mystery leak that turned out to be a simple five-minute fix? Tell me about your ‘aha!’ moment in the comments below!