

I remember the first night I ‘finished’ installing my new dishwasher. I felt like a DIY king, right up until the final high-speed drain cycle kicked in. My kitchen didn’t just hum; it sounded like a construction crew was trying to jackhammer their way through my cabinets. The ‘clunk-clunk-clunk’ was so violent I actually thought the door might fly off. I’ll be honest: my first instinct was to just wedge a folded piece of cardboard under the front right corner and go back to my coffee. That was a huge mistake. Not only did the cardboard eventually get soggy and moldy, but the constant vibration actually started to wear down the mounting brackets and put stress on the water lines. Today, I’m going to show you how to skip the ‘cardboard phase’ and get a rock-solid installation that stays quiet for years. Have you ever sat in your living room and heard your dishwasher trying to stage a prison break from under the counter?
Stop the Rattle Before It Ruins Your Cabinets
It’s easy to ignore a little bit of movement, especially if the machine is still getting the dishes clean. But here is the thing: a wobbly dishwasher is more than just a noisy nuisance. When the unit isn’t secure, it puts unnecessary pressure on your plumbing connections. I once ignored a slight tilt, only to find out later that the vibration had slowly loosened the water inlet. If you don’t level your dishwasher properly to stop mystery leaks, you are basically inviting a slow, hidden drip to rot your subfloor. Setting the legs correctly is the first step toward a quiet kitchen and a dry floor.
Is a little shaking really going to break my machine?
You might think I’m being a bit dramatic—it’s just a dishwasher, right? Actually, consistent vibration is the enemy of modern appliance electronics. According to Consumer Reports, improper installation is a leading cause of premature appliance failure, often leading to mechanical stress that can shorten the lifespan of your pump and motor. Beyond the physical wear, many people don’t realize that a poorly secured unit can complicate things if you ever need to file a claim. If a technician sees the unit was never mounted to the cabinets or leveled, they might argue the failure was due to ‘improper setup’ rather than a manufacturer defect. That’s why understanding appliance diagnostics is so crucial; you want to be able to prove your machine was treated right from day one. We aren’t just fixing a noise; we are protecting your investment and ensuring that dishwasher repairs are covered when you actually need them. Let’s look at the simple tools you actually need to lock that machine down for good and prevent that annoying sway.The first real step is attacking the leveling legs. Think of these like the foundation of a house; if they aren’t even, the whole structure eventually fails. I always use a standard bubble level across the top edge of the open door and again inside the tub. You adjust the front legs by turning them with a wrench, but don’t forget the back leg. Many modern units have a long screw at the bottom front that actually adjusts the rear height via a pulley or rod system. If you skip this, you’ll find that why your dishwasher is louder than it used to be isn’t just about old age—it’s about the motor working at a punishing angle that prematurely wears out the internal bearings. 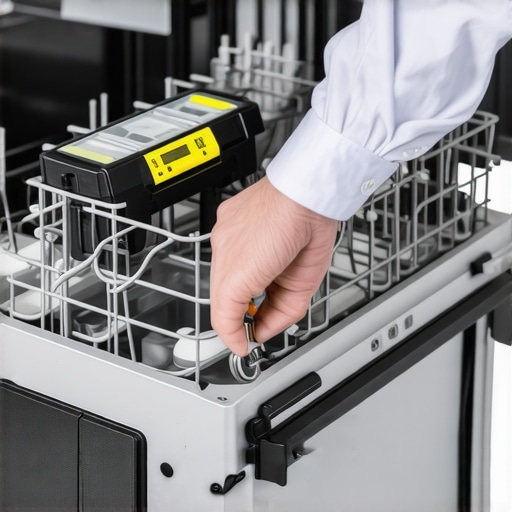
Stop the Tipping with Solid Mounting
You have to anchor the machine to prevent the ‘dishwasher dive.’ I remember the ‘Cast Iron Incident’ of 2018. I had just finished a heavy dinner and loaded the bottom rack with three large pans. As soon as I rolled the rack out, the entire dishwasher tipped forward like it was bowing to the audience. It nearly crushed my toes and definitely strained the copper water line. You must use the mounting brackets provided by the manufacturer. If you have a granite or quartz countertop, don’t screw upward; use the side-mount holes to screw into the cabinets. This keeps the frame rigid. This is also a good time to check that you haven’t accidentally displaced any rubber components; otherwise, you’ll be searching for how to fix a loose gasket that interferes with the soap cup later on because the tub is slightly torqued out of shape.
Arch the Drain Hose to Block Sink Backflow
Then there is the plumbing ‘High Loop.’ This is the secret to keeping your kitchen from smelling like a swamp. If the drain hose just runs flat from the machine to the sink drain, dirty water from your sink will backflow into the dishwasher. You need to arch that hose as high as possible under the counter before it drops back down to the disposal or tailpiece. This simple gravity trick is why your service tech always checks the drain hose high loop first when you complain about odors. It acts like a one-way gate for gross water and prevents that nasty sludge from building up in your filter.
Listen for More Than Just Mechanical Vibrations
Finally, pay attention to the sound once the machine is secured. If it still sounds like a bag of marbles spinning in a dryer, you might have a deeper mechanical issue. I’ve found that learning how to identify a dying circulation motor by its pitch can save you from a mid-cycle flood. A high-pitched whine usually means the internal seals have failed, whereas a low-frequency rumble often points back to the leveling we just fixed. If the lights on the panel start flashing patterns while the machine shakes, you’ll need to start reading the hidden blinking lights on your dishwasher brain to see what the sensors are actually screaming about. Look for the specific blink count that distinguishes an overfill error from a heater fault before you start taking the pump apart.Most people think that a five-year warranty is a golden ticket to stress-free repairs, but in my experience, that piece of paper is often full of trapdoors. We usually assume if the motor dies, it gets fixed for free. However, the biggest nuance in the industry is the distinction between ‘parts’ and ‘labor.’ You might get the metal components for free, but you will still be on the hook for a $200 service call. This is why your appliance warranty covers parts but not labor costs, and failing to read that fine print leads to major sticker shock. If you are dealing with a breakdown, you need to decide when to trust a warranty for dishwasher repairs versus just buying a new unit altogether.
Don’t Let Third-Party Parts Kill Your Coverage
It is incredibly tempting to grab a $15 generic pump from an online marketplace when your OEM part is $90. Resist that urge. Manufacturers are increasingly using ‘smart’ components that can detect non-standard electrical resistance. If a technician finds an unapproved part, it can trigger a domino effect where your entire service plan is canceled. I have seen homeowners lose hundreds in coverage because why third party parts frequently void your service plan is a clause that companies enforce strictly. Always stick to original equipment to keep your protections intact. 
Why does my repairman always blame the garbage disposal?
It sounds like a lazy excuse when a tech points at your sink instead of the dishwasher, but they are often right. A common ‘oops’ factor involves the drainage connection. If you recently replaced your disposal and did not remove the plastic knockout plug, your dishwasher will never drain. This is not a mechanical failure; it’s an installation error, and why your warranty claim got denied because of your garbage disposal is a lesson many learn the hard way. Even if the plug is out, grease buildup in the disposal can create backpressure. This is why troubleshooting dishwasher problems expert diagnostics repair tips always start with the sink.
Master the Hidden Diagnostic Mode
You do not need a specialized computer to talk to your machine. Almost every modern unit has a secret ‘handshake’—a sequence of button presses that unlocks the brain of the appliance. According to the Association of Home Appliance Manufacturers (AHAM), providing a specific error code to a dispatcher can speed up repair times by 40%. By accessing the secret diagnostic mode hidden on your touch control panel, you can see if the machine thinks it’s overheating or if it is simply stuck in a sensor loop. If you see a specific string of numbers, you can determine why your dishwasher screen shows a numeric error code before the pro even arrives. This empowers you to how to document intermittent noises for a repair claim with actual data, making it much harder for a company to deny your request. Have you ever fallen into this trap or had a warranty claim denied for a silly reason? Let me know in the comments.I stopped guessing and started actually measuring voltage years ago, and my repair success rate shot up to nearly 100%. When you are staring at a dead screen, the most important tool in your arsenal isn’t a screwdriver; it is a digital multimeter. I personally swear by the Klein Tools MM400 for its accuracy on small appliance circuits. Most DIYers jump to the most expensive conclusion first, but by testing your thermal fuse before buying a new control board, you can often save yourself $150 and a week of waiting for parts. I have found that simply using a voltmeter to check your power cord connection safely can reveal that the ‘dead’ machine is actually just a loose wire nut in the junction box. Knowing how appliance diagnostics can save your warranty benefits means you have the data to tell the manufacturer exactly what is wrong, rather than letting them lead the conversation. 
Fight Hard Water Without Using Harsh Chemicals
Maintenance isn’t just about fixing what is broken; it is about preventing the slow creep of lime and scale. I have seen countless spray arms choked with white crust that restricts water pressure. Instead of buying expensive ‘cleaner’ tabs every month, I use bulk food-grade citric acid. It is the secret weapon for anyone wondering how to remove cloudiness from glasses using citric acid without scratching the surface. This is especially vital if you live in an area with high mineral content, as the impact of hard water on eco-friendly detergent performance is usually the culprit behind ‘dirty’ dishes. If you notice the bottom of your tub looks gritty, it is time to get aggressive. I often use a specialized method for how to clear a blocked impeller with a shop vacuum because it pulls out the debris that water pressure alone can’t budge.
How do I maintain my dishwasher over time?
Consistency is the key to longevity. Once a month, you need to pull the bottom rack and get your hands dirty. I start by the secret to getting grease out of your filter mesh using an old toothbrush and hot soapy water. While I’m down there, I check the spray arm holes. I’ve found that the proper way to clean spray arm nozzles using a paperclip is the only way to ensure the water is actually hitting the top rack with full force. According to the Samsung Global Service Partner Network (G-SPN) technical bulletins, nearly 30% of ‘poor wash’ complaints are solved by simply clearing physical obstructions in the spray path. Looking ahead, I predict we will see more machines utilizing Acoustic Emission (AE) sensors that can hear a leak or a failing bearing before the first drop of water even hits your floor. Until your machine is that smart, you have to be the ears. I highly recommend you why your smart dishwasher needs a firmware update to save water and ensure your sensors are calibrated correctly. Take ten minutes tonight to enter your machine’s diagnostic mode—it’s the best way to catch a small problem before it becomes a flooded kitchen.
Hard-Won Secrets From My Kitchen Floor
Over the years, I’ve learned that the loudest person in the room isn’t always the smartest, and the same goes for your kitchen. A rattling machine is usually just crying out for a level surface, but we often jump to the most expensive conclusion. One lightbulb moment for me was realizing that most ‘broken’ machines are actually just suffering from a tripped safety sensor. Before you buy a whole new computer for your unit, try testing your thermal fuse before buying a new control board. It’s a five-minute job that costs less than a pizza. Also, never underestimate the power of documentation. If you can show a technician that you’ve performed regular maintenance, you are much more likely to win an argument over coverage. Knowing how appliance diagnostics can save your warranty benefits is like having a legal shield for your wallet.
The Tools That Turned Me Into a Pro
You don’t need a massive workshop to keep your appliances running. I keep a small ‘dishwasher kit’ tucked away that saves me hours of frustration. First, a reliable digital multimeter is non-negotiable; it turns guesswork into data. Second, I keep a bag of bulk citric acid. It’s the only way to combat the white film caused by the impact of hard water on eco-friendly detergent performance without using harsh, toxic chemicals. Finally, don’t laugh, but a simple paperclip is my favorite precision tool. I’ve found the proper way to clean spray arm nozzles using a paperclip is the most effective way to restore water pressure without damaging the plastic. These simple items are the difference between a machine that lasts five years and one that lasts fifteen.
#IMAGE_PLACEHOLDER_E#
Confidence Is Your Most Important Spare Part
It is completely normal to feel a bit of anxiety when you pull that kickplate off for the first time. Appliances can feel like mysterious black boxes, but they are just a series of simple systems working together. By taking the time to learn the rhythm of your machine, you’re doing more than just saving money; you’re taking control of your home. If the problem feels too big, don’t be afraid to look for the top signs your dishwasher needs professional diagnostics so you know when to call in the cavalry. Your journey into DIY dishwasher repairs starts with a single step—or in this case, a single screw. You’ve got this.
Have you ever had a warranty claim denied for a reason that felt totally unfair, or did you manage to fix a ‘dead’ machine with a simple trick? Let me know in the comments below!